Official game
Play VROOMSDAY
This game is hosted by itch.io. Continue to the official page to play or download it.
Play on itch.ioOverview
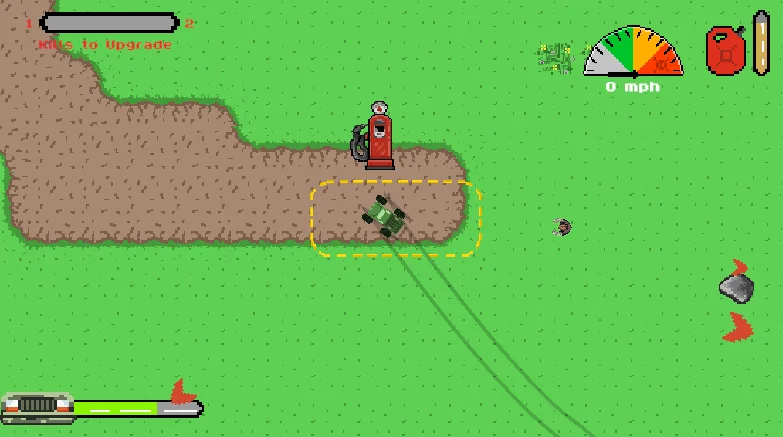
VROOMSDAY is a top-down racing roguelike by indie developer pstuudio, free to play in your browser on itch.io. You drive a beat-up truck through zombie-infested roads in a procedurally generated map, balancing speed against fuel consumption while making upgrade trade-offs between runs.
The game's core tension is simple but brutal: go fast to survive, but going fast burns fuel. Run out of gas and you're stranded in a horde. The longer you stay alive, the more zombies spawn and the faster they move. There's no final boss, no ending screen — the game is a pure score chaser. Distance traveled, zombies destroyed, and fuel efficiency all contribute to your final score, which feeds into a global leaderboard.
| Detail | Info |
|---|---|
| Genre | Top-down racing roguelike |
| Developer | pstuudio |
| Platform | Web browser (itch.io) |
| Price | Free |
| Players | Single-player |
| Controls | Keyboard |
Getting Started
First 30 Minutes
Your first run will last about 45 seconds. That's normal. The game doesn't hold your hand — you spawn on a road, zombies are already shambling toward you, and your fuel gauge is ticking down. Panic is the default state.
Use the first few deaths to learn the map layout. The procedural map has consistent elements: roads, open fields, clusters of gas pumps, and dead-end sections. Gas pumps are your lifeline — memorize their typical locations (usually at intersections or near buildings).
Don't worry about score. Don't worry about upgrades. Just drive, survive for 60 seconds, and learn how the zombie AI works.
Controls
| Action | Input |
|---|---|
| Drive forward | W |
| Reverse / Brake | S |
| Turn left | A |
| Turn right | D |
| Drift (brief burst) | Space (tap while turning) |
| Boost (sustained) | Space (hold) |
| Select upgrade | Mouse click |
| Pause | Tab / Escape |
Beginner Mistakes
Holding boost constantly. New players see the boost and think faster = better. Boost drains fuel at roughly 3x normal rate. Holding it for 5 seconds straight costs you a gas pump's worth of fuel. Use boost only for escapes and gap-crossing.
Driving in straight lines. Zombies cluster in predictable patterns based on your trajectory. A straight path runs you into every horde. Constant gentle weaving throws off zombie pathing and spreads the crowd behind you.
Chasing every zombie. You score points for kills, but every detour to splatter a zombie costs fuel. Prioritize zombies that are directly in your path. Don't double back for a single straggler.
Ignoring the minimap. The game shows gas pump locations on the minimap. New players focus entirely on the road ahead and miss the fuel icon blinking in the corner. Glance at the minimap every 5-10 seconds. Know where your next gas stop is.
Core Mechanics
Speed as Weapon and Weakness
Your truck deals damage based on speed. At low speed (under 30 km/h on the game's internal scale), zombies take minimal damage from collisions. At medium speed (30-60 km/h), you can splatter standard zombies. At high speed (60+ km/h), you plow through clusters and even damage larger enemies.
But speed burns fuel. The fuel consumption curve is non-linear:
- 0-30 km/h: 1x burn rate
- 30-60 km/h: 1.5x burn rate
- 60-80 km/h: 2.5x burn rate
- 80+ km/h: 4x burn rate
The sweet spot for cruising is 40-50 km/h — fast enough to kill standard zombies, fuel-efficient enough to reach the next gas pump.
Fuel System
Fuel is displayed as a gauge. It depletes constantly while driving. Running out doesn't kill you instantly — it slows your truck to a crawl (about 10 km/h max). At that speed, zombies catch up and tear your truck apart in seconds.
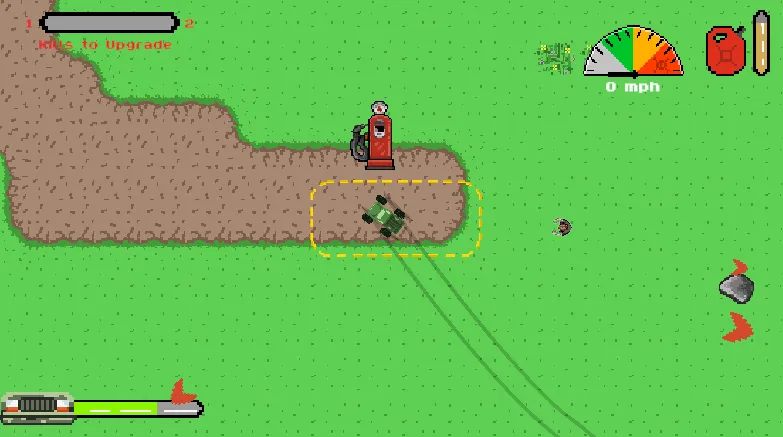
Gas pumps are scattered across the map. They're tall, bright yellow structures visible from a distance. Driving over one refills roughly 50-60% of your tank. Each pump can be used multiple times but has a cooldown (the same pump won't refill again for about 30 seconds).
Fuel management rule: Always have a gas pump within 20 seconds of driving distance. If the nearest pump is more than 20 seconds away, you're in danger.
Upgrade System
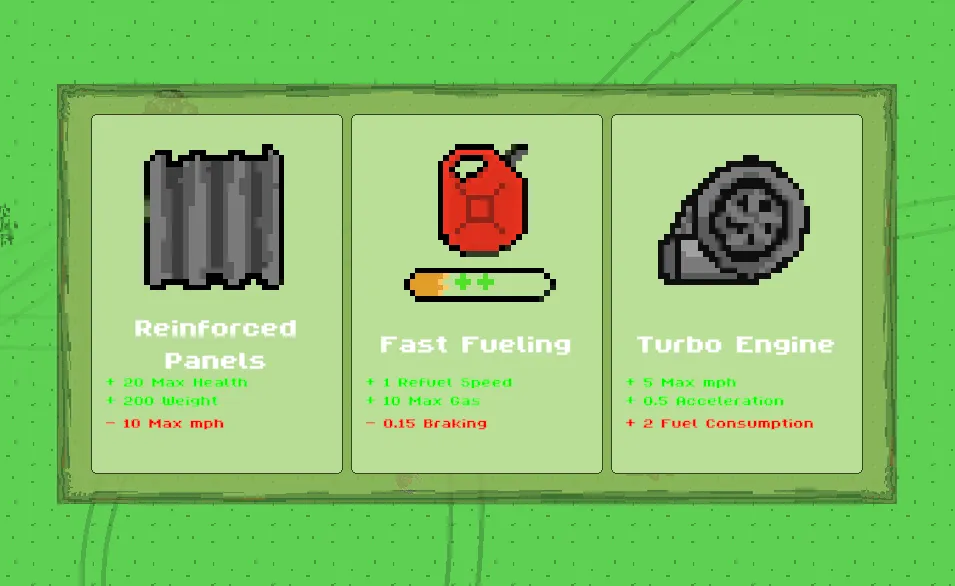
Between stages (every ~30 seconds of survival), you're offered 2-3 random upgrades. Each upgrade has a benefit and a drawback. You can't skip — you must pick one.
| Upgrade | Benefit | Drawback | Best For |
|---|---|---|---|
| Heavy Armor | +40% health | -20% acceleration, -10% top speed | Survival builds |
| Turbo Engine | +35% top speed | -25% fuel efficiency | Speedrun builds |
| Reinforced Bumper | +60% ram damage | -15% turning radius | Aggressive play |
| Fuel Tanks | +50% fuel capacity | -15% max health | Long runs |
| Lightweight Frame | +25% acceleration, +10% top speed | -30% health | Glass cannon |
| Spiked Tires | +20% turning, +10% drift control | -10% top speed | Maneuverability |
| Oil Slick | Leaves oil trail that slows zombies | -10% fuel capacity | Crowd control |
| Siren | Repels zombies in a radius (15s cooldown) | +15% fuel consumption rate | Escape artist |
| Reinforced Glass | +25% visibility at night (extends view range) | -5% acceleration | Night stages |
| Nos Canister | Boost lasts 50% longer | -20% fuel capacity when boost used | Burst mobility |
Zombie Types
| Type | Behavior | Speed | Health | How to Handle |
|---|---|---|---|---|
| Shambler | Walks toward you slowly | Low | Low | Run over, no special handling needed |
| Runner | Charges at you when you're within sight range | High | Low | Avoid direct lines; weave so they overshoot |
| Tank | Slow, huge, takes 3-4 hits to kill. Block paths. | Very low | High | Don't engage unless you have Reinforced Bumper. Go around. |
| Swarm | Spawns as a cluster of 6-8 small, fast zombies | Medium | Very low | Plow through with boost active. Don't stop in the middle. |
| Spitter | Ranged attack from distance. Slow movement. | Low | Medium | Prioritize. Their spit slows your truck. Dodge by weaving. |
Progression Strategy
Early Game (First 3 Upgrades)
Your first three upgrades determine your entire run. Don't pick randomly — have a build in mind.
Safe start: Fuel Tanks → Heavy Armor → Spiked Tires. This gives you survivability, fuel range, and handling. You won't set records, but you'll consistently reach 5+ minutes.
Aggressive start: Turbo Engine → Reinforced Bumper → NOS Canister. High risk, high reward. You clear zombies faster but one mistake ends the run.
Balanced start: Heavy Armor → Fuel Tanks → Reinforced Bumper. The classic all-rounder. You can handle anything the game throws at you in the first 3 minutes.
Mid Game (Upgrades 4-7)
By now you know your build direction. Lean into it.
- If you went tanky: add Oil Slick and Siren for crowd control. Your health pool lets you take hits while controlling the zombie flow behind you.
- If you went speed: add Lightweight Frame (yes, even with the health penalty — you're already committed) and Spiked Tires to maintain maneuverability at high speed.
- If you went balanced: add whatever covers your current weakness. Dying to fuel shortage? Take Fuel Tanks. Dying to tight corners? Take Spiked Tires.
Late Game (Upgrades 8+)
At this point, zombie density is extreme. You should be moving constantly, never stopping. Prioritize upgrades that improve your ability to keep moving:
- NOS Canister (burst through thick clusters)
- Siren (gives you breathing room on cooldown)
- Oil Slick (zombies behind you become slow and irrelevant)
- Fuel Tanks (the 50% capacity increase is proportionally more valuable as fuel drain accelerates)
Builds — Tier List
S-Tier: The Marathon Runner
Fuel Tanks (2x) → Heavy Armor (1x) → Reinforced Bumper (1x) → Spiked Tires (1x) → Oil Slick → Siren → NOS Canister → whatever
This build is designed for survival time above all else. You trade kill speed for longevity. The strategy: drive in large circles, collect every gas pump, use Siren on cooldown when surrounded, leave an Oil Slick trail behind you. You won't top the kill leaderboard, but you'll consistently hit 10+ minute runs.
A-Tier: The Juggernaut
Reinforced Bumper (2x) → Heavy Armor (2x) → Turbo Engine (1x) → Fuel Tanks → Spiked Tires
Plow through everything. Zombies die on contact. You're slow to accelerate but unstoppable at speed. Best for players who prefer aggressive driving. The weakness: tight turns are hard. Stick to wide open areas.
B-Tier: The Speed Demon
Turbo Engine (2x) → Lightweight Frame (1x) → NOS Canister (1x) → Spiked Tires → Fuel Tanks → Reinforced Glass (if available)
Maximum velocity. You're the fastest thing on the map. Kill zombies by existing near them at high speed. The risk: one wrong turn into a dead end and you're swarmed. Requires excellent map knowledge. Not recommended for beginners.
C-Tier: The Survivor (Safe Build)
Heavy Armor (2x) → Fuel Tanks (1x) → Siren → Oil Slick → Spiked Tires → Reinforced Bumper
This is the "I just want to finish a run" build. Nothing exciting. Nothing flashy. But it gets the job done. You can afford to make mistakes. Use this build to learn map layouts and zombie patterns, then switch to a more focused build.
Step-by-Step Strategy
Phase 1: Spawn to First Gas (0-30 seconds)
- As soon as you spawn, look at the minimap. Identify the nearest gas pump.
- Drive toward it at moderate speed (30-40 km/h). Don't boost.
- Weave gently as you drive. Don't go straight through zombie clusters — curve around them.
- Hit the gas pump. Note its location — you'll need it again.
Phase 2: First Upgrade to 3rd Upgrade (30-90 seconds)
- You'll get your first upgrade around the 30-second mark. Pick based on your intended build.
- Establish a circuit route: find 3-4 gas pumps in a loop. Drive this loop.
- Between pumps, sweep through zombie clusters to score kills. Don't chase them — intercept them.
- Conserve boost. Use it only to cross gaps in the gas pump circuit.
Phase 3: Mid-Run (3-8 minutes)
- Zombie density increases significantly. Your circuit should now be muscle memory.
- Use Siren proactively — don't wait until you're surrounded. Pop it when you see the horde getting thick.
- Boost through swarm clusters. Don't slow down — they'll surround your wheels.
- Check your fuel gauge constantly. If it drops below 30%, the next gas pump is your only priority.
Phase 4: Late Run (8+ minutes)
- Zombies are everywhere. The map is essentially a moving wall of undead.
- You should never stop moving. Stopping = death.
- Use NOS Canister + boost combo to clear a path through dense walls.
- If you get cornered: Siren + reverse + hard turn. Create space, then boost away.
- Don't fixate on kills. Your survival is the only thing that matters.
Map Navigation Tips
Learn the road grid. The map is built on a semi-regular grid of roads with occasional dead ends and open fields. Roads are the fastest path (no terrain slowdown). Open fields provide shortcuts but slow you down by 20%.
Gas pump clusters. Gas pumps appear in pairs or triples. If you find one, scan the immediate area — there's usually another within 3 seconds of driving. Hitting two pumps in quick succession fills you from near-empty to full.
Dead ends kill. Don't drive down narrow roads unless you can see the exit on the minimap. If a road dead-ends and you're being chased, you have to reverse out through the horde. Memorize which roads are through-routes.
The center zone. The map center has the highest gas pump density but also the highest zombie spawn rate. If you're confident in your driving, the center gives you the best fuel-to-kill ratio. If you're struggling, stick to the outer ring — fewer zombies, fewer pumps, longer loops.
Advanced Tips
Boost-brake tap. When turning at high speed, tap S (brake) while turning to execute a sharp drift. This tightens your turning radius by roughly 40% at the cost of a brief speed drop. Essential for navigating tight gas station entrances.
The zombie train. Zombies that are chasing you form a conga line behind your truck. If you make a sharp turn, the train continues straight for a moment before correcting. Use this to make zombies crash into environmental obstacles (walls, barriers, other zombie clusters) — they take damage from collisions too.
Pump baiting. When you're low on fuel and a gas pump is guarded by a cluster, don't slow down. Drive past the pump at speed, make a U-turn, and approach it from the opposite direction. The zombies that were clustering near it will have moved toward your previous trajectory, leaving the pump clear.
The reverse sweep. If a runner charges you from the front, brake hard and reverse. You maintain directional control while the runner overshoots. Then accelerate forward and splatter it from behind. This is safer than trying to dodge at the last second.
Night mode adaptation. When the game transitions to "night" (screen darkens, visibility drops), immediately change your driving pattern. Slow down by 10 km/h. Stick to roads you've already driven — you know they're safe. The Reinforced Glass upgrade extends your view range by 25% at night, making it the single best night-mode upgrade.
Score optimization. Your final score is Distance × Kill Multiplier × Fuel Efficiency. The kill multiplier increases with consecutive kills (same mechanic as the streak system). To maximize score: focus on kill streaks during the early game when zombies are manageable, then switch to pure survival in the late game when the streak is inevitably broken by the horde density.
Cooldown awareness. Gas pump cooldown is ~30 seconds. Siren cooldown is 15 seconds. NOS Canister has no cooldown but consumes the upgrade on use. Learn to time your loops so you're never waiting at a gas pump. If you arrive at a pump still on cooldown, you have roughly 10 seconds to kill zombies nearby before it refreshes.
FAQ / Common Mistakes
Q: I keep dying with full fuel. What's happening? A: You're being surrounded and overwhelmed. The fuel gauge isn't a health bar — it's a timer. Even with a full tank, if you stop moving, zombies will tear you apart. Keep driving, keep weaving, never stop.
Q: Which upgrade should I avoid? A: Reinforced Glass is the weakest upgrade overall. It only helps at night, and night phases are relatively short. Only take it if the other two options are actively harmful to your build.
Q: Is the Truck customizable? A: No visual customization. Your upgrades are your customization.
Q: How do I deal with Tanks? A: Don't. Go around them. A Tank takes 3-4 hits to kill, and each hit slows you down significantly. Unless you have Reinforced Bumper at 2 stacks, the time and fuel cost of killing a Tank isn't worth it.
Q: What's the best map strategy? A: Pick a circuit of 3-4 gas pumps in a loop and stick to it. Learn every turn, every dead end, every pump location in your circuit. By the 5-minute mark, you should be driving on autopilot.
Q: Why does the game sometimes feel slower? A: You're likely hitting environmental slowdown. Grass, mud patches, and debris piles reduce your speed by 15-25%. Stick to paved roads for maximum speed.
Q: Does drifting help or hurt? A: Drifting (Space + turn) tightens your cornering at the cost of brief speed loss. Use it for navigating tight spaces around gas pumps. Don't drift on open roads — the speed loss isn't worth the marginal turning benefit.
Q: How do I survive the first 30 seconds consistently? A: Memorize the spawn layout. There's always a gas pump within 8 seconds of your spawn point. Drive directly to it, top off, then assess your surroundings. The first 30 seconds are about establishing your baseline fuel level.
Q: Is there a pause button? A: Tab or Escape pauses the game. Use it. If you need to plan your route, pause. The game doesn't punish you for pausing.
Screenshots