Daily Pick
One deeply researched guide worth reading today.
A practical route through the systems that matter most, written to help new players make confident decisions quickly.
Overview
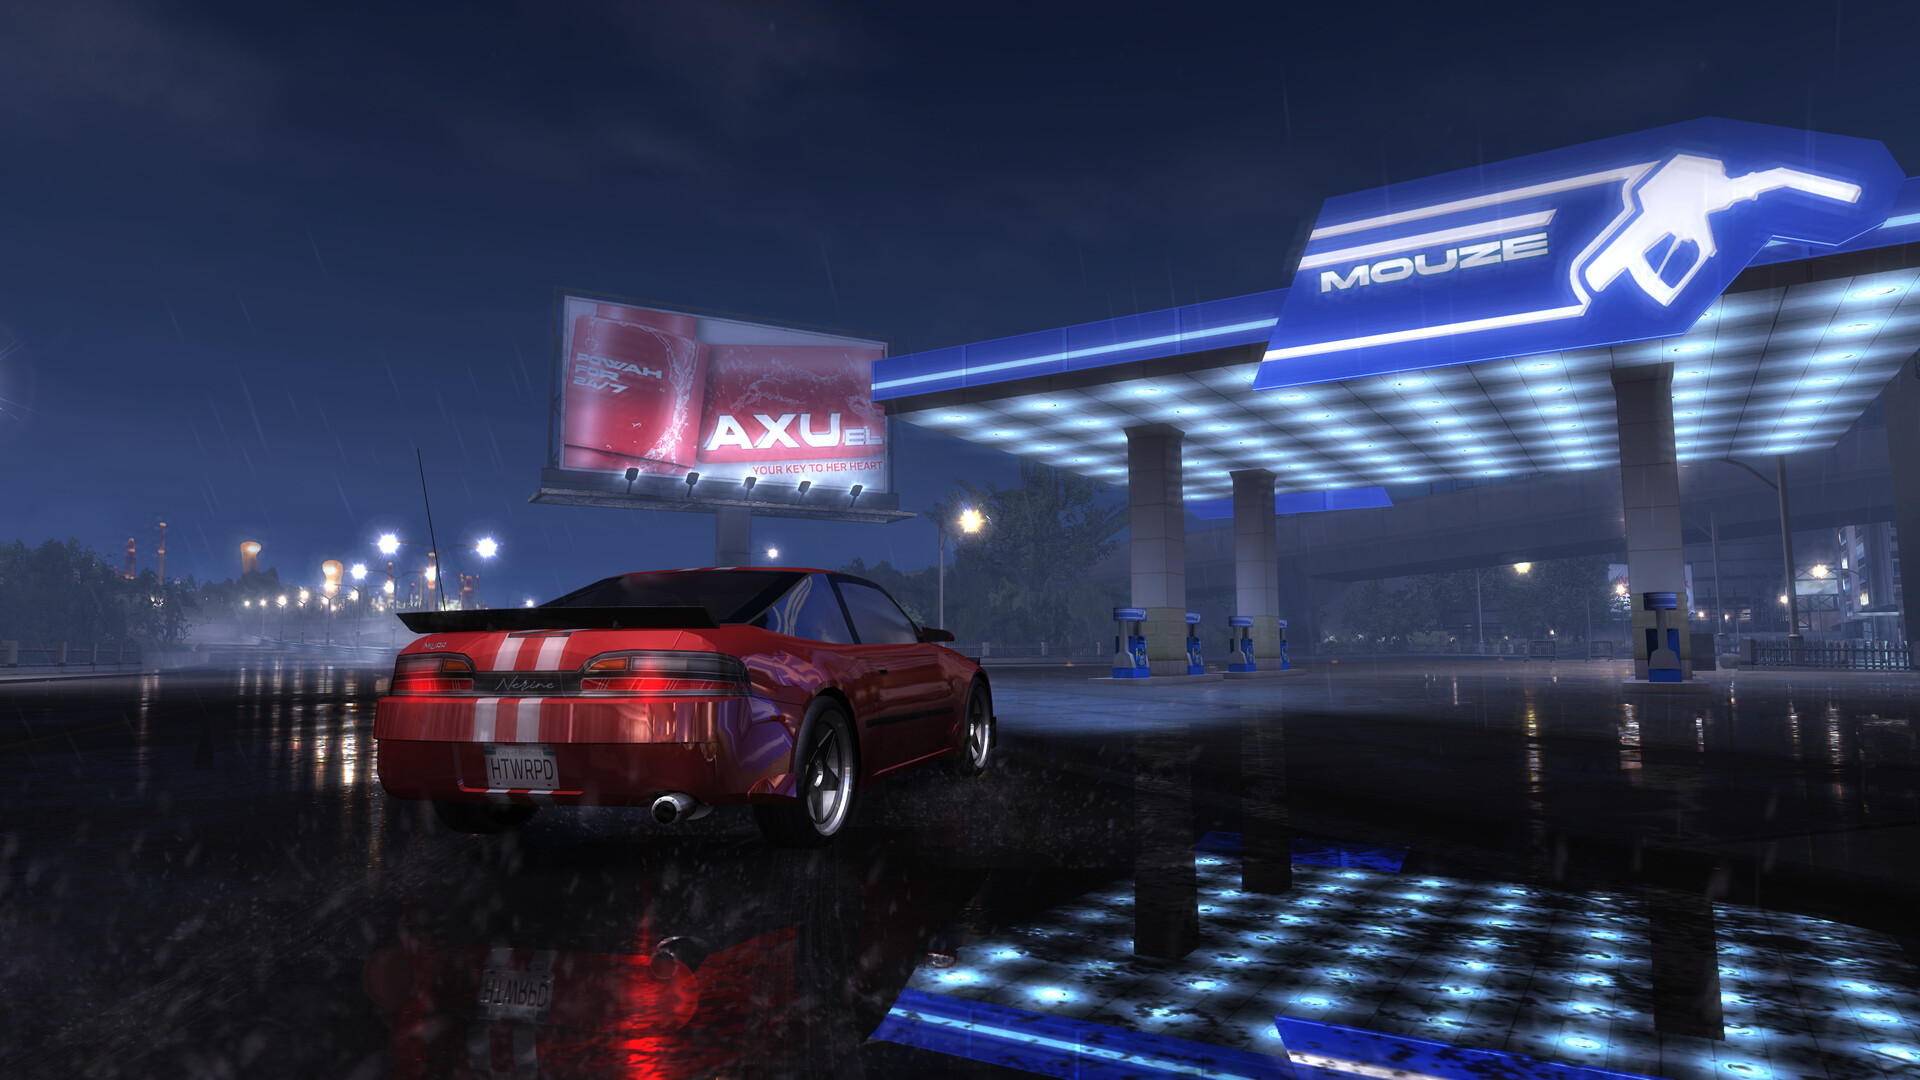
HEATWARPED is an open-world arcade street racer from indie developer Sealime, built as a love letter to the PS2-era Need for Speed games. You roam Ratfield, a 2000s city that runs from a neon-drenched downtown to wide highway outskirts, race a ladder of events, and turn a stock daily driver into a show car through one of the deepest part-based customization systems in the indie racing scene.
The full game still has no release date, but the free Steam demo is a complete slice: fully beatable, with every performance part purchasable. The demo's economy is deliberately tight, the AI rubberbands like it is 2004, and the community meta is already forming in public. Players race, argue about part order in the Steam forums, and post their tuned builds. That meta is exactly what this guide covers.
This is not a nostalgia-bait cash grab wearing neon. The tuning physics, the wallrun mechanic, the PDA race-forum system, and the part economy all have real depth. Treat the demo as a tech demo with a fully formed gameplay loop and you will be pleasantly surprised. Treat it as a 2026 AAA and you will be disappointed. It is the rare indie that ships its demo first and lets the streets do the talking.
| Fact | Detail |
|---|---|
| Developer / Publisher | Sealime |
| Genre | Open-world arcade street racing, 2000s setting |
| Platform | Windows (Steam), full controller + DualShock support |
| Release date | TBA; free demo live on Steam |
| Setting | Ratfield: neon downtown + wide outskirts, night driving |
| Race size | 4 cars per race |
| Demo-verified modes | City Circuit, City Sprint, City Time Trial, City Track Drift |
| Race variants | NOS / No-NOS, Forward / Reverse routes |
| Customization | 8 performance slots, T1/T2/T3 tiers, vinyls, body kits, neon kits, modular lights |
| Part economy | Cash from race payouts + free roam cash pickups; 50% resale |
| Online | "Compete Online" confirmed as a pillar by the official site; Steam still lists Single-player; not in demo |
| Community | Discord, Patreon, Bluesky, X, Instagram |
Who it is for: street racing fans who miss the 2000s, demo hunters, tuner culture enthusiasts, and anyone who wants a racer where the car build matters as much as the driving.
Who it is not for: simulation drivers, people who need a full campaign today, and players who cannot forgive an economy that punishes careless spending.
Getting Started
Download the demo from the official Steam page, install through the Steam client, and launch from your Library. Pick a graphics preset on first boot. The demo defaults to Vulkan, which is the right call on most machines. If you see stutter immediately, read the Performance section before touching anything else.
Your first session plan
- Cruise for 15 minutes before you race. Ratfield is a city you learn by driving. Every shortcut you find in free roam is a shortcut that wins races later. Ignore the race menu on session one.
- Run the first two normal races stock. Do not buy anything. The stock car is competitive in the early events, and every credit needs to go to the parts that actually matter.
- Collect the cash pickups in free roam. Bright money pickups sit around the map. They are the difference between a comfortable run and a soft lock later. Grab them early; grinding for cash mid-demo is miserable.
- Buy tires T2 and a spoiler with your first winnings. The grip change is immediate and the car finally holds a line. This also sets up the upgrade order below.
- Join the Discord and read the Steam discussions. Sealime posts performance fixes and balance notes there. Demo builds change fast, and players who read the notes race with current intel.
Beginner mistakes to avoid
- Overspending on visual parts. Cash is the tightest resource. Buy a vinyl pack you do not need and you can soft lock yourself out of engine parts. A locked-out run means restarting or grinding cash pickups for hours.
- Grinding the first race with a stock car. Normal races pay for your first parts. Beat them stock, spend the prize on T2 tires, then push harder events.
- Trusting every shortcut. Ratfield is full of fake shortcuts. Some dead end, some add distance, and some look like a gap until you commit and hit a wall. Only trust a shortcut after you have driven it in free roam at full speed.
- Hoarding nitro. Nitro refills fast. Use it out of corners and on the straights that matter. Crossing a finish line with a full tank is throwing away time.
- Racing hard variants before engine T1. The "R" races assume a tuned car. Rush them stock and the AI simply drives away from you.
- Forgetting the headlight wink. Flick your lights like old-school racers signal. It is cosmetic, but it is also how the community says "clean pass" and how you flash a rival into a mistake.
First run priorities
| Priority | Why it matters |
|---|---|
| Free roam map knowledge | Shortcuts and cash pickups live there |
| T2 tires + spoiler | First buy that changes how the car drives |
| Engine T1 ASAP | Biggest single performance jump in the game |
| Night driving practice | The city's identity, and most races happen after dark |
| Discord / Steam notes | Performance fixes and balance changes land there |
Core Mechanics
Arcade handling with a 2004 brain
The handling sits between NFS Underground 2 and NFS Most Wanted (2012). Cars slide, counter-steer, and recover. Braking is optional on most corners: lift, turn in, let the rear step out, and power out with nitro. The game wants you to drive like it is 2004.
The community describes the physics as "easy to pick up, hard to master." One gamepad player found the controls "super floaty"; others love the alive feeling. If the car feels loose, that is the arcade tuning, not you. Learn to drive the slide instead of fighting it. New players who complain about handling usually brake too late and counter-steer too hard. The car recovers if you let it.
The engine is heavily processor-dependent, and a tachometer shows 9,000 RPM max. Engine audio is flat and unresponsive in the current build. Expect audio polish later; do not expect it to change lap times.
The wallrun: your free speed
The signature mechanic. Graze a wall and you barely slow down; you roll along it like a pinball and keep most of your speed. That makes wall taps a legitimate racing tool on technical tracks. Use them to carry speed through chicanes and to correct a bad entry.
The tradeoff is real but soft right now: wall taps cost almost nothing, so the risk/reward sits heavily in your favor. The veteran community wants this tuned so smashing walls punishes more. Expect that to change, but in the current build, wall contact is your friend. The AI uses it too, which is why opponents rarely lose time on their mistakes.
One rule: graze, do not smash. A full-speed head-on wall hit still hurts.
Nitro is everyone's weapon
Nitro is always on the table, and the AI has it too. That differs from NFS Underground 2, where rivals skip nitro unless you buy it. Here everyone deploys it, so your lead can evaporate at any moment.
The refill rate is fast, which works for you if you use nitro aggressively out of every major corner. Screenshots and trailers show the classic trailing light effect when you hit the boost, the iconic 2000s sense-of-speed trick. A small detail worth knowing: nitro sound is only audible in cockpit view. If you want to hear your boost, drive from the cockpit.
The PDA and the race forum
Your PDA is a proto-smartphone, a portable racing forum. You check the board, read challenges, accept them, and head out. It is the game's mission system and its community fiction in one device: Ratfield sits atop an underground racing scene, and you build respect by winning. The interface is simple enough that you should never be lost, but the fiction matters. Every race you take is a post on the board.
The same PDA doubles as your map tool in the demo. It displays the city map, lets you browse messages, enter photo mode, and points you to the next event. Hands-on reports describe a nice touch: the overworld holds pickups and at least one shop, so the PDA map is worth opening even between races.
Races feature four cars on the road at once. The pack is small, which makes it readable: you always know where everybody is, and a single mistake by the leader is a real opening.
The chevron racing lines
The roads use a glowing chevron system that traces the racing line. These are not just decorations. They act like an invisible wall guiding you through the layout, and they are bright enough to read at speed in the dark. Use them as your default line reference. The trick is that the chevrons show the safe, wide line, not always the fastest one. The fastest line in Ratfield is usually the one that clips a wall-run and skips a chevron arc.
Look one corner past the next chevron before you spend nitro. A boost that carries you into a bad entry loses more than it gains.
Race modes and the rank ladder
Progress runs through a rank system up to A-Rank. The demo's confirmed events are City Circuit (lap race), City Sprint (point-to-point), City Time Trial (against the clock), and City Track Drift (multiplier scoring). The "R" variants are harder versions of existing races and they are the gates that most players hit. Speedrun leaderboards also track NOS and No-NOS runs and Forward and Reverse route directions, so treat those as real rule variations rather than cosmetic labels.
At A-Rank the reverse races become available, and they are the hardest content in the demo. The AI behaves differently there: it blocks your line, dodges into your path, and deliberately sabotages your corner entries. Treat every A-Rank reverse race as a boss fight and bring a fully tuned car.
Drift races measure your multiplier. The good news: stopping does not kill it. You can crawl, correct, and even pause your drift without losing the chain, which makes them far more forgiving than the game lets on. The catch: drift events are where frame drops hit hardest, adding input delay. Drive a gear lower than you think you need, let the car slide wide, and prioritize keeping the multiplier alive over lap time. The demo's recorded drift benchmark sits at 107,502 points, which is a useful sanity check for how much a clean evening of runs can produce.
Domination points: the demo's second currency
Races are not the only progress gate. The demo tracks a Domination score, and it gates content: at least one two-lap race will not open until you have banked enough Domination points, and players have burned an hour of retries on that track before realizing the problem was the gate, not their driving. Points come from driving well across the demo's activities: clean race finishes, drift chains, near-misses in traffic, and free-roam stunts.
The end goal is documented by speedrunners: 10,000 Domination points earns S Rank, and that is the demo's true 100% line. Reaching it takes a full clear of everything the demo offers, roughly 22 to 25 minutes on a routed run. Practical advice: do not chase Domination mid-run. Finish the race ladder first, then farm the events that pay the most points per attempt. Drift chains in free roam and clean sprint finishes are the efficient farmers.
Assist settings: turn stability control off
The settings menu hides the demo's biggest handling upgrade. Community consensus is blunt: turn stability control off. With the assist on, the car feels numb, fights your inputs at the limit, and contributes to the "floaty" complaints in the forums. With it off, the slide behavior becomes readable: you feel the rear step out, counter-steer, and recover, which is exactly what the wallrun technique builds on.
Pair it with these baseline settings:
| Setting | Recommended | Why |
|---|---|---|
| Stability control | Off | Car stops fighting you at the limit; slide becomes predictable |
| Camera | Chase for racing, cockpit for boost checks | Nitro is only audible in cockpit view |
| Controller layout | Remap to taste | Full layout customization is supported, a rarity in this genre |
| Sound | Audible | The speedrun ruleset requires tire and engine audio for a reason: it is a driving input |
Drag racing is not confirmed for the final game, and reviewers did not see it in the demo. Do not plan a build around it.
The part system: 4-Wheel Heroes
The heart of progression. Parts come in tiers T1, T2, T3, and each tier is a step change in performance, not a percentage bump. The slots are Engine, ECU, Nitro, Turbo, Gearbox, Suspension, Tires, and Spoiler. Rare parts, the "4-Wheel Heroes," exist beyond the common tiers and breathe new life into your ride.
| Part | What it does | Buy priority |
|---|---|---|
| Engine | The monster. Stock ≈ 100 hp, T1 ≈ 250 hp, T2 ≈ 400 hp | 1st major purchase |
| Tires | Grip, braking, slide control | 1st minor purchase |
| Spoiler | Stability at speed | 1st minor purchase |
| Nitro | Refill rate and boost strength | 2nd wave |
| ECU | Rev response and power delivery | 2nd wave |
| Turbo | Top-end power | 3rd wave |
| Gearbox | Acceleration and gearing | 3rd wave |
| Suspension | Cornering behavior | As cash allows |
The engine is not a small upgrade. One player's car went from barely reaching 240 km/h to hitting 277 km/h shortly after swapping the stock engine for T1. Another player estimated the demo's hero car at roughly 232 km/h stock-ish with upgrades. The engine is the difference between finishing hard races and watching the field leave you. Do not delay it.
Parts sell back for 50% of their value, so mistakes are recoverable at a cost. One known bug: T1 tires refund nothing. Never sell T1 tires expecting cash back.
Visual customization
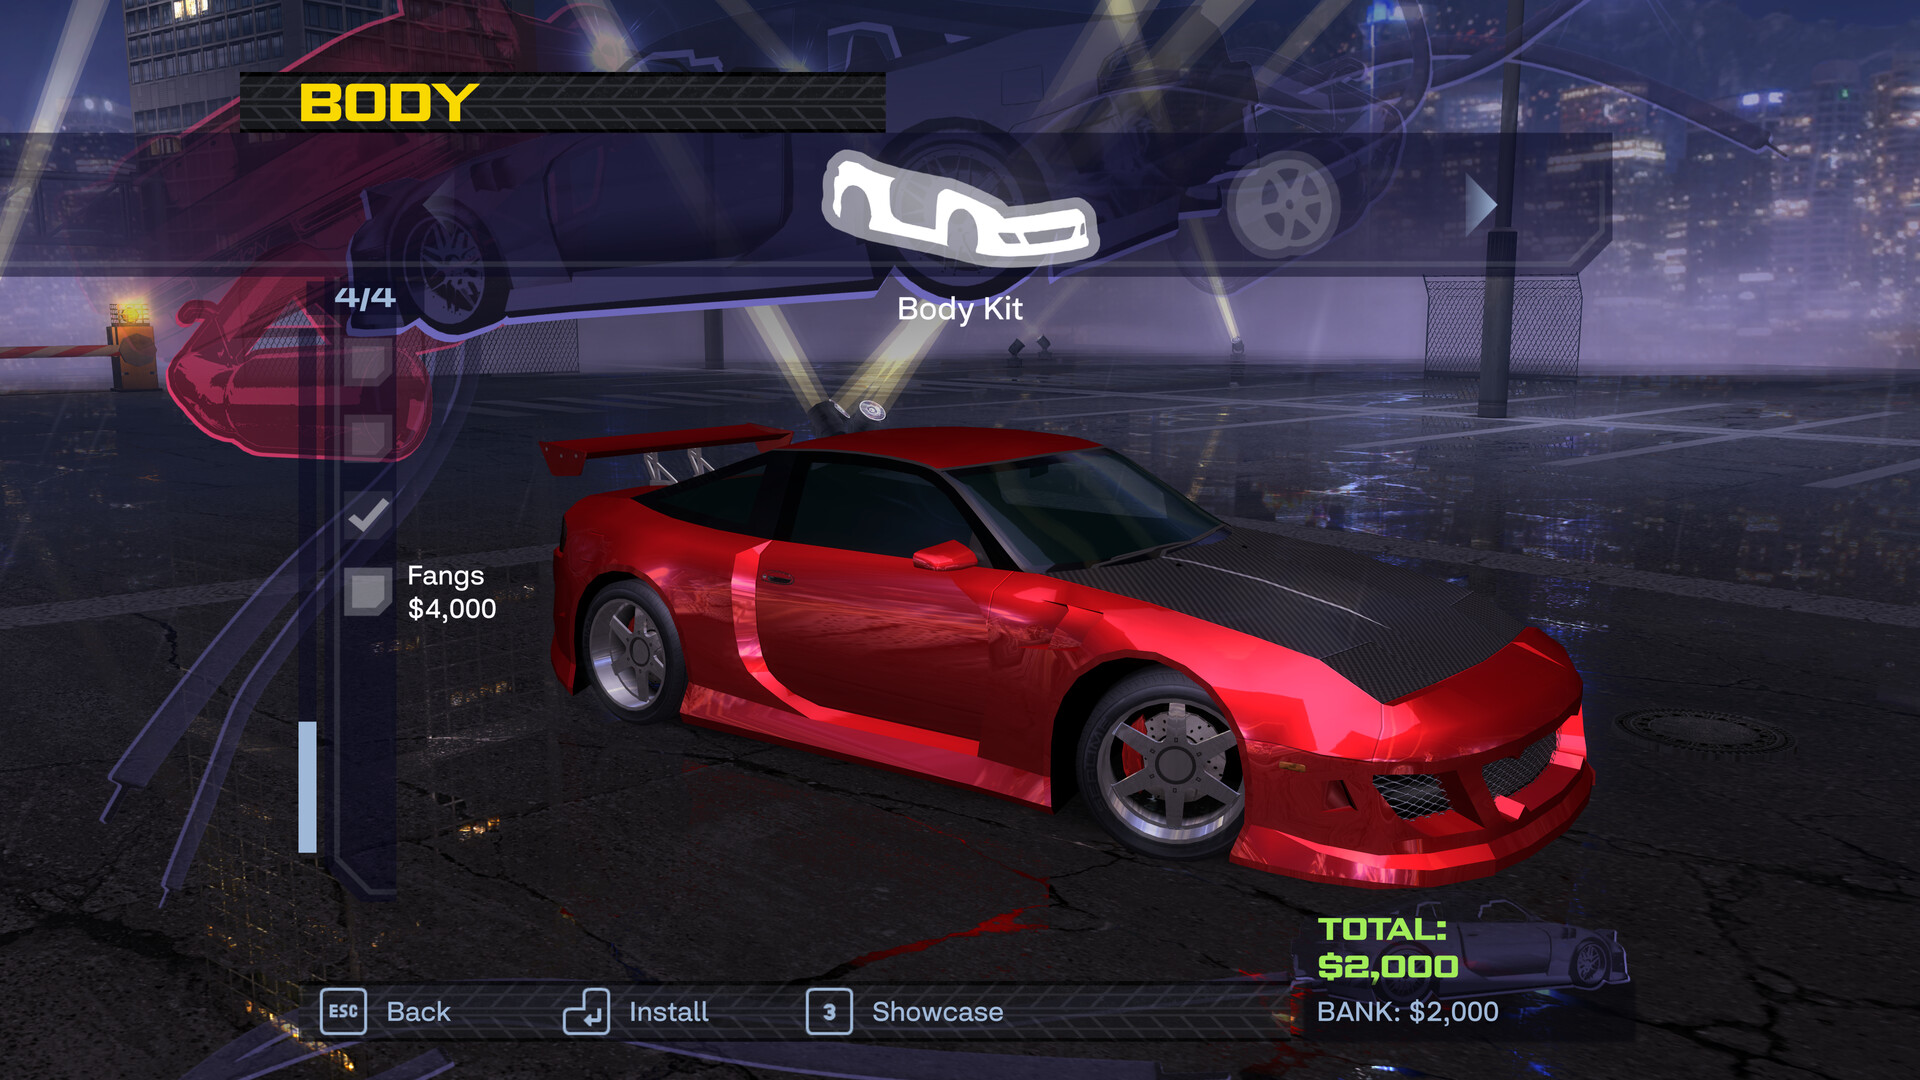
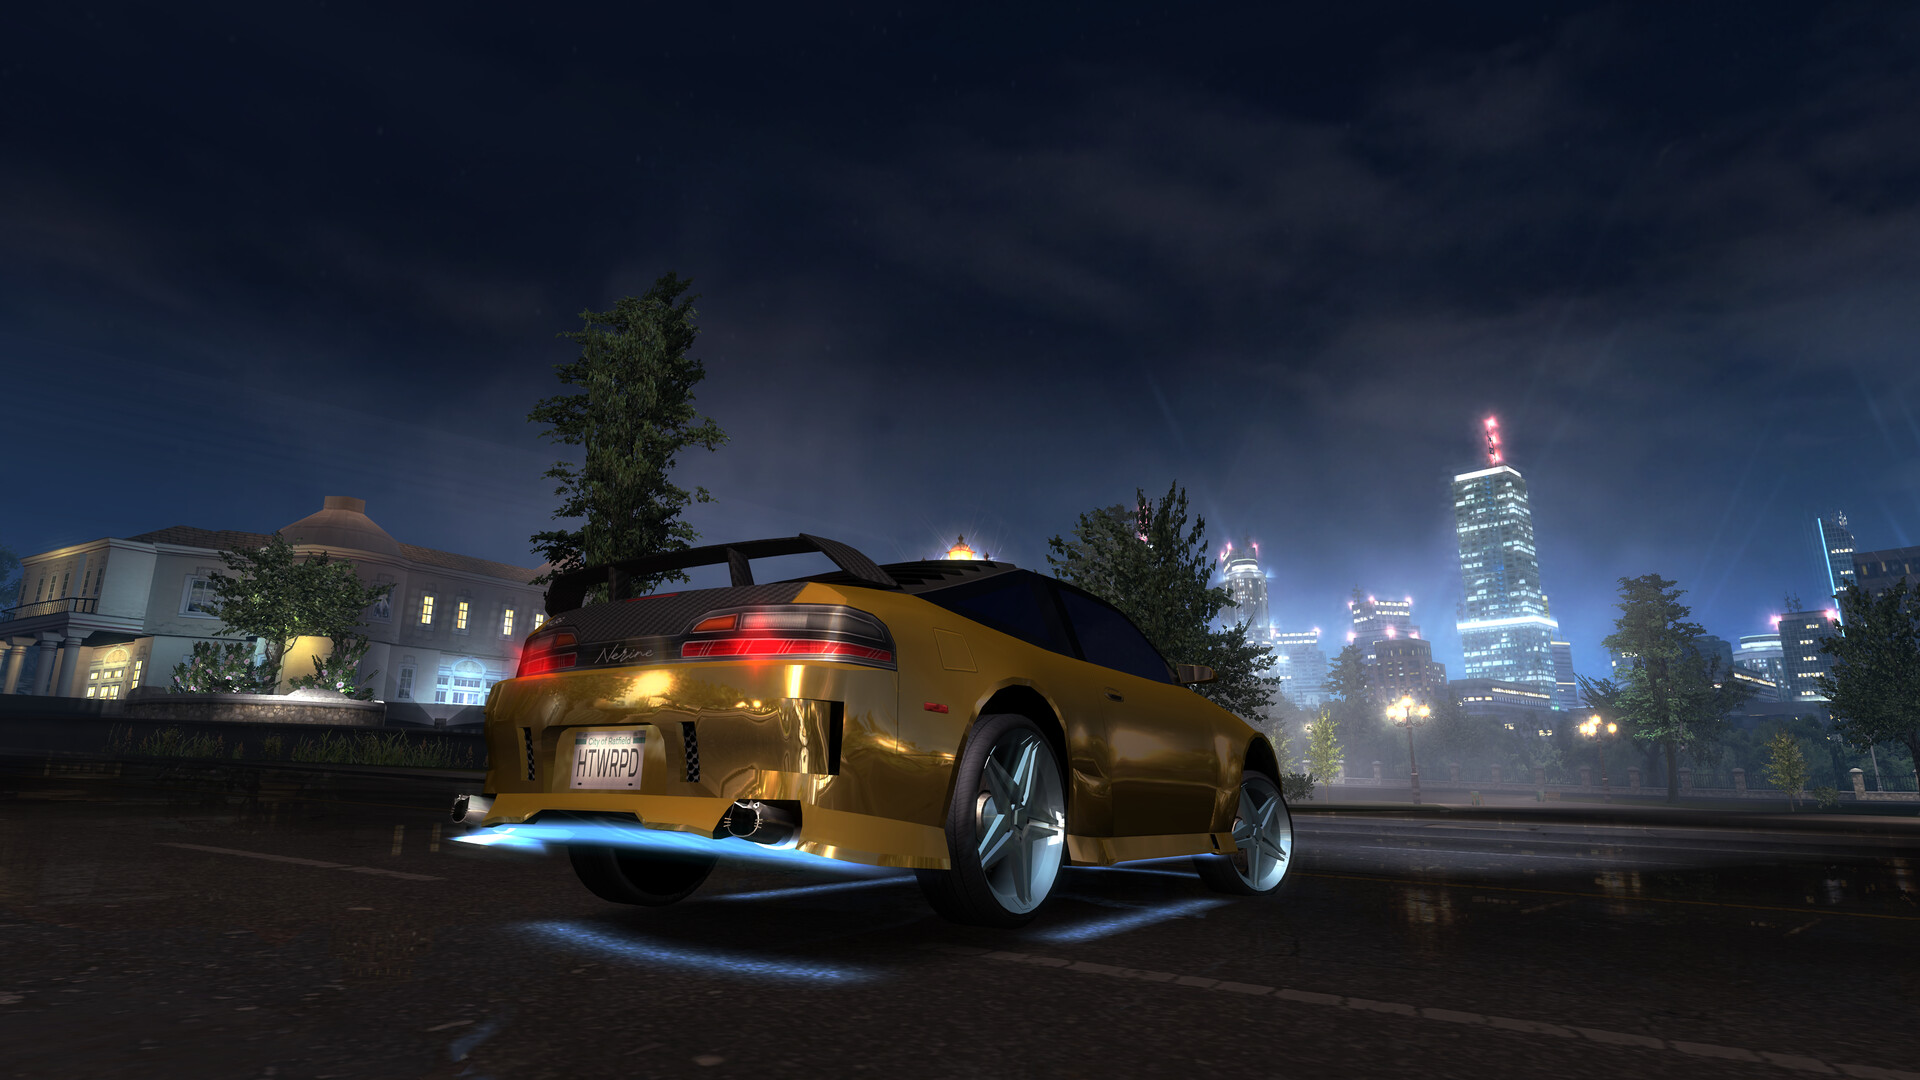
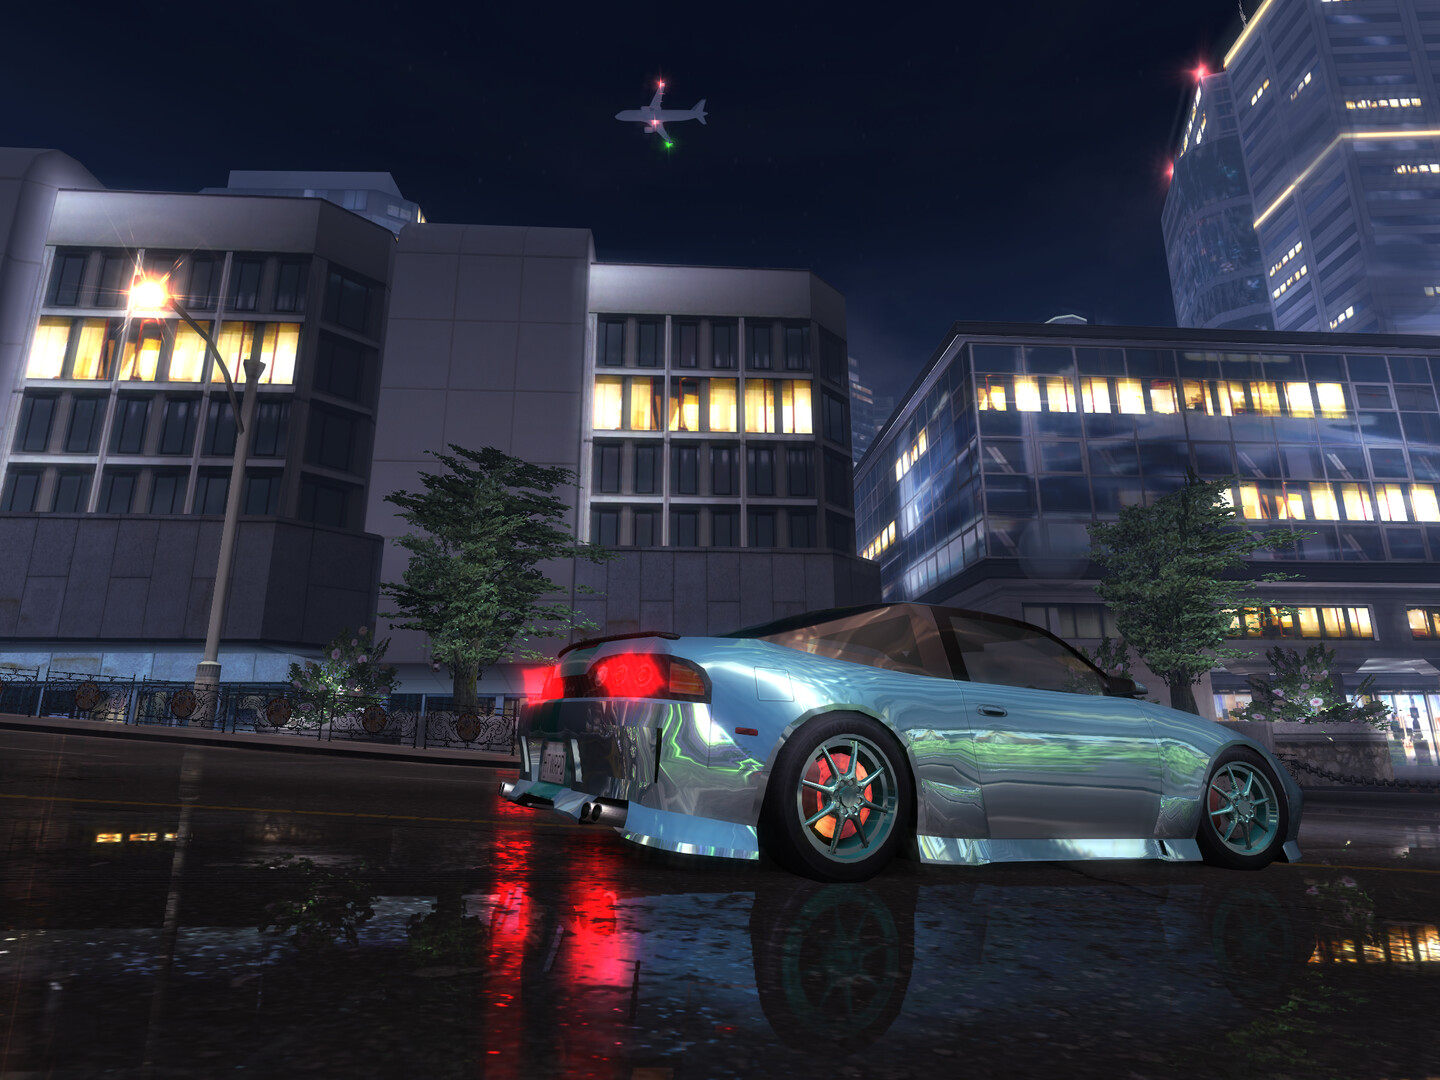
The garage goes beyond numbers. You can fit body kits, spoilers, exposed carbon fiber hoods, and neon underglow kits for the full Y2K look. Hands-on coverage spotted a body kit called Ab-Smug in the demo garage. Modular rear light variants exist, though in the current build their material does not match the body paint. The vinyl editor exists but is limited: no move, scale, rotate, or layering. The community wants matte and gloss options within the same wrap. Keep expectations in check and treat the editor as a decal picker, not a livery studio.
The economy
Money comes from race payouts and free roam cash pickups. That is the whole economy, and it is tight. A full T3 build costs nearly every credit the demo gives you. If you spend on cosmetics early, you may not be able to afford the engine that opens the hard races. The demo does not hand out money. Treat every purchase as a commitment, and every cosmetic buy as a risk.
The Car: Muira and the Streets of Ratfield
The demo ships with one playable car, the Muira, a fictional hero ride that looks like a cross between a Nissan 240SX and a Lexus SC. The name echoes the Lamborghini Miura, but this is not a licensed roster. It is Sealime building its own car culture, and the Muira is a fine first platform because its handling is the most neutral of the roster. Its top speed with a partial upgrade sits around 232 km/h, so it is not the fastest possible rocket, but its cornering balance makes it the best learning platform for wallrun technique.
A second car is not confirmed. No unlock trigger, level requirement, or garage price has been published. Treat a second vehicle as an in-game discovery target, not a documented route, and do not bank credits on an unverified unlock claim.
The streets of Ratfield are populated by traffic, and the demo's set is a period-correct trio: a 2004 Ford F-150, a 2008 Ford Focus, and a 2003 Volkswagen Golf. They are not player-drivable, but they matter for two reasons. First, they fill the 2000s fantasy with believable everyday cars. Second, they are mobile obstacles that the AI loves to hit, which means a clean lap from you gains automatic time whenever a rival clips one. At least five more vehicles appear in Steam screenshots and the reveal trailer without names. Do not read that as a hidden roster; read it as the full game holding cards close to its chest.
The demo map covers part of Ratfield, and the playable chunk includes a neighborhood hands-on coverage has called Ashtray. Neon downtown and wide outskirts frame the extremes: tight, reflection-heavy corners in the core, long straights and room to overtake on the rim. The full city has not been published, so treat every free roam session as cartography.
Builds: The Ratfield Meta
Part priority: the tier list
| Tier | Parts | Verdict |
|---|---|---|
| S | Engine T2 | Wins hard races; nothing else comes close |
| A | Tires T2, Spoiler, Engine T1 | The run's foundation |
| B | Nitro T1, ECU T1 | Keeps you in the fight vs nitro-using AI |
| C | Turbo T2, Gearbox T1, Transmission T2 | Speed and gearing for the endgame |
| D | Suspension, visual parts | Nice-to-have; buy last |
The three working builds
The Grip Build (recommended for first completion). Tires T2, spoiler, engine-first. This is the economy-safe order. You maximize reliability per credit, the car holds lines, and hard races become winnable before the A-Rank wall. Slowest to max top speed, fastest to a completed demo.
The Speed Build (for Time Trials). Engine T2, turbo T2, gearbox T2, then tires. You chase top speed for the long outskirt straights and the clock. The car will slide more and the drift events will be harder without tire grip. Do not attempt the hard circuit races with this until you have suspension and ECU.
The Drift Build (for multiplier events). Stock or T1 tires (they slide more), suspension T2, nitro T1. Keep the multiplier alive and you can win drift races with a weaker engine, because drift scoring punishes stopping, not slow driving. This is the cheapest build in the game and the one that lets you save cash for the engine fund.
Upgrade order cheat sheet
Tires T2 + Spoiler (first buy)
Nitro T1 + ECU T1 (second wave)
Turbo T2 + Gearbox T1 (third wave)
Engine T1 (turning point)
Engine T2 + Transmission T2 (hard race ready)
Tune one category at a time and test on the same route. If you change tires, suspension, and engine together, you will not know which part fixed what. The community standard practice is a baseline lap, one swap, same lap again.
Step-by-Step Strategy: The Optimal Demo Run
This sequence beats the demo in around five hours with a fully upgraded car. Follow it in order and do not skip ahead.
- Free roam for 30 minutes. Learn the city, mark the shortcuts, and vacuum up every cash pickup on the map. No races yet. This is the single highest-ROI activity in the demo.
- Win the early normal races stock. Beat each early event once, in order, without buying parts. Bank the prize money.
- Buy Tires T2 and a Spoiler. First purchase. The grip change is immediate and makes everything after it easier.
- Race the remaining normal events and take the first drift race. The extra grip helps, and drift races are forgiving because stopping keeps your multiplier.
- Buy Nitro T1 and ECU T1. Nitro keeps you in the fight, since the AI uses it too. ECU sharpens power delivery.
- Buy Turbo T2 and Gearbox T1. You are now fast enough to start the hard variants of the city races.
- Save for Engine T1, then Engine T2. The run's turning point. With engine T2 and transmission T2, the hard races become winnable. The stock car's 240 km/h becomes 277 km/h and the game changes.
- Clear the City Sprint R and City Time Trial R on hard mode. Use shortcuts you verified in free roam. Expect the leading AI car to block and dodge; pass it where the road opens up, not in the corners.
- Finish with the A-Rank reverse races. Bring the full build. Race clean, use wallrun to save time, and spend nitro on the straights.
- Spend leftover cash on visual parts and vinyls. The victory lap. 100% completion is done.
How to beat the first hard race without 21 reloads
The first hard event is the demo's most notorious wall. One player reported 21 restarts before beating it, and the AI car dodges and sabotages your line. The winning pattern:
- Shortcut discipline. The AI takes the real shortcuts. Watch where the lead car disappears, then use the same line next lap.
- Do not try to overtake in the corners. The AI blocks the inside. Pass on the short straights that follow the chicanes.
- Use wallrun defensively. If an AI car pushes you wide, let the wall carry you instead of fighting for the racing line.
- Bank the lead before the final sector. The last corner is where the AI closes in. Enter it clean, exit with nitro.
- If you are stuck, restart the demo and follow the cash route: win normal races stock, collect map cash, buy engine T2 + transmission T2, then return to the hard races.
Speedrun targets worth knowing
The demo has an organized speedrun scene with five tracked categories, and the boards moved fast through September 2026. The August Circuit record of 2:11.720 fell to 1:56 by early September, a 15-second improvement in two weeks. Route knowledge, not car pace, drove that jump.
Full-game categories (fresh profile required, all timed from when you gain control of the car):
| Category | Finish condition | World record (Sep 2026) |
|---|---|---|
| any% | Receive the "Thanks for playing!" SMS | 21:00.767 RTA (19:16 IGT) |
| Stage 1 | Finish the last normal difficulty race | 10:25.333 RTA (9:45 IGT) |
| Domination (100%) | Reach 10,000 pts and S Rank | 24:37.750 RTA (22:41 IGT) |
| All Treasures | Receive the "Good job" text message | 3:56.65 |
Individual events (per-level boards, split by NOS / No NOS and Forward / Reverse):
| Event | Category | World record (Sep 2026) |
|---|---|---|
| City Circuit | NOS, Forward | 1:51.24 |
| City Circuit | No NOS, Forward | 1:56.46 |
| City Sprint | NOS, Forward | 1:52.20 |
| City Sprint | No NOS, Reverse | 1:58.33 |
| City Time Trial | NOS, Forward | 1:11.98 |
| City Time Trial | No NOS, Forward | 1:18.02 |
| City Track Drift | No NOS, Reverse | 1:56.55 |
Board rules worth copying into your own play: traffic and opponents must stay enabled, all upgrades are allowed in NOS runs, and every upgrade except NOS in No NOS runs. The ruleset also requires audible tire and engine sound, which tells you something about the game itself: audio is a driving input. Listen for tire squeal to gauge slide angle in drift events.
Pace targets from the top runs: sub-10 minutes IGT for Stage 1 is achievable with average circuit execution, and the any% record holder described their own Stage 1 as merely average. If your drift and sprint lines are clean, there is time on the table.
Use these to check your own pace, but compare like with like. A Reverse NOS run is a different race from a Forward No-NOS run. If you chase speedrun times, keep a note of the level, direction, and NOS rule for every attempt, and separate execution errors (late turn, missed boost, collision) from route errors (a line that is simply slower). The leaderboard gap between a sloppy lap and a clean one is several seconds; most time falls in the corners, not on the straights.
Treasures: the 3:56 side quest
The All Treasures category confirms a dedicated collectible track in the demo: a set of map pickups that, when cleared, trigger a "Good job" text message on your PDA. The record sits at 3:56.65 with a route of at least eight cash pickups, and runners report traffic hazards positioning themselves right on the collection lines. Your practical takeaway: sweep the map's pickups in free roam with a mental route ordered to minimize backtracking, collect them early before spending on parts, and treat the "Good job" message as confirmation you have drained the demo's economy dry.
Advanced Tips
Beat the rubberbanding
The AI rubberbands hard. Take a big lead through shortcuts and the pack will still be on your bumper within seconds. What does not rubberband is your driving quality. Race a clean line every lap, avoid walls on the final corner, and never celebrate before the line. The AI also crashes into traffic and obstacles constantly, so a mistake-free lap from you always gains time. If you never make a mistake, the AI cannot overtake. This is the most common complaint on the forums, and it is also the easiest to answer: the AI is fast but brittle, and clean driving beats raw pace.
One more September finding that changes how you think about contact: AI cars have effectively no physics weight. Forum testing confirms opponents "going like a train" cannot be knocked off course, and side-by-side contact punishes you, not them. Do not attempt to bully the AI off its line the way you would in a sim or even in modern NFS titles. Race the road, not the cars. Pass where the road gives you room, and let them pile into their own traffic mistakes.
Use wallrun deliberately
Wall taps are free speed in the current build. On chicanes, aim for a controlled graze instead of braking. In A-Rank races, wallrunning through a corner while an AI car blocks the inside is often the only clean pass. The AI wallruns too, which is why the pack stays close, but it also smashes into light poles, overhead signs, and traffic. Let the AI hit the props; you hit the clean air.
Read the props
The world is full of explosive barrels and other props. They look cool and currently have no gameplay impact. The real hazard is map readability: dense objects cause crashes, and the city is full of traps like a sharp turn with a street light immediately after it. Learn the prop geography of each track. A barrel you do not clip is a second saved.
Manage nitro like a resource, not a button
Refill is fast, so dump nitro out of corners and on long straights. The AI uses its own, so saving yours only cedes the fight. In the last sector of any race, check your lead before burning a tank. If the finish line is close, spend everything.
Drift race secrets
Stopping never resets the multiplier. Frame drops add input delay, so shift down and drive with smoother inputs than usual. If the car feels stiff in drift events, that is the drift tuning, not you. Force the slide early and hold it. Stock tires slide more, which actually helps here, so do not panic if your drift build is not fully upgraded. Line choice before angle: a car that holds a predictable arc scores more than one that enters dramatic and corrects all the way out. Clean exits preserve momentum into the next linked corner.
The restart strategy for a locked run
If you overspent and cannot afford the engine, restart the demo. It takes about 15 minutes of play to be back where you were if you skip cosmetics entirely. Known working route: win the normal races stock, collect map cash, buy Engine T2 and Transmission T2, then clear the hard races.
Shortcut discipline
Only shortcuts you have verified in free roam count. Mark them mentally: the alley cut, the underpass jump, the highway service road. Fake shortcuts are everywhere in Ratfield, and they cost more time than they save. When an AI car disappears ahead of you, it took a real shortcut. Find where, and use it next lap.
Use the cockpit view
The cockpit camera is not just for immersion. Nitro is only audible there, which sounds trivial until you realize the audio is a boost-status cue you can train your ear on. In the current build most players prefer chase cam for racing, but a quick cockpit check before a race tells you exactly how your engine and nitro sound after a part swap.
Rain, crests, and the high-speed slide problem
Past roughly 73% demo completion, a wall appears: the car starts sliding at the slightest bump, loses control over gentle crests, and rain exaggerates all of it. Traffic spawns in blind spots at the worst moments, especially in tight corners, and the city's lights are all equally bright, which makes it hard to read a corner against the buildings behind it. The community has not found a magic fix, but the working mitigations are consistent:
- Stability control off (see the settings table above). It masks slide onset instead of preventing it.
- Lift before crests. The slide triggers on weight transitions, so a tiny throttle lift over a crest keeps the rear planted.
- In rain, brake in a straight line only. Corner entry speed carries you; corner braking rotates you into the wall.
- Learn the blind-spot traffic patterns per track. The spawns are consistent, and the cars that "appear from nowhere" appear from the same places every lap.
- Gearbox note from the speedrun board: the auto gearbox can hold a wrong gear under partial throttle. Manual upshifts on long straights avoid the "stuck in 6th" problem runners report.
Behind the barriers: the profile edit and map edge secrets
The demo's "coming soon" barriers are not load-bearing. Editing the demo profile file opens the gates. Windows path: C:\Users\<you>\AppData\LocalLow\Sealime\Heatwarped\Profiles_Demo\<your profile name>. On Linux or Steam Deck, the same file lives at /home/<you>/.local/share/Steam/steamapps/compatdata/4999690/pfx/drive_c/users/steamuser/AppData/LocalLow/Sealime/Heatwarped/Profiles_Demo. Find the "CurrentStage" line and set it to any invalid value, for example "asd". The barriers open on next load. The same file enables traffic toggling and a custom profile avatar.
Two map-edge discoveries came out of this:
- The Mad Pancake gap. City Circuit's guardrails have a break in front of the Mad Pancake diner. Drive through, exit the play area, and quit the race. A text message confirms you made it out.
- "Are You lost?" Drive far beyond the map boundary and your PDA receives that exact message. An easter egg, and proof the devs expected explorers.
Two warnings. First, speedrun leaderboards ban profile edits and traffic toggles, so keep a clean profile for any run you plan to submit. Second, no second car has been confirmed through this method despite active testing. The edit opens the map, not the garage.
Performance and Settings
The demo's performance is the least polished part of it. The stutter complaints are real, but most have fixes that work today.
| Symptom | Fix |
|---|---|
| Constant stutter, especially on AMD GPUs | Add -force-vulkan to launch options |
| Stutter on older NVIDIA cards | Add -force-d3d11 to launch options |
| Low FPS on weak hardware | Set graphics preset to Authentic |
| Locked but unstable frame rate | Enable double V-Sync in settings |
| Shader stutter on first run | Play one full race; the second lap is smoother |
Community reports: an RX 9070 rig stuttered on DirectX until -force-vulkan; a 7800X3D + 9070XT hit a locked 90 fps with double V-Sync; a mid-range 4060 + R7 5700X held constant 120 fps at max settings; a laptop with 2 GB VRAM ran 60+ fps on Authentic. The potato PC crowd is also represented: a GTX 970 + i5 4670k + 16 GB rig runs the demo without issue. The game is heavily processor-dependent, and Vulkan is the default API.
September added the floor test: an ancient i3 m370 laptop (2 cores, 4 threads at 2.4 GHz) with a 512 MB ATI Radeon 4500 and 3 GB of DDR3 launched the demo and drove it, with the hard drive pegged at 100% as the only real bottleneck. GPU sat at 70%, CPU at 80%, RAM at 2.8 of 3 GB. If hardware that old clears the bar, any machine with an SSD will run Ratfield. The practical lesson from that build: storage speed matters more than GPU tier on low-end systems, so install the demo on an SSD if you have one.
How to set launch options: right click HEATWARPED Demo in your Steam Library, open Properties, go to Launch Options, and paste -force-vulkan or -force-d3d11.
One gap players keep requesting: an option to lock the framerate to 30 fps. It does not exist yet, so if you want a hard 30 fps cap you will need to use driver-level tools for now.
The Authentic preset trick
Besides the clear "Enhanced" option, there is an "Authentic" setting that deliberately reduces the graphics and interface to create a retro vibe like the sixth-generation consoles. You can even drop the resolution way back to feel properly 2004. It is not just a nostalgia gimmick: Authentic is the universal performance fallback, and it runs above 60 FPS on hardware that chokes on Enhanced.
System requirements
| Component | Minimum | Recommended |
|---|---|---|
| OS | Windows 10 64-bit | Windows 11 64-bit |
| Processor | AMD FX 8320 / Intel i5-3570K | AMD Ryzen 5 5500 / Intel i5-12400F |
| Memory | 4 GB RAM | 8 GB RAM |
| Graphics | GTX 960 / Radeon HD 7970 | GTX 1070 / RX 5600 XT |
| DirectX | Version 11 | Version 11 |
| Storage | 1 GB | 1 GB |
| Target | 1080p 30 fps, Authentic preset | 1080p 60 fps, Enhanced preset |
FAQ and Common Mistakes
Is Heatwarped out? The full release is TBA. A free demo is available now on Steam, and it is the real game in miniature: about an hour of pure race content on top of free roam and tuning, and fully completable in roughly five hours for a focused run.
What is the best first purchase? Tires T2 and a spoiler. Then save everything for the engine.
Why is the AI so fast? The AI rubberbands and uses nitro, just like the player. It also crashes constantly. Clean driving beats raw pace.
How do I stop the stuttering?
Add -force-vulkan to the launch options or set the preset to Authentic. AMD users should try Vulkan first.
Can I complete the demo? Yes. Plan the run, skip cosmetics until the engine is maxed, and the hard races fall one by one.
Is there multiplayer in the demo? No. The official site advertises online challenges as a pillar of the full release, but Steam's listing still says Single-player, and neither is in the demo. Treat online as confirmed intent, not a playable feature.
Are there licensed cars? No. The game builds its own car culture. The demo's hero car is the Muira, a fictional coupe inspired by the Nissan 240SX and Lexus SC, and traffic is a period trio of Ford, Ford, and Volkswagen from the 2000s.
Is there a second car in the demo? No confirmed unlock. The garage, race, and challenge rewards may hold something, but no trigger, price, or model is published. Do not waste credits chasing one.
Will there be drag racing? Not confirmed. Reviewers did not see it in the demo.
Should I turn stability control on or off? Off. It is the community's single most agreed setting. The assist fights your inputs at the limit and masks slide onset, which makes both racing and drifting harder to read. Combined with the wallrun technique, raw unassisted handling is where the game's depth lives.
Why is my handling so slippery at high speed? Three stacking causes: stability control masking the slide onset, crests and bumps triggering weight-transition slides, and rain exaggerating everything. Lift before crests, brake in straight lines, and save rain races for after you have a full grip build.
Why can't I enter a race even though it shows on my PDA? Some events are gated by Domination points, not rank. If a two-lap race refuses to open, farm drift chains and clean sprint finishes until your Domination score crosses the threshold. 10,000 points is the demo's S Rank target, and no gate asks for more than that.
Are the demo's locked areas really accessible?
Yes, through the profile edit described in Advanced Tips: change "CurrentStage" in your profile file to an invalid value and the barriers open. You will find the Mad Pancake guardrail gap and the "Are You lost?" easter egg past them. Just keep it off any profile you use for speedrun submissions.
Is the game really just an NFS Underground 2 clone? The inspiration is open and total, menus included. Whether that is a dealbreaker depends on what you want: critics on the forums call it a copy, and defenders call it the modern Underground EA never made. The wallrun, Domination scoring, and profile-layer secrets are the parts that are not borrowed.
Is the demo representative of the final game? Treat it as a tech demo. Balance, economy, and performance are expected to change.
Common mistake: buying cosmetics before the engine. This is the demo's classic soft lock. The economy gives you roughly enough credits for a full performance build if you skip visuals until the end. Every vinyl bought early is an engine delayed.
Common mistake: fighting the hard AI in corners. The AI blocks the inside line and dodges into your path. Pass on straights, use wallrun on chicanes, and let the AI crash into its own mistakes.
Bottom Line
HEATWARPED is the rare indie that ships its demo first and lets the streets do the talking. The open world of Ratfield, the tiered part system, the forgiving wallrun, the PDA race forum, and the chevron-guided roads all reward players who treat free roam as training. The cash economy punishes carelessness, and the A-Rank races punish sloppy lines, but everything in the demo is beatable with the right purchase order and a mental map of the shortcuts.
September's community cycle sharpened the picture without changing its shape. The speedrun boards found 15 seconds in two weeks and mapped the demo's true completion line: 10,000 Domination points for S Rank, a treasure sweep that ends in a "Good job" text, and a finish that arrives as an SMS. The forums settled the handling debate with one setting, documented the rain and crest slide problems past 73% completion, proved the AI cannot be bullied off its line, and pulled the "coming soon" barriers open with a one-line profile edit. Two diner gaps and an easter egg later, the demo's edges are mapped.
Download the demo, spend your first half hour in free roam, and buy tires before horsepower. Ratfield rewards the players who know it, and the release build will still be running on those same streets.