Daily Pick
One deeply researched guide worth reading today.
A practical route through the systems that matter most, written to help new players make confident decisions quickly.
What Is Beyond All Reason?
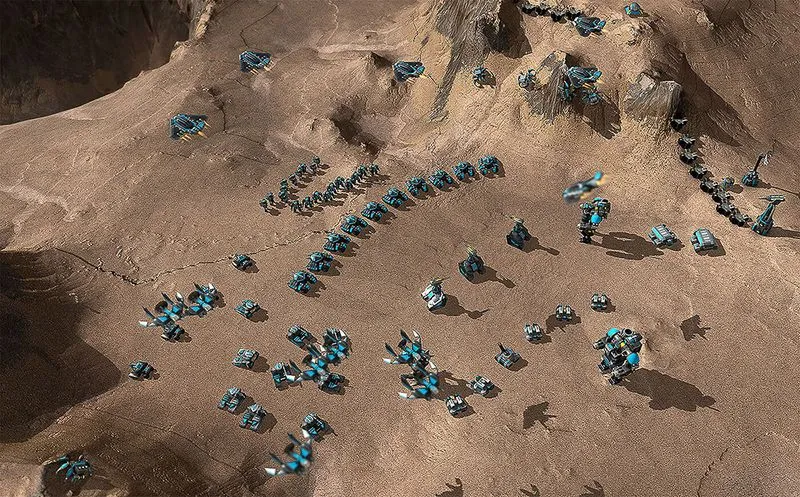
Beyond All Reason (BAR) is a free, open-source sci-fi real-time strategy game built on the Recoil Engine, a fork of SpringRTS. Think Total Annihilation meets Supreme Commander — every projectile, explosion, and terrain deformation is simulated in real time.
Three factions:
- Armada — Speed and stealth. Fast bots, cloaking, hit-and-run. Best for beginners.
- Cortex — Brute force. Heavy armor, raw firepower, frontal assault.
- Legion — Experimental faction with multi-functional units. More complex.
Battles range from 1v1 up to 8v8 (community events have hit 110 players). The Commander is your king — lose it and you lose.
PCMag called it "the best RTS release in years." Rock Paper Shotgun ranked it #20 in their all-time favorite strategy games. Download free at beyondallreason.info.
Why play Beyond All Reason?
- Genuinely free — no purchase, no Steam needed, no pay-to-win; the game is open source and funded by donations
- Massive simulated battles — up to 8v8 online (community events hit 110 players), with every projectile, wreckage, and terrain crater physically simulated
- Three asymmetric factions — Armada, Cortex, and Legion play differently, so the game stays fresh long after your first win
- Beginner-friendly onboarding — in-game tutorial missions, AI skirmish with 4 difficulty levels, and PvE modes (Raptors, Scavengers) let you learn without multiplayer pressure
- Actively developed — major balance patches and new units ship regularly; the planned Steam release will bring a story campaign
Quick Answer: Start with Armada, enable Always Show Prices, Unit Groups, and Idle Builders, then open with metal extractors plus wind or solar based on the map. Keep energy positive, build a Bot Lab first, use Shift queueing, and download the free Windows/Linux launcher from the official site.
Jump to: Beginner's Guide · Build Orders · Base Building · Economy · Controls · Tips & Tricks · Meta Guide · Air Combat · Download & Free to Play · System Requirements · Single Player · FAQ
Essential Settings (Before You Play)
Open the settings menu before your first match and toggle these on:
| Setting | Location | Why |
|---|---|---|
| Always Show Prices | Interface → Advanced | See metal (white) and energy (yellow) costs at a glance |
| Unit Groups | Interface → Advanced | Auto-assign new units to existing groups |
| Idle Builders | Interface → Advanced | Hotkey to find idle constructors |
| Factory Dock | Interface → Advanced | Remote unit production without returning to base |
| Energy Converter Usage | Interface → Advanced | Visual indicator of converter efficiency |
| Building Grid | Interface → Page 2 | Snap buildings to grid for cleaner layout |
| Simple Team Colors | Accessibility | Clearer unit identification in team games |
How to Play Beyond All Reason — Beginner's Guide & Tutorial
The core loop is simple: establish a stable metal-and-energy economy, use that income to keep factories producing, expand toward new resource points, and pressure the enemy without exposing your Commander. The opening below turns that loop into a practical first-match plan.
Pre-Match: Commander Placement
Once you load into a map, the match doesn't start immediately. Use this time wisely.
1. Pick your faction. Armada for learning, Cortex once you understand the flow, Legion after you've mastered the basics.
2. Choose your spawn — look for metal clusters. Left-click on the green part of the map where you see 3-4 closely packed metal deposits (small white circles with a number inside). That number shows the income a metal extractor will generate on that spot.
3. Plan your build queue before the match starts. Hold Shift and left-click buildings in the menu, then left-click the ground to place them inside your Commander's build range (the green circle around it). If you make a mistake, left-click a new building on top of the old one to replace it.
Beyond All Reason Strategy Guide: Build Orders & Openings
BAR has no universal build order. Your opening depends entirely on wind conditions — but every strong opening follows the same economy logic: metal extractors first, energy to power them, then keep both production lines growing without stalling. The sequences below are proven starting build orders you can run in your first matches, plus the economy build order principles that tell you what to build next at any moment.
Wind Map Opening Build Order (wind speed > 0)
1. Metal extractor × 2 (on the best nearby spots)
2. Wind turbines × 3 (inside Commander's build range)
3. More metal extractors (expand outward)
4. Bot Lab as soon as energy income stabilizes (~1:30-2:00)
5. Constructor bot first from the lab, then scouts
Check the wind info card:
- Top number = minimum wind speed
- Bottom number = maximum wind speed
- Low maximum wind? Add 1-2 solar collectors to your opening build as backup
No-Wind Map Opening Build Order (wind icon crossed out)
Wind turbines are disabled. You must build solar collectors instead:
1. Metal extractor × 3 (even if they're close together)
2. Solar collectors × 2-3
3. Bot Lab at the same energy checkpoint as wind maps
With no wind, building 3 metal extractors upfront is fine — they drain your energy reserve, but solar collectors don't require energy to build, so you won't stall.
Economy Build Order: What to Build Next
After the opening, stop memorizing sequences and read your resource bars instead. The bars at the top of the screen tell you your next build at any moment:
- Energy income (green) below spending (red) → build wind turbines or solar collectors immediately. Energy stalls slow every construction project at once.
- Metal income below spending → build more metal extractors on the nearest unclaimed spots, or add Energy Converters if you're boxed in.
- Both bars full and income positive → you're wasting momentum. Add another factory, a construction turret, or expand to a new metal cluster. A full stockpile is wasted economy.
- Income strong but army thin → queue more units and add a second lab only when the first one can't spend your income.
This read-and-react loop is the real "economy build order" in BAR: metal extractor rows at every expansion, wind/solar behind them, and production facilities whenever stockpiles start filling.
General Rule
The lower the maximum wind speed, the more solar collectors you need in your starting build. Always check the wind before committing.
First 90 seconds, tick by tick (wind map):
| Time | What to do |
|---|---|
| 0:00 | Queue 2 metal extractors + 3 wind turbines before the match starts (Shift + click in the build menu) |
| 0:05 | Commander builds the extractors, then the turbines — watch the metal bar, not the map |
| ~0:40 | Queue metal extractors 3-4 on the next nearest spots while energy builds |
| ~1:30 | Bot Lab — as soon as energy income covers it without dropping your stockpile |
| ~2:00 | First constructor bot from the lab, then 5 scouts |
| 2:00+ | Re-read the resource bars and follow the economy rules above |
The exact seconds shift with map and wind, but the order never does: extractors → energy → more extractors → lab → constructor. If your stockpile is draining during any step, you queued too much too early — pause the queue and let income catch up.
Common Opening Mistakes
- Extractors before energy, but never energy forgotten. Two extractors then zero power production is the classic new-player stall — the second extractor sits idle while your stockpile drains.
- Queuing units before the first constructor. Your Commander alone can't scale; the first constructor out of the Bot Lab doubles your build power for a fraction of an army unit's cost.
- Expanding without scouting. Every metal spot you claim blind is a spot a raider can punish. Send scouts along with your expansion.
- Turtling on one metal cluster. Two extractors with good defense beat six extractors the enemy is actively raiding. Claim territory steadily, not all at once.
- Comparing your timing to the wrong map. A 1:45 Bot Lab is fine on a rich wind map and slow on a poor one — judge your opening by whether your stockpile ever hit zero, not by a stopwatch.
Beginner build order FAQ:
- "Should I build metal extractors or wind turbines first?" Extractors — metal income gates everything else. Wind comes right after, before your energy stockpile runs dry.
- "How many wind turbines is enough?" Three in your opening, then keep adding lines behind your extractor rows as you expand. On maps where maximum wind is below ~5, swap to a solar mix.
- "When do I build my first army?" After the first constructor bot, not before. Five scouts give vision and delay raids; a bigger army before your economy scales just slows everything down.
Beyond All Reason Base Building — Layout & Defense Basics
Your base layout decides how well you survive raids. A clean base keeps constructors working, protects your energy grid, and expands without strangling itself.
Core Layout Principles
- Spread energy production behind your metal line. Extractors sit on fixed spots at the front; wind turbines and solar collectors go behind them so raiders have to chew through extractors before reaching your power grid. Use Z while drag-placing to add gaps — turbines chain-explode when packed tight.
- Keep labs near the middle, defenses at the front. Bot/Vehicle labs belong where new units spawn close to both your army staging area and your constructors. Defensive turrets (LLTs) go at chokepoints facing the likely attack direction — usually toward the center of the map.
- Put radar high and central. A radar tower near your base center covers every approach. Without it, raider groups are invisible until they're already firing.
- Cluster constructors near a construction turret. A construction turret (built by any advanced constructor) repairs and assists everything around it — parking your builders in its range keeps your economy running under fire.
- Leave room to expand. Don't fill your starting cluster to the walls. Your first forward expansion needs open ground for a lab, energy, and defenses; a crowded base forces you to build your second base too far away to defend.
First Defense Checklist (first 5 minutes)
- 2-3 metal extractors on your starting cluster
- Wind turbines (or solar) in a spaced line behind them
- Bot Lab producing constructors + scouts
- 1 radar tower near base center
- 1-2 LLT turrets at the approach facing the enemy
- A control group of 2-3 scouts patrolling the approaches — your early warning system
If you can't cover all six before the first attack lands, prioritize radar and turrets over more extractors — a raided extractor is lost income, but a raided base is a lost game.
Understanding the Streaming Economy
BAR uses a streaming economy — resources aren't spent in batches. They trickle from your stockpile as you use them.
The resource bars at the top of the screen show five numbers:
| Position | Meaning |
|---|---|
| Bottom (green) | Your income per second |
| Top (bright red) | Total spending (from production + stockpile) |
| Middle red | Spending from active production only |
| Middle (white) | Current stockpile amount |
| Right | Maximum stockpile capacity |
When the bright red number > middle red number → you're draining your stockpile. That's a warning sign — build more production.
Energy stalling is worse than metal stalling. When you run out of energy, all construction and unit production slows to a crawl. Keep energy positive at all costs.
First Production: Bot Lab
Once your economy is stable, build a Bot Lab (easier for beginners than Vehicle Lab — fewer units, more focused roles).
You can queue units before the lab finishes building. Click the lab in your build queue, open its menu, and start ordering.
Recommended opening lineup:
- Constructor bot × 1 (can build things your Commander can't)
- Scout bot (Tick) × 5 — fast, wide line of sight, tiny gun
- Constructor bot × 3
- Pawn infantry × 10 — more firepower and HP than scouts
Commander assist: After the lab finishes, select your Commander and right-click on the lab. His build power speeds up unit production. Warning: this drains extra energy — monitor your stockpile.
Expanding Energy Production
Wind turbines are your main energy source on most maps. Mass-place them efficiently:
- Shift + left-click drag → draw a line of turbines
- Alt + hold → double or triple lines at once
- Z → add spacing between turbines (prevents chain explosions)
Combine them: Shift + Alt + left-click drag + Z for a spaced double line.
The gap spacing persists in future matches, so set it once and forget it.
Solar collectors produce constant energy regardless of wind but cost metal. Use them on no-wind maps or when wind suddenly drops.
Emergency adjustment: If wind drops and you're stalling, Spacebar + left-click a solar collector to bump it to the front of the build queue.
Build Power as a Third Resource
Build power is effectively a third resource. More build power = faster construction = faster army.
Sources of build power:
- Commander — strongest builder, but risky to expose
- Constructor bots — produce from your lab, assist construction
- Construction turrets — 200 build power in range, can finish projects without a builder present (but can't start them)
Tip: Let your first constructor bots build a construction turret near your base. It passively speeds up all nearby construction and repair.
Energy Converters
When you have excess energy but can't expand to new metal spots, build Energy Converters. They convert 70 energy → 1 metal at Tech 1.
The white box on your energy bar shows the converter cutoff point:
- Move right → more energy goes to converters (more metal)
- Move left → limit converter draw (protect other buildings from stalling)
Toggle the Energy Converter Usage option (settings → Interface) to see how efficiently your converters are running.
Controls & Keyboard Shortcuts
BAR uses familiar RTS controls, but its queueing and area-command shortcuts are especially important. Master these and you'll spend less time fighting the interface and more time fighting the enemy.
Movement & Combat
| Action | Shortcut | Notes |
|---|---|---|
| Move / Attack / Assist | Right-click | Context-sensitive — right-click enemy to attack, ally to assist, ground to move |
| Attack-move | A + left-click | Units engage anything in their path. Use this instead of right-clicking into combat |
| Stop | S | Units halt and engage nearby enemies |
| Patrol | P + left-click | Units loop between current position and patrol point, attacking enemies in between |
| Hold position | H | Units hold ground but still fire at enemies in range |
| Set move order | W + left-click | Direct movement — units ignore enemies and go straight to the point |
Command Queueing
| Action | Shortcut | Notes |
|---|---|---|
| Queue commands | Shift + command | Chain multiple orders together. Hold Shift to see your queue visualized on the map |
| Insert at front of queue | Spacebar + click | Emergency priority — uses the Commander's build power to instantly place the item next in line |
| Remove from queue | Right-click queued item | Remove a specific order without clearing the whole queue |
| Cancel entire queue | Select unit + press Stop (S) | Clears all queued orders for the selected unit |
Unit Selection
| Action | Shortcut | Notes |
|---|---|---|
| Select all visible units of type | Ctrl + Z | Selects every unit of the same type currently on screen — great for grabbing scattered scouts or constructors |
| Select idle constructor | ` (backtick) or customizable | Jump to your nearest idle builder. Rebind this in settings to a key you can hit instinctively |
| Add to selection | Shift + click | Add individual units to your current selection |
| Remove from selection | Ctrl + click | Deselect a unit from a group without breaking the group |
| Double-click unit | Double-click | Select all visible units of the same type |
Control Groups & Auto-Groups
| Action | Shortcut | Notes |
|---|---|---|
| Create control group | Ctrl + 1-9 | Standard RTS grouping. Use from minute 1 |
| Auto-group (factory binding) | Alt + 1-9 | All future units of the same type produced by any factory are auto-assigned to this group |
| Select group | Number key (1-9) | Instantly select the group |
| Center camera on group | Double-tap number key | Jump camera to the group's location |
Why auto-groups matter: Use Alt+1 for your scout group, Alt+2 for main army, Alt+3 for constructors. Every new unit you produce joins its assigned group automatically — no more manually adding reinforcements mid-battle.
Camera Controls
| Action | Shortcut | Notes |
|---|---|---|
| Zoom in/out | Mouse wheel | Zoom from individual units all the way to the tactical minimap view |
| Pan camera | Arrow keys or edge scroll | Move the camera without moving units |
| Track unit | T (with unit selected) | Camera follows the selected unit — useful for watching scout paths or bomber runs |
| Free look | Middle mouse button + drag | Orbit camera freely without affecting unit selection |
| Jump to alert | Spacebar (on alert) | Camera jumps to the last ping, attack warning, or construction-complete notification |
Building & Placement
| Action | Shortcut | Notes |
|---|---|---|
| Place building line | Shift + left-click drag | Draw a straight line of buildings — essential for wind turbine arrays |
| Spaced placement | Z (while dragging line) | Adds gaps between buildings to prevent chain explosions (especially for turbines and energy storage) |
| Multi-line placement | Alt + hold | Draw double or triple parallel lines at once |
| Replace building in queue | Left-click new building onto old | Swap a queued building without canceling and requeuing |
| Building grid snap | Toggle in Settings → Interface | Snaps buildings to an alignable grid for cleaner base layouts |
Team Coordination
| Action | Shortcut | Notes |
|---|---|---|
| Ping map | ` (backtick) + click | Quick alert for teammates — use on enemy positions, resource spots, or attack targets |
| Draw on map | Hold ` and left-click drag | Freehand drawing for attack plans, defensive lines, or marking enemy expansions |
| Erase drawing | Hold ` and right-click drag | Clear your drawings when plans change |
| Share resources | Click teammate name in resource panel | Send metal or energy to struggling allies |
Replay Controls
| Action | Shortcut | Notes |
|---|---|---|
| Pause/play | Spacebar | Toggle playback |
| Speed up | + (plus) | 2×, 4×, 8× speed for fast-forwarding to key moments |
| Slow down | - (minus) | 1/2×, 1/4× speed for analyzing micro decisions |
| Toggle player vision | Number keys 1-8 | Switch between each player's perspective (fog of war) |
The Factory Dock (right side of screen) shows what's currently producing in each lab. Click any factory to queue orders remotely without returning to base — this alone saves minutes of travel time per match.
Tips and Tricks
Economy Tips
- Keep energy income positive. An energy stall slows nearly everything you do — production, construction, repair. Build energy before you need it, not after.
- Scout early and often. A single scout can reveal the enemy's expansion plan faster than 10 minutes of guessing. Scout information lets you match (or counter) their economy decisions.
- Spend resources continuously. A full stockpile usually means unused momentum. If both metal and energy bars are full, you're building too slowly — add more factories or construction turrets.
- Add build power only when your economy can support it. Every construction turret and builder bot drains resources faster. If you add build power before your income scales up, you'll stall.
- Metal extractors are your first priority. Every game. Expand to new metal spots before building more army. An army that can't be reinforced loses to one that can.
Combat & Micro Tips
- Use control groups from the opening minutes. Ctrl+1 for scouts, Ctrl+2 for main army, Ctrl+3 for constructors. Sorting a large army later is ten times harder.
- Pull damaged units back. A unit with 10% HP does the same damage as one with 100% HP — but it dies to a stiff breeze. Rotate wounded units to the back line and let them repair.
- Attack-move (A + left click) instead of right-clicking. Units set to attack-move will engage anything in their path instead of blindly walking past enemies. This single habit prevents most "why didn't my army shoot?" situations.
- Target enemy constructors and Commander first in raids. Killing a constructor sets their economy back more than killing 20 pawns. If you see their Commander exposed, ping it for your team immediately.
- Radar is your second scout. Build a radar tower near contested metal spots. It reveals enemy movements through fog of war, giving you 10-15 seconds of warning before an attack hits.
Army Composition Tips
- Don't build only one unit type. A pure pawn army dies to a handful of rocket bots. A pure rocket army dies to scouts. Mix unit roles — front line, support, anti-air — in every attack group.
- Raiders (fast, cheap units) win early game. Send 5-10 fast units to harass enemy metal extractors while you build your main force. Even if they die, the economic damage they deal is worth the cost.
- Artillery wins stalemates. If neither side can push into the other's defenses, build 3-5 artillery units and shell their static defenses from outside their range. Forcing them to come to you is always better than charging into turrets.
- Anti-air is not optional. Even if the enemy hasn't built air yet, one AA unit in each control group prevents being caught off-guard by a surprise bomber run.
Team Play Tips
- Communicate your plan. Ping where you're expanding, call out enemy scout positions, and announce when you're attacking. A coordinated push from two players simultaneously breaks defenses that would stop either alone.
- Share resources with struggling teammates. If your ally is stalling and you have excess metal, send them a constructor or donate resources (click their name in the resource panel). A teammate who falls behind becomes a backdoor for the enemy.
- Watch the minimap more than the main screen. The minimap shows the entire battlefield. Glance at it every 5-10 seconds — you'll spot raids, undefended expansions, and attack opportunities earlier than tunnel-vision players.
Settings & Quality of Life Tips
- Rebind the idle constructor key to something you can hit instinctively (Tab, tilde, or a mouse button). Jumping to idle builders instantly is one of the highest-impact habits you can build.
- Disable screen shake in settings → Camera. BAR's explosions are cinematic, but screen shake throws off your micro during fights. Turn it off and you'll land more commands accurately.
- Use the spacebar priority queue for emergency units. If an enemy bomber is heading toward your base, Spacebar + click an AA turret to bump it to the front of every constructor's queue simultaneously.
Beyond the Basics
This guide covers the most critical first 10 minutes. Master these before moving on:
- ✅ Economy never stalls
- ✅ Build queue planned during pre-match
- ✅ Energy production scales with your army
- ✅ Constructor turrets deployed early
- ✅ Unit groups set up from minute 1
Beyond All Reason Meta Guide — Unit Roles & the Current Meta
BAR doesn't lock its meta into a fixed build order the way some RTS games do. The meta revolves around two things that never change: economy tempo and the rock-paper-scissors relationships between unit roles. This section breaks down those roles so you can diagnose any matchup — what your army has, what it's missing, and what to build next.
Unit Roles: The Rock-Paper-Scissors of BAR
| Role | What It Does | Beats | Loses To |
|---|---|---|---|
| Raider | Fast and cheap; harasses metal extractors and constructors early | Unprotected economy, slow units caught out of position | Static defenses, massed cheap units |
| Frontline brawler | Holds the line and absorbs damage | Raiders, units caught in the open | Ranged units that kite from distance |
| Ranged / kite units | Deal damage from outside melee range while pulling back | Brawlers, slow heavies like the Sumo | Raiders that close the gap, artillery |
| Artillery | Breaks stalemates by shelling defenses from outside their range | Turtling, static defense lines | Raids on its exposed position, bombers |
| Anti-air | Deters and intercepts bombers and gunships | All air units | Ground units — keep it behind the line |
| Constructors | Build, repair, reclaim, and set up forward production | Nothing (they don't fight) | Everything — protect them at all times |
| Scout / sensor | Reveals the map; radar makes your fires accurate | Fog of war | Juno pulses, raiders hunting radar |
Every strong composition fields at least one unit in each role — the army composition tips above are really this table in action. The way to read any game: check your army against this list, and whichever role is missing is what your next production run builds. This is also the answer to "what do I do in the mid game" — you're not memorizing unit counters, you're keeping the role table covered as losses open gaps in it.
Meta by Game Type
- 1v1 meta: Fast expansion plus constant raider pressure. Games are decided by economy trades in the first 10 minutes — whoever extracts more metal while denying the enemy's expansions snowballs into an unwinnable position.
- Team games (4v4-8v8): Map control across multiple fronts. Players specialize — one goes air, one feeds artillery to the front line, one raids — and the team that coordinates with pings and map drawings wins the fights (see the ping and drawing guides below).
- The constant: streaming economy discipline. Faction and unit balance shift patch to patch, but "keep income positive, keep extractors coming, cover every role" wins in every version of the game.
How to Ping in Beyond All Reason — Quick Team Alerts
Pinging is the fastest way to grab a teammate's attention: press ` (backtick) + left-click anywhere on the map or minimap to drop a ping marker that plays an audible alert for your whole team. Ping when something is happening now; use the drawing tool (next section) when you're explaining a plan.
How pinging works:
- Ping: ` + left-click on the map or minimap — a marker appears and teammates hear the alert sound.
- Jump to the last alert: Spacebar snaps your camera to the most recent ping, attack warning, or construction-complete notification (see the camera controls table above).
- Ping + draw combo: Circle the enemy base with the drawing tool, then ping it — the drawing provides context, the ping forces eyes onto it.
When to ping:
| Situation | What to Ping |
|---|---|
| Enemy raiders spotted | The raider group heading for someone's economy |
| Enemy Commander exposed | The Commander position — focus fire on it wins games |
| Unclaimed metal cluster | Spots you can't take but a teammate should |
| Attack incoming | The defense point where you need help |
Ping etiquette: one ping per event, never spam. A player who receives ten pings in ten seconds stops looking at any of them. If a spot needs sustained attention, draw around it and ping once.
How to Draw on the Map — Team Strategy & Coordination Tool
BAR includes a built-in drawing tool that lets you sketch directly on the map and minimap during matches. It's the fastest way to coordinate attack plans, mark enemy positions, and communicate strategy without typing.
How to use the drawing tool:
- Hold the backtick key (`) and left-click drag to draw freehand lines on the map. Release to finish the line.
- Draw on the main map for detailed tactical plans (flanking routes, defensive lines, artillery targets).
- Draw on the minimap for quick, broad-strokes communication — circle an area to mark an enemy expansion, or draw arrows showing your team's planned attack direction.
- Hold the backtick key (`) and right-click to erase your drawings.
When to draw:
| Situation | What to Draw |
|---|---|
| Pre-match planning | Sketch your intended expansion path, mark key metal clusters to claim, and draw fallback defensive lines |
| Scout reports enemy base | Circle the enemy Commander location on the minimap so every teammate sees it instantly |
| Coordinating a push | Draw attack arrows from your position to the target base, showing the route and timing |
| Warning of a raid | Quickly circle the area where enemy raiders were spotted — faster than typing coordinates |
| Post-fight analysis | During replays, draw on the map to discuss what went right/wrong with your team |
Tips for effective map drawing:
- Keep it simple. A circle and an arrow communicate more in one second than a paragraph of text. Don't overdraw — one clear line is worth ten scribbles.
- Color-code by purpose. If multiple players draw, agree on a convention: red for enemy positions, green for allied plans, yellow for resource spots.
- Draw during downtime. When you're waiting for production or traveling across the map, sketch the next phase of the plan so your team is aligned before the fight starts.
- Clear old drawings. Right-click drag while holding backtick to erase previous marks when they become irrelevant. Cluttered drawings cause confusion, not coordination.
Drawing tool settings:
Access drawing-related options in Settings → Interface → Page 2:
- Drawing opacity — Lower it if drawings block too much map visibility
- Drawing color — Change default line color per player
- Auto-erase timer — Set drawings to fade after a configurable time (10s, 30s, 1 min) so old plans don't linger
The drawing tool is especially important in team games (4v4 and larger), where typing "attack the base to the north with the green Commander at coordinates 342, 567" isn't practical. A quick circle on the minimap does the same thing instantly — and in BAR, seconds of coordination can decide the match.
Air Combat Guide — When and How to Build Air Units
This air guide covers everything you need to know about BAR's aerial warfare: when to build air units, which aircraft each faction brings to the fight, and how to set up effective anti-air defense.
Air power is a completely different economy layer — aircraft require energy (not metal) to build and operate. This makes air gameplay distinct from ground warfare.
When to build air:
- Scout first. A single air scout can reveal the enemy's expansion faster than 10 ground scouts. Build one early if you suspect the opponent is hiding a second base.
- Counter specific threats. If the enemy is massing artillery or building a forward base, a few bombers can disrupt their setup before your ground army arrives.
- Don't rush air superiority. New players often build air labs too early, draining energy that should fund ground economy. Get your ground economy stable first, then add air.
Key air units by faction:
| Faction | Scout | Fighter | Bomber | Gunship |
|---|---|---|---|---|
| Armada | Fink (fast, stealthy) | Thunder (speed interceptors) | Phoenix (precision strike) | — (use Phoenix for ground attack) |
| Cortex | Peeper (cheap, spammable) | Rapier (heavy fighter) | Revenant (area bombing) | Wraith (armored air-to-ground) |
| Legion | Owl (cloaked scout) | Eclipse (multi-role) | Gargoyle (heavy bomber) | — |
Anti-air basics:
- Jammers (Armada) or AA turrets (Cortex) are your first line of defense. Place them near resource clusters.
- Fighters intercept incoming bombers. Keep a patrol route over your economy.
- Don't overbuild AA. Two AA turrets cover the same area as four — test your coverage using the range circle before placing extras.
- Mobile AA (AA bots/vehicles) protect advancing armies. Build 2-3 per attack group.
Air player tip: If you're playing an air-heavy strategy, build energy storage and additional wind/solar before the air lab finishes. Air production stalls are the #1 reason air players lose before their first bombing run.
How to Get Chevrons — Unit Experience & Rank System
Units in BAR gain experience as they survive combat and destroy enemies. Experience is displayed as chevrons (rank insignia) above the unit — the more chevrons, the higher the rank.
How chevrons work:
| Rank | Chevrons | Bonus |
|---|---|---|
| Green (recruit) | 0 chevrons | Default stats |
| Regular | 1 chevron | +25% reload speed, +10% damage |
| Veteran | 2 chevrons | +50% reload speed, +20% damage, +10% armor |
| Elite | 3 chevrons | +75% reload speed, +30% damage, +20% armor |
| Hero | 4+ chevrons | +100% reload speed, +40% damage, +30% armor |
Why chevrons matter: A veteran unit (2 chevrons) is roughly twice as effective in combat as a fresh recruit. Losing a high-chevron unit is a bigger strategic loss than losing its metal cost — protect your experienced units by pulling them back from dangerous engagements.
How to gain chevrons efficiently:
- Let scouts survive. A scout that survives 3-4 skirmishes earns chevrons and becomes faster and more dangerous. Don't suicide-scout unless you absolutely need vision.
- Feed kills to your Commander. The Commander gains chevrons from destroying enemies. A veteran Commander builds faster and fights harder — keep it alive and let it finish off wounded enemies.
- Rotate front-line units. If a unit has 1-2 chevrons, pull it back from the front line and let fresh units take over. The veteran survives for the next push.
- Watch for chevron indicators. When selecting units, look for the small rank icon below the health bar. Units with visible chevrons should be prioritized for retreat.
Pro tip: Queue a retreat waypoint behind your lines for units that survive a fight. Ctrl + right-click sets a move order that pulls damaged units back automatically.
Beyond All Reason Juno Guide — The Anti-Radar, Anti-Jammer Building
The Juno is a specialist defense building (all three factions field one: Armada, Cortex, and Legion versions share the same stats and role). It fires a magnetic impulse rocket that doesn't damage health — it deletes electronics. The in-game description says it plainly: "Anti Radar / Jammer / Minefield / ScoutSpam Weapon."
| Stat | Value |
|---|---|
| Faction availability | Armada (640 metal / 17,000 energy), Cortex (660 / 16,000), Legion (660 / 16,000) |
| Role | Anti-sensor defense building |
| HP | 2,350 (Armada) / 2,500 (Cortex & Legion) |
| Weapon | Magnetic impulse rocket — 32,000 range |
| Ammo | 20 rockets stockpiled, ~75 seconds per rocket |
| Cost per shot | 200 metal + 12,000 energy |
| Built by | Constructors (Construction Bot, Vehicle, Hovercraft, Aircraft) |
What a Juno hit actually does:
- Destroys radar, jammers, and sonar instantly. Any unit flagged as a sensor dies to a single pulse: Radar Towers, Advanced Radar Towers, jammer towers (Armada's Sneaky Pete, the Veil), radar/jammer bots and vehicles, radar planes, and sonar. The blast does 1 damage to everything else — your army walks through it unharmed.
- Wipes mines and stuns scout swarms. Mines detonate, and cheap scout units (Ticks, Rovers, Wheelies) get caught in the denial zone.
- Creates a 30-second denial ring. The impact leaves a lingering EMP ring (450 radius) that destroys any sensor entering it and re-stuns scouts for its full 30-second duration. Flying a radar plane through that space is a donation.
- Ignores shields. The pulse penetrates shield AOE protection, so a bubble up doesn't save your radar line.
When to build one:
- The enemy leans on radar-guided artillery (you'll see constant accurate shelling from out of sight) — a Juno strike blindfires their whole artillery line.
- They've mined the chokepoints you need to push through.
- Their strategy depends on radar coverage to spot your raids: killing 4-5 radar towers with one 200-metal rocket is the best trade in the game.
How to play against one:
- Spread sensor buildings out; never chain all your radar in one cluster where a single pulse cascades.
- Keep a constructor on standby to rebuild radar right after the denial ring fades (30 seconds).
- Remember the Juno stockpiles slowly (~75s per rocket at 12,000 energy each). If you spot one charging, that's your window to push before the next shot.
- The Juno itself is a 2,350-2,500 HP building with no direct damage — kill it with any attack group.
The Juno never shoots at units, which is why new players build it and forget it. Queue a strike the way you'd queue artillery: pick the enemy radar cluster, fire, and time your push with the 30-second blind window.
Beyond All Reason Sumo Guide — Cortex's Heavy Assault Bot
The Sumo is Cortex's Tier 2 armored assault bot — a slow walking fortress built to anchor a front line and never give it back. For 560 metal it gives you 6,500 HP and a Beam Laser (~344 DPS at 275 range) that melts anything that gets close.
| Stat | Value |
|---|---|
| Faction / Tier | Cortex, Tech 2 |
| Role | Armored Assault Bot (frontline brawler) |
| HP | 6,500 |
| Weapon | Beam Laser — ~344 DPS, 275 range |
| Cost | 560 metal / ~9,300 energy |
| Speed | Slow (38) — cannot chase or retreat effectively |
How to use the Sumo:
- Anchor your push, don't lead it. Move Sumos in first as a damage sponge, then stack ranged units (rockets, artillery) behind them. The Sumo holds enemy fire while your back line does the killing.
- Defend chokepoints. A Sumo parked in a narrow gap forces attackers through its beam. Pair it with a constructor repairing from behind and it holds far longer than its cost suggests.
- Cover the weakness. Its short range and slow speed make it prey for kiting units and bombers. Keep mobile AA nearby and never send Sumos out without support.
Armada's counterpart is the Welder — a similar brawling role with a different stat profile. If you're playing Armada and keep losing Sumo-style standup fights, that's the unit to look at.
How to Download Beyond All Reason — Where to Play & Is It Free?
Is Beyond All Reason free? Completely. BAR is free and open source — no purchase, no subscription, no pay-to-win mechanics, and no ads. Development is funded entirely by donations, and the full game client downloads without any price attached. "Free" here means free to play and free as in open source: the game's entire codebase is public on GitHub.
Where can you play it? BAR runs on Windows (10/11, 64-bit) and Linux via its own launcher. Download it at beyondallreason.info/download:
- Pick the Windows installer or the Linux AppImage/PPA package
- Run the launcher and create a free account (email + password, no payment details)
- The launcher downloads the engine and assets (6-10 GB) on first start
- Click Play — you land in the multiplayer lobby, the single-player skirmish menu, or the PvE modes
There is no native macOS build, and BAR is not on Steam, Epic, or in browsers — the official launcher is the only way to play today (a Steam release is planned for the future). See the System Requirements section below for hardware specs and installation troubleshooting.
Who Makes Beyond All Reason?
BAR is developed by Beyond All Reason team — an open-source community project, not a traditional studio. The engine itself is the Recoil Engine (the SpringRTS 105 fork), maintained by the same community, and the whole stack — engine code, game logic, and balance patches — lives in public GitHub repositories where anyone can contribute. That structure is why balance updates and new units ship regularly without a publisher: the developers are the player base.
Where to Find More Info (Wiki, Guides, Community)
- Official site — beyondallreason.info for news, download links, and the unit database
- BAR Wiki — beyondallreason.info/wiki for detailed unit stats and mechanics
- BAR Discord — discord.gg/beyondallreason for live help, replays, and finding games
- r/beyondallreason — guides, patch discussion, tournament news
- In-game replays — every match auto-saves a replay; filter the lobby's replay tab by map or player to study top openings
This guide covers everything a new player needs; the wiki is the reference when you want exact numbers for a specific unit.
Beyond All Reason System Requirements & Installation
The full Beyond All Reason install takes about 6–10 GB of storage. Before diving in, make sure your system can handle BAR's large-scale battles — the game simulates every projectile and explosion in real time, so system requirements vary significantly with battle size. An 8v8 match demands considerably more CPU and RAM than a 1v1.
Minimum Specs
These minimum requirements will get you playable framerates on smaller maps with low unit counts. If your PC is close to these specs, drop resolution and shadows before assuming the game won't run:
| Component | Requirement |
|---|---|
| OS | Windows 10 (64-bit) / Linux (Ubuntu 22.04+, Fedora 38+) |
| CPU | Intel Core i5-4570 / AMD Ryzen 3 1200 (4 cores) |
| RAM | 8 GB (16 GB recommended for 4v4+) |
| GPU | NVIDIA GTX 960 2 GB / AMD Radeon RX 470 4 GB |
| Storage | 4 GB (base game) + 2-4 GB for maps and mods |
| Internet | Broadband connection (required for multiplayer) |
Recommended Requirements
For smooth 60+ FPS in 8v8 games with maximum unit counts:
| Component | Requirement |
|---|---|
| OS | Windows 11 / Linux (Ubuntu 24.04+, Fedora 40+) |
| CPU | Intel Core i7-8700K / AMD Ryzen 5 3600 (6+ cores) |
| RAM | 16 GB |
| GPU | NVIDIA RTX 2060 / AMD RX 5600 XT (6+ GB VRAM) |
| Storage | SSD (NVMe preferred) — 10 GB free |
| Internet | 50 Mbps or faster (latency matters more than bandwidth) |
How BAR Scales With Your Hardware
| Battle Size | CPU Load | RAM Usage | VRAM Usage | Target FPS on Min Spec | Target FPS on Rec Spec |
|---|---|---|---|---|---|
| 1v1 (small map) | Low | 4-6 GB | 1-2 GB | 45-60 | 60+ |
| 4v4 | Medium | 8-12 GB | 2-3 GB | 30-45 | 60+ |
| 8v8 (large map) | Heavy | 12-16 GB | 3-6 GB | 20-30 | 45-60 |
| 16v16 (community events) | Very heavy | 16+ GB | 6+ GB | <20 | 30-45 |
Key insight: BAR is CPU-bound in large battles. The GPU matters less than a fast processor with good single-thread performance. If you're building or upgrading for BAR, prioritize CPU clock speed and cache over GPU tier.
Laptop & Integrated Graphics
- Dedicated GPU laptops (GTX 1650 or better): Run at medium settings on smaller maps. Reduce unit detail and particle effects in the settings menu.
- Integrated graphics (Intel UHD / AMD Vega): Not recommended. BAR may launch but will struggle below 20 FPS even on the smallest maps.
- Power settings: Make sure your laptop is plugged in and set to high-performance mode. BAR is heavy enough that battery-saving profiles will throttle performance noticeably.
Storage Breakdown
| Item | Size |
|---|---|
| Base game engine | ~1 GB |
| Core assets (textures, models, sounds) | ~3 GB |
| Maps (installed on first play) | 200 MB - 500 MB each |
| Mods & community content | Variable (1-5 GB typical) |
| Replay files (optional, auto-saved) | 10-50 MB per replay |
| Typical total install | 6-10 GB |
The launcher manages all downloads, so you don't need to manually track what's installed.
How to Check Your System Compatibility
Windows: Open Task Manager (Ctrl+Shift+Esc) → Performance tab to check CPU, RAM, and GPU. For detailed GPU info, run dxdiag from the Start menu.
Linux: Use these commands in the terminal:
# CPU info
lscpu | grep "Model name"

# RAM
free -h

# GPU
lspci | grep -E "VGA|3D"

# Disk space
df -h / | tail -1
If your system meets the minimum requirements listed above, you should be able to play. If it falls short, try reducing the resolution and disabling shadows in the settings menu before your first match.
How to Install
Windows: Download the installer from beyondallreason.info/download and run it. The launcher handles updates automatically.
Linux: Use the AppImage (universal) or your distribution's package:
# AppImage (works on any distro)
wget https://github.com/beyond-all-reason/Beyond-All-Reason/releases/latest/download/Beyond-All-Reason-x86_64.AppImage
chmod +x Beyond-All-Reason-x86_64.AppImage
./Beyond-All-Reason-x86_64.AppImage

# Ubuntu / Debian
sudo add-apt-repository ppa:beyond-all-reason/ppa
sudo apt update
sudo apt install beyond-all-reason
The launcher will download the game engine and assets on first launch. This takes about 10-15 minutes on a standard connection. Subsequent updates are incremental and much faster.
Installation Troubleshooting
| Issue | Likely Cause | Fix |
|---|---|---|
| Launcher fails to start | Missing Visual C++ Redistributables (Windows) | Install vcredist from Microsoft's website |
| AppImage won't run | FUSE not installed (Linux) | Run sudo apt install fuse or extract with --appimage-extract |
| "libX" errors on Linux | Missing 32-bit OpenGL libraries | sudo apt install libgl1-mesa-glx:i386 (Ubuntu) |
| Game launches but no maps | Incomplete asset download | Restart the launcher — it resumes where it left off |
Best Mods & Game Modes
BAR's open-source nature means a thriving modding scene. These mods are worth trying once you've mastered the basics:
Recommended Mods
| Mod | What It Does | Why Play |
|---|---|---|
| Bar Evolution | Expanded unit roster with 100+ new units | More strategic depth and variety |
| Red vs Blue | Simplified 1v1 mode with mirrored starts | Perfect for practicing build orders |
| Classic TA Units | Ports classic Total Annihilation units into BAR | Nostalgia trip for TA veterans |
| Naval Expansion | Extended navy units and water maps | Adds depth to naval gameplay |
Official PvE Modes (Built In, No Mod Needed)
Beyond the mods above, BAR ships with two official PvE game modes built into the client:
| Mode | What It Is | Why Play |
|---|---|---|
| Raptors | Survival waves of alien raptors (the chicken-defense-style mode descended from Spring's classic Chicken mod), with Queen bosses at six difficulty tiers | Learn economy under relentless pressure — waves scale from gentle to absurd |
| Scavengers | Fight a rogue AI faction with its own tech tree and boss fights | A full co-op-ready PvE campaign-style experience with a final boss battle |
Both modes are selectable from the single-player menu — no install step. Select Raptors or Scavengers as the game mode when setting up a battle, and the AI runs the invasion for you (solo or with teammates). About 23 official single-player scenarios are also included, each with par times and difficulty tiers.
Finding & Installing Mods
- Launch BAR and click Play → Missions & Mods in the main menu
- Browse the in-game mod repository
- Click Install on any mod — it downloads and activates automatically
- Filter by category: Game Mods, Maps, AI Skirmish, or Widgets
Mods are stored separately from the base game, so uninstalling one never breaks your installation.
Beyond All Reason Blueprints — Save & Place Building Layouts
Blueprints let you save a group of buildings (or units) as a single stamp and place the whole layout with one command. Instead of manually queuing the same metal extractor / wind turbine / solar collector opening every match, you save it once and stamp it at every new expansion.
Default blueprint hotkeys (Grid key profile):
| Action | Hotkey |
|---|---|
| Save selected units/buildings as a blueprint | Alt + T |
| Place a saved blueprint | Alt + B |
| Cycle to next blueprint | Alt + ] |
| Cycle to previous blueprint | Alt + [ |
| Delete a blueprint | Alt + Y |
All five hotkeys are rebindable in Settings → Hotkeys (search for "blueprint"). Keys differ on the Legacy profile (Alt + C saves, Alt + D deletes) — check yours before your first match.
Placement modes (hold these while placing with Alt + B):
| Mode | Keys | What It Does |
|---|---|---|
| Single | Alt + B, left-click | Place one copy of the blueprint |
| Line | Shift + drag | Stamp copies in a straight line |
| Snapline | Shift + Ctrl + drag | Line that snaps to terrain angles |
| Grid | Shift + Alt + drag | Fill a rectangular area in a grid |
| Box | Shift + Alt + Ctrl + drag | Fill the dragged rectangle |
| Around | Shift + Ctrl + click a unit | Wrap copies around an existing unit |
Extra controls while placing:
- Alt + mouse wheel cycles through your saved blueprints without touching the hotkeys above
- Mouse wheel while holding Shift (during placement) adjusts spacing between copies
- Blueprints snap to the building grid automatically, and units inside keep their selection order
Good first blueprints to save:
- Opening economy — 2 metal extractors + 3 wind turbines (or solar on no-wind maps). Stamp it at every expansion.
- Expansion extractor row — 4-6 metal extractors in a line for claiming a new metal cluster fast
- Forward base pack — 1 lab, 2 radar, a few LLT defenses, and energy for a forward push
Blueprints persist between matches. Delete old ones with Alt + Y to keep the Alt + ] / Alt + [ cycle fast.
Beyond All Reason Map Editor — Terraform Your Own Maps
BAR ships a built-in map editor (the "Terraformer") for creating and editing maps — heightmap sculpting, texture splatting, metal layout, feature placement, and more. Map projects save as a single git-friendly folder bundling the heightmap, textures, metal map, decals, lighting, and start positions.
How to Open the Map Editor
The Map Editor lives in the lobby client but is hidden by default — it's flagged as a developer tool. To unlock it:
- Find your BAR install directory (Launcher → Open install directory)
- Create an empty file named
devmode.txtin that directory:- Windows:
AppData/Local/Programs/Beyond-All-Reason/data/devmode.txt - Linux:
~/.local/state/Beyond All Reason/devmode.txt
- Windows:
- Restart the launcher
- Open Singleplayer → Map Editor (the tab appears once devmode is active)
The editor launches a special session with the combat UI stripped out, leaving only the terraform brushes and the top bar back to the lobby.
What the Editor Can Do
- Sculpt terrain — raise, lower, and smooth the heightmap with brush tools
- Paint textures — splat grass, rock, sand, and water onto the terrain
- Place metal spots — design your own metal distribution for balanced custom maps
- Set start positions — define spawn boxes for 1v1 through team games
- Save projects — one project = one folder you can version with git or share with friends
There is no official community map browser inside the editor yet — custom maps made this way are shared as project folders or published maps. For playing community maps (not making them), the in-game map download list under Multiplayer already covers you.
Beyond All Reason Widgets & Plugins — UI Customization
BAR's interface is built from ~300 Lua "widgets" (the game's term for UI plugins — mods that change how information is displayed, not how the game plays). Two tools manage them:
In the lobby — the Plugins tab (community widgets):
- Open the lobby and click the Plugins tab (right-side panel, next to Settings and Downloads)
- Browse the community widget repository — the list refreshes from the BAR community repo
- Click Install on any widget; it downloads into your Widgets folder automatically
- Use Widgets Folder (in the same tab) to open the local install directory in your file explorer
In-game — the Widget Selector (built-in widgets):
- During a match, press F11 to open the Widget Selector
- Toggle any widget on/off, change its layer order, or clear its saved settings
- Settings persist per profile — what you disable stays disabled next match
Widgets worth knowing about: the ones enabled by default (Always Show Prices, Idle Builders, Factory Dock from the settings table above) are all widgets themselves. Turning off a core widget can break others that depend on it — the Widget Selector warns you before it lets you.
Community widgets from the Plugins tab range from minor UI tweaks to full custom overlays. The disclaimer in the tab says it straight: community widgets are not officially maintained, so if one misbehaves after an update, disable it with F11 before reporting a bug.
Multiplayer Tips & Community
BAR's multiplayer is where the game truly shines. Here's how to get started without getting crushed.
Finding Games
The in-game lobby shows active matches with player counts and map names. Look for:
- "Noob friendly" or "New players welcome" in the game title
- 1v1 or 2v2 (easier to learn than 8v8 chaos)
- Moat or Red vs Red maps (simple, symmetrical layouts)
Beginner-Friendly Multiplayer Tips
- Watch the first 3 minutes of replays from top players on your map. Copy their opening build exactly — it's the fastest way to learn.
- Communicate. BAR has built-in team chat. Call out enemy scout positions and your planned expansion.
- Focus on economy first, army second. A new player's #1 mistake is building army before the economy can support it.
- Don't quit early. Even if you lose your Commander, teammates can rebuild you. Stick around.
Where to Find Help
| Resource | Link | Best For |
|---|---|---|
| BAR Discord | discord.gg/beyondallreason | Live Q&A, find teammates, replays |
| BAR Subreddit | r/beyondallreason | Guides, discussion, tournament news |
| BAR Wiki | beyondallreason.info/wiki | Detailed mechanics, unit stats, modding |
| YouTube Tutorials | WinterGaming, BAR Community channel | Visual guides at every skill level |
The BAR community is one of the most welcoming in competitive RTS. Ask questions freely — experienced players are surprisingly happy to help new blood.
Beyond All Reason Single Player — AI Skirmish & Solo Guide
BAR isn't just a multiplayer game. The built-in skirmish mode against AI bots is a full-featured single-player experience — and for many players, it's where they spend most of their time.
Is there a campaign? Not yet. BAR has no story campaign — one is planned for its future Steam release, and the game is still in active alpha development. Today, single-player means skirmish against AI, the built-in Raptors and Scavengers PvE modes, and about 23 official single-player scenarios. For players used to campaign-driven RTS games, skirmish plus PvE waves covers most of the same "play alone and improve" ground.
Starting a Skirmish Match
- From the main menu, click Play → Skirmish
- Pick a map. Start with Moat (simple, mirrored layout) or Red vs Red (symmetrical, predictable)
- Click Add AI to add bot opponents. You can set different difficulty levels per bot
- Choose your faction and spawn position
- Click Start
AI Difficulty Levels
| Difficulty | What the AI Does |
|---|---|
| Easy | Builds slowly, expands to one or two metal spots, sends predictable attack waves. Good for learning the UI and build order timing. |
| Medium | Actively expands, builds mixed unit compositions, raids your economy. Expect your metal extractors to get harassed. |
| Hard | Aggressive expansion, combined arms pushes, uses radar and jammers. The AI will punish economic greed — if you overexpand without defense, you'll lose bases. |
| Brutal | Relentless pressure from minute 5 onward. Multi-pronged attacks, counters your unit composition, builds nukes and superweapons. Needs a polished build order to beat. |
Progression tip: Don't jump from Easy to Brutal. Beat Medium consistently before touching Hard. The difficulty gap between Hard and Brutal is wide — Brutal cheats with extra resources, so beating it requires tight execution, not just a good plan.
Best Maps for Solo Practice
| Map | Why It's Good |
|---|---|
| Moat | Flat terrain, clear metal clusters, no water. Perfect for build order repetition. |
| Red vs Red | Symmetrical start, standard resource layout. Compare your timing against pro replays. |
| Tezier5 | Large map with water — practice navy and amphibious play solo. |
| DeltaSiege Dry | Popular competitive map without water. Good for mid-game expansion practice. |
| Titan Duel | 1v1 focused. Small and fast. Best map for grinding 1v1 build orders against AI. |
What to Practice in Skirmish Mode
- Build orders. Set the AI to Easy and just run your opening 20 times. Track your timing — how fast can you get your first Bot Lab up?
- Economy scaling. Crank the AI to Hard and focus purely on expanding to every metal spot while defending. Can you hold 3 bases without stalling energy?
- Air openers. Try a full air build against Medium AI. Fail fast, learn the energy requirements, then try again.
- Navy play. Water maps demand a completely different economy rhythm. Practice on Tezier5 with a Medium bot to learn the naval tech tree.
- Late-game transitions. Set up a 1v1 on Titan Duel, tech to T2, and practice juggling multiple production lines.
Community AI Mods
The base game AI is solid, but community mods crank it up:
| Mod | What It Does |
|---|---|
| BARbarian AI | Smarter expansion, better unit micro, actually dodges artillery. The go-to for serious practice. |
| Raptor AI | Aggressive early game, punishes greedy build orders brutally. |
Install these from Play → Missions & Mods in the main menu. They appear as selectable AI opponents in the Skirmish lobby after installation. For wave-survival PvE, you don't need a mod at all — the official Raptors and Scavengers game modes are built in (see the PvE section above).
Skirmish vs Multiplayer: When to Switch
You're ready for multiplayer when:
- Your build order lands a Bot Lab before the 3-minute mark (Easy AI)
- You can beat Medium AI without losing a single metal extractor to raids
- Your energy bar never hits zero for more than 5 seconds in the first 10 minutes
- You've watched at least two replays of your map from top players and copied their opening
Start with 1v1 lobbies labeled "noob friendly" before joining team games. The jump from AI to human opponents is bigger than any difficulty setting — humans will feint, fake, and exploit gaps the AI never finds.
FAQ
Is Beyond All Reason really free?
Yes. BAR is free and open source, with downloads available from the official website for Windows and Linux.
How big is the Beyond All Reason download?
The total install is about 6–10 GB: roughly 1 GB for the game engine, 3 GB for core assets (textures, models, sounds), and the rest for maps and community mods. The launcher downloads incrementally — the base game is ready to play after the first 4 GB.
Which faction is best for a beginner?
Armada is the easiest starting point because its mobile units and straightforward roles make early mistakes more forgiving.
Is there a single-player mode?
Yes. BAR includes a full-featured AI skirmish mode with four difficulty levels (Easy through Brutal), a map picker, and community-made AI mods. There is no story campaign yet — one is planned for the future Steam release — but the built-in Raptors and Scavengers PvE modes and ~23 official scenarios round out solo play. See the Single Player — AI Skirmish & Solo Guide section above for a complete walkthrough.
Does Beyond All Reason have PvE?
Yes — two official PvE game modes ship with the client: Raptors (survive waves of alien raptors with Queen bosses) and Scavengers (fight a rogue AI faction with its own tech tree and boss battles). Select either as the game mode when setting up a battle, solo or with teammates. See the PvE section above for details.
Does Beyond All Reason have different races or factions?
Yes — BAR has three playable factions, though they aren't called "races" in the classic RTS sense:
- Armada — fast, mobile, stealth-oriented. The recommended starting faction.
- Cortex — heavy armor and raw firepower. Slower but brutally durable.
- Legion — an experimental faction with multi-functional units. Added later than the other two, so older guides and articles often mention only Armada and Cortex.
All three share the same tech tree structure (metal extractors, energy production, labs), so skills transfer between them — only unit rosters and playstyles differ.
Are there cheats or hacks in Beyond All Reason?
There is no cheat-console system like classic RTS games, and using third-party hacks or modified clients in multiplayer will get your account banned — don't look for them.
What BAR does have is an official Cheats section in custom battle options. When you set up a custom or skirmish match, the battle settings include a "Cheats" area (used responsibly by content creators and for practice):
- Overall Resource Income multiplier (0.1×–10×), plus separate multipliers for metal extraction, energy production, and energy conversion
- Starting Metal / Starting Energy (0–10,000 each)
- Weapon Damage and Weapon Range multipliers (0.1×–10×)
- AI Income Multiplier and a "Dynamic Cheats" toggle that auto-adjusts AI resources so struggling opponents stay competitive — and can be scoped to AI only
These options only apply to battles you set up yourself. Public multiplayer lobbies run with default settings.
Where can I play Beyond All Reason?
Download the free launcher from beyondallreason.info/download for Windows (10/11, 64-bit) or Linux (AppImage, Ubuntu PPA, or Fedora package). There is no native macOS build, and the game is not on Steam, Epic, or browser platforms — the official launcher is the only official way to play. Install it, create a free account, and you're in the lobby; a Steam release is planned for the future.
Can you play Beyond All Reason offline?
Not really. The launcher requires an internet connection to log in, download the game assets on first run, and connect to the multiplayer lobby server. Once installed, a skirmish match against AI still needs you to be logged in to the lobby client.
If you want to practice without other players, the closest to offline play is Skirmish mode against AI bots — you're on your own local battlefield, no human opponents involved, but the client itself must be online. There is no single-player story campaign to play offline (see the single-player section above).
Should I build bots or vehicles first?
Bots are a strong beginner choice. Their smaller, clearer roster makes it easier to learn economy, scouting, and unit control before adding more specialized vehicle play.
Does Beyond All Reason have blueprints?
Yes — press Alt + T to save selected buildings/units as a blueprint and Alt + B to place it. Alt + [ and Alt + ] cycle through saved blueprints, Alt + Y deletes one. Hold Shift (plus Alt/Ctrl combos) while placing to stamp lines, grids, or boxes. See the blueprints section above for all placement modes.
Is there a map editor in Beyond All Reason?
Yes. BAR includes a built-in terrain editor (the Terraformer), but it's hidden
as a developer tool: create an empty devmode.txt file in your BAR install
directory (e.g. AppData/Local/Programs/Beyond-All-Reason/data/ on Windows) and
restart the launcher. A Map Editor tab then appears under Singleplayer.
Can I customize the UI with widgets or plugins?
Yes. The lobby's Plugins tab installs community widgets, and pressing F11 in-game opens the Widget Selector for toggling built-in widgets on and off. Most of the recommended settings above (Always Show Prices, Idle Builders, Factory Dock) are widgets themselves.
Why does my base suddenly build so slowly?
The most common cause is an energy stall. Check whether your energy spending is higher than your income, pause nonessential construction, and add wind or solar generation immediately.