Daily Pick
One deeply researched guide worth reading today.
A practical route through the systems that matter most, written to help new players make confident decisions quickly.
Overview
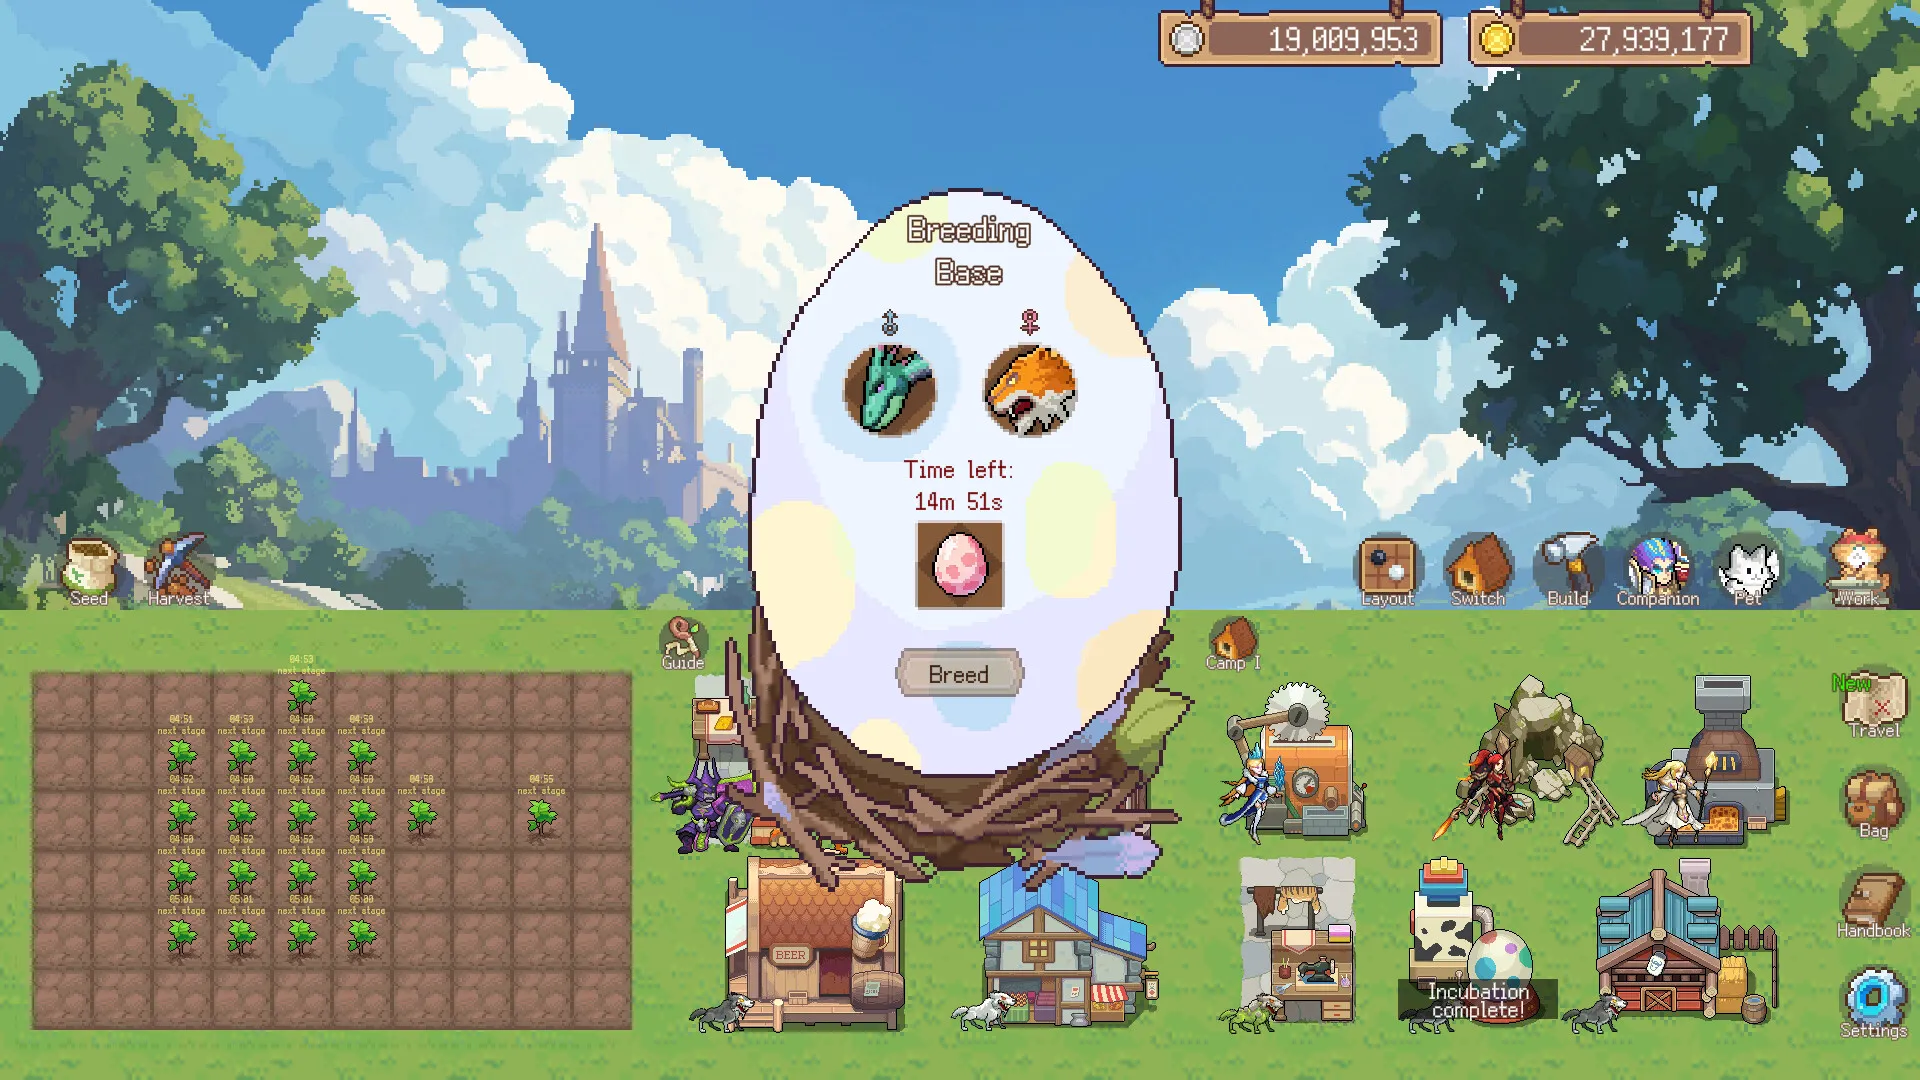
SlackOffDiary (also called SlackOff Diary, or 异世界旅行日记 in Chinese) is an idle management RPG from solo developer ThreeMountains, released June 20, 2026 on Steam for S$1.25 (about US$0.95). The pitch is simple: build a home in another world, recruit companions, breed pets, send them on adventures, process loot, forge gear, and do it all without interrupting your work day. The wallpaper mode is the headline feature — the game pins itself to your desktop so you see your companions trekking across your spreadsheets.
This is not a game that demands your attention. It rewards the kind of player who likes watching numbers go up, systems click into place, and efficiency improve over days and weeks. Think of it as a cozy factory manager with JRPG-adjacent party building, minus the stress of real-time combat. The game has no microtransactions, no energy timers you need to pay to skip, and no FOMO mechanics. Every upgrade, every stone, every pet — all earned in-game. The pace is designed around days, not dollars.
Target audience: people who work from home, students who want something running alongside study sessions, and idle game veterans looking for a loop that respects your time.
| Detail | Value |
|---|---|
| Developer | ThreeMountains |
| Price | S$1.25 (~US$0.95), no microtransactions |
| Platform | Windows (Steam) |
| Genre | Idle management / RPG-lite |
| Players | Single-player |
| Steam Achievements | 5 |
| Languages | English, Simplified Chinese |
| Release | June 20, 2026 |
| Tags | Casual, Farming Sim, Idler, Pixel Graphics, Relaxing |
| Min specs | Windows 10 64-bit, Dual Core 2.0 GHz, 2 GB RAM, DX11, 800 MB storage |
Getting Started
The first 30 minutes set the tone. You start in an empty base with a single companion and the most basic buildings. The game hands you a short tutorial and a built-in Adventure Guide — follow both. Your immediate goals are:
- Recruit your second companion at the Tavern. Gold is tight early, so pick anyone. Don't wait for a specific class.
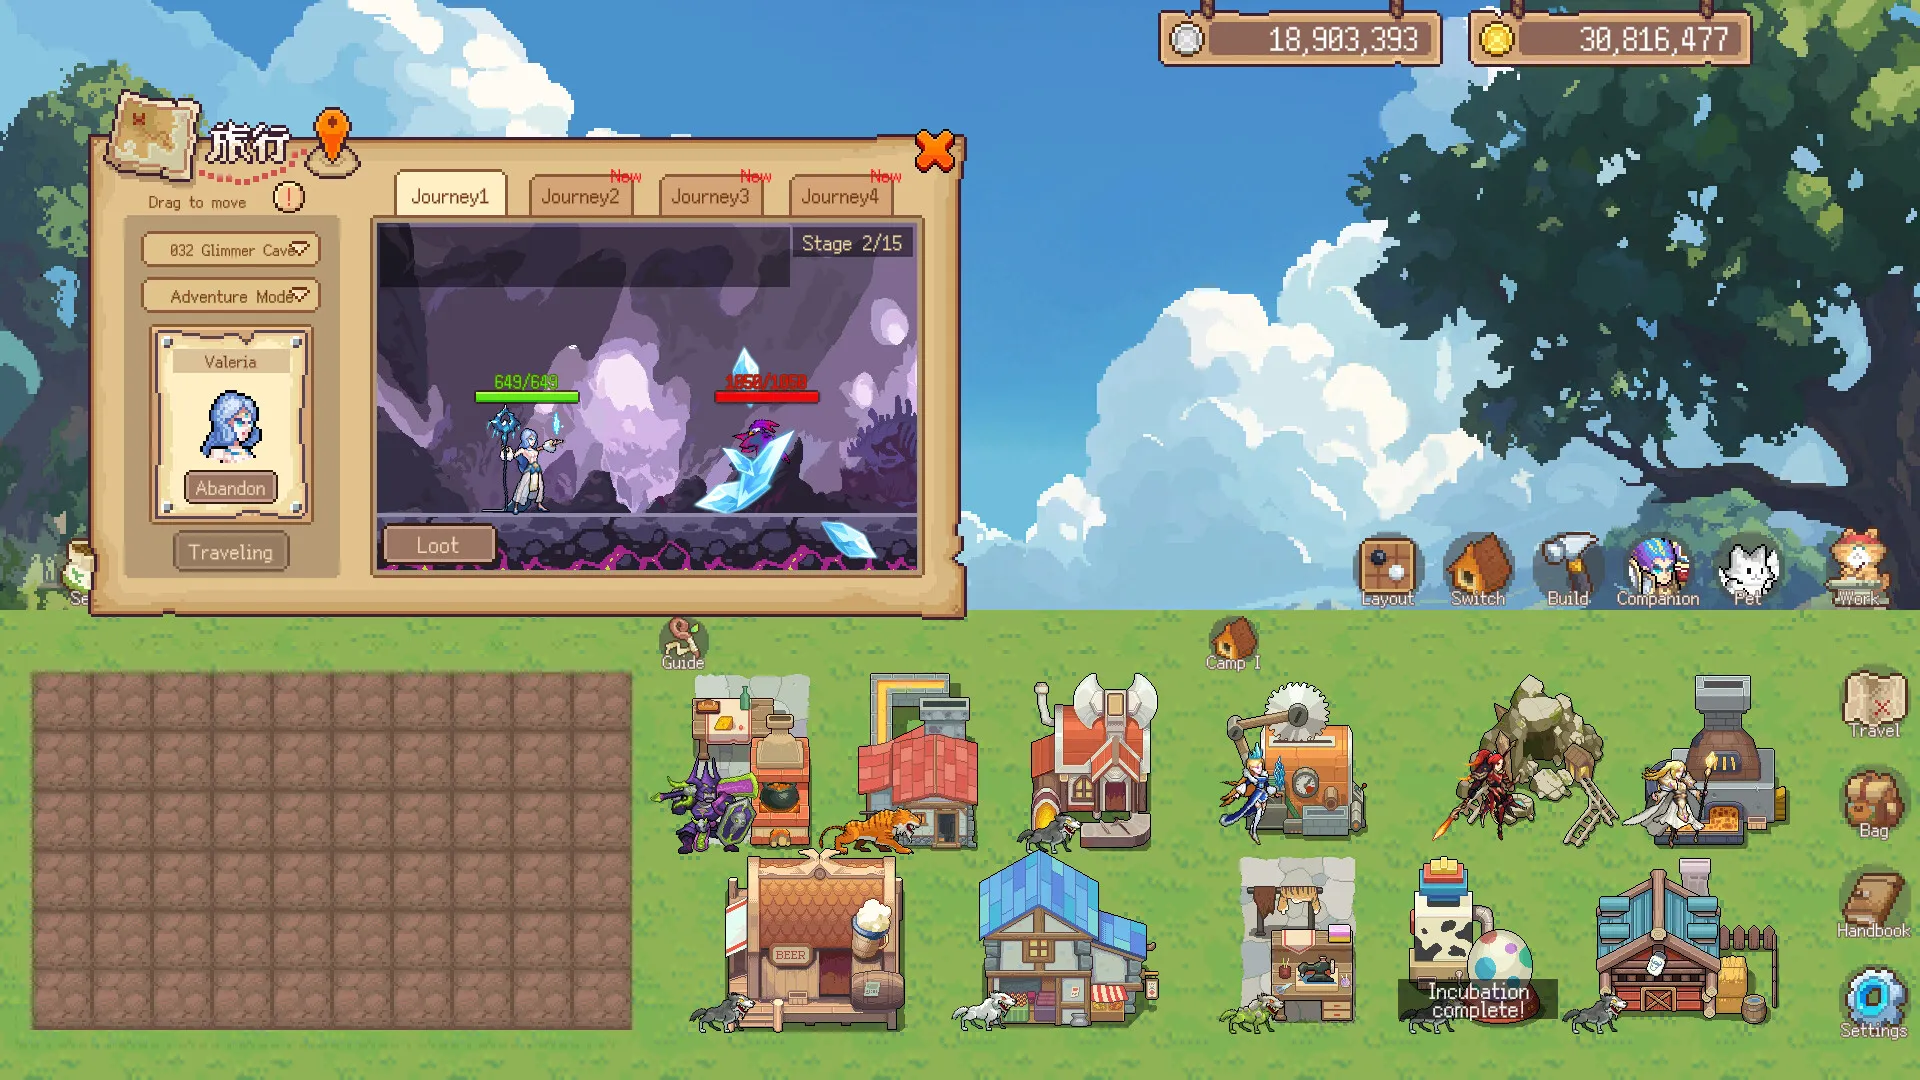
- Send both companions on Travel runs (the right-side tab). Travel takes exactly 15 minutes and requires no input. This is your first income stream.
- While they travel, build the Crusher and Mine. These are your core material generators. Place them adjacent to your base to keep things tidy — layout matters more later.
- When Travel returns, send the loot through your production buildings.
- Forge your first piece of gear at the Forge Workshop. Equip it. Repeat.
- Sell excess gear at the Shop for gold. Reinvest in buildings.
Beginner mistakes:
- Treating Travel like Adventure. Travel is safe, fixed-duration, and steady. Adventure mode has combat and risks injury. In the first hour, stick to Travel until you have gear on everyone.
- Ignoring building upgrades. A level 1 Furnace processes one ore at a time. Upgrade it as soon as you have the gold. The bottleneck in this game is never materials — it's processing speed.
- Hoarding gold. Gold sitting in your wallet does nothing. Spend it on buildings, upgrades, and seeds. The only thing you save for is the next building tier.
- Forgetting to equip gear. The Forge spits out items, but they sit in your inventory until you manually equip them. Check every companion after each forging session.
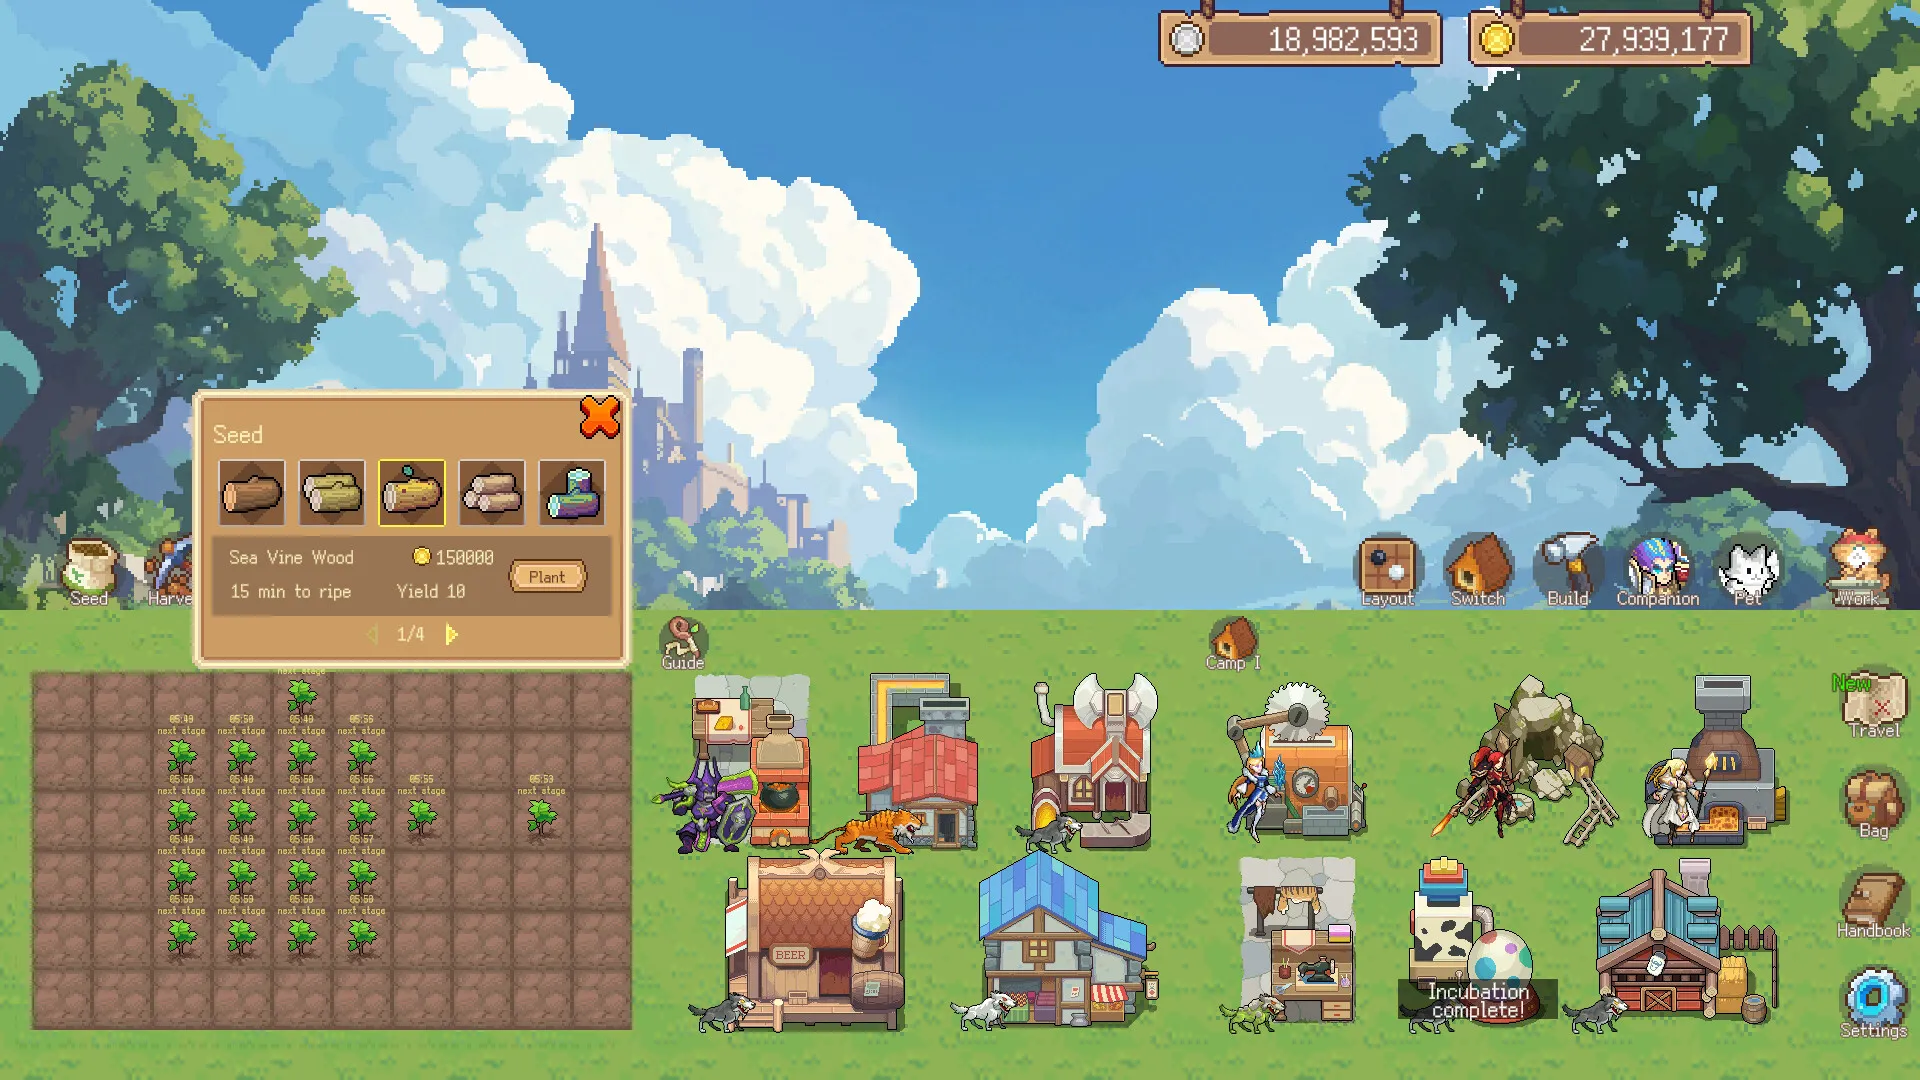
- Seeds are a trap early on. Wood and food seeds seem useful, but they compete for building slots and gold. Skip them until you have at least 3 production buildings running smoothly.
Core Mechanics
The Loop
Everything in SlackOffDiary feeds into a five-step cycle:
Recruit → Send on Travel/Adventure → Process Loot → Forge Gear → Sell/Equip → Reinvest
Each step feeds the next. Better gear lets you tackle harder content. Harder content drops better materials. Better materials make better gear. The game is a spiral of incremental upgrades.
Travel Modes
There are three ways to send companions out:
| Mode | Duration | Combat? | Risk | Best For |
|---|---|---|---|---|
| Travel | 15 min fixed | No | None | Steady material income, early game |
| Adventure | Variable | Yes | Companion injury | Pet eggs, rare drops, mid/late game |
| Abyss | Variable | Yes (scaling difficulty) | High | Endgame gear materials, high risk/reward |
Travel is your bread and butter. Queue it up, forget about it, collect 15 minutes later. The 15-minute cycle aligns naturally with break patterns — coffee, bathroom, checking messages. Adventure mode costs more stamina but can drop pet eggs and rare schematics. Abyss mode is where you push your best gear; failure means your companions return injured and must rest before their next expedition.
Buildings
Your base is a grid where you place and upgrade buildings. Each serves a specific purpose:
| Building | Input | Output | Notes |
|---|---|---|---|
| Crusher | Raw stone | Crushed stone | Baseline material processing |
| Mine | Nothing | Ore (passive) | Generates over time |
| Furnace | Ore | Ingots | Core metal processing |
| Advanced Furnace | Refined ore | Alloys | Unlocked mid-game (Furnace level 3) |
| Sewing Machine | Fibers | Cloth | For armor crafting |
| Gem Mine | Nothing | Raw gems (passive) | Late-game material |
| Alchemy Table | Herbs | Potions/Essences | Buffs and enhancement aids |
| Workshop | Various | Advanced components | High-tier crafting |
| Cooker | 4 ingredient types | Dishes | Temporary buffs |
| Incubator | Pet eggs | Hatched pets | Quality depends on growth stat |
| Breeding Base | 2 parent pets | Offspring | Trait inheritance |
| Pet Care Hospital | Pet | Final drops | Consumes pet for unique items |
Building upgrade priority: Furnace > Crusher > Workshop > Sewing Machine > Alchemy Table > Mine
Upgrade Furnace to level 5 first — it doubles your processing speed and unlocks the Advanced Furnace. After that, push Crusher to level 4, then Workshop to level 3.
Forging and Enhancement
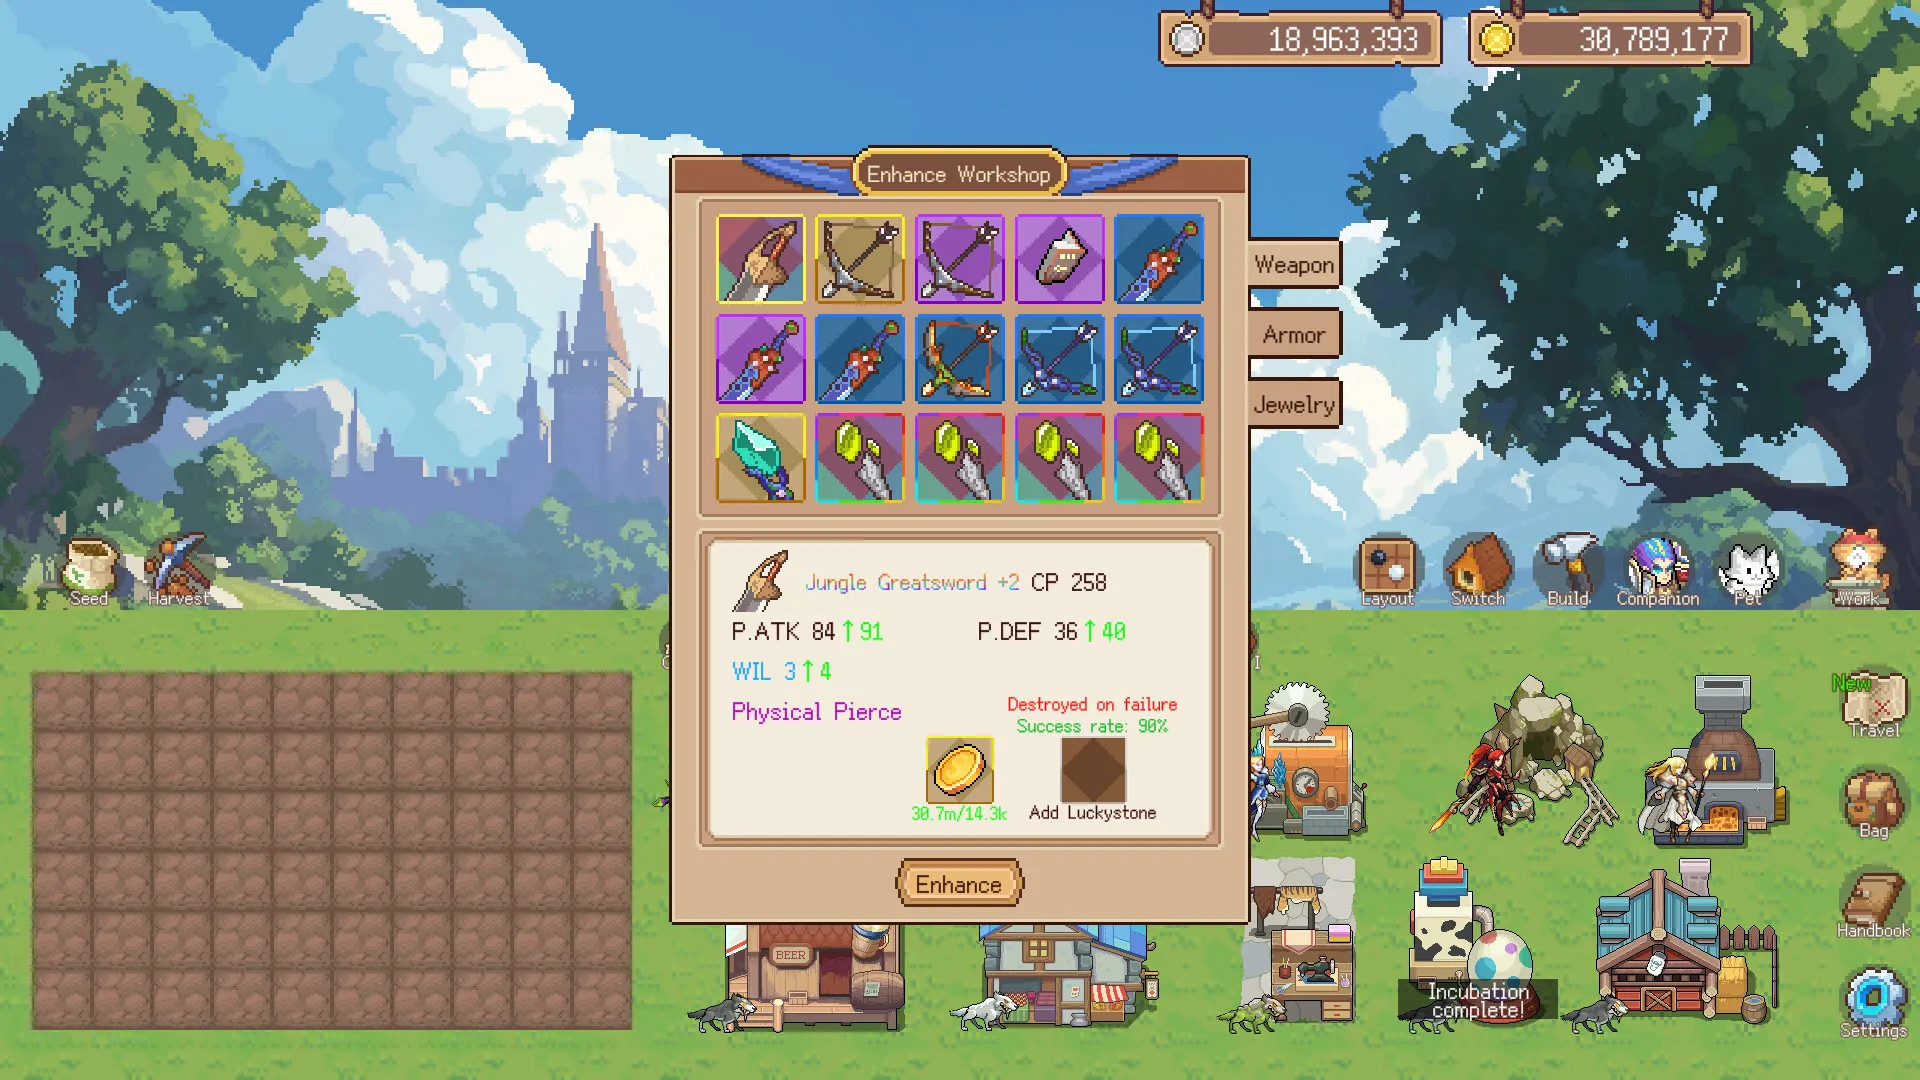
The Forge Workshop is where you turn processed materials into equipment. Three slots: weapon, armor, accessory. Each piece rolls with:
- Base stats determined by material tier (Iron → Steel → Mythril → Adamantite)
- Random bonus stats — flat attack, % crit, health, defense, etc.
- Special effects — rare chance for unique procs (life steal, poison, chain lightning)
Enhancement pushes gear from +0 to +25. Each level costs gold and enhancement stones. Success rate drops sharply after +10. At +15 and above, failure can destroy the item. Enhancement stones (from Alchemy Table and Abyss mode) increase success chance or protect against destruction.
Enhancement strategy:
- +0 to +5: no risk, use basic stones, upgrade everything
- +5 to +10: success rate is good but not guaranteed. Use regular stones.
- +10 to +12: start using protection stones. Items can break here.
- +12 to +15: always use protection stones. Failure destroys the item.
- +15 to +25: this is deep endgame territory. Stockpile stones for weeks.
Never buy enhancement stones with gold — the exchange rate is terrible. Farm them from Abyss mode and the Alchemy Table.
Pets and Companions
Companions are your workers. You recruit them at the Tavern using gold. Each has:
- A class (Warrior, Mage, Rogue, Healer — affects stat growth)
- A level (increases through expeditions)
- Gear slots (weapon, armor, accessory)
- Work talents (boost production when stationed in specific buildings)
- Traits (passive bonuses like Lucky, Sturdy, Efficient)
Companion work talents stack. If you station two companions with "Furnace Efficiency" in the Furnace, the bonus compounds. Check your companion traits and group them by building for maximum efficiency.
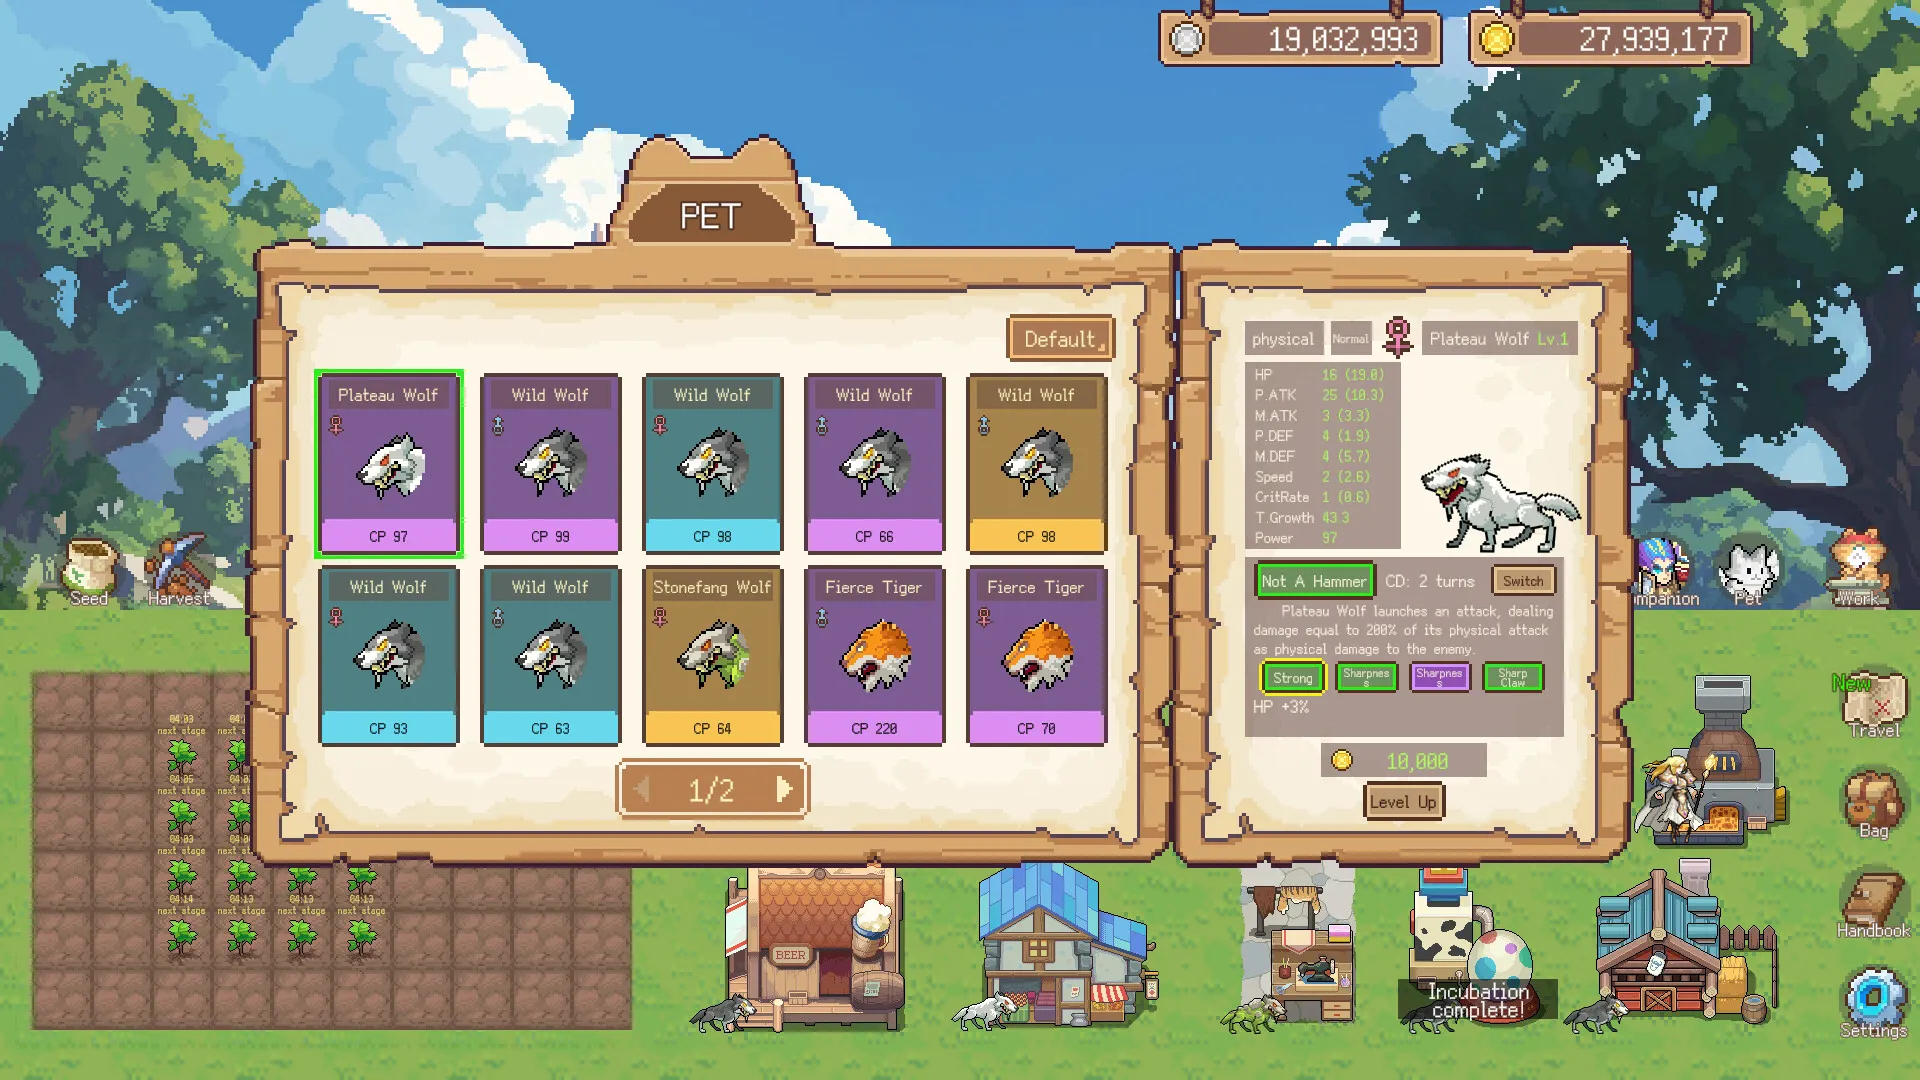
Pets come from eggs (Adventure mode drops). Hatch them in the Incubator. The growth stat during incubation determines their quality tier. Pets can then be bred at the Breeding Base — offspring inherit traits from both parents, sometimes randomly mutating into something new. Pets provide global bonuses (gold gain, crafting speed) and can be stationed in buildings for additional effects.
The Pet Care Hospital is strictly endgame. It consumes a pet permanently for a unique drop tied to that pet's species and quality. Never use it on your only S-tier pet — only on duplicates you've bred as spares.
The Cooker System
The Cooker unlocks after Workshop reaches level 2. It uses four ingredient slots: one protein, one vegetable, one spice, one liquid. Recipes must be discovered through experimentation, but here are known working combinations:
| Ingredient 1 | Ingredient 2 | Ingredient 3 | Ingredient 4 | Result |
|---|---|---|---|---|
| Meat | Cabbage | Pepper | Water | HP Recovery Stew |
| Fish | Seaweed | Ginger | Soy Sauce | Stamina Dish |
| Mushroom | Potato | Herb | Milk | Defense Up Meal |
| Egg | Tomato | Salt | Oil | Attack Up Omelette |
| Fruit | Honey | Cinnamon | Water | Speed Boost Dessert |
Dish effects last for one expedition. Use them before Abyss runs or tough Adventure stages.
Progression Strategy
Early Game (Hours 1-5)
Goal: establish a stable material loop.
- Build Crusher and Mine immediately.
- Recruit 3-4 companions. Send all on Travel continuously.
- Upgrade Furnace to level 3. Material processing speed is everything.
- Forge basic Iron gear for everyone. Iron is cheap and the stat jump over nothing is huge.
- Unlock the Sewing Machine for cloth armor.
- Use the Shop to sell low-tier gear you don't need. Every piece of gold counts.
Do not touch Adventure mode yet. You do not have the gear to survive it, and injured companions slow your material income.
Mid Game (Hours 5-20)
Goal: push into Adventure mode, unlock Advanced Furnace and Alchemy Table.
- Replace all Iron gear with Steel. Steel requires Coal + Iron in the Advanced Furnace.
- Send your best-geared party on Adventure runs. Farm pet eggs.
- Hatch pets. Even Common pets provide useful global bonuses.
- Start cooking. Dishes from the Cooker give temporary buffs that help in Adventure and Abyss.
- Upgrade your key buildings to level 5-7. Prioritize Furnace and Workshop.
- Start paying attention to companion work talents. Move companions to buildings where their talents apply.
- Use the Layout tool to reorganize your base. Removing a building does not reset its level.
Late Game (Hours 20+)
Goal: Mythril/Adamantite gear, +15 enhancement, Abyss farming.
- Mythril requires rare drops from Abyss mode. Start with difficulty 1 and work up.
- Focus enhancement on one weapon at a time. A +15 weapon is better than five +5 weapons.
- Breed pets for specific traits. Lucky (better loot) and Efficient (faster crafting) are top tier.
- Complete the 5 achievements. All five are handbook completions: Companion, Cooking, Equipment, Pet, and CollectionRoom. "The Impossible Achievement" lives up to its name only because the CollectionRoom Handbook demands the rarest drops in the game. See the achievement section for the full strategy.
- Build the Gem Mine for late-game material income. Raw gems are used in the best jewelry.
- Master the Abyss daily reset. Even if you can only clear difficulty 1, do it every day for the first-clear bonus rewards.
Step-by-Step Strategy
1. The Perfect First Hour
- Complete the tutorial (5 min).
- Spend starting gold on a Crusher and Mine. Place them adjacent to your base.
- Recruit the first companion available at Tavern. Do not wait for a specific class.
- Send both starting companions on Travel (right tab, 15 min).
- While waiting, read the built-in Adventure Guide and click through the UI tooltips. There is no time pressure.
- Collect Travel rewards. Send to processing buildings.
- Forge 2 basic weapons. Equip on both companions.
- Send them on another Travel run.
- Upgrade Furnace to level 2.
- End of hour check: both companions should have full Iron gear, Furnace level 2-3.
2. Breaking into Adventure Mode
- Equip full Steel gear on your three best companions.
- Queue the shortest Adventure available. Watch the first fight — it is automated but you can see their damage output.
- If they clear it without injury, move to the next Adventure.
- If they get injured, pull back to Travel and forge better gear.
- First pet egg usually drops from Adventure 3-5. Hatch it immediately in the Incubator.
- The pet's quality is set at incubation start. If you want better quality, save your eggs for when you can afford growth-boosting potions from the Alchemy Table.
3. Building Upgrade Schedule
Upgrade buildings in this order. Only move to the next when the current one hits the target level:
- Furnace → level 5 (doubles processing speed, unlocks Advanced Furnace)
- Crusher → level 4
- Workshop → level 3
- Sewing Machine → level 3
- Alchemy Table → level 2
- Mine → level 3
After this baseline, push Furnace to 7, then Workshop to 5.
4. Enhancement Path to +15
- Only enhance weapons first. Armor second. Accessories last.
- Below +5: no risk. Go for it with basic stones.
- +5 to +10: use regular enhancement stones. Success rate is still good.
- +10 to +12: start using protection stones. The item can break here.
- +12 to +15: always use protection stones. Failure destroys the item. This is where "The Impossible Achievement" speculation lives.
- Stockpile stones from Alchemy Table and Abyss mode. Never buy them with gold — the exchange rate is terrible.
5. Pet Breeding for Max Value
- Hatch every egg you find. Even bad pets can be used as breeding stock.
- For your first breeding pair, pick one parent with Lucky and one with Efficient.
- Offspring can inherit both traits. If you get Lucky+Efficient, that is your S-tier pet.
- Level the pet by keeping it active in buildings. Higher-level pets pass better traits.
- When you have two S-tier pets, breed them together for a chance at mutated traits.
- Pet Care Hospital is endgame — it consumes the pet permanently for a unique drop. Only use it on duplicates.
6. Mastering Slack Off Mode
- Tap Work Mode to enter wallpaper mode. The game sits on your desktop layer.
- In wallpaper mode, companions continue Travel runs and processing continues.
- Set up desktop file shortcuts in Slack Off mode to open documents or tools while your session keeps running.
- Use system tray shortcuts on Windows to return to normal play instantly.
- This mode is not cosmetic — it is the intended way to play for long sessions. Design your play around it.
Builds / Tier Lists
Companion Tier List
| Tier | Classes | Why |
|---|---|---|
| S | Rogue | Fastest travel times, bonus crit on gear crafts |
| A | Mage | AoE in adventure mode, boosts Alchemy Table output |
| B | Warrior | Solid in combat, good for Abyss tanking |
| C | Healer | Useful for long Abyss runs but slow for Travel |
Pet Trait Tier List
| Trait | Effect | Tier |
|---|---|---|
| Lucky | Increased rare drop chance | S |
| Efficient | Reduced processing time | S |
| Sturdy | Reduced companion injury chance | A |
| Nurturing | Better pet breeding outcomes | A |
| Wealthy | Bonus gold from sales | B |
| Swift | Faster travel times | B |
Gear Stat Priority
Weapon: % Attack > Flat Attack > Crit Rate > Crit Damage Armor: % Defense > Flat Defense > Max HP > HP Regen Accessory: Gold Find > Craft Speed > Move Speed > All Stats
Achievement Hunting
There are 5 Steam achievements, and every single one is a handbook completion. The game tracks your discoveries in five handbooks, and filling each one is the real endgame. Verified names and global unlock rates:
| Achievement | Requirement | Unlock Rate |
|---|---|---|
| Companion Collection Master | Unlock all entries in the Companion Handbook | 11.1% |
| Cooking Collection Master | Unlock all entries in the Cooking Handbook | 3.7% |
| Equipment Collection Master | Unlock all entries in the Equipment Handbook | 3.7% |
| Pet Collection Master | Unlock all entries in the Pet Handbook | 3.7% |
| The Impossible Achievement | Unlock all entries in the CollectionRoom Handbook | 3.7% |
Four of the five sit at 3.7%, meaning under one in twenty-five owners finishes any collection. The CollectionRoom one carries the game's joke name: it is the hardest completion in a game that is otherwise allergic to pressure.
How handbooks work. Every companion, recipe, equipment piece, and pet you discover gets logged. The Companion Handbook fills as you recruit every class at the Tavern. The Cooking Handbook fills as you find every dish combination at the Cooker. The Equipment Handbook fills as you forge every item type at the Forge. The Pet Handbook fills as you hatch and breed every species. The CollectionRoom Handbook is the deepest one: it tracks the special drops earned from the Pet Care Hospital and other rare collection events.
Hunting strategy:
- Companion Collection is the easy one (11.1%). Keep checking the Tavern pool between runs and recruit anything you have not hired before. Classes rotate, so visit after every few Travel cycles.
- Equipment Collection needs deliberate forging. You cannot discover every item by accident. Make a checklist of weapon, armor, and accessory types, and forge one of each at least once. Bulk crafting helps here.
- Cooking Collection is an experiment log. Every four-ingredient combination you try and get wrong still teaches you nothing, but every success unlocks a dish. Work in families: keep the base liquid constant and swap one ingredient at a time to map out recipe branches.
- Pet Collection needs the Breeding Base. Random mutated offspring are how new species appear. Breed every pair you can, and do not discard "useless" pets — they may be the only parent line that unlocks a missing species.
- The CollectionRoom is the genuine endgame. Its handbook fills from rare drops, including pet-final-care drops at the hospital. Only sacrifice duplicate pets here, and never a unique species you still need for the handbook.
- The 3.7% club is a marathon, not a sprint. Nothing in the game is missable permanently because the world keeps running, but the rarity tells you most players quit before the final handbook. Set the collection as the goal of a second long-term save if your first file is mid-progress.
Advanced Tips
- Wallpaper Mode is not just cosmetic. In wallpaper mode, companions continue their Travel runs and processing continues. You can even queue new actions from the desktop shortcuts. The game was designed around this mode.
- The 15-minute Travel cycle is the sweet spot. Longer adventures exist, but 15 minutes aligns with natural break patterns (coffee, bathroom, Slack messages). Optimize for the cadence you actually follow.
- Companion work talents stack. If you station two companions with "Furnace Efficiency" in the Furnace, the bonus compounds. Check your companion traits and group them by building.
- Bulk crafting is better than single crafts. The Forge has a bulk option. Always use it — the cost per item is the same, but you save the time of clicking through the menu repeatedly.
- Abyss mode resets daily. If you can clear only difficulty 1, do it every day. The daily reset gives bonus rewards for first clear.
- Achievement "The Impossible Achievement" is a handbook completion, not a +25 item. Unlocking every entry in the CollectionRoom Handbook demands the rarest drops in the game, including Pet Care Hospital results. Treat it as a second-save goal if your main file is mid-progress.
- Save Anytime and Playable without Timed Input are official Steam categories — this game truly does not pressure you. Play at your own pace.
- The built-in Adventure Guide explains each mode and mechanic. Read it when you hit a wall.
- Custom Volume Controls mean you can play music or audio-focused work without game sounds interfering. Keep the game running in wallpaper mode with sound off.
FAQ / Common Mistakes
Q: I am stuck at Iron gear. How do I get Steel? A: You need the Advanced Furnace. It unlocks when Furnace reaches level 3. Then combine Coal (from Crusher + certain seeds) with Iron ingots.
Q: My companions keep getting injured in Adventure mode. What do I do? A: Go back to Travel for a few cycles. Forge better gear. Check that you are equipping both weapon and armor — a weapon-only build dies fast. Also check the Adventure difficulty rating against your party's power score.
Q: Is it worth buying things with real money? A: There are no microtransactions, energy timers, or paid skips. The S$1.25 (about US$0.95) purchase price is everything. Every building, stone, and pet comes from playing.
Q: How do I get pet eggs? A: Adventure mode drops them, especially mid-difficulty Adventures. Higher difficulty = better egg quality, but also higher injury risk.
Q: I cannot find the Cooker. Where is it? A: The Cooker is a separate building unlocked after Workshop level 2. It uses four ingredient slots. Experiment with protein + vegetable + spice + liquid combinations.
Q: Does progress carry over if I close the game? A: Travel and processing pause when the game is fully closed. But wallpaper mode keeps them running. If you are away from your desk, leave it in wallpaper mode.
Q: How many buildings can I have? A: Your base grid expands as you upgrade your Home building (separate from production buildings). At max upgrade, you can fit roughly 15 buildings comfortably.
Q: The enhancement broke my +12 sword. Can I get it back? A: No. Without a protection stone, the item is gone forever. This is why you never enhance past +10 without protection. Learn this lesson once.
Q: What are the language options? A: English (interface + subtitles) and Simplified Chinese (interface + subtitles). No full audio — the game has interface sounds but no voice acting.
Q: Can I play this on Steam Deck? A: Steam only lists Windows support. No official Mac or Linux support at launch. Steam Deck users should verify compatibility before purchasing.