Official game
Play Rail Estate
This game is hosted by steam. Continue to the official page to play or download it.
Play on SteamOverview
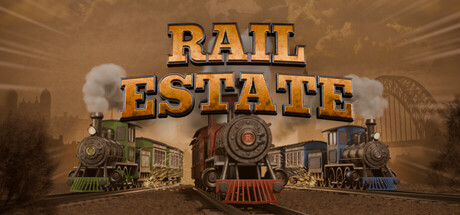
Rail Estate is a real-time multiplayer strategy game from Swiss studio Holonautic. Think Ticket to Ride meets Power Grid — cutthroat blind auctions, procedural maps, and a railway network where every track you lay changes the game for everyone. It launched on Steam July 16, 2026, with a full single-player campaign, challenge missions, and multiplayer for up to 8 players.
You're a rail tycoon competing against AI rivals or human opponents to build the most profitable network. There's no luck-based dice rolls, no random card draws — just blind bids, resource management, and the ability to read the table as well as the map.
| Detail | Info |
|---|---|
| Genre | Strategy / Simulation / Multiplayer |
| Developer | Holonautic |
| Platforms | Windows, Mac (Steam) |
| Steam Deck | Verified |
| Price | ~$7 USD ($9.55 SGD) |
| Players | 1-8 (Single-player campaign, FFA, Teams) |
| Release | July 16, 2026 |
Getting Started
First 30 Minutes
Start with the single-player campaign. The tutorial scenarios ease you in — first one or two missions teach you the auction system, then you learn track building, then you face your first rival with actual competitive pressure.
Don't skip to multiplayer immediately. The blind auction system has a learning curve, and AI opponents in the campaign are tuned to teach you specific concepts. The first campaign mission practically hands you a route — use it to understand the interface, not to win.
Beginner Mistakes
Overpaying in the first auction. New players see a shiny route and bid everything they have. Then they have zero budget left for track upgrades, rolling stock, or maintenance. The route sits there generating barely enough revenue to cover its own upkeep. Rule: never spend more than 30-40% of your cash on a single route in the first half of the game.
Ignoring the network effect. A route connecting to your existing network is worth 2-3x more than an isolated line. New players bid on routes based on their individual values. Veterans bid based on how routes connect. A cheap, low-value route that fills a gap between two of your profitable lines is a steal.
Building everything at once. You win a route, you immediately max out the track, buy the best train, build three stations. Your cash burns in seconds. Build incrementally. Get the route operational with basic infrastructure first, then upgrade as revenue comes in.
Core Mechanics
The Blind Auction System
The heart of Rail Estate. Every session, routes become available for bidding in rounds. Players submit blind bids — you don't see what others are offering until all bids are revealed.
Bid strategy factors:
- Route base value — Each route has a publicly visible base value determined by length, terrain, and economic potential. Use this as your starting reference.
- Your cash reserve — Blind bidding means you can't react. Set a maximum before the round. Stick to it.
- Rival behavior patterns — AI opponents have bidding personalities. One rival always overbids on mountain routes. Another avoids high-maintenance lines. Learn their patterns and exploit them. If you know Rival A will blow their budget on a mountain route, leave them to it and pick up two cheaper routes uncontested.
- Bluff bidding — In multiplayer, you can bid aggressively on a route you don't want just to drain an opponent's cash. They match you, overspend, and now they're strapped for the next round. This is advanced play — don't try it until you can read the table.
The overpay trap: Winning a bid is not the goal. Winning at the right price is. A route that costs you 80% of your cash reserve is a liability. You need capital for track, stations, trains, and maintenance. A bankrupt tycoon doesn't run trains.
Network Building Strategy
Your rail network is a living grid. Every connection you make changes the math for everyone.
Core principles:
- Connectivity > Quantity. Three connected routes generating through-traffic revenue will outperform five disconnected routes. Through-traffic occurs when passengers and freight can travel across multiple routes you own. The longer the connected chain, the more you earn per trip.
- Bottleneck control. Key junctions where multiple routes converge are critical. If you control the bottleneck, you can charge competitors for passage (in modes that allow it) or simply reap the rewards of everyone's traffic flowing through your network.
- Terrain shortcuts. Mountain routes are expensive to build and maintain, but they create direct connections that bypass long, winding flat routes. Sometimes the expensive shortcut is the strategic play — it cuts your opponent's potential network in half.
Route valuation matrix:
| Route Type | Build Cost | Maintenance | Revenue Potential | Best For |
|---|---|---|---|---|
| Flat, short | Low | Low | Low | Early game, cash flow |
| Flat, long | Medium | Low | Medium-High | Mid-game, stable income |
| Hilly, short | Medium | Medium | Medium | Network connectors |
| Mountain, short | High | High | High | Late-game, shortcuts |
| River crossing | High-High | Medium | High-High | Critical bottlenecks |
Train & Rolling Stock Upgrades
Your trains are your revenue engines. Literally. Upgrading them is how you scale.
| Upgrade | Effect | Cost Tier | Priority |
|---|---|---|---|
| Speed | Faster trips = more trips per turn = more revenue | Medium | High — pays for itself fast |
| Capacity | More passengers/freight per trip | Medium | Medium — depends on route demand |
| Fuel Efficiency | Lower operating costs per trip | High | Low early, High late |
| Reliability | Less downtime, fewer breakdowns | Low | High — a broken train earns nothing |
| Signaling | Increases route capacity (more trains per track) | High | Critical for high-traffic lines |
Upgrade order priority: Speed (1) → Reliability (1) → Capacity (if route is at capacity) → Efficiency → Signaling
Don't upgrade every train equally. Identify your 2-3 most profitable routes and upgrade those trains first. Your feeder lines can run basic equipment.
Revenue Streams
| Source | Description | Best For |
|---|---|---|
| Passenger tickets | Per-trip revenue from travelers | High-density urban connections |
| Freight contracts | Bulk cargo, long-term contracts | Industrial routes, ports |
| Mail express | Premium speed-based delivery | Short direct routes |
| Station concessions | Shops, parking, advertising at stations | Stations in high-traffic zones |
| Government subsidies | Bonus for connecting remote regions | Low-competition expansion |
Campaign Walkthrough
Mission Structure
The campaign has 10+ scenarios organized by difficulty. Each introduces a new mechanic.
Early missions (1-3): One rival, simple maps, focus on learning auctions and basic track building. Recommended time: 15-20 min each. Strategy: bid conservatively, build one strong connected network, out-earn the AI.
Mid missions (4-7): Two rivals, mountain terrain introduced, procedurally generated maps. The AI gets more aggressive in bidding. Strategy: identify which routes the AI will fight over, let them overpay, grab the routes they ignore.
Late missions (8-10): Three rivals, complex terrain, all mechanics active. The AI coordinates — one rival bids aggressively, another builds defensive networks. Strategy: you must diversify. Spread your network across at least two regions so a single rival can't box you in.
Tips for Each Campaign Map Type
Coastal map: Port routes dominate. Freight contracts here pay 2x normal. Prioritize acquiring port connections and build inland feeder routes to supply them.
Mountain map: Tunnel upgrades are essential. Don't fight over mountain passes in the first 3 rounds — let the AI bankrupt themselves. Pick up lowland routes cheaply, build cash reserve, then grab one critical mountain pass in round 4-5.
Industrial map: Factories generate consistent freight demand. Routes connecting 3+ factories are the highest-value targets. The AI will bid hard on these — be prepared for bidding wars. Set your max bid 20% higher than the base value and walk away if it exceeds that.
Multiplayer Strategy
3-Player FFA
The most balanced format. Key insight: in FFA, the player in second place is in the best position. The leader gets targeted by the third player. Stay in second until the final two rounds, then strike.
Round 1-3: Build your cash reserve. Bid on 1-2 safe routes. Don't fight bidding wars. Round 4-6: Expand aggressively. You should have a core network generating stable income. Start bidding on connector routes. Round 7-9: Block rivals. Identify who's winning. Bid up routes they need, even if you don't want them. A bid that makes an opponent overpay by 30% is a win even if you lose the auction. Round 10-final: All-in. If you have cash reserves and a connected network, outbid everyone on the remaining high-value routes.
2v2 Teams
Communication is everything — but you can't communicate during a blind auction. Build complementary networks. One player focuses on passenger routes, the other on freight. Your networks should connect at exactly one junction so you share through-traffic revenue without competing for the same routes.
Team bidding strategy: Don't both bid on the same route. Designate a primary bidder per route category (passenger vs freight). Coordinate through signals — if your teammate bids on a route, you back off.
Advanced Multiplayer Tactics
The cash trap. Late in the game, if you have a cash lead, bid on every available route at slightly above base value. You force opponents to either spend cash defending their bids (draining their reserves) or let you acquire routes cheaply. This only works if you have a genuine cash advantage — otherwise you're just burning your own money.
The fake interest. Click on a route the AI wants. Hover over it. Let the timer run down. The AI registers your attention and adjusts its bid upward. This costs you nothing but can make the AI overpay by 15-25%.
Bottleneck denial. If you can't afford to build a route, you can still block it. Bid on a route that connects two of your opponent's profitable lines, even if you only have enough cash to build basic track. The minimal investment prevents them from creating a super-route.
Step-by-Step: Winning a Standard Game
Phase 1: Foundation (Rounds 1-3)
- Survey the map. Identify the three most valuable route clusters (groups of 2-3 connecting routes).
- Bid only on routes within one cluster. Don't spread across the map yet.
- Build basic track — don't upgrade anything. Get routes operational.
- Buy one train per route. Speed upgrade only.
- End each round with at least 60% of your starting cash still in reserve.
Phase 2: Expansion (Rounds 4-6)
- Your core network should be generating steady income. Reinvest 40% of earnings into track upgrades.
- Bid on routes that connect your cluster to other regions. A single connector route can triple your network value.
- Upgrade trains on your best route to Speed 2 + Reliability 1.
- Add one station to your busiest route for concession income.
- Cash reserve: maintain 40% of current total. You'll need it for bidding wars.
Phase 3: Domination (Rounds 7-9)
- Identify the current leader (highest net worth). Bid on routes adjacent to their network. You're boxing them in.
- Upgrade your main line to full capacity (all upgrades). This route should be generating 40%+ of your income.
- If you have a cash lead, deploy the cash trap (bid on everything at base value).
- Add a second station on your high-traffic connector routes.
- Cash reserve: 25% is fine now. Your income should cover new investments.
Phase 4: Victory (Round 10-End)
- Count remaining high-value routes. Estimate total value left on the board.
- If you're winning by net worth: defensive play. Bid just enough to block rivals from huge value routes, but don't overextend.
- If you're behind: aggressive. Bid high on the single most valuable remaining route. If you win it and can connect it, the swing might be enough.
- Final round: spend every dollar on upgrades that pay back immediately (Speed, Signaling). Unused cash is wasted.
Advanced Tips
The three-track principle. Never rely on a single route for more than 50% of your income. AI opponents will target your main line's connectors in the auction phase. If you have three independent revenue streams, losing one is painful but not fatal.
Double-track your trunk lines. When a route reaches 80% capacity utilization, build a parallel track. The construction cost is 60% of the original but capacity doubles. This is the most efficient upgrade in the game.
Use maintenance as a tax shield. High maintenance costs reduce your taxable income in scenarios with per-turn taxes. If you're approaching a tax threshold, invest in high-maintenance upgrades (mountain tunnels, expensive rolling stock) to keep your reported income below the tax line.
Station placement is asymmetrical warfare. Place stations not just at your route endpoints, but at junctions where your route crosses a rival's track. The station captures through-traffic from both networks. Your rival is effectively subsidizing your station revenue.
The early pass play. On maps with a mountain pass that connects two halves of the map, winning this pass in round 2-3 (even overpaying by 20-30%) is often the winning play. The pass gives you access to an entire half of the map that rivals can't reach efficiently. The early investment pays back 3-4x by endgame.
Read the procedural generation. Map generation follows rules: industrial zones cluster together, tourist destinations are remote, mountain passes are always limited. Learn to read the generation pattern in the first 30 seconds. If you see three factories near a river, that's the freight corridor of the game. Bid accordingly.
FAQ / Common Mistakes
Q: I keep winning auctions but losing the game. What's wrong? A: You're overpaying. Winning an auction doesn't mean you won the route — it means you paid too much. A route is only a good deal if you have enough capital left to develop it. If you spend 80% of your cash on a route, you can't afford trains or track. The route bleeds money. You lose.
Q: Should I always upgrade my trains? A: No. Upgrade trains on your 2-3 highest-revenue routes. Leave feeder routes on basic equipment. Every dollar spent upgrading a low-traffic route is a dollar not spent on your main line.
Q: How do I deal with an opponent who outbids me on everything? A: Let them. An opponent who wins every auction is burning cash. Bid them up — make them pay 20-30% above fair value on every route. They'll run out of money by mid-game while you build your network with the cash you conserved.
Q: What's the fastest way to recover from a bad start? A: Pivot to government subsidies. Connect remote towns. The subsidy income is guaranteed, opponents won't compete for these routes, and the connections give you a foothold in uncontested territory. You can rebuild from there.
Q: How important is route synergy? A: It's the most important thing in the game. A connected network of 4 routes generates 2-3x the revenue of 4 isolated routes. Through-traffic, shared stations, and network effects compound. Always prioritize connections.
Q: Is the single-player campaign worth playing before multiplayer? A: Absolutely. The campaign teaches you bid psychology, map reading, and pacing. Jumping straight into multiplayer without campaign experience puts you at a severe disadvantage. Play at least the first 5 campaign missions.
Q: What's the biggest difference between AI and human opponents? A: AI opponents have predictable bidding patterns (learnable). Human opponents bluff, trap, and collude. In multiplayer, never assume a bid is genuine — someone might be running the cash trap on you.
Q: How do I win on a map where I start in a bad position? A: Don't fight your starting position. Build whatever routes are in your vicinity, even if they're low-value. Use them as a base to bid on connector routes. A bad starting position just means your first network is a stepping stone, not your final empire. Survive early, thrive late.