Official game
Play Ruins of Enreggel
This game is hosted by itch.io. Continue to the official page to play or download it.
Play on itch.ioOverview / Game Introduction
Ruins of Enreggel is a free browser-based base-disassembly survival strategy game that flips the city-builder genre on its head. Instead of building a settlement from scratch and defending it, you start with a fully constructed village and must systematically dismantle it, evacuate your villagers through dimensional portals, and flee before the supernatural Grim mist consumes everything.
The premise sells the mechanic. After the Cataclysm, the kingdom of Enreggel fell. The Grim mist overtook every fixed settlement, so the survivors built villages where everything is portable. Each cycle your people raise a town, harvest what it needs, answer the King's demands for gold, tear the whole place down building by building, and walk through the portal before the mist arrives. Every evacuation is a tactical retreat, not a defeat.
| Detail | Info |
|---|---|
| Genre | Strategy / Survival / Base-Disassembly |
| Developer | speratus (Andrew Luchuk), mechanics by Aegrithas |
| Engine | Redot (Godot fork), HTML5 web build |
| Platform | Browser (itch.io) |
| Price | Free |
| Players | Single-player |
| Version | 0.1.0 (Game Jam Entry, prototype) |
| Art | TinyWorld pixel tileset by itch.io creator Fliegevogel |
| AI Disclosure | None used, per the itch.io page |
| Difficulty | Medium. Punishing if you mismanage Portalium, forgiving once you internalize the rhythm |
| Session Length | 15–30 min per cycle, repeatable with escalating difficulty |
Target audience: players who enjoy resource-management puzzles and strategy games where planning beats reaction speed. If Frostpunk's "the storm is coming" pressure or Banished's economy balancing hooks you, the reverse city-builder concept clicks immediately. There is no combat, no enemies, no micro. The mist is the only opponent and it never negotiates.
Honest caveats before you invest: this is a jam prototype. The itch.io page says it directly: version 0.1.0 has no sound at all, may contain bugs, and may never see updates since the developer moved on to other projects. Controls are camera keys plus mouse clicks. None of that ruins the core loop, but set expectations: this is a clever systems puzzle with prototype polish, not a finished commercial title.
The core loop in one line: harvest four resources → complete the King's objectives for gold → pay villagers to disassemble buildings → stockpile Portalium → open the portal → evacuate everyone and everything → repeat on a harder, repositioned map.
Getting Started — First 30 Minutes
What You See
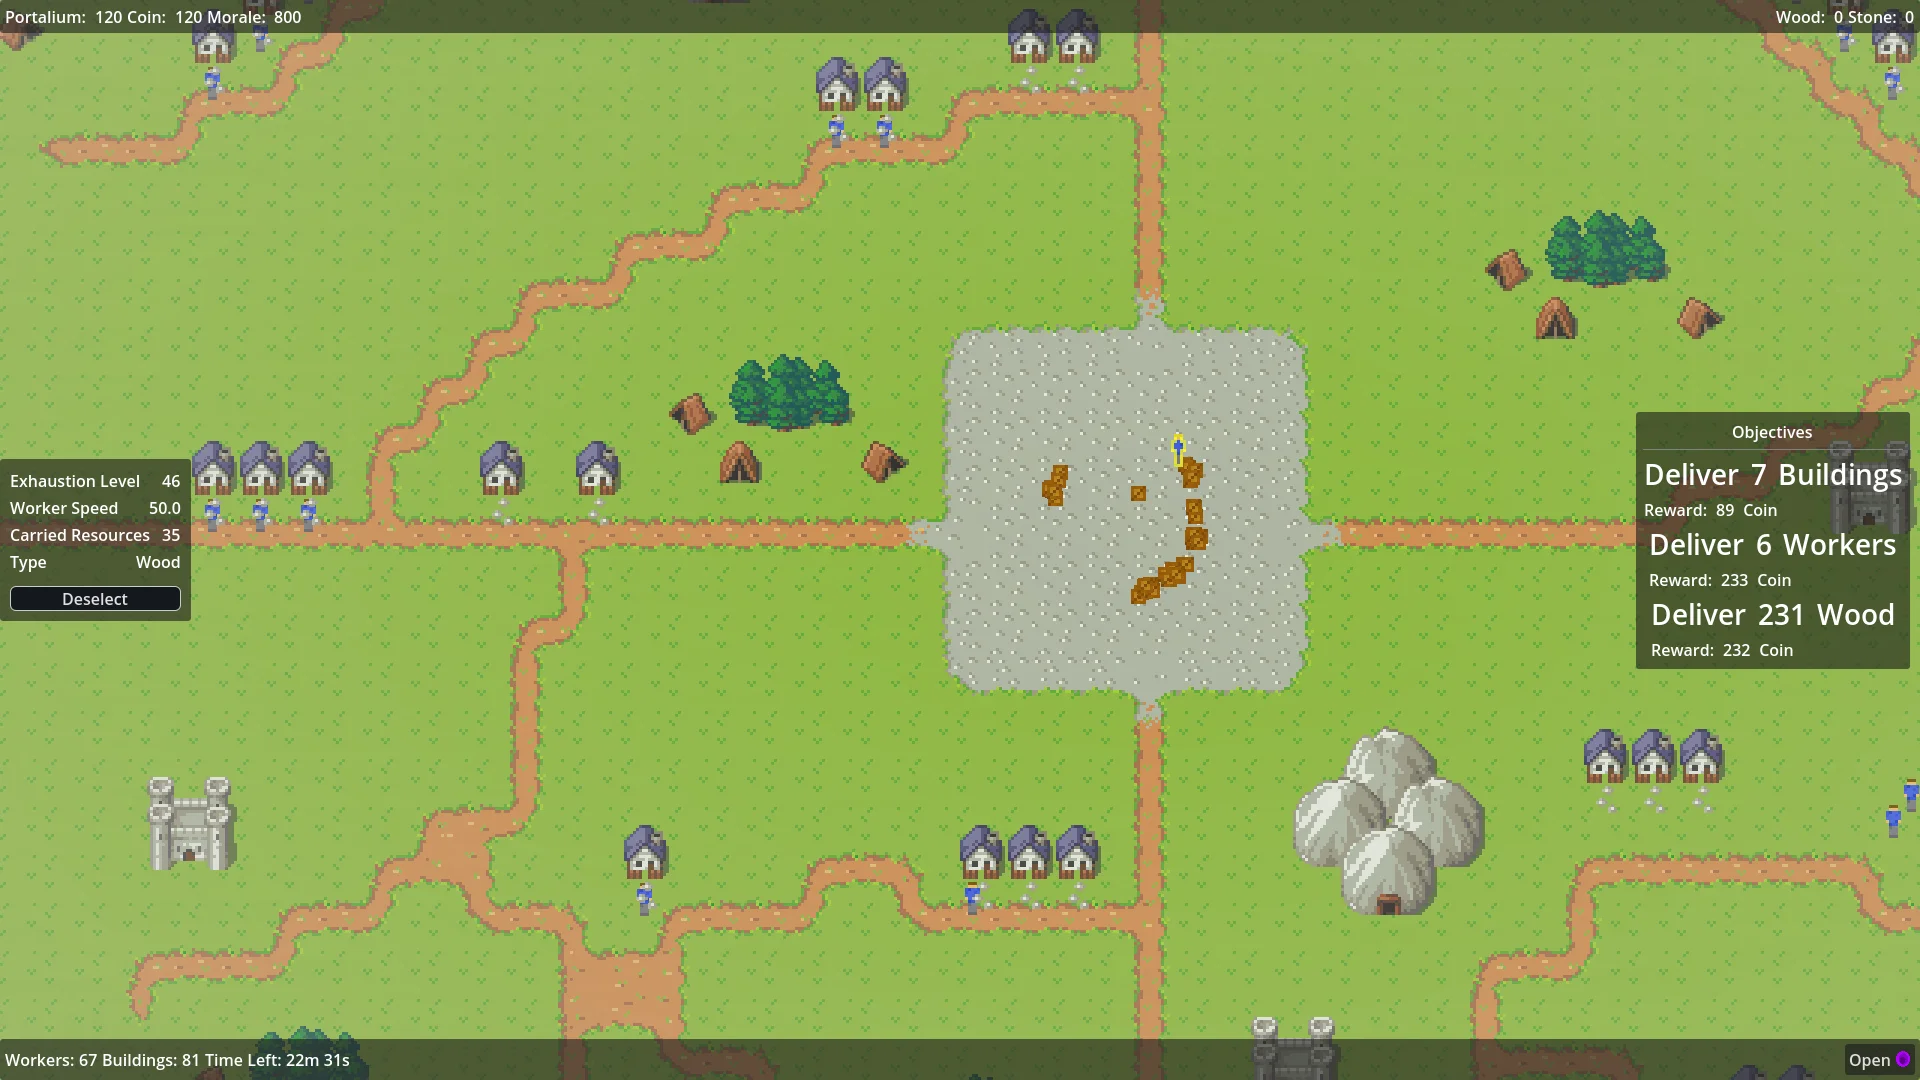
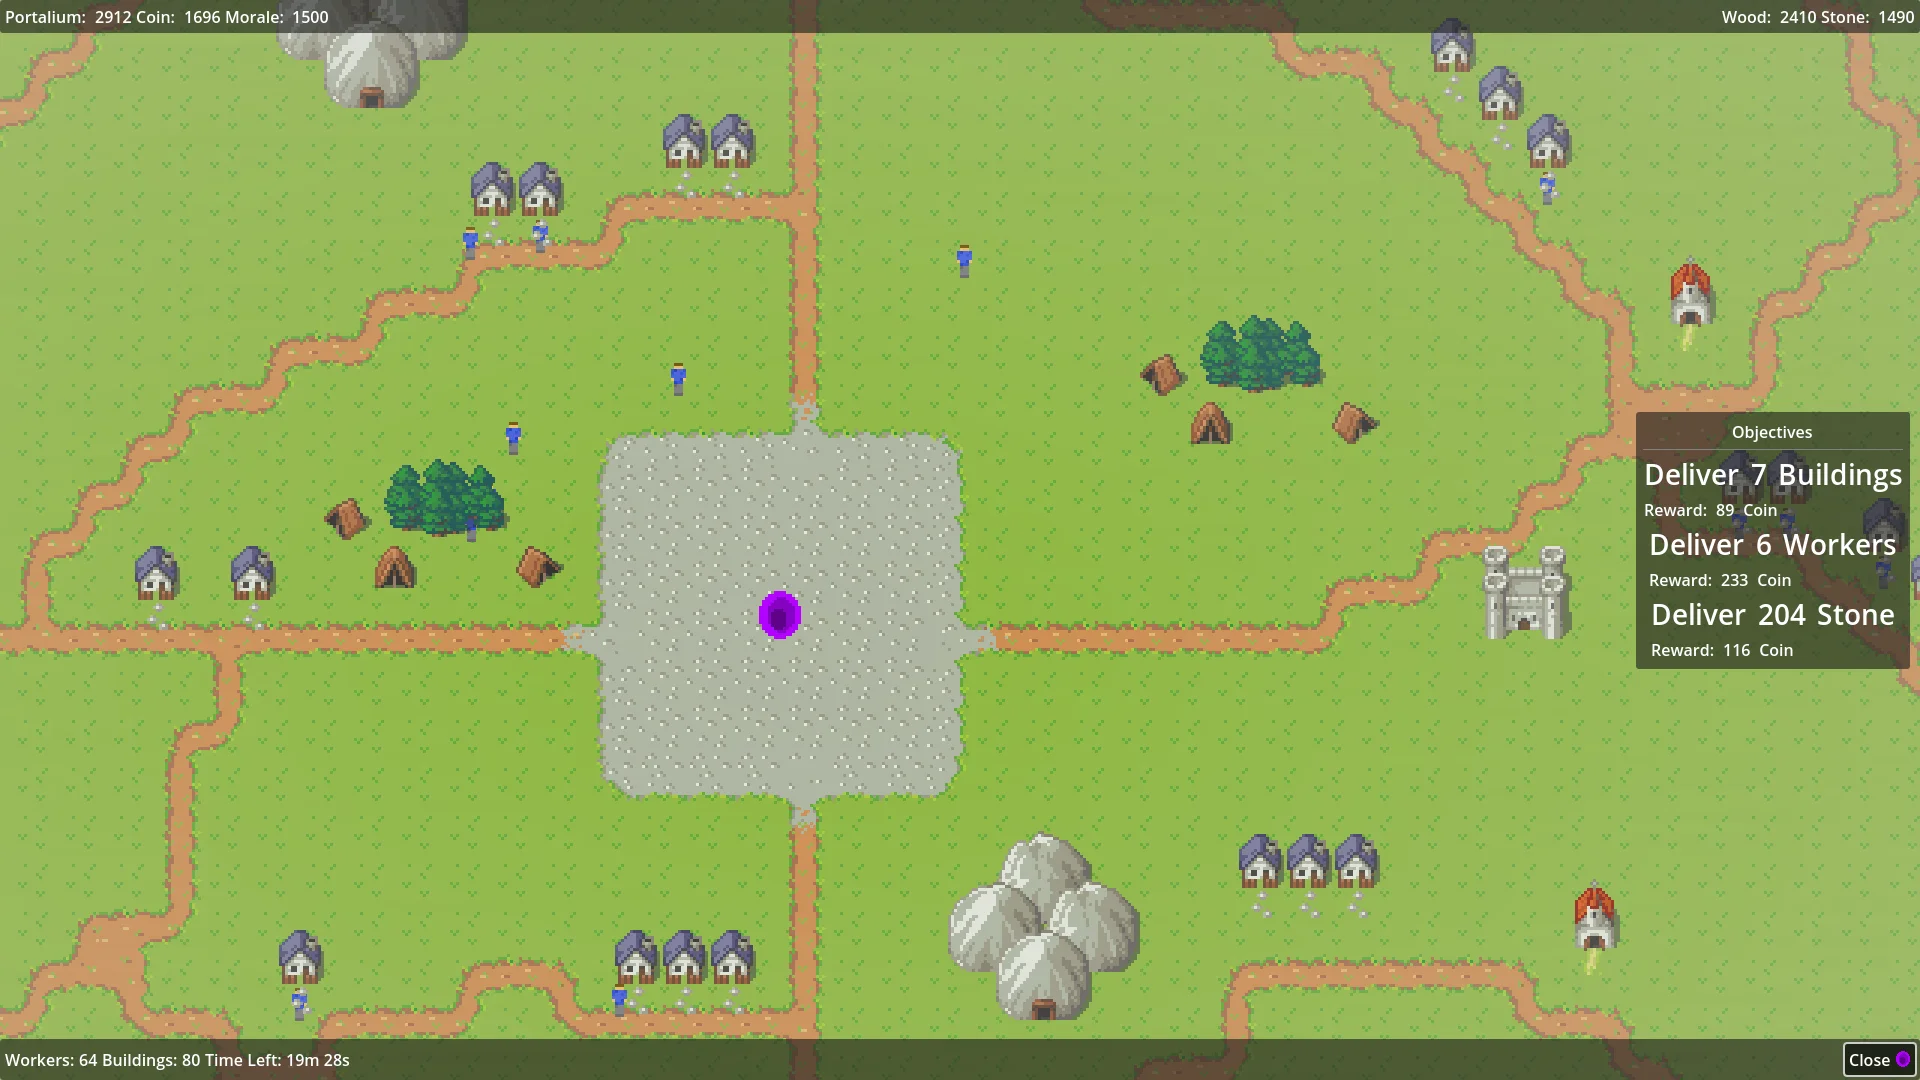
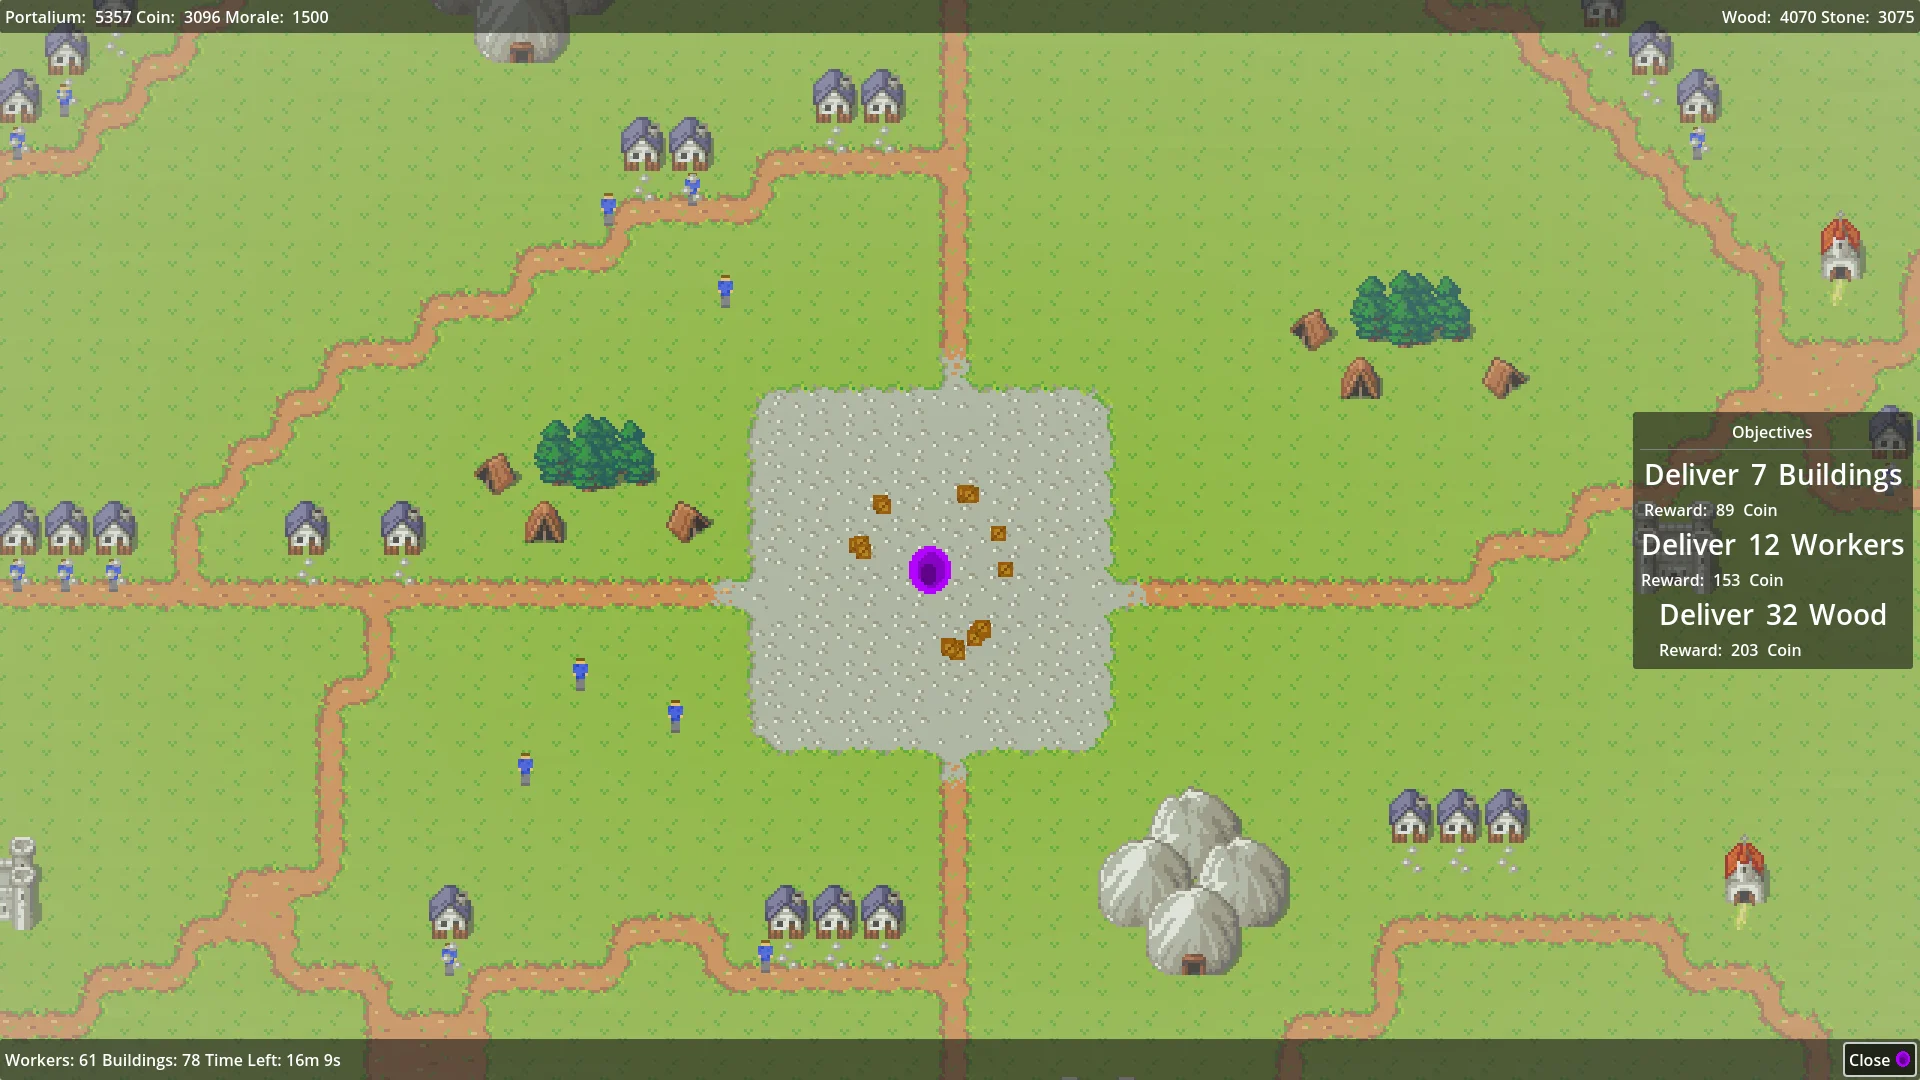
The game drops you into a top-down settlement: buildings scattered around a central glowing portal, the King's objectives in a panel, and a dark haze creeping in from the map edges. The status bar tracks four resources — Wood, Stone, Portalium, Morale — plus gold coins and your worker count. Workers wander autonomously; click one to select, click a building to see its options.
Controls (Complete List)
| Input | Action |
|---|---|
W | Move camera up |
A | Move camera left |
S | Move camera down |
D | Move camera right |
| Mouse click | Select worker or building |
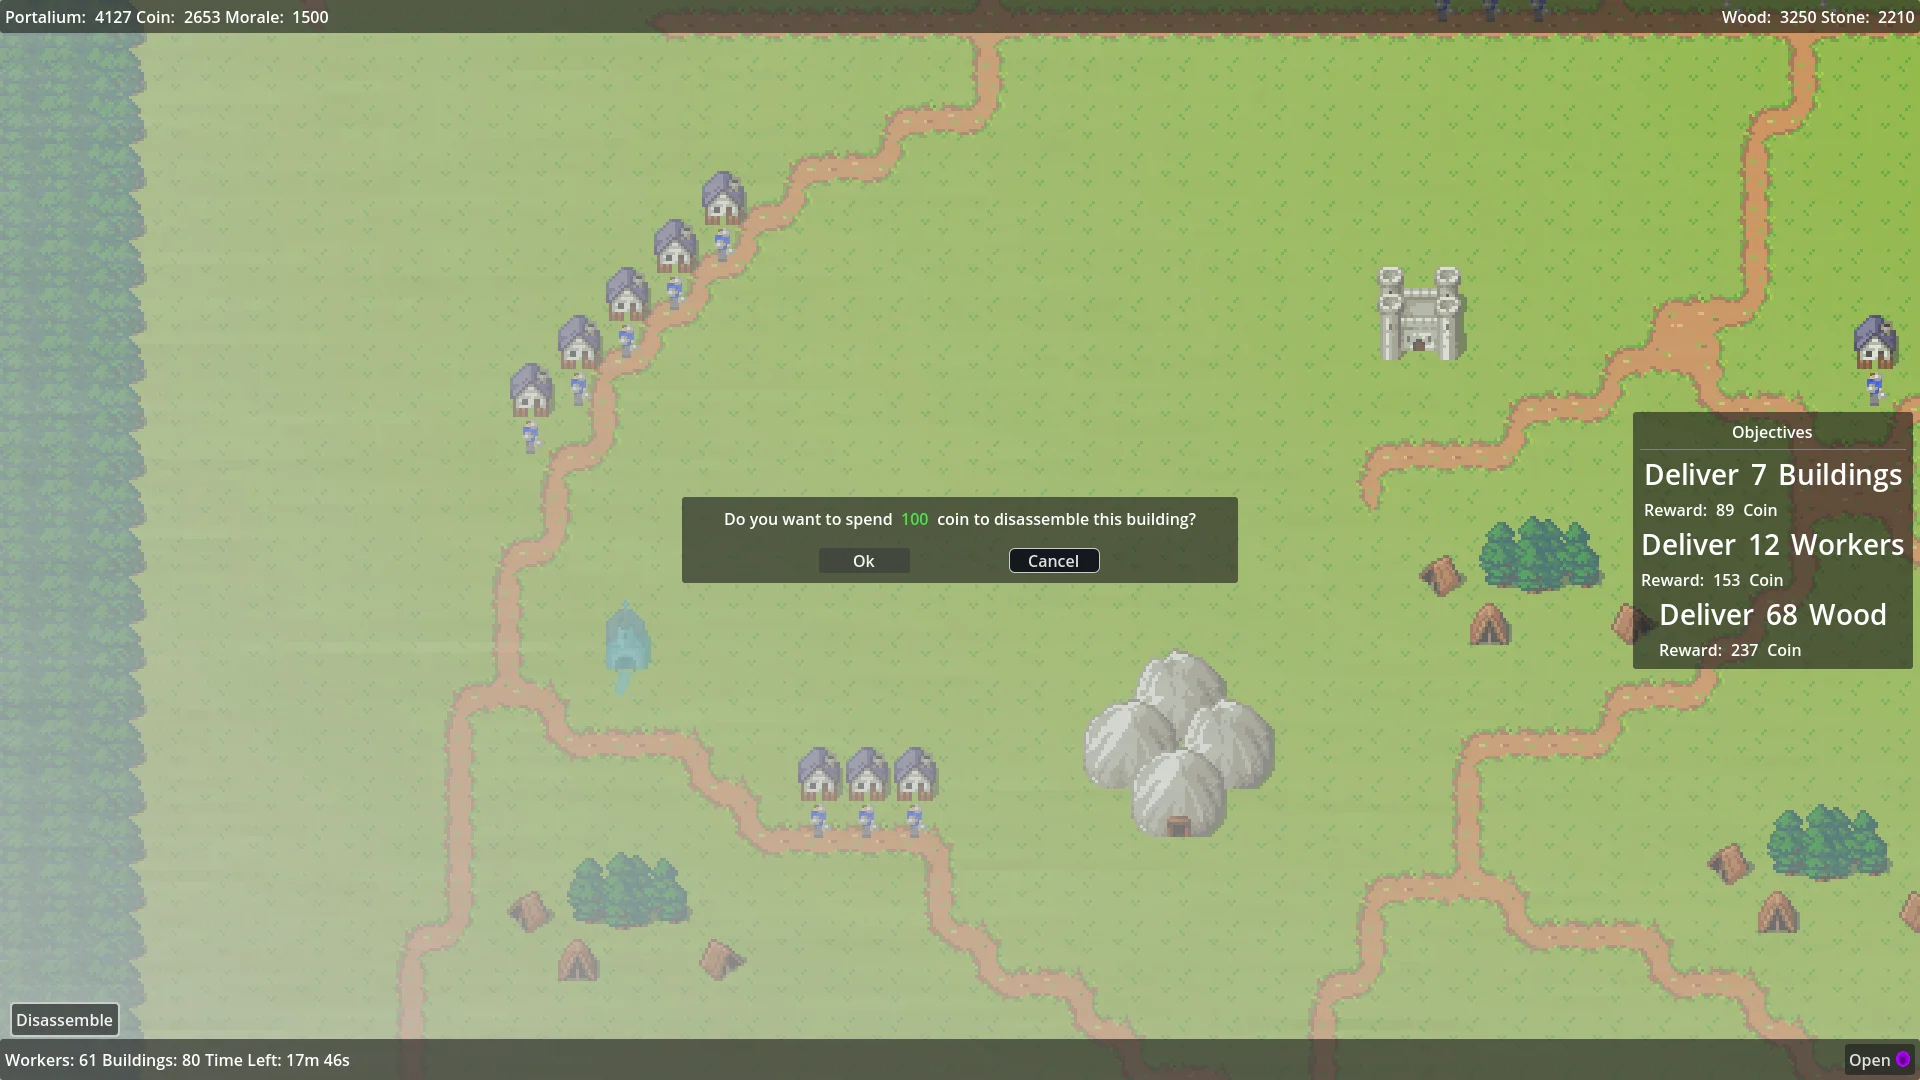
| Disassemble button (bottom-left when a building is selected) | Pay gold to dismantle the selected building |
Escape | Pause and open the menu |
That is everything. There is no drag-select, no hotkeys for workers, no minimap. All depth lives in decisions, not inputs.
Critical First Moves
1. Pause immediately (Escape) and survey. Locate the four resource node types: Forest Groves (wood), Mountains (stone), Churches (morale), Castles (Portalium). Find the portal. Identify which buildings sit farthest from it, because the mist consumes the perimeter first.
2. Assign 2 workers to Castles before anything else. Portalium is the run-critical resource. Without it the portal cannot open, and if it hits zero while the portal is open, the portal closes permanently. That is the instant-loss condition.
3. Read the King's first objective. His requests are your only gold income, and gold is the only way to disassemble buildings. Assign your next 1–2 workers to whichever resource the first objective demands.
4. Leave one worker unassigned as a floater. Whichever bottleneck emerges, the floater plugs it.
5. Do not open the portal early. It drains Portalium continuously while active. Stockpile 50+ before opening, and keep at least one worker on Castle duty for the entire evacuation.
Beginner Mistakes to Avoid
| Mistake | Why It Hurts |
|---|---|
| Opening the portal too early | Continuous Portalium drain. Running dry mid-evacuation closes the portal forever. Run over. |
| Ignoring morale | Low morale slows every worker. Slow workers harvest less, buildings get consumed, morale drops further. The spiral ends runs. |
| Spreading workers across all four resources | Focus-fire one node type at a time. Four workers on one node out-produce one worker on each of four nodes. |
| Disassembling before checking the gold cost | Every building has a cost. Ran out of gold mid-teardown? Those buildings get eaten by the mist for nothing. |
| Evacuating workers before stockpiling resources at the portal | Workers are your carrying capacity. Send them through last, after the goods are staged. |
| Letting exhausted workers idle far from houses | An exhausted worker carries roughly half per trip. Houses near the work area keep trips short. |
Core Mechanics Explained
The Reverse City-Builder Loop
Standard builders reward construction. Enreggel rewards clean deconstruction:
Survey → Harvest → Complete King's Objectives → Disassemble (edge-in) →
Stockpile Portalium → Open Portal → Evacuate villagers + staged resources → Repeat
Buildings you successfully disassemble carry over; buildings the mist eats are gone. That asymmetry is the whole game. Each cycle asks the same question with less margin: what do you save, what do you sacrifice, and when do you leave?
The Grim Mist — Your Countdown Clock
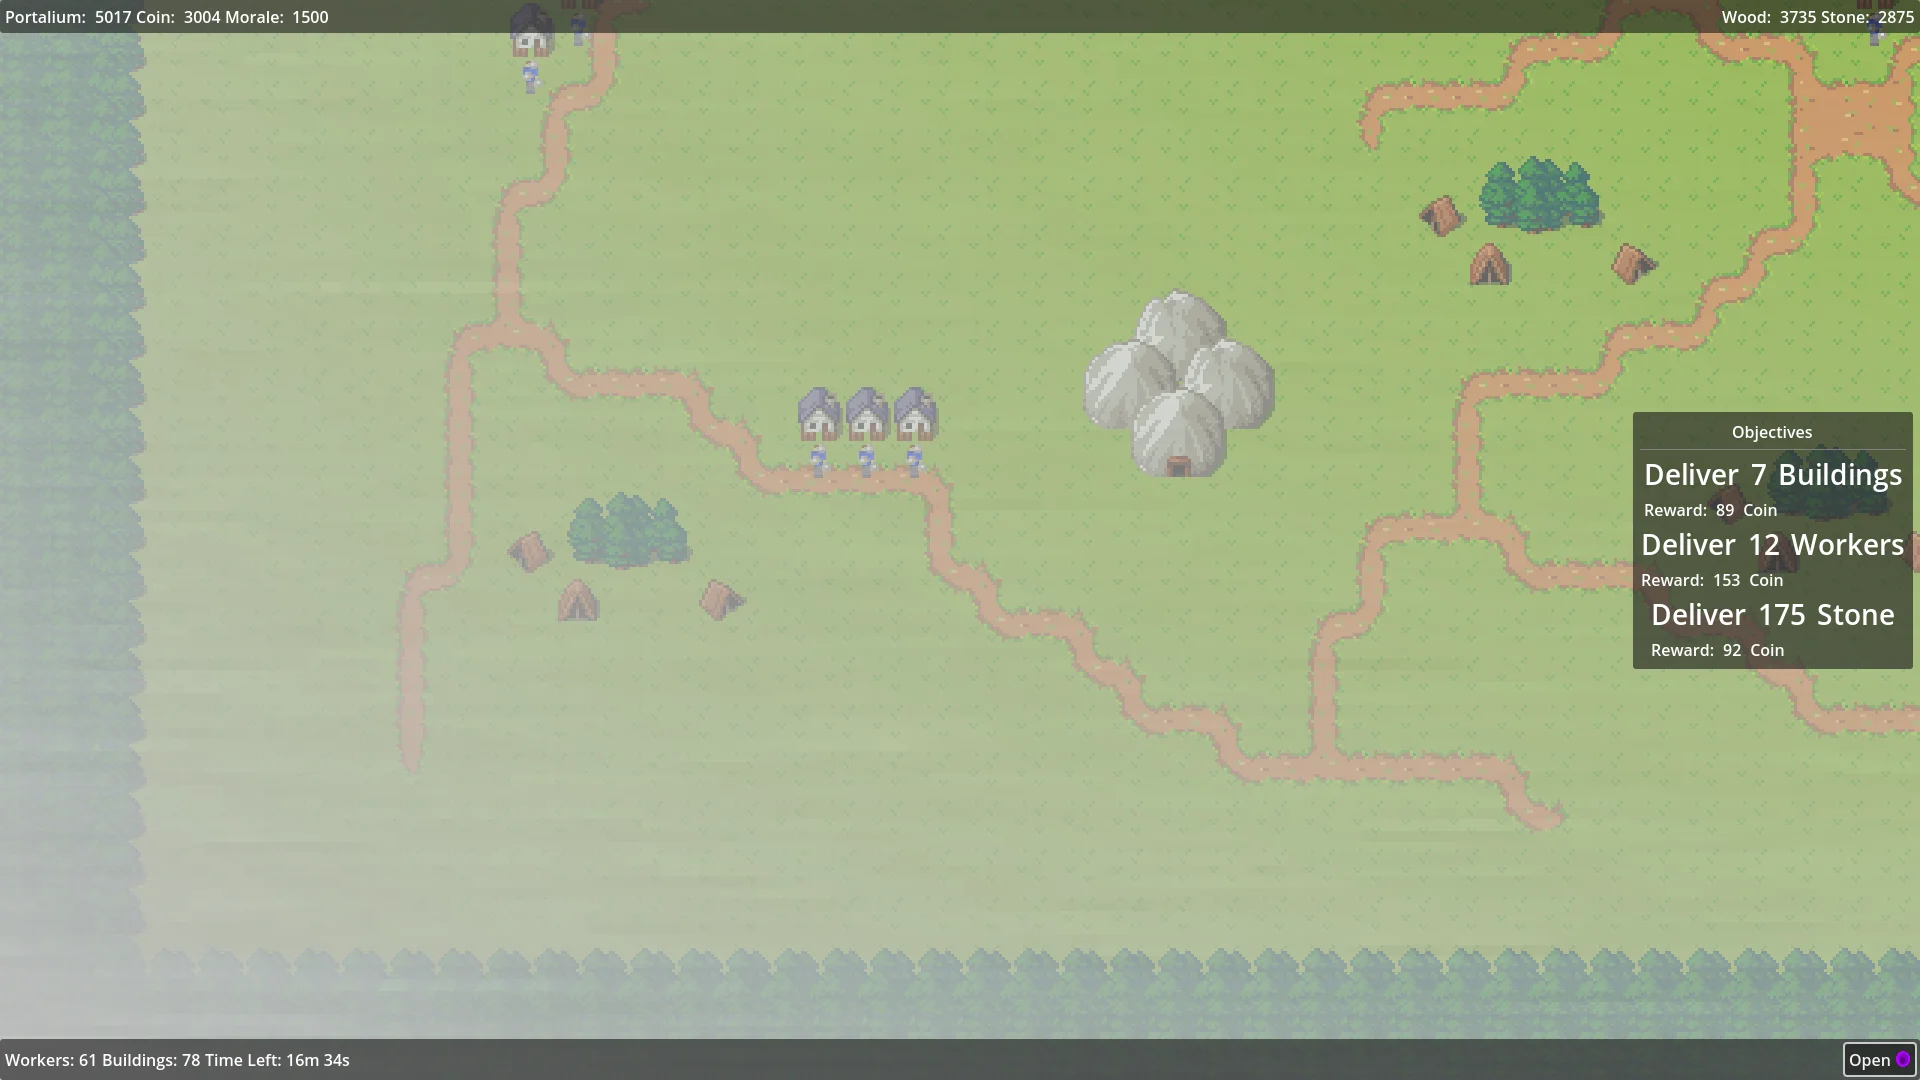
The mist advances from the map edges toward the portal at a steady, deterministic pace. It does not accelerate or stall. Buildings farthest from the portal are consumed first. Any building or worker it touches dies and costs morale. If it reaches the portal before the last villager passes through, the run ends: "The grim fog consumed your domain."
The strategic consequence: distance-to-portal is a countdown timer for each building. Work the perimeter inward like peeling an onion. The buildings hugging the portal are, by definition, your safest and last priority.
Worker AI & Exhaustion
Workers run a fixed loop:
Move to assigned node → Harvest → Carry to portal → Check exhaustion →
If tired: walk to a house with a free bed → Sleep → Resume
Details that matter:
- Exhaustion accumulates per harvest and per distance traveled. Past the tired threshold, carry capacity drops by roughly half.
- Each house has a fixed number of sleep slots. All beds full means tired workers keep stumbling around at half capacity. Housing near resource routes is not optional.
- A rested worker delivers roughly 2× per trip versus an exhausted one. Two workers rotating through nearby beds out-produce three workers staggering across the map.
- Workers store harvested resources near the portal. What they stage there before evacuation is delivered to your supply when the portal reopens next cycle.
Resource System
| Resource | Source | Primary Use | Critical Notes |
|---|---|---|---|
| Wood | Forest Grove | Rebuilding next cycle | Harvest early; next cycle starts with nothing built |
| Stone | Mountain | Rebuilding next cycle | Second priority after wood |
| Portalium | Castle | Keeps the portal open | Run-critical. Zero while portal open = permanent close = loss |
| Morale | Church | Global worker speed multiplier | The death-spiral resource. Below ~40% everything slows |
| Gold | King's objectives | Pays for disassembly | Only income source. Spent gold is gone |
Not all resource types need to go through the portal, only the ones tied to buildings. Over-harvesting wood for an objective that needs stone is worker-trips burned for nothing.
Gold Economy
The King posts objectives: deliver X units of a resource, receive Y gold. Disassembling a building costs a fixed gold amount that varies by type. Try without enough and the game tells you "You do not have enough coin." Three rules govern the economy:
- Objectives are the only faucet. No gold generation exists elsewhere, so an objective that demands more worker-trips than its reward is worth is a trap. Compare reward to travel distance before committing workers.
- Disassembly order should mirror mist distance. Pay for the buildings about to be eaten first. Gold spent on a safe central building while a Castle gets consumed is wasted twice.
- Castles and Churches justify premium gold. Losing a Castle costs Portalium production for the rest of the cycle. Losing a Church starts the morale spiral. Both are worth rushing gold to save.
The Portal — Your One-Way Door
The dimensional portal at the settlement center is the only exit:
- Opening and holding it costs Portalium continuously.
- Staged resources at the portal deliver to your supply when it reopens next cycle.
- Every villager must pass through before the mist arrives or the run ends.
- If Portalium runs dry while it is open, it closes permanently. There is no reopen, no second chance, no scramble-back. That cycle is lost.
Progression Strategy
Cycle 1: Learning Phase
Goal: evacuate with at least 70% of buildings intact and understand the rhythm.
- Pause. Map the nodes: Castles, Churches, Groves, Mountains, portal.
- 2 workers → nearest Castle. 1 worker → nearest Church.
- Read the King's first objective; assign 1–2 workers to that resource.
- Keep 1 worker floating.
- Complete the first objective. Spend that gold on the perimeter building farthest from the portal.
- Build Portalium to 50+. Open the portal only when most buildings are already down.
- Evacuate. Workers go through last, after resources are staged.
Target stockpiles exiting Cycle 1: Wood 30+, Stone 20+, Portalium 50+, Morale 20+.
Cycles 2–3: Efficiency Optimization
- Cluster housing near the portal. Sleeping trips shrink, effective carry capacity rises.
- Assign by distance. A node two tiles from the portal beats a richer node across the map. Every step walked without cargo is waste.
- Grade objectives by gold-per-trip, not raw gold. A 30-gold objective next door beats a 50-gold objective requiring cross-map hauls.
- Hold Morale above 60%. The speed multiplier compounds through every harvest, every disassembly, and the final evacuation sprint.
Cycle 4+: Survival Mode
Maps get harder: nodes sit farther out, building counts shrink, the mist presses from more directions. Adapt:
- Accept partial saves. Priority order: Castles > Churches > Houses > resource buildings > everything else.
- If gold runs scarce, disassemble only what the next cycle actually needs and let the mist have the rest. Each loss stings in morale but a lost run stings more.
- Stockpile Portalium more aggressively. Late cycles should target 80+ before opening.
- Skip low-value objectives. At this stage the King's gold is a tool, not a score.
Tier List — Buildings by Value
| Tier | Building | Why |
|---|---|---|
| S | Castle | Portalium production is the single most critical function. Never let one be consumed while you still need the portal. |
| S | Portal | You cannot evacuate without it. It is not really saveable, it is fuel-manageable. |
| A | Church | Morale is a global multiplier. One worker on Church duty keeps the whole settlement fast. |
| A | House | No free beds means exhausted workers stay exhausted. Roughly 1 house per 2–3 workers, near the action. |
| B | Forest Grove | Wood matters next cycle, but stockpiles buy slack. |
| B | Mountain | Same as groves. |
| C | Decorative / non-functional | First sacrifice when gold is tight. Disassemble only with spare coins. |
Step-by-Step Strategy — 7 Actionable Sequences
Sequence 1: The Perfect Cycle Opening
1. Pause (Escape).
2. Locate: Castles, portal, and the buildings farthest from the portal.
3. Unpause. Assign 2 workers to the nearest Castle.
4. Assign 1 worker to the nearest Church.
5. Assign 1–2 workers to the King's first objective resource.
6. Keep 1 worker floating for bottlenecks.
7. Do NOT open the portal.
Sequence 2: Gold Generation Rush
1. Read the objective panel: required resource and amount.
2. Reassign workers to that resource node until the quota is met.
3. Stop harvesting the moment the quota fills. Over-harvesting is wasted trips.
4. Collect the gold reward.
5. Immediately spend it on the perimeter building closest to the mist.
Sequence 3: Perimeter Disassembly (Edge-In Method)
1. Select the building farthest from the portal.
2. Check the gold cost. Enough? Disassemble. Short? Run an objective first.
3. Work inward from all directions, onion-style.
4. Houses near the action go later; houses in the mist's path go now.
5. Stop when only buildings within the inner 30% remain.
6. Re-check morale after each loss. A consumed building just slowed everyone.
Sequence 4: Portal Activation Protocol
1. Portalium stockpile at 50+ (80+ in late cycles).
2. Perimeter buildings down. Resources staged at the portal.
3. Open the portal.
4. Keep 1 worker on Castle duty through the entire evacuation.
5. Watch the drain rate. Portalium dipping toward 20? Slow the outflow:
   pause villager crossings for a beat while the Castle worker catches up.
6. Workers cross last, Portalium harvester last of all.
Sequence 5: Crisis Management — Low Morale
1. Morale below 40%: pause and assess. What just died?
2. A building loss is sunk cost. Do not chase it with more losses.
3. Assign 2 workers to the nearest Church.
4. Reassign everyone else to the shortest-distance nodes.
5. Below 20%: abandon remaining objectives. Everything feeds Portalium
   and evacuation.
6. Resume normal operations above 60%.
Sequence 6: Final Evacuation
1. Verify: buildings down (or consciously abandoned), resources staged.
2. Portalium 30+ with a worker still producing.
3. Send villagers through steadily; the mist does not pause.
4. Portalium harvester crosses last.
5. If the mist nears the portal with anyone left, shove everyone through
   immediately. A worker lost is morale damage; a run lost is worse.
Sequence 7: Multi-Cycle Stockpiling
1. Note carryover after each evacuation.
2. Grow Wood +20 and Stone +15 per cycle.
3. Keep Portalium 50+ at all times, 80+ from cycle 4.
4. Short on any resource? That node gets workers first next cycle.
5. Buildings beat raw resources. A disassembled Church is a Church next
   cycle; 20 Morale in the bank is not.
Advanced Tips
The Morale Death Spiral (and How to Break It)
The single most dangerous mechanic in the game:
Building lost → Morale drops → Workers slow → Less harvested →
More buildings lost → Morale drops further → Workers crawl → Collapse
Breaking it: 2 workers to Churches the moment morale dips under 50%, shorten every route (distance is the hidden multiplier), and below 30% go all-in on Portalium plus evacuation. Sacrificing three buildings to save the run is correct. Trying to save all three and losing the portal is not.
Optimal Worker Ratios
| Workers | Assignment |
|---|---|
| 3 | 2 Portalium, 1 Morale |
| 5 | 2 Portalium, 1 Morale, 1 objective resource, 1 floater |
| 7 | 2 Portalium, 2 Morale, 1 Wood, 1 Stone, 1 floater |
| 10 | 3 Portalium, 2 Morale, 2 Wood, 2 Stone, 1 floater |
The floater plugs whatever hurts: accelerating an objective, patching a morale dip, or rush-hauling staged resources during evacuation.
The 40% Rule
Treat 40 Portalium as an emergency floor. Below it: stop all non-portal spending, dump every free worker onto Castles, and think hard about whether the portal should even be open yet. The floor exists because the drain is continuous, not per-crossing; by the time you notice zero, the portal is already gone.
Building Sacrifice Priority
1st: Decorative props, fences, non-functional structures
2nd: Extra houses (you need ~1 per 2–3 workers, no more)
3rd: Forest Groves / Mountains (if stockpiles are healthy)
4th: Churches (painful but survivable with a morale reserve)
5th: Castles (last resort — losing Portalium production is catastrophic)
NEVER: The portal itself
Exhaustion Micro-Management
Watch worker state as they work. When a worker hits roughly 70% exhaustion they still have one good trip in them; after that, capacity craters. Workers auto-seek beds only when fully tired, which means they often stagger far from where you need them. Sending a worker to sleep slightly early, at a house near their node, beats letting them limp across the map. Housing placement does most of this work for you: beds between nodes and portal turn exhaustion into a 10-second detour instead of a 30-second loss.
Efficiency Formula
Optimal play minimizes total worker-travel-distance per cycle. Houses between nodes and portal. Workers on nearest nodes. Disassembly edge-in. Objectives judged by gold per trip. Every mechanical rule in this guide is that one principle wearing different hats.
FAQ / Common Mistakes
Q: Why did my portal close permanently? A: Portalium hit zero while it was open. The drain is continuous. Stockpile 50+ before opening and keep a Castle worker active through the whole evacuation.
Q: My workers are barely moving. What happened? A: Morale crashed. Check the bar; under ~40% applies a heavy speed penalty. Two workers to the nearest Church, and shorten routes. Also check exhaustion: tired workers with no free beds stay slow.
Q: I have gold but Disassemble does nothing. A: Select the building first, then use the Disassemble button in the bottom-left corner. Each building shows its own coin cost, and different types cost different amounts.
Q: Can I pause during the mist? A: Yes. Escape fully pauses the game, mist included. Use it freely; the game has no time pressure on your decisions, only on your workers' execution.
Q: What carries over between cycles? A: Resources staged at the portal, every building you disassembled (they rebuild next cycle), and all surviving workers. Anything the mist consumed is gone, and each consumption cost morale.
Q: Do I need to evacuate every building? A: No, only the ones worth keeping. Decorative structures can feed the mist, but every loss drops morale, so abandon consciously, not carelessly.
Q: Is there a victory condition? A: No. Cycles continue indefinitely with rising difficulty. Winning is how many clean evacuations you string together before the fog takes your domain.
Q: The game has no sound? A: Correct. Version 0.1.0 shipped without audio. The developer flagged it as unfinished jam work with no update timeline, so treat silence as a feature of the prototype.
Q: Are there bugs? A: Possibly. The itch.io page warns about jam-entry rough edges directly. If something behaves oddly, pausing and re-selecting usually settles the AI; a page refresh restarts the cycle.
Developer Background & Design Philosophy
Ruins of Enreggel was created by speratus (Andrew Luchuk) with mechanic and feature work by Aegrithas, built in Redot (a Godot fork) for the Redot Spring Game Jam 2026. The pitch question was simple: what if a strategy game made you tear down a base instead of build one? The two-week jam window was too tight to submit on time, so speratus finished the game after the deadline and published it free on itch.io, explicitly labeled as the jam version.
The design discipline shows in what is missing. No combat, no tech tree, no unit variety. Four resources, one enemy that never fights back, one exit that costs money to use. The lore — a kingdom that survives by constantly fleeing — exists purely to justify the loop. The tileset is the free TinyWorld asset pack by itch.io creator Fliegevogel, and the page carries an explicit "no generative AI" note, both refreshingly direct for a jam release.
Speratus maintains dozens of repositories on GitHub across tools and experiments; Enreggel is the most playable among them. The developer has stated that updates will likely be a long time coming, so the 0.1.0 balance is effectively the final balance. Everything in this guide is written against that version.
Comparison With Similar Games
| Game | Core Loop | How Enreggel Differs |
|---|---|---|
| Frostpunk | Build, heat, survive the storm | Frostpunk's storm arrives on a schedule; the mist advances visibly at all times. Enreggel trades social systems for pure logistics. |
| Banished | Build a self-sustaining town | Banished punishes over-expansion slowly; the mist punishes over-sitting within minutes. No food, no births, no deaths except mist. |
| Terra Nil | Reverse city-builder (restore terrain) | Closest genre neighbor. Terra Nil is meditative and scripted; Enreggel is timed and adversarial. One relaxes, the other sweats. |
| This War of Mine | Scavenge and survive | Both are about triage under time pressure, but Enreggel removes the moral choices. Buildings do not vote. |
The niche is genuinely unoccupied: a real-time strategy game where construction is the failure state. As a free 20-minute browser session, it works as a palate cleanser between heavier strategy games, or a focus exercise: one loop, fully explainable, with real decisions every 30 seconds.
Changelog & Version Notes
| Version | Date | Notes |
|---|---|---|
| 0.1.0 | June 2026 | Initial jam release after the Redot Spring Game Jam deadline. Base disassembly, four resources, King's objectives, portal evacuation, Grim mist. No audio. Balance bugs expected per the developer. No updates announced. |
Guide refreshed October 2026. Mechanics verified against the live itch.io build 0.1.0 and the developer's published notes.
Screenshots