Daily Pick
One deeply researched guide worth reading today.
A practical route through the systems that matter most, written to help new players make confident decisions quickly.
Cookie Circuit rewards players who treat the board as a math problem with lucky dice, and punishes everyone playing it like a reskin of the property games they grew up with. This deep dive covers the systems the standard guide introduces: the exact power windows per character, the Overclock recharge economy, landing probability, the trading playbook against each AI personality, bankruptcy math, and build orders for all three match modes. Every formula here is verified against the v1.0.1 game files: rent math, upgrade costs, pressure ladder, AI trade ceilings, and all 48 cards.
Overview
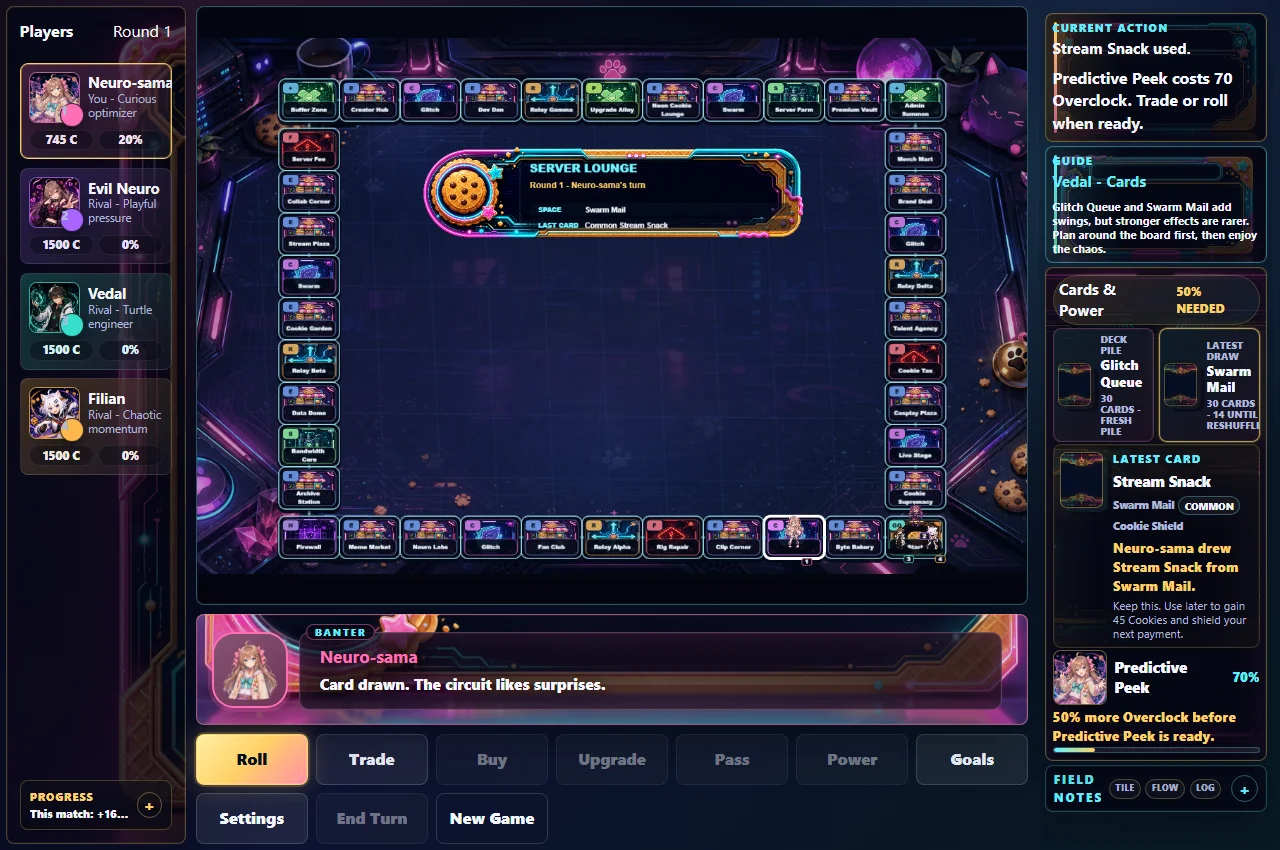
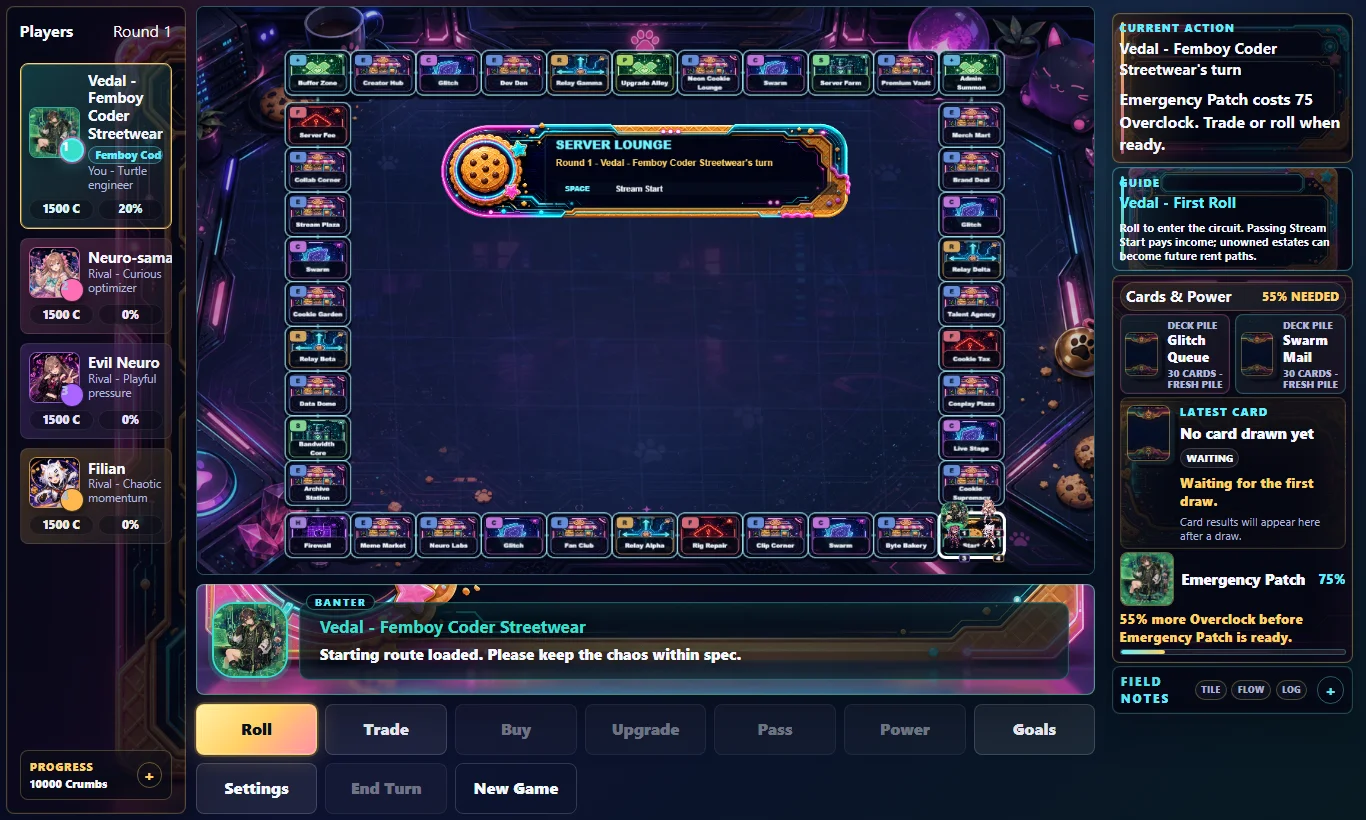
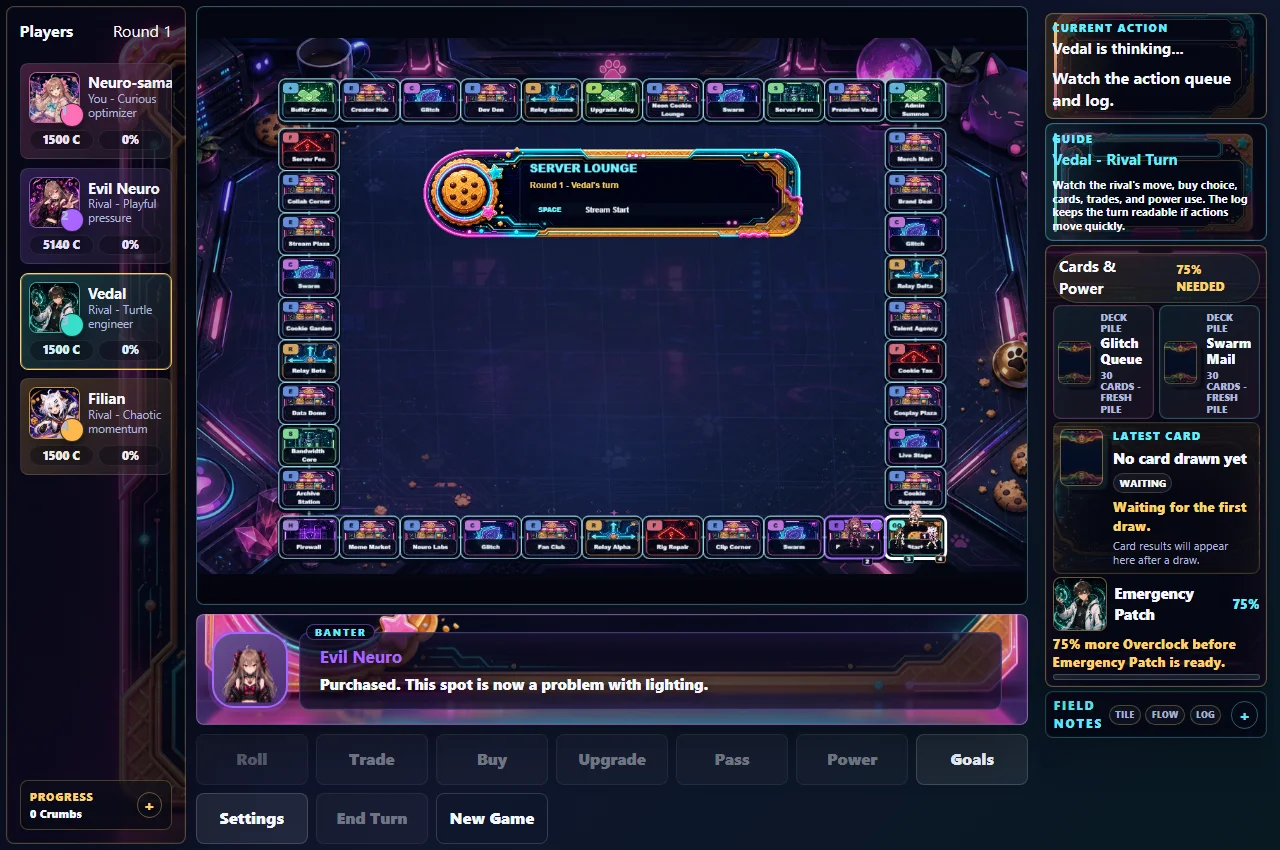
Cookie Circuit - Neuroverse Estates is a free, browser-based strategy board game by indie developer Clord. You pick a VTuber-inspired avatar, race three AI rivals around a glowing circuit of cookie estates, and win by buying property, collecting rent, trading for set pieces, and timing character powers. Matches run 20 to 40 minutes, save cosmetic progress between games, and the whole thing plays in your browser at clord.itch.io/cookie-circuit. A 230 MB desktop download exists too if you prefer a local build.
The game is a property-trading board game at heart, but it layers on three systems that separate good players from lucky ones: the Overclock economy that fuels character powers, the two card decks (Glitch Queue and Swarm Mail) that create comeback swings, and the pressure system that makes late Classic matches brutally expensive. This guide walks through all of it with exact numbers: the full 40-tile board map, rent formulas, every card in both decks, all three match modes, and the AI profiles you can exploit.
| Fact | Detail |
|---|---|
| Developer | Clord |
| Engine | Phaser 3.90.0 (HTML5) |
| Platforms | Browser (itch.io), Desktop download (230 MB) |
| Price | Free |
| Players | You + up to 3 AI rivals (local, no online multiplayer) |
| Genre | Strategy / Board Game / Card Game |
| Match Length | 20-40 minutes |
| Current Version | v1.0.1 |
| Match Modes | Classic, Quick, No-Elimination Timed |
| Boards | Classic Circuit, Festival Network, Subathon Spiral, Corrupted Cloud |
| Status | In development (checked September 2026) |
Who this guide is for: anyone who wants to win their first match instead of fumbling through it. The in-game tips are friendly, but they do not tell you where to spend, when to trade, or which tiles to upgrade. This guide covers all of that.
Getting Started
Step 1: Pick Your Avatar
Five characters are playable, and each one pairs a unique power with a distinct AI personality that also shows up when that character sits at the rival table.
| Character | Archetype | Power | Overclock Cost | Playstyle |
|---|---|---|---|---|
| Neuro-sama | Curious optimizer | Predictive Peek | 70 | Flexible: bend your next roll for board control |
| Evil Neuro | Playful pressure | Malicious Fork | 80 | Aggressive: pressure the richest rival |
| Vedal | Turtle engineer | Emergency Patch | 75 | Defensive: shield the next painful payment |
| Filian | Chaotic momentum | Parkour Pivot | 65 | Tempo: hop to the next action tile |
| Spring Neko | Imperial cat thief | Lucky Bell | 70 | Safety: shield plus emergency cookies |
For your first matches, take Vedal. Emergency Patch is the easiest power to use well because it never requires reading the board state. Neuro-sama is the strongest for learning because Predictive Peek turns random dice into a plan. Leave Evil Neuro and Filian for later; their powers need you to know exactly who is ahead and where the action tiles sit.
What each power actually pays in Cookies (numbers the game rarely surfaces):
| Power | Primary effect | Cookie rider |
|---|---|---|
| Predictive Peek | +1 on your next roll | +45 Cookies |
| Malicious Fork | Steals from the richest rival, capped at 90 | Full steal amount, but the target banks +14 Overclock |
| Emergency Patch | Shields the next payment | +60 Cookies |
| Parkour Pivot | Moves you to the nearest card tile, then resolves the landing | +50 Cookies |
| Lucky Bell | Shields the next payment | +35 Cookies |
Two rows change how you value these powers. Emergency Patch returns 60 Cookies on a 75 cost, so its real price is 15 Cookies for a shield, making it the cheapest answer in the game to a Level 3 rent hit. Malicious Fork caps its theft at 90 Cookies and hands the victim 14 Overclock, so against Vedal (420 buffer) it is a 90-Cookie poke that speeds up his power schedule; it is a knockout tool against Filian's 180 buffer, not a universal weapon.
The Overclock cap is 100 and your hand holds at most 5 cards. Banked Overclock beyond a power's cost does nothing, so fire a power before a big card draw rather than saving past the threshold.
Step 2: Choose Rivals and Board
The rival screen lists four characters and you pick up to three to sit against you. This matters more than it looks. If you want a relaxed match, include Vedal. His AI profile keeps a 420-cookie buffer, so he buys rarely and trades patiently. If you want chaos, include Filian. Her profile runs a thin 180-cookie buffer and buys almost everything she lands on. Evil Neuro is the spiteful trader, Spring Neko the sneaky opportunist, and Neuro-sama the balanced all-rounder. Full personality numbers live in the Advanced section.
Your first board should always be Classic Circuit. It is a single loop with balanced estate values, and every strategy in this guide assumes it. The other boards change the rules; they get their own section below.
Step 3: Understand the Turn
Each turn has a simple flow: plan, then roll, then resolve the tile you land on, then end. You start with 1500 Cookies in Classic mode. Passing or landing on Stream Start pays 200 Cookies. The dice are two six-sided dice, so rolls of 6, 7, and 8 are your most common outcomes. Everything in the planning step happens before you roll: trade, upgrade, play a held card, or fire your power.
Core Mechanics
Estates, Sets, and Rent
The Classic Circuit board has 40 tiles. Twenty-one of them are estates organized into color sets. Owning every estate in a set doubles the rent on all of them. Owning at least two in a set gives a 1.35x bonus even before the set is complete, and each adjacent estate you own adds another 8%.
| Set | Estates | Cost / Rent |
|---|---|---|
| Pink | Byte Bakery, Clip Corner | 60 / 12-14 |
| Cyan | Fan Club, Neuro Labs, Meme Market | 100-120 / 18-22 |
| Violet | Archive Station, Data Dome | 140 / 26 |
| Orange | Cookie Garden, Stream Plaza, Collab Corner | 160-180 / 30-34 |
| Red | Creator Hub, Dev Den | 200-210 / 38-40 |
| Gold | Neon Cookie Lounge, Premium Vault | 240-260 / 46-50 |
| Green | Merch Mart, Brand Deal | 280-300 / 54-58 |
| Blue | Talent Agency, Cosplay Plaza, Cookie Supremacy | 320-400 / 64-80 |
The rent formula that matters: base rent × set multiplier × upgrade multiplier × adjacency bonus. A completed Orange set with a Level 3 Collab Corner collects 34 × 2 × 3.55 ≈ 241 Cookies per landing. One bad landing on that tile costs a rival more than a third of their starting stack. Upgrading one estate inside a completed set is the single most efficient way to grow income in the game.
The Full Classic Circuit Map
Forty tiles, indexed from Stream Start. Use this to plan routes, boosts, and deny plays.
| # | Tile | Type | Set | Cost | Base Rent/Fee |
|---|---|---|---|---|---|
| 0 | Stream Start | Start | - | - | 200 income / 100 landing bonus |
| 1 | Byte Bakery | Estate | Pink | 60 | 12 |
| 2 | Swarm Mail | Card | - | - | draw |
| 3 | Clip Corner | Estate | Pink | 60 | 14 |
| 4 | Rig Repair | Tax | - | - | 100 |
| 5 | Relay Alpha | Relay | - | 200 | 25 × relay count |
| 6 | Fan Club | Estate | Cyan | 100 | 18 |
| 7 | Glitch Queue | Card | - | - | draw |
| 8 | Neuro Labs | Estate | Cyan | 110 | 20 |
| 9 | Meme Market | Estate | Cyan | 120 | 22 |
| 10 | Firewall Hold | Hold | - | - | pause |
| 11 | Archive Station | Estate | Violet | 140 | 26 |
| 12 | Bandwidth Core | Service | - | 150 | 18 × last roll |
| 13 | Data Dome | Estate | Violet | 140 | 26 |
| 14 | Relay Beta | Relay | - | 200 | 25 × relay count |
| 15 | Cookie Garden | Estate | Orange | 160 | 30 |
| 16 | Swarm Mail | Card | - | - | draw |
| 17 | Stream Plaza | Estate | Orange | 170 | 32 |
| 18 | Collab Corner | Estate | Orange | 180 | 34 |
| 19 | Server Fee | Tax | - | - | 120 |
| 20 | Buffer Zone | Safe | - | - | rest |
| 21 | Creator Hub | Estate | Red | 200 | 38 |
| 22 | Glitch Queue | Card | - | - | draw |
| 23 | Dev Den | Estate | Red | 210 | 40 |
| 24 | Relay Gamma | Relay | - | 200 | 25 × relay count |
| 25 | Upgrade Alley | Patch | - | - | free upgrade chance |
| 26 | Neon Cookie Lounge | Estate | Gold | 240 | 46 |
| 27 | Swarm Mail | Card | - | - | draw |
| 28 | Server Farm | Service | - | 150 | 18 × last roll |
| 29 | Premium Vault | Estate | Gold | 260 | 50 |
| 30 | Admin Summon | Safe | - | - | rest |
| 31 | Merch Mart | Estate | Green | 280 | 54 |
| 32 | Brand Deal | Estate | Green | 300 | 58 |
| 33 | Glitch Queue | Card | - | - | draw |
| 34 | Relay Delta | Relay | - | 200 | 25 × relay count |
| 35 | Talent Agency | Estate | Blue | 320 | 64 |
| 36 | Cookie Tax | Tax | - | - | 160 |
| 37 | Cosplay Plaza | Estate | Blue | 350 | 70 |
| 38 | Live Stage | Card | - | - | draw |
| 39 | Cookie Supremacy | Estate | Blue | 400 | 80 |
A few things jump out of this map. The Cyan cluster (tiles 6-9) is the densest property run in the first third of the board, which is why it is the best early target. The Orange set (15-18) sits right after Relay Beta, and the stretch from tile 25 to 29 packs Upgrade Alley plus both Gold estates. The Blue set is spread across the end of the loop, and tile 36 sits between Blue pieces, so chasing Blue means eating a 160-cookie tax on the way.
Upgrades
Estates upgrade to Level 3. You unlock upgrades by completing a set or by owning a run of three adjacent estates. Upgrade costs scale with the property price:
Level 0 → 1: 55% of the estate's cost (min 40)
Level 1 → 2: 80% of the estate's cost
Level 2 → 3: 105% of the estate's cost
Each level multiplies rent by 1 + (level × 0.85). A Level 3 estate collects 3.55x base rent. The Upgrade Alley tile and certain cards (Power Surge, Patch Alley, Upgrade Cheer) interact with this system, so landing on or steering toward Upgrade Alley after completing a set is a strong play.
Relays and Services
Four relay tiles (Relay Alpha, Beta, Gamma, Delta) cost 200 each and pay 25 base rent, but relay rent multiplies by your total relay count. Two relays collect 50 per landing, three collect 75, and all four collect 100. Because relays ignore the set system and just count ownership, they are the best mid-game investment if you can buy two.
The two service tiles, Bandwidth Core and Server Farm, rent for 18 × the last dice roll total. They are weak on calm boards but scale with the pressure system late game, since pressure multiplies their payout too.
The Card Decks
Two decks, Glitch Queue and Swarm Mail, feed the card tiles. Each deck holds 24 cards: 34 of the 48 cards in the game are Common, 16 Uncommon, 8 Rare, and 2 Legendary. Most cards are "keep" cards that sit in your hand until you choose to use them before a roll. v1.0.1 reworked the system around exactly this: hold cards, spend them at the right moment, and trade them when a rival values one more than you do. Your hand caps at 5 cards, so a stuffed hand stops collecting value, spend or trade down before you hit the cap.
Glitch Queue deck:
| Card | Rarity | Effect |
|---|---|---|
| Cookie Drop | Common | Gain 90 Cookies |
| Minor Payout | Common | Gain 80 Cookies |
| Small Refund | Common | Gain 55 Cookies |
| Quick Patch | Common | Gain 35 Cookies, +10 Overclock |
| Hotfix Coin | Common | Gain 45 Cookies and a shield |
| Soft Reset | Common | Shield, +8 Overclock |
| Buffer Bump | Common | +2 on your next roll |
| Syntax Snack | Common | Roll one die and move that many |
| Trace Route | Common | Move to nearest Relay |
| Cache Ping | Common | Draw one Swarm Mail card |
| Cookie Probe | Common | Draw one Glitch Queue card |
| Router Fee | Common | Pay 70 Cookies, gain 18 Overclock |
| Latency Toll | Common | Pay 50 Cookies, gain 18 Overclock |
| Cache Miss | Common | Pay 60 Cookies, gain 20 Overclock |
| Dropped Packet | Common | Pay 40 Cookies, gain 14 Overclock |
| Reroute Fee | Common | Pay 80 Cookies, gain 22 Overclock |
| Backup Cookie | Common | Gain 50 Cookies, +50 more if you are last |
| Momentum Patch | Uncommon | +3 on your next roll |
| Relay Pull | Uncommon | Move to nearest Relay |
| Patch Alley | Uncommon | Move to Upgrade Alley |
| Emergency Buffer | Uncommon | Gain 75 Cookies and a shield |
| Catch-Up Script | Uncommon | Gain 85 Cookies, +75 more if last |
| Safe Mode | Uncommon | Move to nearest safe tile |
| Overclock Burst | Uncommon | Gain 28 Overclock |
| Crowded Cache | Uncommon | Everyone gains 25, you gain 35 more |
| Safety Buffer | Rare | Shield, +25 Overclock |
| Cookie Jackpot | Rare | Gain 160 Cookies, +60 more if last |
| Recovery Loop | Rare | Gain 120 Cookies and a shield |
| Power Surge | Rare | Upgrade one eligible estate for free |
| Golden Patch | Legendary | Claim a random rival estate; owner paid 180 Cookies |
Swarm Mail deck:
| Card | Rarity | Effect |
|---|---|---|
| Fan Mail | Common | Gain 60 Cookies |
| Kind Clip | Common | +2 on your next roll |
| Cookie Comment | Common | Gain 70 Cookies |
| Tip Jar | Common | Gain 80 Cookies |
| Cozy Cookie | Common | Gain 65 Cookies |
| Gift Cookie | Common | Gain 75 Cookies |
| Mod Nudge | Common | Shield, +10 Overclock |
| Clip Boost | Common | Gain 40 Cookies, +12 Overclock |
| Chat Charge | Common | Gain 20 Overclock |
| Signal Boost | Common | Gain 35 Cookies, +18 Overclock |
| Stream Snack | Common | Gain 45 Cookies and a shield |
| Safe Emoji | Common | Move to nearest safe tile |
| Lighthearted Detour | Common | Move to nearest Relay |
| Support Ping | Common | Gain 55 Cookies, +45 more if last |
| Kind Refund | Common | Gain 90 Cookies, +40 more if last |
| Small Hype | Common | Everyone gains 15, you gain 15 more |
| Micro Raid | Common | Everyone gains 20, you gain 20 more |
| Cookie Raid | Uncommon | Everyone gains 35, you gain 35 more |
| Collab Ping | Uncommon | Everyone gains 30, you gain 55 more |
| Lucky Chat | Uncommon | Gain 100 Cookies and a shield |
| Clip Train | Uncommon | Roll one die and move that many |
| Moderator Cover | Uncommon | Shield, +22 Overclock |
| Upgrade Cheer | Uncommon | Move to Upgrade Alley |
| Comeback Wave | Uncommon | Gain 100 Cookies, +90 more if last |
| Warm Signal | Uncommon | Draw one Swarm Mail card |
| Hype Train | Rare | Everyone gains 45, you gain 90 more |
| Rare Support | Rare | Gain 150 Cookies and a shield |
| Super Chat | Rare | Take 120 Cookies from the richest rival (80 if nobody qualifies) |
| Full Chat Focus | Rare | Roll two dice and move the total |
| Front Page Raid | Legendary | Claim a random unowned estate for free |
Patterns worth noticing. The Glitch Queue is the "engine" deck: it pays in Overclock, movement, and free upgrades. Swarm Mail is the "money and shields" deck. Both decks carry catch-up cards that pay double digits extra when you are last, so trailing players draw real comeback fuel. The two legendary cards are board-state changers: Golden Patch steals property, Front Page Raid claims any unowned estate for free.
Cards can also be traded. In v1.0.1, offering a held card as trade currency is often smarter than spending Cookies, because rivals value cards at fixed trade values between 70 and 160.
Overclock and Powers
Character powers run on Overclock, a second resource you build from card effects, tax tiles, and (on Subathon Spiral) patch spaces. Powers cost between 65 and 80 Overclock and go on a 2-turn heat cooldown after use. Overclock carries across laps, so holding cards that grant Overclock for a future power activation is a real strategy. Quick and Timed modes also inject Overclock every round from round 2 onward, which makes powers a bigger part of those modes.
Match Modes Explained
The three modes are not cosmetic variants. They change starting cash, income, multipliers, and the win condition, and each one rewards a different strategy.
| Setting | Classic | Quick | Timed |
|---|---|---|---|
| Starting Cookies | 1500 | 1200 | 1300 |
| Lap income (pass start) | 200 | 150 | 180 |
| Start landing bonus | 100 | 75 | 90 |
| Rent multiplier | x1.00 | x1.16 | x1.05 |
| Tax multiplier | x1.00 | x0.90 | x0.85 |
| Pressure system | Round 10+, +30%/round, cap x8 | None | None |
| Round limit | None | 10 | 8 |
| Elimination | Yes | Yes | No |
| Win condition | Last standing | Net worth, round 10 | Net worth, round 8 |
| Property value at finish | 0.8x cost | 1.0x cost | 1.0x cost |
| Upgrade value at finish | 45/level | 45/level | 45/level |
| Overclock pulse (round 2+) | None | Leader +2, field +5, trailing +5, behind-leader +2 (threshold 280) | Leader +4, field +9, trailing +8, behind-leader +3 (threshold 220) |
Three strategic consequences fall out of this table.
In Classic, property value counts at only 0.8x at the finish and pressure never stops climbing, so the mode hard-rewards owning and upgrading estates. Hoarding cash is how you lose a Classic match you were winning.
In Quick, rent flows 16% hotter and net worth counts property at full price, so aggressive early buying is correct. The round-10 cutoff means every lap is 10% of the game; there is no time to wait for perfect rolls.
In Timed, nobody gets eliminated and the field feeds you Overclock every round from round 2. Powers fire constantly. Filian and Neuro-sama, whose powers depend on board position, are at their best here.
The Four Boards
Classic Circuit is the 40-tile single loop mapped above. Balanced values, predictable traffic, and the mode where the pressure system lives. Learn this board first.
Festival Network branches. Transit hubs split the route into garden and stage paths, and a festival buzz meter runs from 1 to 5, peaking at 4, that pumps event tiles along the way. The lounge costs 35 Cookies, tables cost 15, taking a branch pays 8 Overclock, and trailing players get a 45-cookie catch-up. Strategy here is route arbitration: pick the branch that feeds your sets, and use the buzz meter to time when event tiles are worth hitting.
Subathon Spiral winds inward, and its patch spaces charge your Overclock. If you have been starving for power energy on Classic, this board feeds it. Powers fire far more often, which makes character choice matter more than property luck.
Corrupted Cloud mutates. Glitch events change tile states mid-match, and board corruption feeds directly into the rent formula (mode rent × pressure × corruption). Estates can get hotter or colder under your feet. Value flexibility here: sets you can complete in two laps beat monster sets you complete in five, because the board will not sit still that long.
Step-by-Step Match Strategy
Opening Phase (Laps 1-3): Buy the Board
- Buy every estate you can afford while keeping at least 300 Cookies in reserve. Bankruptcy is the only real loss condition in Classic.
- Target one set early and commit. The Cyan set (Fan Club, Neuro Labs, Meme Market) is the best first target because three estates sit close together in the first third of the board.
- Pass on expensive blue estates in the opening. Cookie Supremacy at 400 Cookies is a trap when you could buy two Cyan estates for the same money.
- Draw every card you land on. Early cards fund purchases and build Overclock.
- Buy relay tiles when you can. Two relays beat any single estate for passive income.
Mid Game (Laps 4-7): Upgrade and Trade
- Complete your first set, then upgrade one estate to Level 2 immediately. The 2.7x multiplier starts forcing rivals to respect your corner of the board.
- Open the trade screen and hunt set pieces. The trade panel shows estimated values, so you can see exactly what a rival property is worth before you negotiate.
- Offer cards instead of Cookies when you can. A held card plus 60 Cookies often closes a deal that pure cash would not.
- Watch the rival personalities. Vedal refuses risky deals, Filian overpays for set pieces she wants, Evil Neuro counters aggressively, and Spring Neko values safety.
- Build Overclock toward your power. If you are Neuro-sama, Predictive Peek at 70 Overclock lets you steer your next roll onto a set piece.
End Game (Laps 8+): Close It Out
- Push your primary set to Level 3. In Classic, rent pressure starts multiplying from round 10, so a Level 3 Orange or Gold estate becomes a knockout weapon.
- Deny the leader. If a rival owns two of three in a set, buy or trade for the third even if you do not need it. Blocking a completed set is worth the cost.
- Save shield cards for the leader's upgraded corner. One blocked payment can be the difference between surviving and elimination.
- Use your power at the moment it wins, not when it is convenient. Malicious Fork should hit the richest rival right before they would buy a set piece.
- In Quick and Timed, remember the win condition is net worth. Property counts at full value and upgrades add 45 per level, so hoarding cash into the last rounds loses to a player who converted cash into property.
Match Sequence Cheat Sheet
Classic (aim to win by round 12):
  Laps 1-3   Buy Cyan set pieces, keep 300+ reserve
  Lap 4      Complete Cyan set, upgrade Fan Club to L2
  Laps 5-6   Trade cards for Orange/Red set pieces
  Lap 7      Buy a second relay if available
  Laps 8-9   Upgrade primary set to L3
  Lap 10+    Deny leader's sets, shield your corner, collect rent

Quick (10-round net worth):
  Laps 1-2   Buy aggressively, rent is boosted 16%
  Lap 4      First upgrade (earlier than Classic)
  Lap 6      Convert cash into property; net worth counts 100%
  Lap 8      Stop trading with the leader
  Lap 10     Highest net worth wins, not most cash

Timed (8 rounds, no elimination):
  Every round  Counts. Buy property early, upgrade once, bank the rest
  Round 2+    Overclock pulse feeds powers; use Parkour Pivot to grab action tiles
  Round 7     Final conversion: spend cash on any remaining set pieces
Advanced Tips
The Pressure System
Classic matches hide a time bomb. From round 10, every round adds 30% to all rent and tax payments, up to a maximum of 8x. The exact ladder:
| Round | Multiplier |
|---|---|
| 1-10 | 1.0x |
| 11 | 1.3x |
| 12 | 1.6x |
| 13 | 1.9x |
| 14 | 2.2x |
| 15 | 2.5x |
| 16 | 2.8x |
| 18 | 3.4x |
| 20 | 4.3x |
| 25 | 5.8x |
| 30+ | 8.0x (cap) |
The same multiplier hits both directions: it inflates the rent rivals pay you and the taxes you pay the bank. And the tax tiles scale one step further, because the board fee multiplier stacks with pressure on Corrupted Cloud and Subathon Spiral.
A match that runs to round 20 plays with 4x rents. This changes your strategy completely: passive players who banked cash instead of property get destroyed by the pressure multiplier, while property owners get richer every lap. In Classic, the correct play is almost always to own property. In Quick and Timed, pressure never activates, so cash hoarding is viable.
The Overclock kickback: every payment to the bank refunds 20 Overclock, win or lose, shield or not. Three tax landings plus two rent hits fund a 70-cost power without drawing a single card. When you are bleeding cookies in the late laps, your power meter is filling, plan the Predictive Peek or Emergency Patch for exactly the rounds you can least afford a bad landing.
Traffic and Positioning
With two dice, rolls of 6, 7, and 8 account for 44% of all outcomes. Tiles roughly 6 to 8 spaces ahead of Stream Start (the Cyan set and Relay Alpha region) see the most landings per lap. Upgrading estates in high-traffic positions generates more rent per match than upgrading expensive estates in dead zones. The Blue set at the far end of the board is powerful but lands rarely early, which is why experienced players complete Orange and Green before touching Blue.
Reading the AI Table
Each rival plays by a fixed personality profile. The numbers below are the actual values the AI uses to decide purchases and trades:
| Rival | Cash Buffer | Risk | Spite | Generosity | Trade Patience |
|---|---|---|---|---|---|
| Vedal | 420 | 0.28 | 0.08 | 0.18 | 0.80 |
| Neuro-sama | 260 | 0.55 | 0.15 | 0.35 | 0.70 |
| Evil Neuro | 220 | 0.72 | 0.60 | 0.12 | 0.45 |
| Spring Neko | 230 | 0.66 | 0.20 | 0.25 | 0.50 |
| Filian | 180 | 0.82 | 0.28 | 0.22 | 0.35 |
The buy decision runs on this logic:
AI buys a tile when:  cookies - cost
  >= cashBuffer
   - 120 (if it already owns tiles in that set)
   - 55  x adjacent estates it owns
   - 90  (if the purchase creates a 3-estate run)
That means Filian will happily buy a 300-cookie estate with only 480 in the bank. Punish that: trade her the piece she needs, take her Cookies, then watch her fail the next tax tile. The reverse is also true: Vedal needs a huge surplus before any purchase, so he is the safest trading partner and the hardest player to bankrupt.
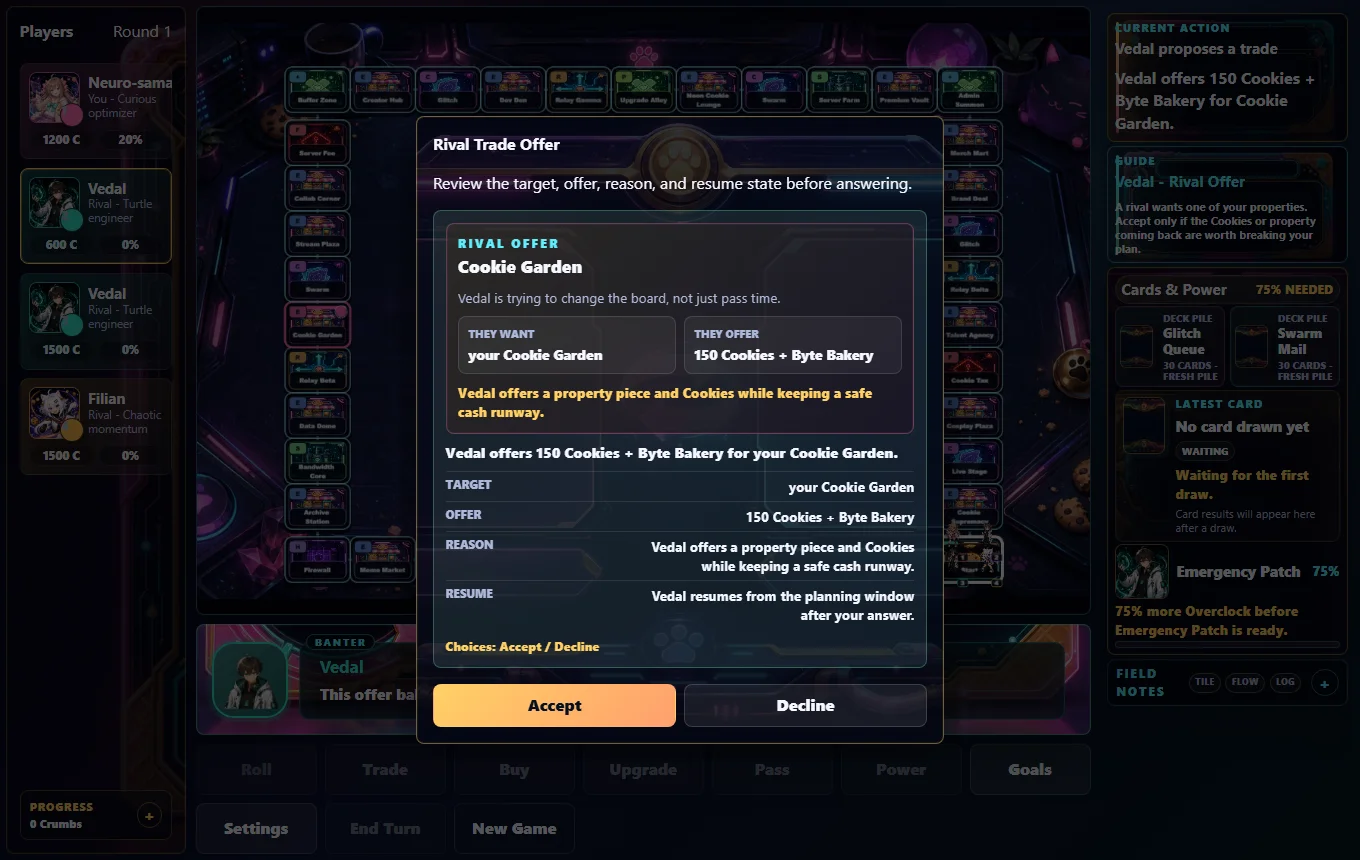
Trading has tells. Rivals open with reasons attached to offers ("sees value in that set and still keeps a safe cash runway"), and the trade dialog shows estimated values for every property on the table. Evil Neuro opened one observed match by offering 300 Cookies for a relay that cost 200, then escalated to cash plus a violet estate when refused. Accept escalation offers only when the property coming back beats what you are giving up.
Card Economy
Hold between 2 and 3 cards. Fewer than 2 and you have no answers; more than 4 and you are hoarding value that could be rent-generating property. Sell surplus cards early. A common card trades for 70 to 115 Cookies of value, which is often better than the 60 to 90 Cookies it would grant directly.
The strongest combo in the game: a shield card plus a completed set. Land on your own upgraded corner with a shield active and you collect rent while the shield waits for the next rival to arrive. On the other side, hold a boost card like Kind Clip until you are 2 to 3 spaces short of a set piece, then roll with +2.
Cards that pay extra when you are last (Backup Cookie, Catch-Up Script, Comeback Wave, Support Ping, Kind Refund) are worth more in a losing position than their face value suggests. If you are trailing, burn cash cards early and hold the last-place bonus cards until you actually are last.
The two movement families matter more than they look. Relay pulls (Trace Route, Relay Pull, Lighthearted Detour) hop you to income tiles, and Upgrade Alley cards (Patch Alley, Upgrade Cheer) convert a completed set into a free or accelerated upgrade. Holding one of each is a flexible default.
Goals, Secrets, and Cosmetics
Matches award Crumbs and XP for goals, and Crumbs buy cosmetics in the Bazaar. None of the cosmetics affect gameplay; they are pure drip for your pawn, nameplate, and UI. The goal list spans onboarding, property, trading, cards, character, board, and match categories, plus five secrets:
| Goal | Requirement | Reward |
|---|---|---|
| First Circuit Roll | Roll the dice in your first match | 75 Crumbs, 20 XP |
| First Node Claimed | Buy your first property | 100 Crumbs, 30 XP, badge |
| Back Around | Pass Stream Start | 100 Crumbs, 30 XP |
| Circuit Complete | Own a complete set | 160 Crumbs, 45 XP |
| Deal Maker | Get a trade accepted | 150 Crumbs |
| Table Regular | Complete 5 trades | Crumbs + XP |
| Inbox Active | Draw 10 cards | Crumbs + XP |
| Overclock Habit | Use powers 5 times | Crumbs + XP |
| Five Loops | Pass start 5 times in one match | Crumbs + XP |
| First Circuit Win | Win a match | Big payout |
| Secret: Boxcars | Roll a natural 12 | Badge |
| Secret: Premium Invoice | Collect a single rent of 200+ | Badge |
| Secret: Rare Signal | Draw 3 rare cards | Badge |
| Secret: Fully Patched | Upgrade an estate to Level 3 | Badge |
| Secret: Fast Circuit | Win a Quick match by round 10 | Badge |
Goals complete mid-match and pin to the side panel, so a single strong match can knock out the whole onboarding block. Premium Invoice is easiest with a Level 3 Orange or Gold estate in a pressure-late Classic match. Fast Circuit wants Quick mode with the aggressive opening described above.
The rest of the 40-goal list, beyond the table above, so you know what is still paying out after your first weekend:
| Goal | Requirement |
|---|---|
| First Queue Pull | Draw your first card |
| Fee Paid / Fee Veteran | Pay the bank once / three times |
| Rent Reminder | Pay rent to a rival once |
| Small Portfolio / Board Presence | Buy 3 / 8 property nodes lifetime |
| Relay Investor / Service Contract | Own a Relay Hub / a service node |
| Server Farm Starter | Upgrade completed-set estates three times |
| Landlord Loop | Collect 500 total lifetime rent |
| Mixed Offer / Clean Swap / Counter Accepted / Rival Offer Accepted | Trade variety goals |
| Rare Pull / Glitch Regular / Swarm Regular / Uncommon Streak | Card draw goals |
| Comeback Spark / Overclock Habit | Use powers 1 / 5 times |
| No Overlap | All four pawns share one tile |
| Quiet Landing / Patch Visit | Land on a safe tile / Upgrade Alley |
| Five Loops | Pass Stream Start five times in one match |
| Circuit Regular | Finish three matches |
Cosmetics confirmed in the current build: the Fresh Crumb title, Cookie Spark Badge, Cookie Coin Pawn and Glitch Ring Base tokens, Pastel Punk Nameplate, and the Neon Bakery UI theme. All of them are Crumbs-only purchases in the Bazaar and none touch match rules.
Settings Worth Changing
Open Settings before your first match. Turn on color-safe token markers if you struggle to tell the four pawns apart on a bright board. Text size offers Normal, Large, and Extra Large, and reduced motion is available for accessibility. Audio defaults are fine: master 80%, music 70%, voices 80%, and every voice line can be muted independently.
Playing the Browser Build Smoothly
Cookie Circuit runs on Phaser with WebGL, so it wants a modern desktop browser. A few practical notes:
- If the board stutters, enable hardware acceleration in your browser settings and close other heavy tabs. The animated board background is the heaviest element.
- The itch.io embed can feel cramped on small windows. Fullscreen the page (the icon in the embed's corner) for the full layout.
- Progress (Crumbs, ranks, goals, cosmetics) persists between sessions. Mid-match state does not save, so budget 20 to 40 minutes for a full Classic match.
- No dedicated mobile build exists. The UI is mouse-first; touch works poorly on small screens.
- If the browser misbehaves, the 230 MB desktop download is the same v1.0.1 build and sidesteps embed quirks entirely.
Developer Background
Clord is a solo developer and Cookie Circuit is their fan-game project: an original board-game design starring a cast inspired by the Neuro-sama VTuber universe, with each character voiced and given distinct dialogue during matches. The build runs on Phaser, and the itch.io page discloses AI assistance for code, graphics, sounds, and text under Clord's direction. The project launched June 18, 2026, and v1.0.1 shipped the same day with a reworked card system and card trading. The page remains marked "in development," so more boards, characters, or systems may arrive; as of October 2026, v1.0.1 is the current build with no additional patch notes. The character files also confirm the cast's permissions are explicit: the Neuro-sama trio and Filian sit in approved fan-game groups, Spring Neko is the project owner's original avatar, and two original fallback characters (Cookie Cadet with a 150-Cookie cache power, Glitch Scout with a forward jump) exist in the files but are not selectable in normal play, worth knowing if a future patch flips them on.
How It Compares
Next to classic property-trading board games, the skeleton is familiar: 40 tiles, color sets, rent, upgrades, bankruptcy. The differences are where the strategy lives:
- Powers and Overclock replace pure dice luck. A well-timed Predictive Peek or Emergency Patch is worth several properties over a match.
- Held cards create a second economy. Cards trade at fixed values, so your hand is a wallet.
- The pressure system puts a hard clock on Classic. Rent inflation up to 8x means late-game landings decide everything, and there is no equivalent in traditional property games.
- AI personalities are published numbers, not faceless opponents. You can play the cash buffers and risk values directly.
- It is singleplayer only. There is no online multiplayer; every match is you against up to three AI personalities at a local table.
- It is free, with cosmetics bought by earned Crumbs and no real-money store.
FAQ
Where do I play Cookie Circuit? Free in your browser at clord.itch.io/cookie-circuit. A 230 MB desktop download is also available.
How many players? You plus up to three AI rivals at a four-pawn table, picked from a bench of four characters.
How much does it cost? Free. Cosmetic unlocks cost Crumbs earned in matches, never real money.
How long is a match? 20 to 40 minutes. Quick mode is the shortest, Classic the longest.
What is Overclock? A resource built from cards, taxes, and some boards. Character powers spend it, then recharge over 2 heat turns.
What happens when a player goes bankrupt in Classic? They are eliminated. The match continues until one player survives or the others concede the net worth lead.
What is the difference between the three modes? Classic is open-ended with elimination and rising rent pressure after round 10. Quick ends at round 10 by net worth. Timed ends at round 8 by net worth with no eliminations and constant Overclock pulses.
Which character is best for beginners? Vedal. Emergency Patch is simple, and his cautious AI keeps rivals from snowballing too fast.
What is the fastest way to earn Crumbs? Complete onboarding goals in one match, then farm Deal Maker and trading goals in Quick mode, which finishes fast.
Does the game save progress? Crumbs, ranks, goals, and cosmetics save between matches. Mid-match state does not.
Is there online multiplayer? No. Every match is local: you versus AI rivals.
Does it work on mobile or Steam Deck? There is no dedicated mobile or Deck build. The browser version is playable on anything that runs a modern browser, but the UI is designed around a mouse.
Is the game still updated? The itch.io page is marked in development. v1.0.1 (June 2026) is the current build as of September 2026.
What is the single most important tip? Own property early. In Classic the pressure system punishes cash hoarders after round 10, so convert Cookies into estates, complete one set, and let rent plus pressure do the killing.
Character Deep Dives
The avatar table above tells you what each power does. This section tells you when the power actually wins games, because every power has two or three moments per match where it is worth its entire Overclock cost and a dozen moments where firing it wastes a cooldown.
Neuro-sama — Predictive Peek (70 Overclock)
Predictive Peek bends your next roll toward a target tile, which makes it the strongest routing tool in the game. Dice randomness is the biggest source of variance in Cookie Circuit, and this power deletes variance for one turn.
The three firing windows that matter:
- Set completion. You are 4 to 7 tiles short of closing your Cyan or Orange set. Peek, complete the set, and every estate in it doubles rent immediately. A turn-5 set completion is worth 300+ Cookies over the remaining match, five times the cost of the power.
- Relay sniping. An unowned Relay sits ahead. Two relays beat any single estate for income, so a free routing onto Relay Alpha before a rival passes it is a quiet power play.
- Tax avoidance. You are 1 to 2 spaces upstream of Cookie Tax (tile 36) with under 200 Cookies banked. Peek moves you onto a safe tile or past the tax. Emergency use, but it wins ugly games.
Mode fit: Timed mode is Neuro-sama's home. The constant Overclock pulses mean Peek comes off cooldown every other round, so you are effectively choosing your landing spots for half the match. In Classic, save the first Peek for the set-completion window and hold the second for endgame denial.
Counter-AI line: Filian overpays for set pieces she wants. Peek onto her target estate before she lands there and her thin 180-cookie buffer forces her to overbid when you offer it back.
Vedal — Emergency Patch (75 Overclock)
Emergency Patch shields your next painful payment. It is reactive, which makes it the lowest-skill power in the game and, in long Classic matches, one of the highest-value.
The math: a Level 3 Gold estate under a 4x pressure multiplier collects 50 × 3.55 × 4 ≈ 710 Cookies. That single blocked landing pays for Emergency Patch nine times over, and since the power also returns 60 Cookies on use, its net cost is 15 Overclock's worth of Cookies for a shield. The shield is only wasted if you fire it on a turn where nobody can reach your corner, so the skill is in reading the board: watch which rival pawns sit 6 to 9 tiles upstream of your upgraded estates and fire the patch the planning phase before they arrive.
Mode fit: Classic only. In Quick and Timed, matches end before the pressure multiplier grows teeth, and net-worth modes reward spending Overclock-income on property instead. If you queue Vedal outside Classic, treat the power as insurance for one bad tax tile and nothing more.
Counter-AI line: Vedal's own AI keeps a 420-cookie buffer and trades patiently. He is the safest rival to include in your match if you plan an aggressive buy-out, because he rarely contests early estates and almost never bankrupts himself chasing property.
Evil Neuro — Malicious Fork (80 Overclock)
Malicious Fork pressures the richest rival directly. It is the only power that attacks another player's economy head-on, which makes it the strongest eliminator tool and the weakest snowball tool: fire it while you are ahead and you protect your lead, fire it while behind and you are burning resources you cannot replace.
The firing rule: fire it in the planning phase immediately before the leader would complete a purchase that matters, a third Blue estate, a relay, an upgrade on a completed set. The steal caps at 90 Cookies and hands the target 14 Overclock, so the real damage is timing: a leader who lands on your corner one turn short of buying set denial is a leader who loses that set, and the 14 Overclock you donated speeds up a power that will not save them.
Mode fit: Classic elimination matches. Malicious Fork plus a Level 3 Orange corner is a bankruptcy engine: pressure the leader's cash, tax tiles drain the rest, and the AI's buy logic (Filian especially) keeps their buffer too thin to survive your rent. In Timed mode there is no elimination, so the power has no kill condition and should be skipped entirely.
Counter-AI line: Evil Neuro's AI profile (spite 0.60, generosity 0.12) counters aggressive trades and opens with escalating offers. If she sits at your table, hold your set pieces until she escalates twice — her second offer typically beats market value.
Filian — Parkour Pivot (65 Overclock)
Parkour Pivot hops you to the next action tile. It is the cheapest power and the most positioning-dependent: card tiles, Upgrade Alley, and the safe tiles are all action tiles, so the pivot is worth exactly as much as the next tile's value to you.
The two uses that pay:
- Card chaining. Landing on a Glitch Queue tile draws a card, and the pivot re-positions you onto the next card tile two turns early. Card advantage compounds: a hand of 3 held cards is a wallet worth 70 to 160 Cookies per card in trades, and movement cards (Trace Route, Relay Pull, Patch Alley) are the cheapest routing in the game.
- Upgrade Alley delivery. You completed a set this lap. Pivoting onto Upgrade Alley (tile 25) converts that set into a free or accelerated upgrade one lap sooner, and the pivot hands you 50 Cookies for the trouble. The Level 2 multiplier (2.7x rent) starting a lap early is worth several hundred Cookies in a Classic match.
Mode fit: Timed mode, again. Overclock pulses feed her cheap power constantly, and the 8-round limit means tempo gains matter double. In Classic she is fine but not special — her 180-cookie AI buffer makes Filian-as-rival more dangerous than Filian-as-avatar.
Counter-AI line: never trade Filian the estate adjacent to her existing pieces at market price. Her risk profile (0.82) means she will pay well over it, and her cash buffer means the payment hurts.
Spring Neko — Lucky Bell (70 Overclock)
Lucky Bell grants a shield plus 35 emergency Cookies. It is a safety valve with a small economy engine attached, and the guide's own testing frame is right: it never requires board reading, so it is the second-easiest power to use well.
When it beats Emergency Patch: the shield plus Cookie injection means Lucky Bell is both defense and tempo. Fire it whenever your cash dips under 300 with unowned estates ahead — the Cookies fund the buy, the shield covers the rent trap you are about to walk into. Patch can only do one of those jobs.
Mode fit: Quick mode. The 10-round cutoff and 16% rent boost mean games swing fast and a single blocked payment decides eliminations. Neko's shield is a 200-plus-Cookie swing in exactly the rounds that matter.
Counter-AI line: Neko's AI (patience 0.50, generosity 0.25) trades fairly but takes safe deals first. Offer her trades that include shields or small guaranteed Cookies over big speculative ones and she accepts below-market packages.
The Overclock Economy
Overclock is a second currency, and most players bankrupt their power schedule without noticing. Here is the income math.
Income sources:
| Source | Overclock | Frequency |
|---|---|---|
| Pay-cost cards (Router Fee, Latency Toll, Cache Miss, Dropped Packet, Reroute Fee) | +14 to +22 | Draw-dependent |
| Quick Patch | +10 | Common draw |
| Soft Reset | +8 | Common draw |
| Clip Boost / Signal Boost / Chat Charge / Mod Nudge / Moderator Cover | +10 to +22 | Common draws |
| Overclock Burst | +28 | Uncommon draw |
| Safety Buffer | +25 | Rare draw |
| Tax tiles (Rig Repair, Server Fee, Cookie Tax) | Board-dependent | Per landing |
| Festival Network branch tiles | +8 per branch take | Per pass |
| Subathon Spiral patch spaces | Charge per landing | Per landing |
| Quick mode pulse (round 2+) | +2 to +5 per round | Guaranteed |
| Timed mode pulse (round 2+) | +3 to +9 per round | Guaranteed |
Cost of a power: 65 to 80 Overclock, then a 2-turn heat cooldown.
The recharge timeline: in Classic with no pulses, a typical player draws one Overclock-bearing card every 3 to 4 card tiles and passes a tax tile every other lap. Realistic income is 15 to 25 Overclock per lap, so a power comes online roughly every 3 laps. That is your true cooldown, and it means the three or four power activations you get per Classic match are a budget. Plan them in advance: Neuro-sama (set completion, relay, denial), Vedal (two rent blocks, one tax block).
Pulse math in Timed mode: the round-2+ pulse pays the leader +4, the field +9, and the trailing player +8, with a further +3 if you sit more than 220 net worth behind the leader. Quick mode runs the same logic smaller: +2 leader, +5 field, +5 trailing, +2 beyond 280 behind. The practical read: in Timed mode you bank 8 to 12 Overclock per round for free, so a 70-cost power recharges in about 6 to 8 rounds with zero card help. Powers fire nearly every other activation window from mid-game on, which is why Timed mode is the powers board.
The first-turn edge: the human player opens every match with 20 Overclock banked; all AI rivals start at zero. That is a sixth of a Predictive Peek before anything happens, and it means the first power of the match usually belongs to you if you draw one Overclock card early. Never skip a turn-1 card tile.
Landing Odds and Traffic Math
Two six-sided dice produce 36 combinations. The distribution below drives every positioning decision in the game.
| Roll | Combinations | Probability |
|---|---|---|
| 2 | 1 | 2.8% |
| 3 | 2 | 5.6% |
| 4 | 3 | 8.3% |
| 5 | 4 | 11.1% |
| 6 | 5 | 13.9% |
| 7 | 6 | 16.7% |
| 8 | 5 | 13.9% |
| 9 | 4 | 11.1% |
| 10 | 3 | 8.3% |
| 11 | 2 | 5.6% |
| 12 | 1 | 2.8% |
Rolls of 6, 7, and 8 account for 44.4% of all landings. Rolls of 5 through 9 account for 72.2%.
What this means for upgrading: in Classic, the tiles that see the most traffic per lap are the ones 5 to 9 spaces ahead of the highest-traffic tiles, which are the start-of-lap positions. The Cyan set (tiles 6 to 9) sits exactly 6 to 9 spaces past Stream Start — it is not a coincidence that it is the best early buy, it is the probability sweet spot. The Orange set (15 to 18) sits 5 to 8 past the Cyan cluster, making it the second-highest traffic zone.
The Blue set trap: tiles 35, 37, and 39 sit at the far end of the loop, and the highest-probability rolls landing there come from positions around tiles 26 to 33, which see less traffic early. Blue estates also cost 320 to 400. A Level 3 Cookie Supremacy collects 80 × 3.55 ≈ 284 per landing, but the landings arrive later and less often. Complete Orange and Green first; buy Blue when your income can carry the purchase without dropping your reserve under 300.
Upgrade priority by expected value: expected rent per lap equals base rent × set multiplier × level multiplier × landing probability. Worked example, mid-game Cyan set complete:
Fan Club (tile 6), Level 2:
  18 × 2 × 2.7 = 97.2 per landing
  Landing odds per lap (rolls 6-9 from start region): ~38%
  Expected value: ~37 Cookies/lap

Neon Cookie Lounge (tile 26), Level 2:
  46 × 2 × 2.7 = 248.4 per landing
  Landing odds per lap: ~12%
  Expected value: ~30 Cookies/lap
The expensive Gold tile earns less per lap than the cheap Cyan tile until the late laps, when board-wide traffic from all four pawns evens the distribution. Upgrade cheap high-traffic sets first, expensive sets when laps are flying.
The Trading Playbook
Trades decide Classic matches. The AI evaluates offers through fixed personality values, so negotiation is a solvable problem.
Valuation basics: the trade panel shows estimated values for everything on the table. Estates value near cost (0.8x to 1.1x depending on set completion potential), cards value 70 to 160, and relays value above cost once a rival owns one. Open every negotiation knowing the panel numbers; any offer you accept above panel value is profit by definition.
Per-rival playbooks:
| Rival | What they accept | What they refuse | Your line |
|---|---|---|---|
| Vedal | Patient multi-asset deals, cash-heavy offers | Anything dropping his buffer below ~420 equivalent | Offer cash + a surplus card; expect slow, fair deals |
| Neuro-sama | Balanced value trades | Lopsided requests | Trade set pieces straight across at panel value |
| Evil Neuro | Aggressive escalation games, spite-driven counters | First offers, always | Lowball once, absorb her counter, accept the second offer |
| Spring Neko | Safety packages (shields, small guaranteed Cookies) | Speculative big payouts | Card + small cash beats card + big cash |
| Filian | Anything feeding her sets, immediately | Waiting | Name 130-150% of panel value; her 180 buffer means she overpays |
Escalation handling: rivals open with reasons attached ("sees value in that set and still keeps a safe cash runway"). The reason text telegraphs what they want. When a rival escalates twice without acceptance, their internal patience value is exhausted for that turn — Neuro (0.70) and Vedal (0.80) come back next lap, Filian (0.35) and Evil Neuro (0.45) may not. If the deal matters, close it on the second offer.
Card-as-currency: a held Common card is worth 70 to 115 Cookies of trade value against a 60 to 90 direct-use value. Selling surplus cards early funds property purchases, and property compounds while cards expire. Hold a maximum of 3, sell the rest.
The counteroffer ceiling: the AI accepts any counteroffer up to a patience cap computed from its own generosity stat: target value × (1.1 + generosity × 0.18). Worked ceilings per rival:
| Rival | Generosity | Will accept counters up to |
|---|---|---|
| Evil Neuro | 0.12 | 112% of panel value (the stingiest) |
| Vedal | 0.18 | 113% |
| Filian | 0.22 | 114% |
| Spring Neko | 0.25 | 115% |
| Neuro-sama | 0.35 | 116% (the loosest) |
The practical play: when the AI counters your offer, its counter lands near that ceiling. Accepting the second offer usually beats haggling further, because no rival budges past its ceiling and Evil Neuro's 112% cap makes prolonged negotiation with her pure waste. The AI also prices denial pieces against you: asking for a tile where you own 2 of 3 adds 95 plus 45 per set-mate you already own, so if the panel value jumps oddly, that is the denial premium, send a different piece instead or pay it knowingly.
Two more AI internals worth exploiting. The AI offers you at most one trade per round and suppresses the rest, so a quiet round 3 is normal, not a broken trade system. And when it picks its ask target, it weights tiles by 90 Overclock-equivalents of synergy per set-mate it already owns, so rivals come for the exact piece that completes their set, pre-empt that by trading the piece away to a different rival before the owner comes knocking.
The denial trade: when the leader owns 2 of 3 in a set, the third estate is worth more to you as a wall than as income. Offer the leader's rival set-mate (a piece they cannot complete) plus cash for the blocking tile. The AI values pieces by their own set progress, so a useless-to-them tile prices cheap and blocks a 2x rent multiplier for the rest of the match.
Bankruptcy Math
Classic elimination is a cash-flow death, not a single hit. Here is the kill sequence.
The pieces of a rent kill, worked end to end:
Target: Filian (AI buffer 180 Cookies)
Your weapon: Orange set complete, Collab Corner at Level 3

Base rent:            34
Set multiplier:       ×2
Level multiplier:     ×3.55
Landing payment:      241.4 Cookies

Round 14 pressure:    1 + (14-10) × 0.30 = 2.2x
Payment with pressure: 241.4 × 2.2 ≈ 531 Cookies
Filian buys almost everything she lands on with a 180-cookie reserve. One landing on your corner drops her to negative; the AI sells nothing back at a profit, so she is eliminated on the next tax tile (100 to 160 Cookies) unless another rival props her up. Against Vedal the same kill takes three or four landings because his buffer absorbs the hits — bankruptcy the cautious AIs through tax tiles and Blue-set rent over many laps, not single knockouts.
What elimination actually does to the board: a bankrupt player's properties do not go to the bank or the creditor. Every estate they owned returns to unowned, upgrades included, and anyone can buy them on the next landing at base price. This creates the strangest money move in the game: if Filian is about to die holding a half-upgraded Orange estate you want, buying nothing for one lap and letting the tax tiles execute her can hand you a discounted set. The reverse applies to you, never hold your last useful set pieces while insolvent; trade them away for survivable cash before the kill lands, because traded property keeps its upgrades and eliminated property loses its owner.
Defending your own cash line: keep 300 Cookies minimum once any rival completes a set, and 450 once any estate on the board hits Level 3. Shield cards (Hotfix Coin, Soft Reset, Stream Snack, Emergency Buffer, Lucky Chat, Recovery Loop, Rare Support) each block one payment — hold at least one once a Level 3 estate exists anywhere. Emergency Patch and Lucky Bell block one payment each as powers.
The tax-tile squeeze: Rig Repair (100), Server Fee (120), and Cookie Tax (160) cost 380 per full lap under zero pressure. Under round-16 pressure (2.8x) the same lap costs 1,064 in taxes alone. A player without property income cannot survive the late Classic laps; the mode is designed so that renting is the only sustainable economy. Never reach round 15 without at least one complete set.
Mode-Specific Build Orders
The match sequence cheat sheet covers turn order. These are the build orders behind it — what to own by which checkpoint.
Classic (target: win by round 12-16):
Checkpoint      Own
End of lap 2    4+ estates, 1 relay, 250+ reserve
End of lap 3    Cyan complete OR 5 scattered estates + 2 relays
End of lap 5    First set complete, one Level 2 upgrade, 2-3 card hand
End of lap 7    Second set complete or Blue denial piece, second relay
End of lap 9    Primary set at Level 3, shield card held, 400+ reserve
Round 10+       Pressure x1.3 arrives: stop buying, upgrade and deny
Round 12-16     Rival landings on your corner force eliminations
Quick (10-round net worth):
Checkpoint      Own
End of lap 2    5+ estates (rent runs 16% hot, buy aggressively)
End of lap 4    First upgrade done (earlier than Classic — every lap is 10% of the game)
End of lap 6    60%+ of net worth in property, not cash
End of lap 8    Stop trading (trades that help rivals now help the leader)
Lap 10          Highest net worth: property at 1.0x cost + 45/upgrade level
Timed (8 rounds, no elimination):
Checkpoint      Own
Round 1-2       Buy every affordable estate; elimination is off
Round 2+        Overclock pulses begin: fire powers on cooldown
Round 4         First upgrade on your highest-traffic set
Round 6         Position for end-of-match landings: hold a boost card
Round 7         Convert all remaining cash into any property (1.0x value)
Round 8         Net worth comparison; upgrades add 45 each
Route Play on the Other Three Boards
Festival Network (branching): every transit hub splits the route into garden and stage paths. The rules:
- Take the branch that feeds your incomplete set first, income second, event tiles third. A set piece is worth 100+ Cookies of future rent; a branch bonus is 8 Overclock.
- The festival buzz meter starts at 1 and runs to 5, with events pumping hardest at 4+. Taking a branch adds 1 buzz, calm turns strip 1, and buzz feeds the event tiles' payouts. Time your Parkour Pivot and movement cards for rounds when the meter reads 3 or higher.
- The lounge costs 35 Cookies and tables cost 15 — these are position purchases. Pay them only when the next tiles past them are your set pieces.
- The 45-cookie trailing catch-up makes deliberate falls from the lead profitable in mid-game: buy nothing for one lap, collect the catch-up, then re-enter the property market richer.
- Festival taxes hit four times per lap: 100 at Parking Fee, 120 at Sponsor Lights, 135 at Speaker Fee, 150 at Cleanup Fee. That is 505 per clean lap at zero pressure, the heaviest tax load of any board. Income needs to come from properties, not laps.
- Rooftop Booth is the only single-estate set in the game. At 180 Cookies it is instantly "complete," which means double rent from the moment you buy and full upgrade eligibility: 99 to Level 1, 144 to Level 2, 189 to Level 3. A Level 3 Rooftop Booth pays 34 × 2 × 3.55 ≈ 241 per landing for a total investment of 612, the cheapest rent monster the game allows. Buy it on sight; deny it even harder.
Subathon Spiral (inward spiral): the tempo board. Three exact numbers drive it:
- Every pass of Stream Start pays +10 Overclock on top of lap income, and the Tempo Patch tile pays 18 + 8 = 26 per landing. Your power meter refills about once per lap without drawing a card.
- Taxes here carry a 1.08 board multiplier: Energy Fee 110 → 119, Overtime Fee 130 → 140, Crash Fee 180 → 194 per landing.
- Character choice outweighs property luck. Neuro-sama and Filian chain powers every other round; Vedal's reactive shield fires constantly against spiral tax density.
Corrupted Cloud (mutating): the risk board, with a corruption meter that starts at 1 and runs to 4:
- Each corruption level adds +6% to all rent and +8% to all fees, capping at +24% rent and +32% fees at level 4. Glitch card draws pay +1 extra card at corruption 3+.
- The meter moves constantly: glitch events push it up, patch landings pull it down 2, start passes pull it down 1. High corruption (3+) also arms the rift tiles, Static Rift throws pawns 4 tiles forward, Packet Rift 5, Storm Rift drags 6 back.
- Rent = mode rent × pressure × corruption. Estates get hotter or colder under you. Complete sets you can close within two laps; a monster set that takes five laps will be worth different money by the time it lands.
- Re-read the board every corruption event. A Level 3 estate hit with a cold corruption drops below an unupgraded hot one; move your upgrade budget accordingly.
- Hold shields permanently. Corruption swings make rent payments spiky, and one shield card absorbs a 3x corrupted landing.
- The relays here cost 190, the cheapest in the game, which makes the double-relay opening stronger on Corrupted Cloud than anywhere else.
The One-Match Goal Speedrun
Fifteen goals plus five secrets sit in the goal list, and almost all of them complete in a single planned Classic match:
Match plan (Classic, Vedal included as rival):
1. First Circuit Roll      — automatic on your first planning phase
2. First Node Claimed      — buy Byte Bakery on tile 1 your first landing
3. Back Around             — pass Stream Start (lap 1 guaranteed)
4. Inbox Active            — route through card tiles; 10 draws across 3 laps
5. Circuit Complete        — complete Cyan by lap 4 (buy pieces, trade if short)
6. Deal Maker + Table Regular — offer 5 trades from lap 2 on; Filian accepts fast
7. Overclock Habit         — fire Predictive Peek 5 times (tax tiles + pay-cards fund it)
8. Five Loops              — passes 5 by lap 6; +2 roll cards (Buffer Bump, Kind Clip) guarantee pace
9. Fully Patched (secret)  — Level 3 on Collab Corner once Orange completes
10. Premium Invoice (secret) — a 200+ rent lands naturally on a Level 3 estate after round 10
11. Rare Signal (secret)   — 3 rare draws over 10+ cards is near-certain (12% rare rate)
12. First Circuit Win      — the bankruptcy math above closes it out
13. Boxcars (secret)       — 2.8% per natural roll; chain attempts in later Quick matches
14. Fast Circuit (secret)  — run the Quick build order in a separate 10-round match
Crumbs and XP flow from goals, not match wins alone, so even a lost speedrun match pays out most of the list. Queue the secrets you miss into Quick mode replays, which run half the length.
Advanced Mistakes: Failure Patterns by Phase
The FAQ lists beginner errors. These are the mid-tier ones, sorted by when they appear in a match:
| Phase | Mistake | What It Costs | The Fix |
|---|---|---|---|
| Opening | Buying Cookie Supremacy on feel | 400 Cookies for a low-traffic tile | Blue only after two sets are done |
| Opening | Hoarding past 600 cash | A lap of zero income while rivals complete sets | Reserve is 300, not 600 |
| Opening | Skipping relay tiles | Losing the best passive income in the game | Two relays before any third estate |
| Mid | Upgrading before set completion | 55-105% costs with no set multiplier attached | Complete the set, then upgrade |
| Mid | Trading from need | Paying escalation prices for set-mates | Open trades on laps 2-3 before you need pieces |
| Mid | Ignoring Filian's board presence | She completes 3-estate runs by lap 5 uncontested | Deny-buy her targets even at a premium |
| Late | Firing powers on cooldown reflex | Wasting 70-80 Overclock on nothing turns | Fire only on the firing windows above |
| Late | Cash > 800 in round 12+ Classic | Net worth bleed + pressure kills cash holders | Convert to property every lap |
| Late | Shields spent on small rents | Nothing left for the Level 3 corner landing | Hold shields for 200+ payments |
| Elimination edge | Selling property to pay rent | Death spiral, income dies first | Eat the bankruptcy; sell nothing (AI purchases rarely rescue you anyway) |
Quick Reference Card
STARTING PLAN (Classic)
  Buy Cyan set (tiles 6-9) → complete by lap 4
  Buy 2 relays (200 each, rent = 25 × owned count)
  Keep reserve ≥ 300 at all times

UPGRADE MATH
  L1 = 55% of cost, L2 = 80%, L3 = 105%
  Rent multiplier: 1 + (level × 0.85)  →  L3 = 3.55x
  Set complete = x2 | two-in-set = x1.35 | adjacency +8%/estate
  Priority: cheap high-traffic sets first (Cyan → Orange)

TRAFFIC (2d6)
  6-8 = 44% of rolls | 5-9 = 72%
  Highest-traffic tiles: 6-9 past start, then 15-18

POWERS (cost / heat cooldown 2 turns)
  Neuro 70 bend roll | Vedal 75 block payment
  Evil 80 pressure leader | Filian 65 hop action tile | Neko 70 shield+cash
  Fire on: set completion, rent blocks, denial windows — not on reflex

MODES
  Classic: pressure +30%/round from r10 (cap x8), property counts 0.8x
  Quick: rent x1.16, 10 rounds, property 1.0x — buy hard
  Timed: 8 rounds, no elimination, Overclock pulses from r2

ELIMINATION
  Bankrupt = all properties back to unowned, upgrades wiped
  Traded property keeps upgrades, trade before dying

BOARD EXTRAS
  Festival: 4 tax tiles (505/lap total), Rooftop Booth = instant set (180)
  Subathon: +10 OC per start pass, +26 per patch, taxes x1.08
  Corrupted: +6% rent +8% fee per corruption lvl (cap 4), relays 190

CARDS
  Hold 2-3, sell surplus (worth 70-160 in trades)
  Glitch Queue = engine (Overclock/movement) | Swarm Mail = money/shields
  Shields for 200+ payments only | last-place cards pay double when trailing

KILL SEQUENCE (Classic)
  Complete set → L3 upgrade → pressure stacks r10+ → rival lands →
  shield blocks their recovery → tax tiles finish → bankrupt