Official game
Play Astra Bestiary
This game is hosted by Steam. Continue to the official page to play or download it.
Wishlist on SteamOverview
Astra Bestiary is a 2D monster-raising RPG from solo developer Bicho Feo, arriving on Steam November 3, 2026, with a free demo that has been through more than a dozen public patches. You play a Seer exploring Yselion, the remains of a fallen empire where Beasts now roam ruins their old masters left behind. The loop mixes three genres that rarely share a screen: v-pet raising in the vein of Digimon World, tactical turn-based combat, and an open world you cross on the back of your own team.
Three systems make this game worth studying before you play. First, stats come in two layers, base and trained, and the trained layer is capped by how many Star Trials you have cleared. Second, Beasts age. They die of old age, and when they go they leave an orb carrying their stats and skills that another Beast can absorb. Third, evolution branches on a single criterion per species, and reading that criterion correctly is the difference between the Tyrant you wanted and the branch you settled for.
| Fact | Detail |
|---|---|
| Developer / Publisher | Bicho Feo (solo dev, Kickstarter funded) |
| Release | November 3, 2026, Windows 10/11 |
| Demo | Live on Steam, roughly 20% of the full game |
| Party | 3 active Beasts, plus an egg box for storage |
| Bestiary | 140-150+ obtainable Beasts at launch |
| Combat | Turn-based, four attack stances, clash system |
| Evolution | Species + stage, one branching criterion per Beast |
| Aging | Beasts pass away; rare item can stop aging |
| World | Non-linear open world with weather and biome fit |
| Specs | Any Intel/AMD CPU, 4 GB RAM, integrated graphics |
| Steam Deck | Fully playable, Xbox-style glyphs, no official rating yet |
| Saves | 3 slots, Steam Cloud, Steam Achievements |
Who this is for: players who always wanted Digimon World's raising depth with modern quality of life, tamer fans who want evolution to answer to their training choices, and tactical battlers who like reading enemy animations. Who should wait: anyone who needs real-time combat or multiplayer. Battles are turn-driven, and the campaign is single-player end to end.
Getting Started: The First Hours
The demo's reworked onboarding teaches the camp loop before the world opens up, and the habits you build there carry through the whole game. Work the opening like this.
- Pick from the two real starters. The game shows three options but only two are selectable. This is not a bug and there is no hidden third; choose between the two and move on. Skipping the tutorial is safe if you have played before, because skipping still grants the same bonuses: your starter keeps an extra skill and an extra trait, and an egg waits for you in the party screen.
- Train one stat hard before you diversify. Skills unlock by pushing a specific training stat, and a charge bar in the status menu shows how close the next skill is. Maxing a stat also drives stat-criterion evolutions, so an early deep investment pays twice: a new skill now, a new branch later.
- Keep the camp fed. Every camp day consumes food. Enough food means normal training and rest; low food raises injury and failure odds and slows stamina recovery. Food sits everywhere in the overworld, and pressing C on keyboard (Y on controller) in town refills supplies. Check the stock counter before every training block.
- Ride your adult, and put the right Beast in slot 1. Mounting is not just speed. Jump and Stealth only work while you are riding that Beast in slot 1, and passive crossers like Swim and Climb work the same way. Attacks such as Shriek, Acid, and Torch cast from any slot, but the movement kit belongs to your mount alone. Jump shows a red frame when the landing is illegal; it cancels instead of stranding you.
- Inscribe every species and talk to Lorelei early. The bestiary displays a species' stage-advance criteria once you own a non-baby stage of it, and Lorelei's Predict command in the first town analyzes a Beast in your party and tells you its evolution criterion. Between those two tools, evolution stops being guesswork.
Beginner Mistakes to Avoid
| Mistake | Why it hurts | Fix |
|---|---|---|
| Training six Beasts evenly | Food and stamina stretch thin, injuries pile up | Raise two or three until the first trial |
| Ignoring biome fit | Beasts sick in the wrong region, trust and stamina drain | Match exploration rosters to the region |
| Treating clashes as RNG | Clashes telegraph through idle animations | Watch how the enemy holds itself, then commit |
| Fighting the desert early | Tornadoes, pitfalls, spikes, and chasers are the real wall | Clear the first trial, then cross the Mirror Desert |
| Letting the age bar drift | A dying Beast takes your trained stats to the orb | Plan the heir before old age arrives |
That last row is the game's signature decision. A Beast passing away is a planned transfer, not a loss screen, and players who map their lineages early keep momentum through the whole campaign.
Core Mechanics Explained
The Two-Layer Stat System
Every Beast carries base stats from its species and stage, plus trained stats from your camp work. The trained layer has a ceiling, and that ceiling moves with progress: each Star Trial you clear raises the cap. This design does two things. It keeps early grind honest, because no amount of camp repetition breaks the first act, and it makes trials feel like checks on your training quality rather than level gates. Higher-stage Beasts also carry higher base stats, so a well-timed evolution does more for you than a week of extra training.
Difficulty follows the same logic. Regions scale to the trials you have completed, but only forward: cleared areas stay at the difficulty you left them. Backtracking to farm is always safe, and the desert stays brutal only until you are ready for it.
The Four Stances and the Clash
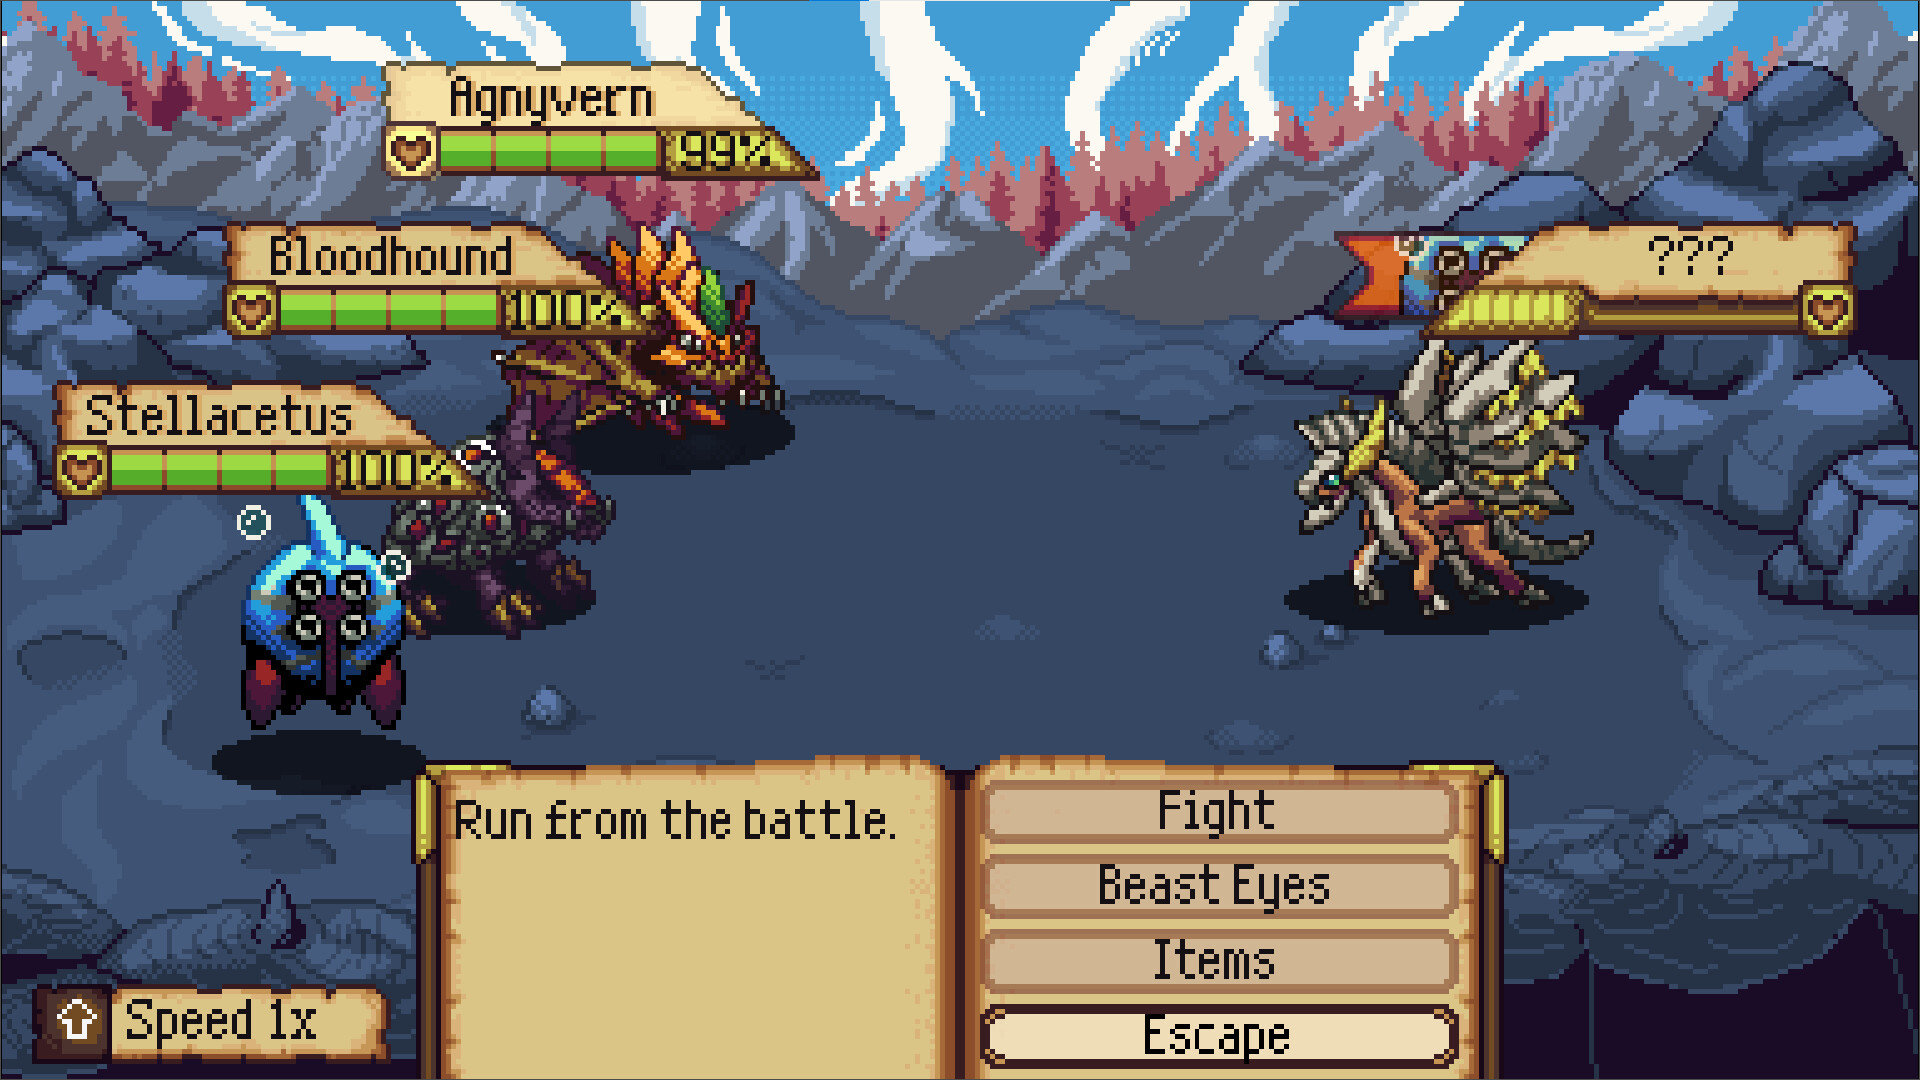
Combat runs on four attack types: Ferocity, Tenacity, Cunning, and Agility. Every enemy telegraphs its next attack through its idle animation during the selection phase. A Beast laying back is loading a Tenacity attack. Read the pose, match or counter the stance, and the clash system opens up.
A clash happens when two Beasts target each other with clashing moves. Winning one swings the fight: the loser eats the exchange, and the winner's momentum carries. Ranged attacks complicate the picture because some of them never clash at all, so check the move description in battle, which recent patches added precisely for this reason. The CPU hunts your weakest Beast, so a common trap is feeding it your frail support turn after turn; rotating positions or buffering the weak link with a status move breaks the pattern.
Status effects map onto the same four stances: Chilled lowers Cunning, Burned tanks Ferocity, and Stunned cuts Tenacity. A Burned Tenacity turtle loses the very stat its posture was building, so a status that looks minor on paper is often a clash decided before it starts.
Orbs and Inheritance
When a Beast dies of old age, its accumulated power compresses into an orb. Another Beast absorbs the orb and inherits stats, skills, and traits. Silver and Gold orbs go further: you select which skills and traits pass down instead of taking the bundle. This is where team planning lives. A damage line wants Ferocity carries passing crit-leaning skill sets; a support line wants tank stat bases and utility traits. Variants add a second use: rare hatches arrive with a different base elemental talent, like a Frost Agnyvern, and absorbing an orb from a different species can trigger a variant mid-life. If you need an elemental answer you cannot catch, the orb system can breed one for you.
Camp, Trust, and Idle Time
The camp is a room, not a menu. Beasts train, rest, and play, and trust rises or falls visibly with how you run the place. Idle mode lets the camp run itself while you are away, and Beasts kept idling gain stats, health, and trust on their own schedule. Speed toggles and hotkeys turn repetitive training blocks into a few keystrokes. Bond matters mechanically: Bond is one of the evolution criteria, and several bonding events only fire after hours of raising, so the camp is not downtime, it is the second half of the game.
Riding and Field Skills
Every adult Beast is rideable, and riding is a key system disguised as a speed boost. Jump and Stealth are active riding skills; Swim and Climb are passive ones. All of them belong to the Beast you are actually mounted on, in slot 1. This is the single most common confusion in the demo, because players keep a Bloodhound in slot 2 and wonder why Jump does nothing. Swap the mount, not the party. Acid deserves a special mention: it scares wild Beasts off, which makes encounter control possible on routes you do not want to fight through.
Progression Strategy
Opening hours
├── Two starters, pick one, train its core stat deep
├── Keep camp food above the red threshold
├── Fill the bestiary; visit Lorelei for Predict
└── First Star Trial: Earth Trial
      gates: trained stat cap rise #1

Middle game
├── Cross Mirror Desert AFTER the first trial
│     (tornadoes, pitfalls, spikers, chasers, sickness)
├── Luram: new town off the desert, restock and recover food
├── Rotate rosters by biome to stop sickness spam
├── Build the orb pipeline: dying Beast → Silver/Gold orb → heir
└── Second trial
      gates: cap rise #2, town upgrade, tamer skills

Late game
├── Variant hunting via rare hatches and cross-species orbs
├── Anti-aging rare item for a legacy Beast (full game)
├── Weather-aware loadouts for battle and exploration
└── Remaining trials → raised caps → endgame training ceiling
Resource priority reads, in order: food, the next stat cap, orb storage, cosmetics. Food is the only consumable that touches everything. Stat caps are progression itself. Orbs are irreplaceable lineage data; losing one to poor planning costs a generation. Everything else waits.
Builds and Team Templates
The game does not publish tier lists, but the mechanics sort roles cleanly. Three templates cover nearly every fight.
The Clash Counter (frontliner). Train Ferocity and Tenacity on a Beast with heavy clash-capable moves. Its job is to read the enemy's telegraph, take favorable clashes, and punish. Pair with Burn application: a Burned enemy loses Ferocity, which weakens the exact clash type aggressive AI opens with. This build carries the early trials because early enemies telegraph slowly and clash rewards are largest when stat caps are low.
The Status Engine (flex). Train Cunning, take Chilled and Stunned applications. Chilled strips enemy Cunning, shutting down their status game; Stunned cuts Tenacity, which makes Tenacity-postured targets lose the stat their defense leans on. This build's clash moves stay home; it fights the fight around the fight. Strongest in the mid game when enemy packs start running mixed stances and raw clash trading stops being free.
The Rider (utility). A mount with Jump, Stealth, and either Swim or Climb, trained for stamina rather than damage. Its combat job is to absorb the CPU's weakest-target bias while the back line works, and its real job is the map: islands, gaps, and stealth corridors that walking Seers never see. Every open-world route you scout on a Rider becomes a shortcut forever.
| Template | Train | Key skills | Trial fit |
|---|---|---|---|
| Clash Counter | Ferocity, Tenacity | Heavy clashers, Burn | Early trials, boss duels |
| Status Engine | Cunning | Chilled, Stunned apps | Packs, mixed stances |
| Rider | Stamina, Agility | Jump, Stealth, Swim, Climb | Open world, desert crossing |
A standard party runs one of each. The template rule: never bring three of the same stance into a trial, because the telegraph system rewards answers, and three copies of one answer is one answer.
Step-by-Step Strategy
- Clear the Earth Trial before touching the desert. The first trial raises your trained cap, and the Mirror Desert assumes that cap. Fighting through with pre-trial stats means sickness, chasers, and tornados on top of under-capped Beasts. Trial first, desert second, always.
- Run a biome-fit rotation. Sickness hits Beasts in regions they are not built for, and the desert amplifies it. Keep a bench in the box, swap before entering a new region, and treat the rotation as free healing: a fitted Beast fights better and trusts you more.
- Read every telegraph once before answering. The selection-phase idle tells you the stance. Tenacity loaders lay back; the others have tells of their own. One deliberate pause per enemy type teaches you its whole kit, and clash wins stop being coin flips from there.
- Route orbs like investments. When a Beast nears old age, list what it alone carries: a skill, a trait, a stat base. Assign the heir before the death, not after, and prefer Silver or Gold orbs when the inheritance must be surgical. A lineage with a plan beats a stronger Beast without one.
- Use Acid to design your encounters. Wild Beasts chase, and the desert chasers will pile onto any fight you start. Scares carve a clean corridor, which means you choose which packs to fight. In farming runs, Acid is the difference between three fights you wanted and six you did not.
- Idle the camp through real-life pauses. Trust, stats, and health accrue while you are gone. The camp speed toggle compresses deliberate sessions too. Log off at camp rather than in the field and every break pays a small dividend.
- Save-slot discipline before trials. Three slots exist for a reason. Snapshot before each trial and before any orb transfer. A wrong evolution branch discovered an hour later should cost a reload, not a generation.
Advanced Tips
- In-battle evolution is live. Beasts can evolve mid-fight and learn skills off attacks that hit them. A Beast on an Instinct criterion sometimes comes out of a losing exchange with a new move; when you plan a risky fight, check whether an evolution is sitting one threshold away and budget for it.
- The weather forecast is a combat buff. Dynamic conditions affect battles and exploration alike. Route storm windows into fights where your Chilled game already wins, and keep weather-sensitive exploration for calm days.
- Variants answer elements. A rare hatch with a foreign base talent, or a cross-species orb absorption, can produce an elemental type you cannot otherwise field. When a trial walls your stances, breed the answer instead of grinding past it.
- CPU target discipline. The AI hunts your weakest Beast. Raise your support's Tenacity above your frontliner's health pool, or swap the weakest link out for the turn the enemy's Ferocity pose appears. Either breaks the harvest.
- Backtrack on purpose. Cleared regions keep your difficulty. Old zones become the safest training grounds after each cap raise, which means camp sessions and farming rotations belong there, not in contested new territory.
- Speed options are not cheating. Battle and camp speed settings exist because the game respects repetition costs. Turn battle speed up for routine encounters and down for trials you are reading for the first time.
Known Issues and Performance
Minimum specs are nearly fictional: any Intel or AMD processor, 4 GB RAM, integrated graphics, DirectX 9, one gigabyte of storage. The demo runs on the Steam Deck at native resolution with performance comparable to desktop; controller glyphs show Xbox-style prompts, and keyboard inputs map through a custom display system. An early physics-frame misalignment caused visible judder at 60fps and was patched in mid-2026. Terrain snags in the desert and a market UI stall were reported by demo players and fixed across the 0.4.x and 0.5.x patches, and the current build is the smoothest public version by a wide margin.
FAQ
When does Astra Bestiary release, and can I play it now? November 3, 2026 on Steam. A free demo is live and carries into the same systems as the full game, though it covers roughly 20% of the final content.
How strong can my Beasts actually get? There is no fixed ceiling; there is a moving one. Trained stats cap per trial, each trial raises the cap, and evolution raises the base underneath. Power compounds across trials and across generations of orbs.
Do Beasts really die? Yes. Aging ends in a Beast passing away, and the orb it leaves carries its stats and skills to an absorber. A rare item in the full game stops aging for a legacy Beast.
Why won't Jump work for me? Riding skills belong to the Beast you are mounted on in slot 1. Active riders like Jump and Stealth and passive ones like Swim and Climb all follow this rule. Move the rider to slot 1 and mount it.
How many Beasts can I keep? Three active in the party, plus an egg box for storage and future raising. The full game ships 140 to 150 plus obtainable species.
How do I pick the right evolution? One criterion drives each species' branch: Stats, Environ, Bond, or Instinct. Once you own a non-baby stage, the bestiary shows the criteria, and Lorelei's Predict command in the first town reads a specific Beast. Maxing a stat is the most direct lever for stat-branch species.
Is it on other platforms? Windows now, Steam Deck playable, with consoles and GOG under consideration. Nothing announced.
Quick Reference Card
| System | What to do | Why |
|---|---|---|
| Training | Push one stat deep per Beast | Skills and stat-branches both feed on it |
| Food | Refill in town, watch the red tooltip | Low food = injuries and failed sessions |
| Clash | Read the idle telegraph, then commit | Clashes are reads, not RNG |
| Status | Burn the Ferocity, Stun the Tenacity | Status pre-decides clashes |
| Riding | Rider in slot 1, always | Jump/Stealth/Swim/Climb live on the mount |
| Orbs | Plan heirs before deaths | Silver/Gold orbs pass chosen skills and traits |
| Desert | After trial one, with a Rider and Acid | Tornadoes, spikes, chasers, sickness |
| Trials | Save-slot snapshot before each | Caps, town, and tamer skills hang on them |
Astra Bestiary's depth lives in the handshake between its systems: training feeds clashes, clashes feed trials, trials feed caps and cap-raised evolutions, and evolutions feed the orb line that outlives every single Beast. Plan the lineage, read the telegraph, and the fallen empire opens up one generation at a time.
Screenshots