Official game
Play Swarmbound
This game is hosted by Steam. Continue to the official page to play or download it.
Buy on SteamWhat Is Swarmbound?
Swarmbound is a high-performance pixel-art bullet heaven (survivor-like) roguelite by solo developer Mathew Newport (MNgame). Released 1.0 on June 26, 2026, it pushes the genre to unprecedented extremes — handling up to 1,500 active enemies at locked 60fps with zero lag, all in charming 8x8 pixel art.
Built on a custom MonoGame engine, Swarmbound throws out the genre's technical ceiling. Where Vampire Survivors chugs past 300 enemies, Swarmbound handles 1,000+ mobs and hundreds of projectiles without breaking a sweat — a love letter to the 8-bit NES era with none of the hardware limits.
You pick one of five distinct classes with unique starting loadouts, passives, and upgrade trees. Every 30 seconds a new wave crashes in with more enemies, new variants, and tougher elites. By Wave 30 your screen is a fireworks display of chain lightning, spiral hammers, poison novas, and blizzards.
Key highlights:
- 1,500 enemies at 60fps — Zero lag even at peak density
The Five Classes
Swarmbound ships with five base classes, each designed for a fundamentally different approach to the swarm. Unlike many survivor-likes where class is just a starting weapon difference, Swarmbound classes have distinct passives, unique ability slots, and different scaling priorities.
Paladin (Frontline Tank)
The Paladin is the most forgiving class and the best recommendation for new players. High base health, a broad melee swing that hits everything in a 120-degree arc, and a passive damage reduction aura make the Paladin exceptionally hard to kill.
Starting loadout: Broadsword (wide melee arc, moderate damage) + Shield Bash (active knockback ability)
Passive: Aegis — Reduces all incoming damage by 15%. Stacks with damage reduction upgrades.
Core playstyle: The Paladin thrives when surrounded. Unlike ranged classes that need distance, the Paladin's weapon hits more enemies the closer they are. Position yourself in the thickest part of the swarm and let your broad sweeps clear everything around you. Use Shield Bash to create breathing room when elites push in.
Recommended: Health regen > Weapon evolution (180° arc) > Damage reduction > Area size Synergies: Damage auras, on-kill explosions, chain lightning Difficulty: ★☆☆☆☆ (Beginner-friendly)
Sorceress (Crowd Control Mage)
The Sorceress is the premier area-denial class, trading survivability for devastating screen-clearing potential. Extremely fragile — she dies in 2–3 hits even with health upgrades — but capable of deleting entire screens if built correctly.
Starting loadout: Magic Missile (fast homing projectile, moderate damage) + Frost Nova (freezes all nearby enemies for 2 seconds)
Passive: Amplify — All elemental damage (fire, ice, lightning) deals 25% more damage.
Core playstyle: The Sorceress must never stand still. Kite constantly, layering area-denial spells like Blizzard and Fire Wall in your escape path. Frost Nova is your panic button — use it when enemies surround you to freeze everything and create an escape window. Prioritize upgrades that add elemental procs to your basic attacks.
Recommended: Move speed > Frost Nova cooldown > Fire Wall > Blizzard > Elemental damage Synergies: Blizzard + Fire Wall, chain lightning + Amplify, freeze + on-kill explosions Difficulty: ★★★★☆ (High skill floor, highest ceiling)
Necromancer (Minion Commander)
The Necromancer commands an army of summoned skeletons, ghosts, and bone constructs that fight autonomously. The Necromancer's personal damage output is the lowest of all classes, but their minion swarm can reach numbers rivaling the enemy count.
Starting loadout: Bone Spear (piercing projectile, low damage) + Raise Skeletal (summons a skeleton warrior for 15 seconds)
Passive: Undying Legion — All summoned minions deal 30% more damage. Max minion count +2.
Core playstyle: Stay mobile and let your minions engage. Resummon skeletons as they die, and layer curses (debuffs that increase damage taken by enemies) on high-priority targets. The Necromancer's strength is in overwhelming enemy spawns with your own units — enemies that attack your minions aren't attacking you.
Recommended: Minion count > Minion health > Raise Skeletal cooldown > Curse of Weakness > Skeletal Archer Synergies: Minion health + damage, Skeletal Archers + Bone Wall, Corpse Explosion Difficulty: ★★★☆☆ (Moderate learning curve)
Ranger (Ranged DPS)
The Ranger is a precision kiting class that excels at single-target elimination and safe distance management. Piercing arrows, high critical chance, and the best move speed in the game make the Ranger the safest class for experienced players.
Starting loadout: Longbow (piercing arrow, high single-target damage) + Rain of Arrows (large AoE carpet-bombing ability, 8-second cooldown)
Passive: Deadeye — 15% critical hit chance. Critical hits slow enemies by 40% for 2 seconds.
Core playstyle: Maintain maximum distance at all times. Fire piercing shots through lined-up enemies for maximum efficiency. Rain of Arrows is your wave-clear tool — use it when swarms get dense enough to threaten your kiting path. The Ranger struggles against fast elites and summoners; prioritize those targets first.
Recommended: Attack speed > Crit damage > Piercing count > Move speed > Rain of Arrows damage Synergies: Crit damage + attack speed, Piercing upgrades, Spiral Projectiles Difficulty: ★★☆☆☆ (Good positioning required)
Vanguard (Hybrid Brawler)
The Vanguard is the fifth class, a close-mid range brawler that builds momentum through aggressive play. Every kill grants a stacking damage and speed bonus that resets on taking damage — rewarding perfect play with enormous power.
Starting loadout: War Gauntlets (short-range rapid punches, moderate damage + stun chance) + Seismic Slam (ground pound, stuns all nearby enemies for 1.5 seconds)
Passive: Adrenaline — Every kill grants +3% damage and +2% move speed for 5 seconds. Stacks up to 20 times. Reset fully on taking damage.
Core playstyle: The Vanguard is a high-risk, high-reward class that punishes mistakes brutally. Build Adrenaline stacks in early waves (when damage is manageable) and ride the momentum into mid-game waves. Seismic Slam is your reset tool — use it when you're about to take damage to stun enemies and preserve your stack. The Vanguard's damage at 20 Adrenaline stacks is unmatched by any other class.
Recommended: Damage > Move speed > Seismic Slam cooldown > On-kill healing > Stun duration Synergies: On-kill explosions, Spiral Projectiles, Damage auras Difficulty: ★★★★★ (Hardest class, near-perfect play required)
Regarding Class Confusion
You may see references to "Knight, Mage, Ranger, Engineer, Reaper" online. Earlier demos used different class names before 1.0. The final game ships with Paladin, Sorceress, Necromancer, Ranger, and Vanguard as described above.
How to Play Swarmbound
Core Gameplay Loop
- Pick a class — Determines starting weapon, passive, and upgrade pool.
- Survive 30 waves (30 seconds each) — Enemies grow more numerous and diverse.
- Choose upgrades between waves — Defeated enemies drop green crystals that fill your upgrade meter. Level up to choose 1 of 3 random upgrades.
- Defeat bosses at Waves 10, 20, 28, and 30 — Each has unique attack patterns requiring focused builds.
- Reach Wave 30 to win — Unlocks Endless mode (waves continue past 30 with escalating difficulty).
Auto-Attack and Positioning
Your character auto-fires toward your mouse cursor automatically — no clicking needed. Focus entirely on movement.
Golden rule: Never stop moving. Standing still past Wave 5 is instant death. The open map has no walls; enemies converge from all sides.
Circle-Strafe: Move in large circles around the perimeter. This keeps enemies in a manageable arc in front of you rather than surrounding you.
Dash-Through Escape: If surrounded, dash through the thinnest point. Dashing grants ~0.3 seconds of invincibility frames — time it to pass through enemies, then resume kiting.
Dash Mechanic (Space)
The dash is the most important survival tool in your arsenal. Understanding its nuances separates players who die at Wave 8 from those who reach Wave 30.
- Cooldown: 3 seconds base (reducible through upgrades)
- Duration: ~0.2 seconds of movement
- Invincibility frames: ~0.3 seconds (slightly longer than the dash animation itself)
- Direction: Dashes in your current movement direction (WASD), not toward your mouse cursor
- Interaction with enemies: Dashing through enemies deals no damage but pushes them aside
Advanced dash techniques:
- Dash weaving: Dash every 3 seconds on cooldown during dense waves, even if you aren't in immediate danger. This keeps you constantly repositioning and makes you harder for enemies to track.
- Crowd surfing: Dash toward a dense cluster of enemies to push through them, then immediately change direction. This scatters the cluster and gives you breathing room.
- Boss dodging: Boss enemies telegraph their attacks with visual cues (usually a flash or wind-up animation). Save your dash specifically for these moments.
The Upgrade System
Upgrades are the primary driver of your character's power within a run. Each upgrade crystal dropped by enemies fills your upgrade meter. When full (roughly every 2-3 waves of normal enemies, or immediately upon killing an elite), you enter the upgrade menu and choose 1 of 3 options.
Upgrade categories:
| Category | Description | Examples |
|---|---|---|
| Weapon Evolutions | Transform basic attack | Broadsword to Greatsword, Magic Missile to Arcane Barrage |
| New Weapons | Add attack types | Chain Lightning, Spiral Hammers, Blizzard, Fire Wall |
| Passive Boosts | Stat upgrades | +10% damage, +5% move speed, +20 HP |
| Trigger Effects | Conditional procs | On-hit lightning, On-kill explosion, On-dash frost |
| Ability Upgrades | Enhance class actives | Cooldown reduction, added effects, longer duration |
| Utility | Economy/QoL | +50% crystal range, +1 choice, rerolls |
The Golden Rule: Specialize, Don't Generalize
The most common mistake new players make is taking one of everything. Swarmbound's upgrade system is designed for synergy stacking. Three levels of Chain Lightning is exponentially more powerful than one level each of Chain Lightning, Blizzard, and Poison Nova, because each additional level increases its damage, chain count, and range.
Build archetypes:
- Lightning Mage: Chain Lightning + Lightning Orb + Thunderstorm (Sorceress)
- Melee Tank: Damage Aura + Thornmail + Health Regen (Paladin)
- Minion Army: Skeletal Archers + Bone Golem + Corpse Explosion (Necromancer)
- Critical Machine: Crit Chance + Crit Damage + Spiral Projectiles (Ranger)
- Adrenaline Rush: Damage + On-Kill Effects + Move Speed (Vanguard)
Shrines
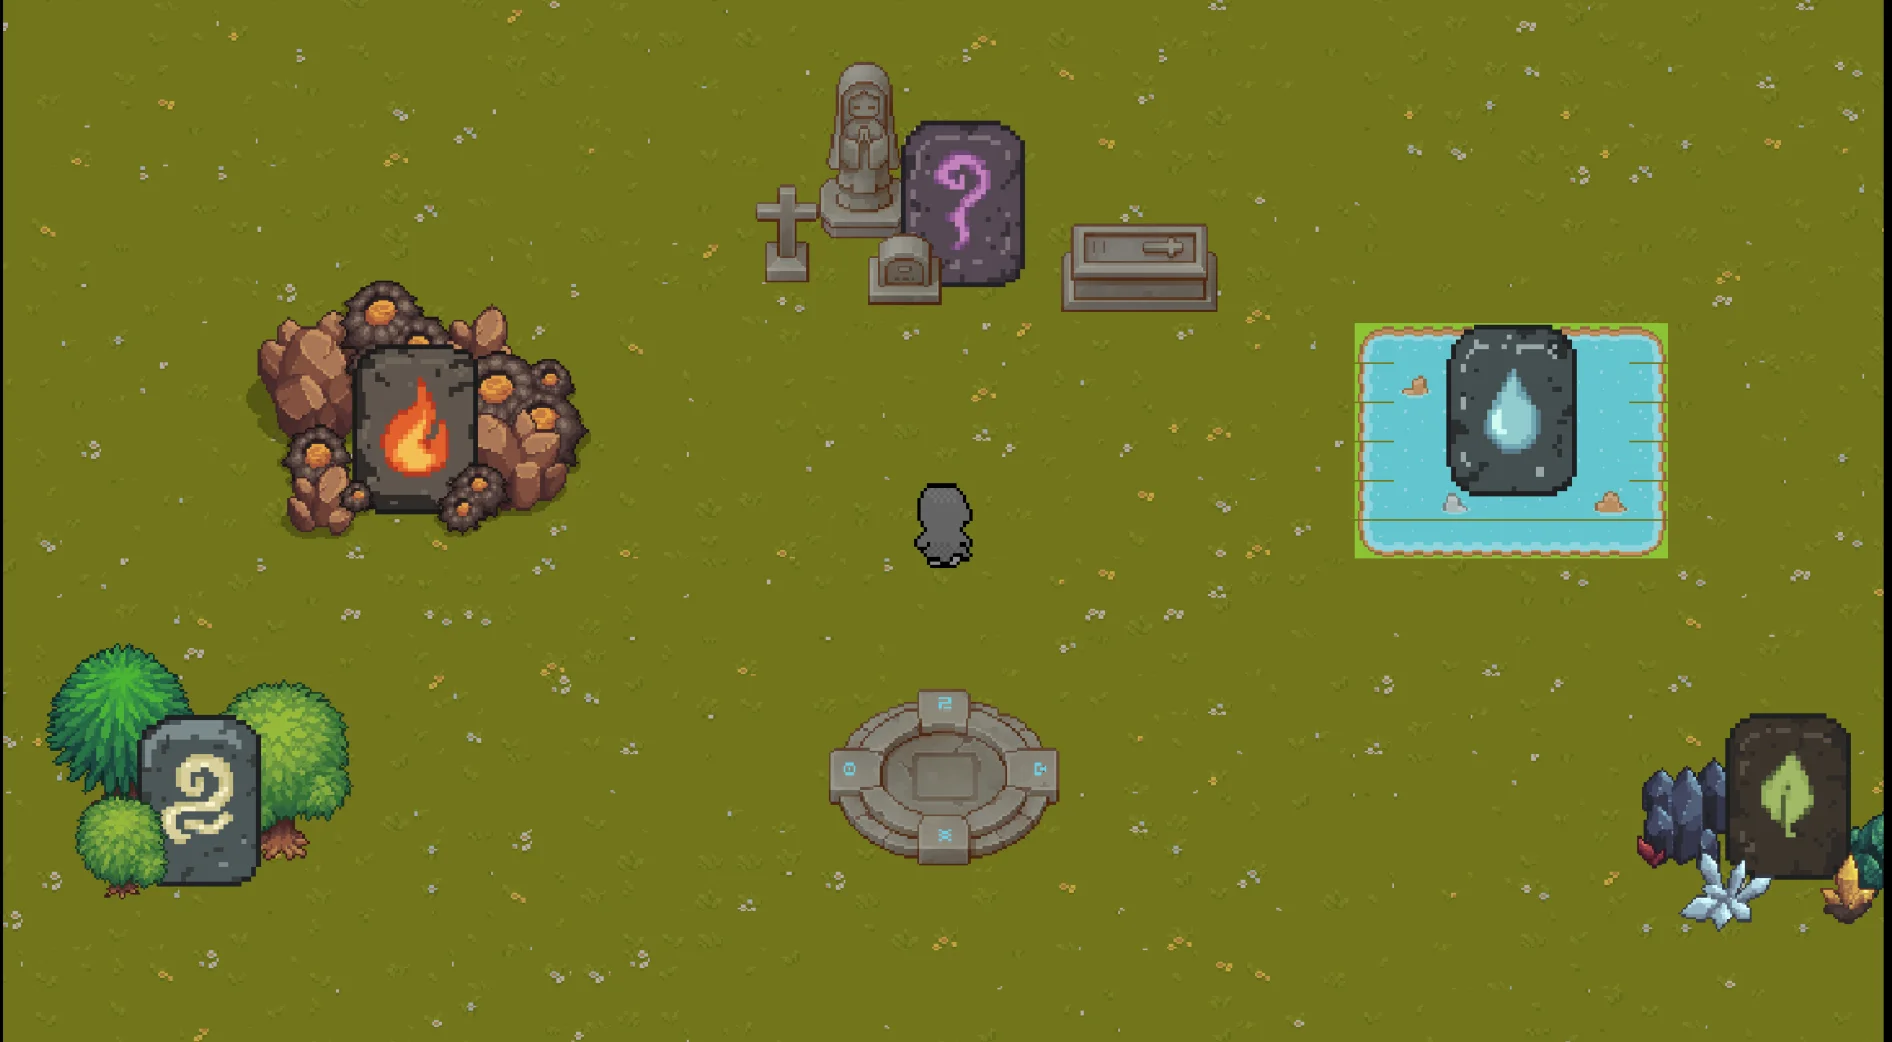
Shrines are glowing pillars offering one-time bonuses. Fixed locations each run.
| Shrine | Effect |
|---|---|
| Health | Full heal +50 max HP for the run |
| Damage | +40% damage for next wave (stackable) |
| Crystal | Instantly fill upgrade meter |
| Reroll | Reroll upgrade choices once |
| Curse | 2x enemy health, +100% soul currency (advanced) |
Elites
Starting at Wave 5. Elites have 5x normal health and special abilities.
| Elite | Visual | Ability | Priority |
|---|---|---|---|
| Shield | Blue aura | Damage shield around nearby enemies | HIGH |
| Summoner | Green aura | Spawns 5 minions periodically | HIGH |
| Speed | Red aura | 150% speed, CC immune | MEDIUM |
| Corruptor | Purple aura | Drains 2% max HP/sec aura | MEDIUM |
| Explosive | Orange aura | Explodes on death for 50% HP | LOW |
Elite farming: Elites drop 3x upgrade meter fill. Seek them out deliberately if your build is strong enough.
Controls
| Action | Key | Notes |
|---|---|---|
| Move | WASD | Four-directional movement |
| Aim / Auto-attack | Mouse cursor | Character fires toward cursor automatically |
| Dash | Space | Invincibility frames; dashes in movement direction |
| Ability 1-3 | Q, E, R | Class abilities (unlocked at Waves 1/5/15) |
| Ultimate | F | Unlocked at Wave 25; long cooldown |
| Upgrade Menu | Tab | Open anytime to check build |
| Pause | Escape | Fully pauses the game |
| Map | M | Toggle minimap overlay |
| Interact | F (near shrine) | Activate shrines |
Controller: KBM at launch (on roadmap). Steam Deck via Steam Input.
Advanced Tips
Waves 1-5: Foundation Phase
Goal: Establish your core build. Skeleton grunts and slimes spawn in groups of 20-50.
- Explore map edges for early shrines.
- Take weapon evolutions when offered.
- Prioritize one defensive passive by Wave 5.
- Avoid contradictory upgrades.
Target: 1 evolved weapon OR 2 levels of one weapon + 1 defensive passive.
Waves 6-15: Specialization Phase
Goal: Commit to a build path. Density climbs to 200-400 enemies. Elites appear (1-2/wave). New types: skeleton archers, wraiths (phase through first hit), ghosts (physical immune).
- Commit to ONE build archetype.
- Ghosts appear at Wave 10. Pick up an elemental weapon by Wave 12 if physical-only.
- Wave 10 Boss: Bone Lord (giant skeleton). Kite in wide circles.
Target: 3-4 levels of primary weapon, 2 defensive passives, 1 trigger effect.
Waves 16-25: Chaos Phase
Goal: Survive the density spike. 600-1000 enemies on screen. Runners, exploders join. 3-4 elites per wave.
- Stop taking new weapon types. Stack what you have.
- Move speed and dash cooldown become critical.
- Wave 20 Boss: Phantom King (massive wraith). Area damage only.
Target: 5+ levels of primary weapon, 3 passives (including move speed), 2 trigger effects.
Waves 26-30: Final Push
Goal: Execute your complete build. Density peaks at 1200-1500. All enemy types at once. Bosses at Wave 28 and 30.
- Two survival strategies: Overwhelming area damage (clear screen every 2-3s) or Invulnerability cycling (chain iframes).
- Save ultimate for bosses.
- Wave 28: Ember Drake (dragon) — 10s fire breath covering half the map. Use ultimate.
- Wave 30: The Swarm Lord — 3 phases (shield orbs, beam attack, enrage + 500 adds).
Meta-Progression: Soul Currency
Between runs, spend Soul Currency on permanent upgrades in the Sanctum.
| Upgrade | Levels | Per Level | Priority |
|---|---|---|---|
| Damage | 10 | +5% | ★★★★★ |
| Max Health | 10 | +10 HP | ★★★★☆ |
| Move Speed | 5 | +3% | ★★★★☆ |
| Crystal Magnet | 3 | +50% range | ★★★☆☆ |
| Dash Cooldown | 3 | -10% | ★★★☆☆ |
| Reroll Tokens | 3 | +1/run | ★★☆☆☆ |
| Starting Gold | 5 | +50 gold | ★☆☆☆☆ |
Optimal order: Damage (5) > Health (3) > Move Speed (3) > Damage (10) > Health (10) > Dash Cooldown (3) > Crystal Magnet (3) > Reroll (3) > Gold (5).
Soul farming: Endless mode offers the best soul-per-hour ratio. Sorceress and Ranger clear fastest.
Enemy Types and Counters
Normal Enemies
| Enemy | Behavior | Counter |
|---|---|---|
| Skeleton Grunt | Walks toward you, melee | Piercing weapons |
| Slime | Bounces, splits on death | Don't kill when surrounded |
| Skeleton Archer | Fires arrows, repositions | High priority |
| Wraith | Phases through first hit | Fast-firing weapons |
| Ghost | Immune to physical | Elemental/spell damage |
| Runner | 200% speed, low health | Kite perpendicular |
| Exploder | Explodes for 30% HP | Never let it touch you |
| Crystal Golem | Reflects 10% damage | Don't attack while low HP |
Boss Enemies
Wave 10 — Bone Lord: Giant skeleton with club. Smashes ground creating shockwaves. Stay behind it.
Wave 20 — Phantom King: Massive wraith. Phase-shifts every 5 seconds (immune to projectiles). Use area damage.
Wave 28 — Ember Drake: Dragon alternating between swooping (dodge perpendicular) and fire breath (dodge to side).
Wave 30 — The Swarm Lord: Three-phase final boss. Phase 1: Shield orbs (kill orbs first). Phase 2: Beam attack (dodge perpendicular). Phase 3: Enrage + adds (use ultimate).
Modding Guide
Swarmbound was built to be fully moddable. Every game asset loads from external files at runtime — no hardcoded packing. The Druid class was created entirely through the external mod system as proof of concept.
Key Features
- Hot-swappable: Mods load/unload without restarting; changes apply next wave.
- Sprite/Sound/Spell replacement: Replace any asset type.
- Custom classes: Complete classes with unique weapons, passives, and upgrade trees.
Getting Started
- Browse game files (Steam: right-click > Manage > Browse Local Files)
- Open
Mods/folder, create your mod folder - Follow template from
Mods/Examples/(Druid mod) - Load from in-game Mod Manager
The Druid Example
A fully functional class built through the mod system with nature-themed spells (Vine Whip, Poison Spores, Summon Wolf). Included for free in Mods/Examples/.
Performance and Settings
System Requirements
| Component | Minimum |
|---|---|
| OS | Windows 10+, macOS 12+, Ubuntu 20.04+ |
| CPU | Dual-core 2.0 GHz |
| RAM | 2 GB |
| GPU | OpenGL 3.0 compatible |
| Storage | 200 MB |
Steam Deck: Locked 60fps. Built for handheld — near-instant loading.
- CRT Shader: On (minimal performance cost, big aesthetic gain)
- Particle Effects: Medium/High
- Damage Numbers: Off for first 10 runs
- Auto-Pause on Upgrade: On
FAQ
Is Swarmbound early access? No. Full 1.0 as of June 26, 2026. All content complete with post-launch updates planned.
How long is a full run? 25-30 min for 30 waves. Early runs: 8-12 min. Endless: 45 min to hours.
Does Swarmbound support controllers? On the roadmap. KBM at launch. Steam Deck works via Steam Input.
Is there co-op or multiplayer? Single-player only. Balanced for solo play against massive hordes.
What's the difference from Vampire Survivors? (1) 1,500+ enemies at 60fps vs ~300 cap. (2) Distinct classes with passives vs character-as-weapon. (3) Built-in hot-swappable mod system.
How to unlock Endless mode? Complete a 30-wave run on any class.
Best class for beginners? Paladin — high health, built-in damage reduction, forgiving melee arc.
Strongest class? Sorceress has highest ceiling. Paladin is safest for consistent runs.
What engine is Swarmbound built on? A custom engine on MonoGame (open-source XNA implementation).
What is the "Unlimited NES" philosophy? Trade high-res textures for high-density simulation — 8x8 sprites and 1x1 pixel projectiles in a massive synchronized world.
Guide by Game How To. Last updated July 2026. All game details sourced from the official Steam store page, SteamDB, and in-game testing. Class names reflect the 1.0 release version.