Official game
Play Midnight Moments
This game is hosted by Steam. Continue to the official page to play or download it.
Play on SteamOverview
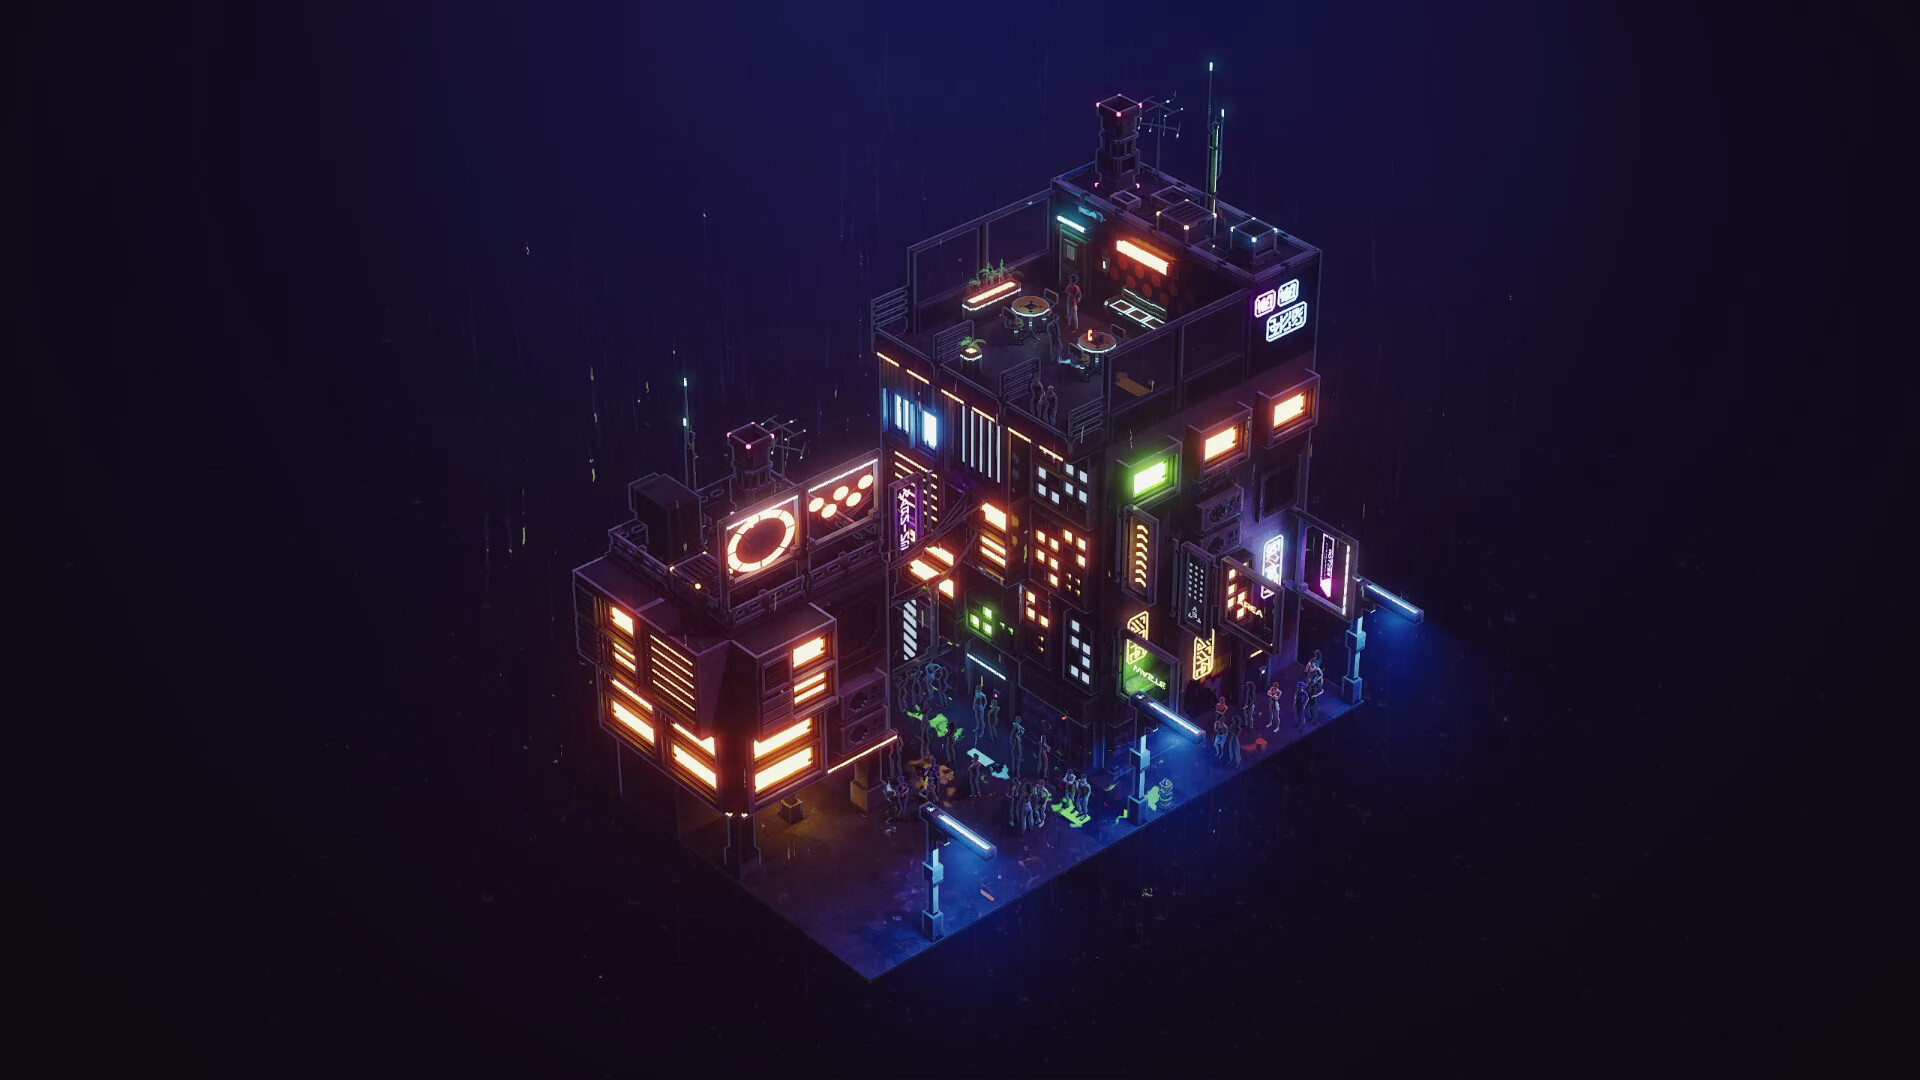
Midnight Moments is a cozy cyberpunk diorama-building game from Happy Volcano, the three-person Belgian studio behind The Almost Gone and Figment. It launched July 30, 2026 on Steam for $2.99 (S$3.65), sitting at Very Positive (roughly 93% of recent reviews positive). You stack apartment blocks, thread alleyways between them, hang neon signs off rain-soaked facades, drop a few citizens below, then zoom in and stare. No objectives, no timers, no fail states. The store pitch is "No goals. Just vibes," and the game means it.
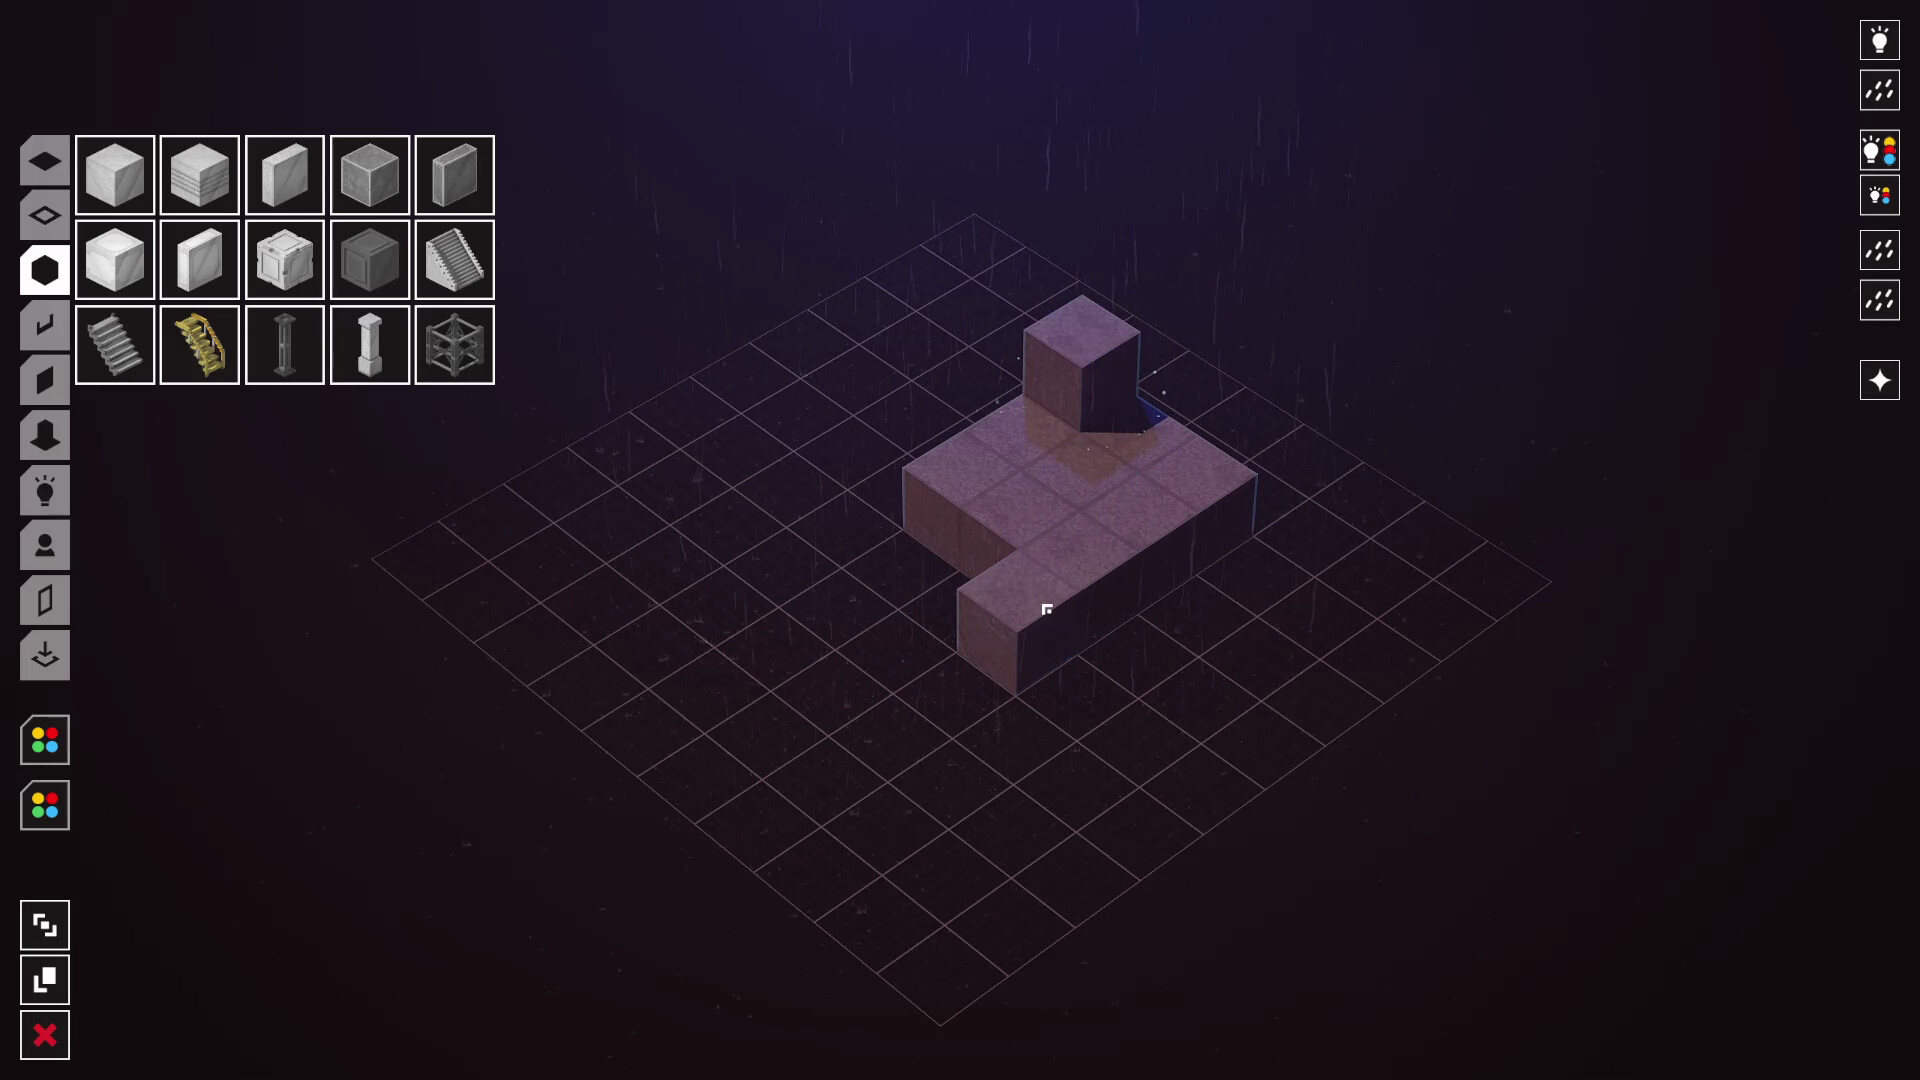
The design philosophy is the story here. The entire game is textless: no labels on parts, no named tools, no tutorial text. Parts are organized purely by geometric shape language, the square tab holds square-ish pieces, the rounded tab holds rounded ones, and you decide what a piece is by looking at it. That one choice shapes every strategy in this guide. The game shipped through a long public development cycle (demo, playtests, screenshot contests, Discord feedback), and it shows: new games drop you into an already-built diorama instead of an empty grid because playtesters reported that blank canvases stalled creativity.
One expectation to calibrate before buying: scenes are static. Citizens do not walk, there is no traffic, no birds, no animated life. You are composing a still frame in 3D, rain and light being the only motion. Players who bounce off the game almost always bounce off that fact. Players who love it treat it as photography, not simulation.
Game Details
| Field | Detail |
|---|---|
| Genre | Cozy sandbox / diorama builder |
| Developer | Happy Volcano (Belgium, team of three) |
| Publisher | Happy Volcano |
| Platform | Windows 64-bit |
| Price | $2.99 USD / S$3.65 |
| Players | Single-player |
| Release | July 30, 2026 |
| Achievements | None |
| Controls | Mouse only, R rotates parts |
| Build area | Roughly one city block, unlimited vertical stacking |
| Accessibility | Camera comfort, color alternatives, custom volume, save anytime, no timed input |
| Saves | Steam Cloud |
| Languages | English |
Target Audience
This is a game for the Dystopika and Townscaper audience: people who find arranging beautiful pieces intrinsically relaxing, who will happily run a synthwave or lo-fi playlist in the background and lose two hours composing one street corner. At $2.99 with a free demo, the entry cost is a coffee. The demo carries over, so try it first if you are unsure whether static dioramas appeal to you.
Skip it if you want city mechanics, simulation, progression, or animation. There are no resources, no unlock trees, no achievements, and citizens never move. Skip it too if a limited part library will genuinely frustrate you; the palette is small by design, and the game asks you to solve that constraint with imagination. Reviewers who embraced the constraint report the parts "unlock" creatively after a few hours; reviewers who wanted more assets burned through the library's potential in an afternoon.
Getting Started — First 30 Minutes
- Open the pause menu first. The game teaches nothing on load. The full control scheme lives in the pause menu, and several early players spent their first session missing basic actions because they never opened it. Two minutes there saves an hour of fumbling.
- Study the starter diorama before touching it. You spawn into a pre-built scene. Walk the camera through it. It demonstrates how pieces snap, how roofs layer, how signs hang, and what the default lighting reads like. It is a free masterclass; delete nothing yet.
- Browse every shape tab once. Before placing a single piece, flip through the square tab, the rounded tab, and the rest. You are building a mental catalog. Players who skip this keep rebuilding the same three pieces they found first and then declare the palette too small.
- Learn that R is your friend. R rotates the piece you are placing. Veterans repeat this constantly. Combined with the snapping system's preferred orientations, R is the difference between a facade that works and one that fights you.
- Set lighting before building. Pick your mood (midnight blue, neon pink dusk, sodium-lamp orange) and adjust time of day, ambient color, and brightness first. Scenes designed around a light palette come together in half the time and photograph twice as well.
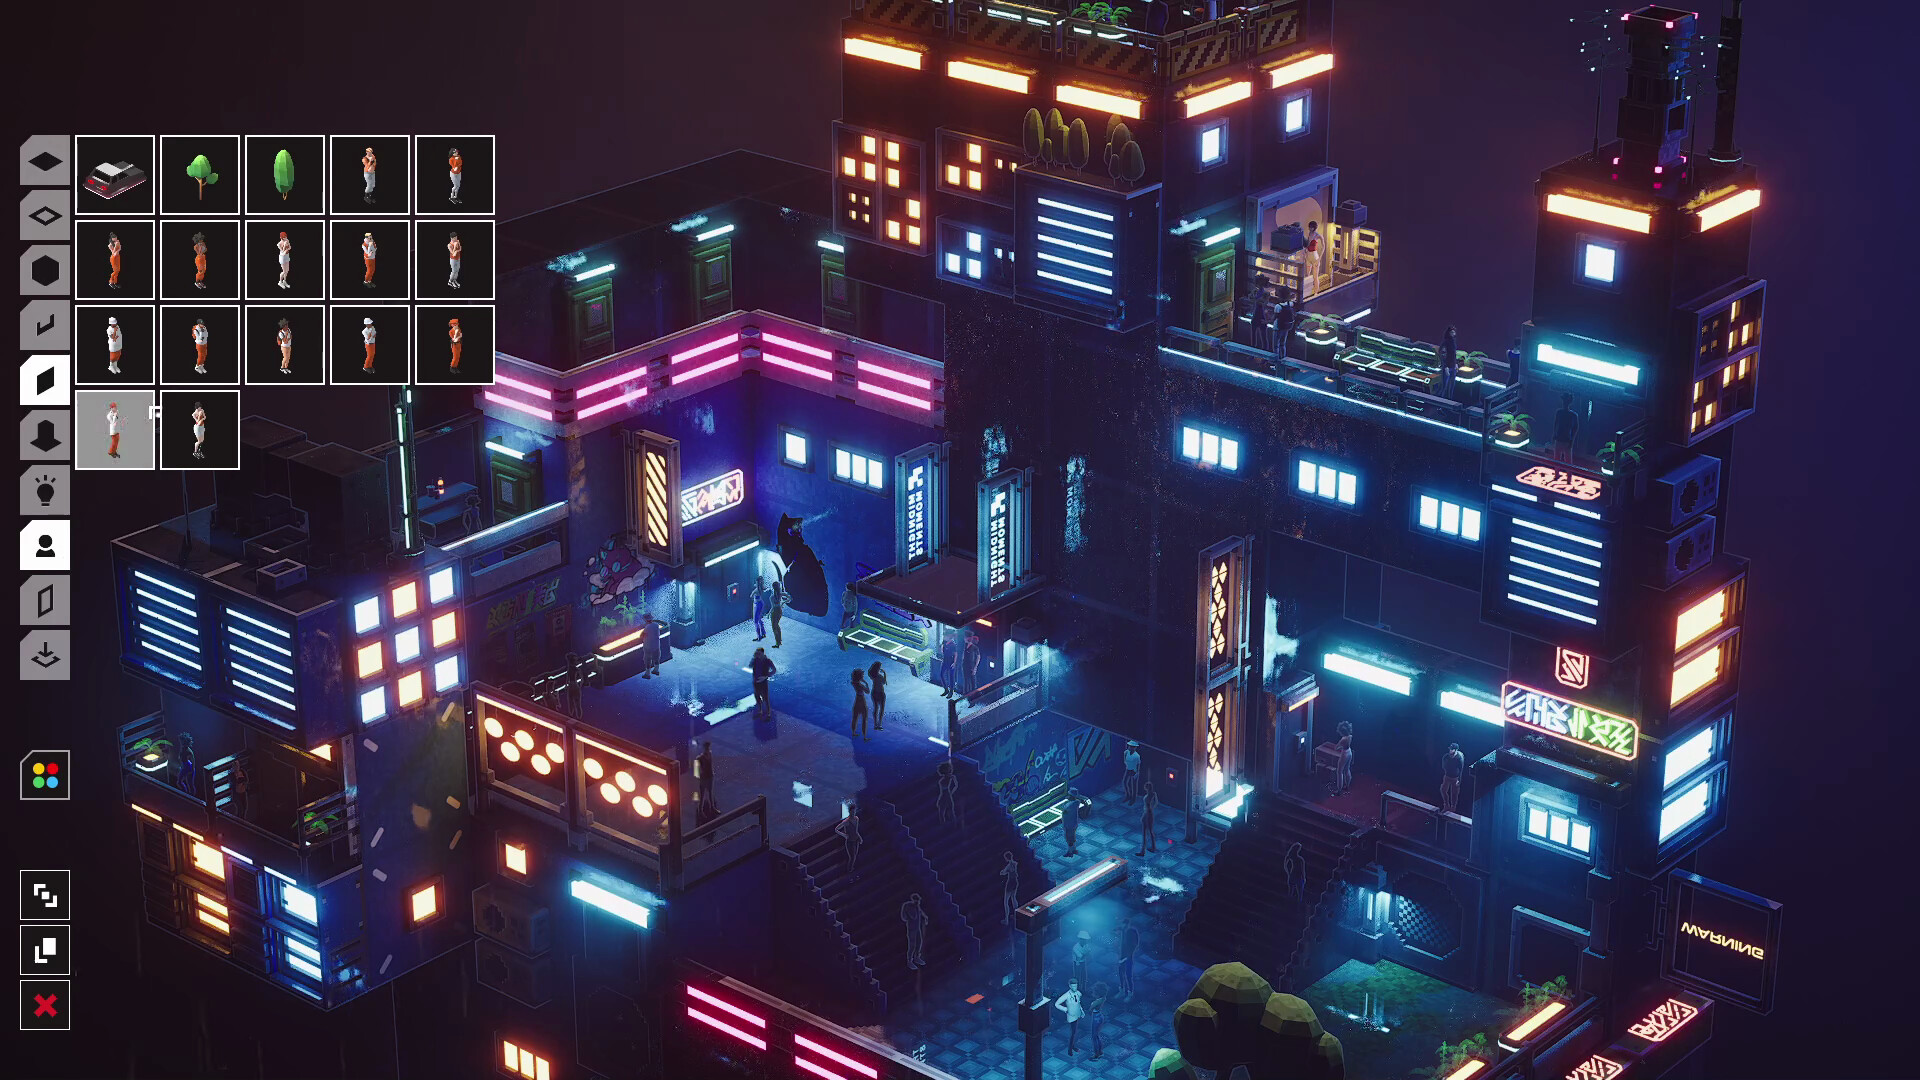
- Place one citizen early. A human figure anchors the scale of everything you build afterward. Without one, you cannot tell whether that tower reads as a skyscraper or a shoebox.
- Save before experiments. Save-anytime is supported and there is no destructive-undo safety net for a complex scene. Save before lighting experiments, mass deletions, or palette explorations.
- Leave the rain on. The rain toggle kills the visuals but not the audio in the current build, so turning it off gets you the sound of rain over dry streets. Just leave it on; the audio is half the atmosphere.
Beginner Mistakes to Avoid
| Mistake | Why It Hurts | Fix |
|---|---|---|
| Building wide | The build area is one block; wide layouts hit the boundary and look sparse | Build tall. Vertical stacking is where the game shines |
| Hunting for labeled parts | Nothing is named; there is no "doors" category | Browse shape tabs and decide each piece's purpose yourself |
| Fighting the snapping bias | Pieces prefer one orientation and rotation is limited | Work with the snap. Redesign the scene around what the pieces want to do |
| Attempting interiors first | Light-up walls and back walls are the hardest pieces to orient | Master exterior facades before trying rooms |
| Expecting cyberpunk citizens | The figures wear modern clothes, no augments | Let architecture and lighting carry the genre; use figures as scale props |
| Judging the palette in ten minutes | The parts feel limiting until you learn to repurpose them | Give it two or three sessions; creative reuse is a skill that compounds |
| Deleting the starter scene on sight | It is the game's only real tutorial | Rebuild it piece by piece as your first exercise |
Core Mechanics Deep Dive
The Shape-Language Parts System
Every part is organized by geometry, not function. This is not laziness; it is the core design decision. Because no piece is labeled, no piece carries a prescribed use. A flat panel can serve as wall, sign, floor, or rooftop. A curved piece can be an awning, a bumper, a bench, or a canal edge. The community screenshot feed proves the ceiling: players have built a Fast and Furious homage street scene, a glowing city with a working-looking train, a rooftop cinema complete with screen and seating, and an entire tower block composed to read as a kneeling robot holding a glowing sword, all from the same modest palette.
The flip side: there are no explicit cyberpunk assets. No holographic ads, no neon signage assets beyond what the light tools produce, no sci-fi props. The genre feel comes entirely from your lighting choices and silhouette composition. Two builders using identical parts can produce a modern suburb or a Blade Runner frame depending on palette discipline.
Stacking, Snapping, and the Vertical Doctrine
Buildings stack vertically and pieces snap on contact with a strong preferred orientation. The rotation tools (R) cannot fully override that bias. The practical consequences define good build strategy in this game:
- Tall builds feel natural; wide builds fight you. The game was effectively designed for vertical composition. A single block can rise impressively high, but horizontal sprawl runs out of both space and coherence.
- Interiors are the hard mode. Light-up wall panels and back walls need specific facing to work, and the snap bias fights camera-facing placements. Exterior facade work first, interiors once you have internalized which pieces cooperate.
- No free placement. Unlike Dystopika, you cannot disable snapping and float objects anywhere. Everything connects. Plan compositions as connected structures, not floating collages.
Lighting and Atmosphere
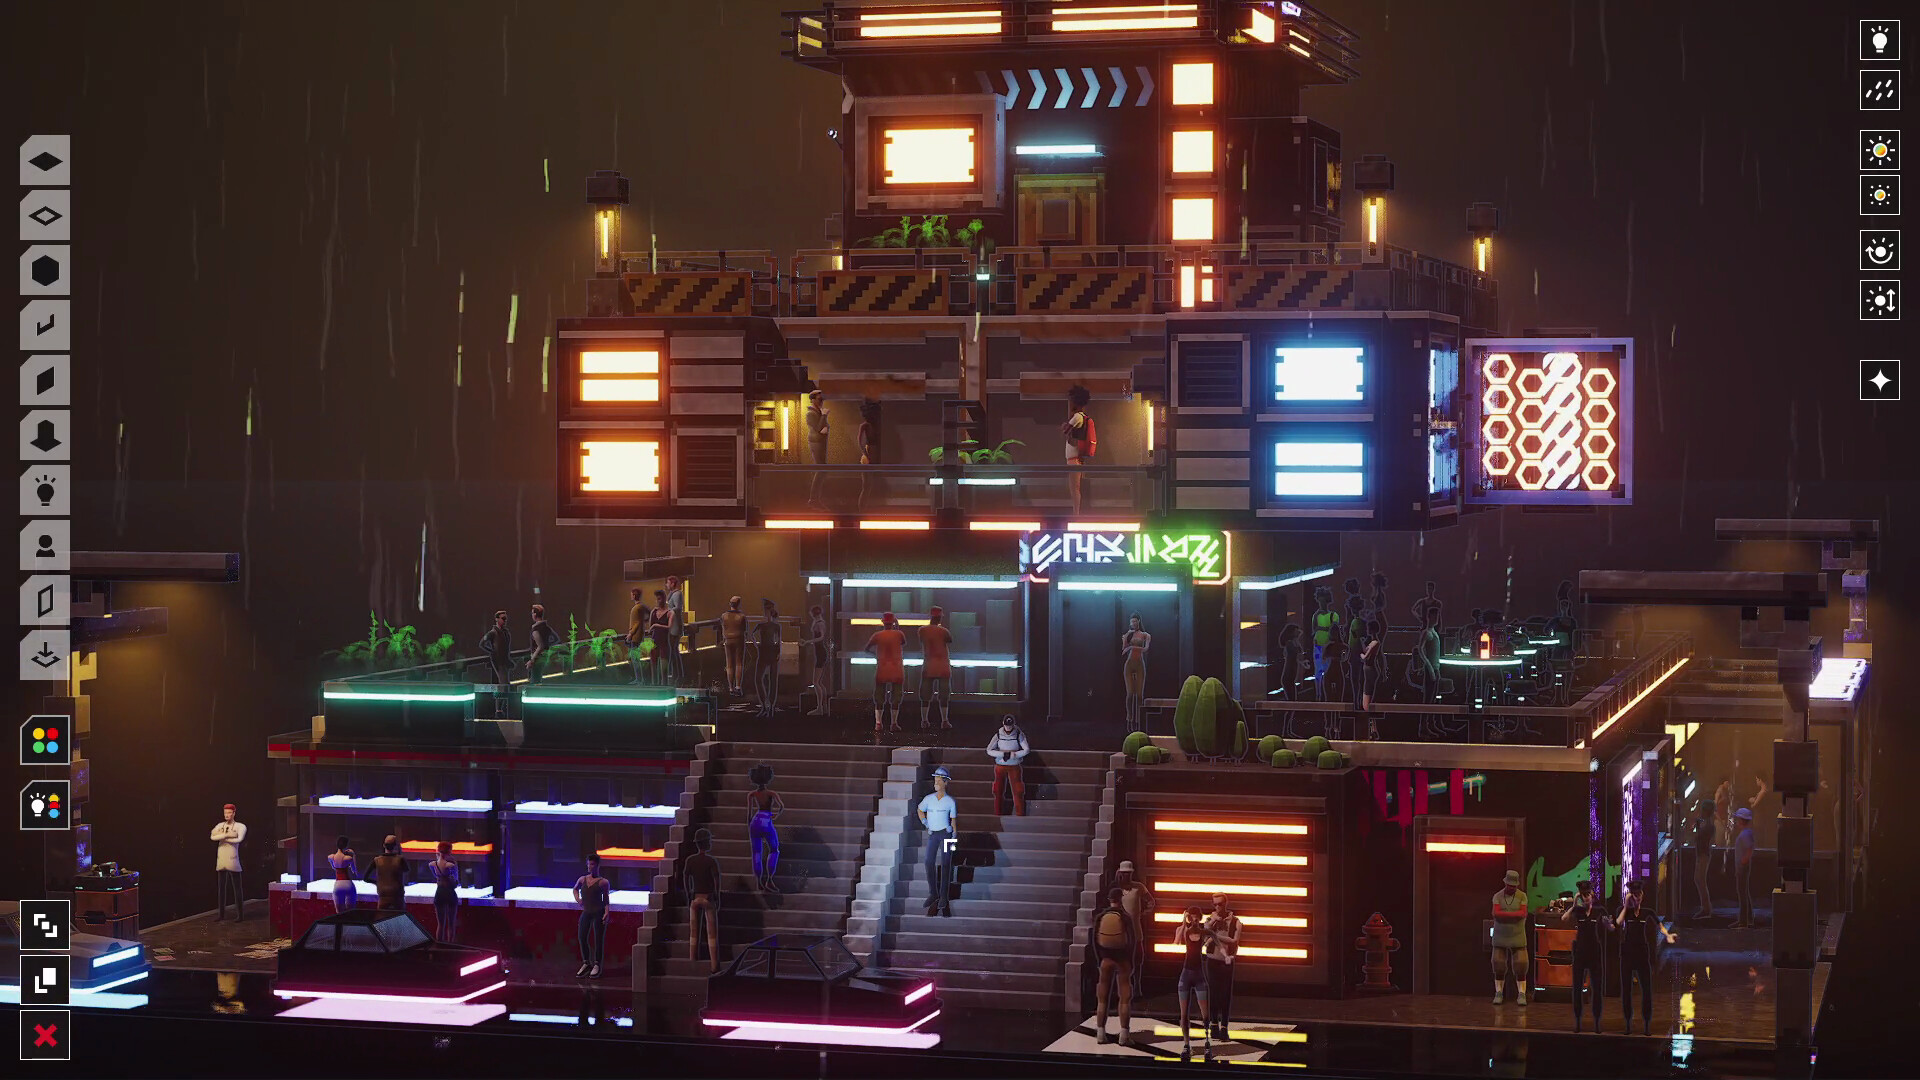
The lighting rig is three controls (time of day, ambient color, brightness) plus always-available rain. Light pools under street lamps, glows through windows and signs, and reflects off wet pavement. This is the heaviest lifting the game does for you visually: the same scene at noon-gray reads as mundane, at midnight-blue with two neon accents reads as cyberpunk photography. The launch window proved the demand; the game was featured in Steam's Cyberpunk Fest in early August as one of the genre's picks.
Practical lighting facts the community has established: the main light had bugs at launch (missing entirely for some players, fixed in Patch 3), virtual shadow maps were removed to fix it, and some players still report modest FPS in dense scenes. The game renders a lot of individual emissive objects; expect better performance in sparse, deliberately lit scenes than in maximalist ones.
Citizens as Scale Anchors
Citizens are static figures you place like props. Their two real functions: scale reference and storytelling. A figure under an awning, a figure at a noodle cart, two figures on a bench, and your corner suddenly implies a story. The models are contemporary and plain, which the community lists as its main wishlist item, but plainness is also flexibility; they read as whatever the scene needs them to read as.
The Static Scene Philosophy
Nothing moves except rain. This is the defining constraint, and the guide's strategies all flow from it. A static scene rewards composition the way photography does: leading lines, light contrast, focal points, negative space. Motion would forgive sloppy composition; stillness punishes it. The players getting the most from Midnight Moments are explicitly composing photographs, using the zoomed camera as their lens.
Progression Strategy
No XP here; progression is your own compositional skill. This arc gets you from first load to screenshots worth posting, mapped onto how the community actually improved:
Session 1: Rebuild the starter. Take the pre-built diorama apart piece by piece and rebuild it. You learn the snap system, the shape tabs, and R-rotation in one exercise without any creative pressure.
Session 2: The one-light scene. Empty the block. Set midnight-blue lighting with rain on. Build one apartment block with a single neon sign and one citizen under a street lamp. Twelve to fifteen pieces, no more. This teaches the discipline that most of this game's beauty comes from restraint.
Session 3: Vertical density. Take the same block and stack it: three floors, each with its own accent lighting, an alley threading up the side, roof clutter (antennae, water tanks, garden plots) on top. This is the "tall block" method that hides the build-area limit.
Session 4: Story composition. Add narrative: a shopfront with its lights on, a figure waiting outside, a puddle catching the sign's reflection. The screenshot contests show what this looks like at the high end: rooftop cinemas, train stations, noodle corners.
Session 5+: Scene series. Save multiple scenes as variations on one neighborhood (same block, different lighting, different stories). The save system makes this free, and it is the closest thing the game has to a campaign.
Builds: Three Scene Archetypes
No character builds in a sandbox; here the "builds" are proven scene templates, drawn from what the community screenshots and contests rewarded:
The Quiet Corner. One shopfront, one lamp, one puddle, one citizen under the awning. Minimal palette, maximum restraint. This archetype won developer shout-outs at launch ("Small. Quiet. Perfect.") and is the best template for learning composition. Lighting: single warm source against blue ambient.
The Vertical Slab. A single dense tower block filling the build area's height: four to six stacked floors, alternating light-up windows and dark facades, rooftop antenna forest, fire escapes implied with ladders and platforms. Lighting: cool ambient, sparse neon accents per floor. This archetype produces the most impressive wide shots.
The Street Story. A run of two or three mid-rise facades forming a canyon, an alley opening between them, props accumulating at street level (crates, carts, signage), multiple citizens placed to imply a moment: someone late, someone waiting, someone eating. Lighting: neon sign as the hero source, everything else subordinate. This is the Blade Runner frame the game's aesthetic is aiming at.
Step-by-Step Strategy
1. The Rebuild Exercise (session 1). Load in → save immediately (this preserves the starter) → delete one piece at a time and immediately place its replacement → repeat until you have rebuilt the whole diorama. You end with a scene you technically built and a working knowledge of every snap relationship the original builder used.
2. The Light-First Workflow (every session after). Empty or new scene → time of day to preference → ambient color chosen → brightness set → rain on → only then place the first building. Every placement decision is now made against the final lighting, not a default. This single workflow change is the biggest quality jump available to new players.
3. The Tall Block Sequence (density). Ground floor: street-facing facades with door-height gaps. Middle floors: alternating window patterns so no two floors repeat. Top floors: lighter masses so the silhouette thins as it rises. Roof: clutter zone, antennae and tanks and gardens breaking the roofline. Alley: thread one up the side so light can rake across the facade faces.
4. The Scale-Anchor Pass (citizens). Before finalizing any scene, drop three citizens at three distances from your camera's intended viewpoint: near, mid, far. Check each building against them. Adjust any structure that reads wrong. Then reposition the citizens into storytelling placements (under the awning, at the cart, on the bench). This pass catches proportion errors that are invisible without human references.
5. The Save-Before-Light Lab (color work). Save. Push time-of-day to both extremes, cycle three or four ambient colors, screenshot each. Reload the save. You now have a lighting contact sheet for your scene and can pick the strongest mood with evidence instead of instinct.
6. The Repurpose Challenge (palette mastery). Pick one piece you have never used. Force yourself to use it five times in one scene, each in a different role. This is the fastest way to break the "palette is too small" plateau, because it forces the interpretive muscle the shape-language system is built to train.
7. The Screenshot Finish (publishing). When a scene feels done: zoom to eye level of your focal citizen, use the rule of thirds (focal point off-center), check what the frame's edges cut, wait for the rain rhythm you like, capture. The community hub's screenshot section runs contests monthly-ish; posting there is the game's endgame.
Advanced Tips
- R-rotation resets per placement. Each newly selected piece returns to its preferred orientation. If you need five pieces facing the same off-axis way, place and rotate each one individually; there is no persistent rotation lock yet.
- Silhouettes matter more than details. In a static scene viewed from a distance, the roofline and building outline carry the composition. Spend your clutter budget on breaking up silhouettes (antennae, water tanks, sign arms) before adding detail at eye level.
- Two light sources per frame, maximum. One hero source (a neon sign, a lit window) and one environmental wash (ambient color). Scenes with four glowing signs compete with themselves. The community's most praised builds are almost all lit with this restraint.
- Wet pavement is a free second image. The rain reflection doubles every light you place. Position hero lights where their reflection lands in your frame's foreground; it fills empty street space with color for free.
- Dense scenes cost FPS. Performance complaints cluster in maximalist scenes. If your build stutters, cull pieces outside your intended camera angles rather than lowering resolution; the game rewards composing for a viewpoint anyway.
- The starter diorama is also a parts catalog. When you cannot remember where a piece you saw lives in the tabs, reload the starter save and find it there. Faster than browsing tabs hunting for it.
- Music is bring-your-own. The game ships without a soundtrack (custom volume controls exist, but no music). Players uniformly recommend dark synthwave or lo-fi playlists. The rain audio layers well under music.
- Wishlist assets by building around gaps. The developer actively showcases community builds and patches weekly-ish. Scenes that stress a missing piece category (doors, market props) make the most compelling feature requests; the post-launch patches already fixed settings saving, GPU crash tracking, the main light bug, and low-FPS camera wobble.
- Color alternatives exist in accessibility settings. If neon palettes read poorly to you, the accessibility options (color alternatives, camera comfort) genuinely help and are not buried deep.
FAQ
How much does Midnight Moments cost? $2.99 USD / S$3.65, with launch and festival discounts having brought it to $2.69 at times. A free demo covers the same core build tools.
What platforms is it on? Windows 64-bit only. Some players run it under Proton, though performance reports there are mixed.
Is there multiplayer, mods, or achievements? None of the three. Single-player sandbox, Steam Cloud saves, no achievement list.
Can I build a whole city? No. The buildable area fits roughly one city block, but vertical stacking lets that block rise impressively high.
Do citizens move? Is there traffic or wildlife? No. Scenes are fully static except rain. Citizens are placed figures that stay put.
Does it have a soundtrack? No music. You bring your own playlist; the built-in audio is rain and ambience.
What are the controls? Mouse only. R rotates pieces. The full scheme lives in the pause menu, which the game never points you to on load.
What are the system requirements? Modest: Windows 10 64-bit, Core i5-class CPU, 8 GB RAM, GTX 1660 / RX 590 class GPU. Note that dense scenes can still dip FPS on strong hardware because of the many emissive objects.
Is the game still being updated? Yes. Post-launch patches fixed settings persistence, GPU crash tracking overhead, the missing main light (virtual shadow maps removed), and low-FPS camera wobble, and the developer runs community spotlights and screenshot contests.
How does it compare to Dystopika? Dystopika builds bigger cityscapes with free placement; Midnight Moments builds smaller, more intimate scenes with connected structures, human-scale storytelling, and a stronger single-mood aesthetic. Owners of both typically describe them as complements, not substitutes.
Is it worth $2.99? The review consensus, including several skeptics, lands on yes for the price. The common caveat: expect a small palette and static scenes, and the value proposition holds.
Common Mistakes Recap
- Judging the palette in the first ten minutes. The shape-language system feels thin until repurposing clicks, usually in session two or three.
- Building wide and sparse instead of tall and dense. The block boundary punishes sprawl; verticality rewards it.
- Building before lighting. Scenes assembled under default lighting get retrofitted badly. Set the mood first, always.
- Forgetting the pause menu. The game's only instructions live there. Every "how do I rotate" question is answered on that one screen.
- Expecting a living city. Static scenes are the design, not a bug. If you need motion, this is the wrong $2.99.
Final Verdict
Midnight Moments is a $2.99 sketchbook for cyberpunk photography. It nails its one aesthetic, its constraint-driven design produces genuinely surprising player work, and the three-person team is patching it attentively. Its limits are real: a small palette, static scenes, no music, and one block of space. Those limits are also the point. For the cozy-builder audience, it is an easy 4/5, with the fifth star waiting on asset expansion.
One habit carries the whole game: light first, build second, compose the screenshot as the actual final product. Players who treat it as photography get photographs; players who treat it as a city simulator get a very small city.
Last reviewed by Game How To Editorial. We play each game, verify details against official sources, and update guides when game mechanics change.
Screenshots