Daily Pick
One deeply researched guide worth reading today.
A practical route through the systems that matter most, written to help new players make confident decisions quickly.
Overview
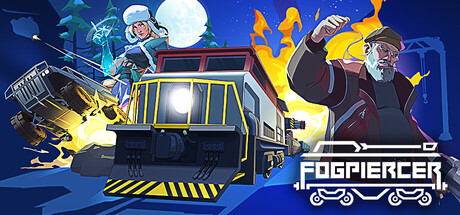
Fogpiercer is a turn-based tactical roguelike deckbuilder where you pilot an armed locomotive through a fog-consumed wasteland. Released July 17, 2026 by Mad Cookies Studio and published by Hooded Horse, it puts you in command of a train that is simultaneously your home base, your weapon, and your deck. Every carriage attached to the train adds a package of cards to your draw pile. Every encounter is a grid-based puzzle where positioning, sequencing, and environmental hazards matter more than raw damage.
If you know Slay the Spire and Into the Breach, you already know Fogpiercer's DNA: spire-style deckbuilding wrapped around breach-style tactical positioning on a single track. You get 5 Action Points per turn, a hand drawn from your train-defined deck, and a scrolling battlefield where enemy vehicles roll in from the right. Chain reactions — pushing enemy trucks into cliffs, triggering explosions, forcing collisions — separate clean wins from lost carriages.
| Stat | Value |
|---|---|
| Developer | Mad Cookies Studio |
| Publisher | Hooded Horse |
| Release date | July 17, 2026 |
| Price | S$19.99 ($14.99 tier) |
| Platforms | Windows, macOS, Linux; Steam Deck great; GOG DRM-free; Game Pass (region-dependent) |
| Genre | Roguelike deckbuilder, turn-based tactics |
| Cards | 170+ |
| Achievements | 50 |
| Default AP | 5 per turn |
| Starting hand | 4 cards |
| Steam rating | Very Positive (297 positive / 35 negative, July 2026) |
| Demo | Free, official, separate Steam listing |
Steam reviews run deep — players with 1,000+ hours call it "a brilliant and original take on the genre" and "Into the Breach with solid deck construction." The critical voice is equally consistent: fights are hardest on turn one, and some anti-synergies between cars can frustrate. Both views are worth hearing: this is a game where the ceiling is genuinely high and the opening is genuinely punishing.
Who this guide is for: Everyone from the first-time conductor to the fog-3 grinder. It covers the verified mechanics, the card color system, the full carriage and driver rosters as currently documented, build archetypes, step-by-step fight sequences, meta-progression paths, boss patterns, and the update history that changed how the game plays.
Getting Started — Your First 30 Minutes
Before your first departure
Fogpiercer drops you into the train assembly screen before your first battle. You pick a locomotive, two carriages, and a driver. These three choices define your starting deck: the locomotive and each carriage contribute their own card packages to your draw pile, and the driver adds a special ability gauge plus driver cards. The game does not hold your hand. Components that work at cross purposes get punished fast in region 1.
The free demo on Steam carries progress to the full game — start there if you're still deciding. The full game has no microtransactions.
Recommended first-run build
| Component | Choice | Why |
|---|---|---|
| Locomotive | Default / starter engine | Balanced card distribution; teaches fundamentals without gimmicks |
| Carriage 1 | Artillery | Push-focused attacks that teach environmental kills |
| Carriage 2 | Protector | Defensive buffer so early mistakes don't end the run |
| Driver | Any with a simple special | Learn the baseline turn loop before complex gauge mechanics |
Beginner mistakes that end runs
Spending all 5 AP on damage. The most common first-run killer. You play three attack cards, deal real damage, then an enemy punches a carriage off the train. Reserve at least 1 AP for repositioning or defense every turn.
Ignoring enemy intent markers. Every enemy telegraphs what it will do next turn — which train part it targets and what it will do. Reading intents is step one of every turn, not something you check after playing cards.
Adding carriages without reading their cards. A carriage looks useful in the shop, but it injects its whole card package into your draw pile. A shiny Crane carriage dilutes your damage deck when what you needed was a Protector.
Hoarding scrap. Repairs cost 30 Scrap per HP in safe areas. A carriage at half HP with 60 Scrap in the bank should be repaired now. The upgrade you're saving for does nothing if your train gets wrecked before you reach the station.
Chasing every battle node. More fights mean more scrap and cards, but also more train damage. Sometimes skipping a fight to reach a waystation is the right call.
Trusting the first hours. Veteran players warn the tutorial undersells the game's depth. The opening runs look simple; the interplay between carriage order, card sequencing, and the Driver Gauge takes time to click. Stick through the first 3–5 deaths.
Core Mechanics — Under the Hood
Action Points and the five-step turn
You get 5 AP per turn by default; cards and effects can change this. The five-step framework separates good players from great ones:
- Read every intent on the field. Find the one threat that would destroy a key carriage or end the run.
- Find the environmental finish. Cliffs, chokepoints, explosive barrels: the battlefield is a puzzle before it's a damage check.
- Budget your 5 AP. Reserve the defensive play before committing to offense.
- Sequence movement before payoff. A push that lines up enemies is worth more than an early attack. Work backward from the board state you want at end of turn.
- Recheck after every effect. A correct plan goes wrong the moment a unit changes cells. Verify intent markers after every movement card.
The card color system
Fogpiercer's 170+ cards are color-coded by role. The official documentation groups them into three core signals:
| Color | Role | What it means | Example effects |
|---|---|---|---|
| Red | Attack and pressure | Direct damage, offensive positioning, effects that weaken or expose enemies | Multi-hit, area damage, Destabilize |
| Blue | Defense and control | Protection, mitigation, tools that preserve train components | Shields, armor, temporary HP, debuff removal |
| Yellow | Tempo and setup | Hand, AP, movement, battlefield, utility | Draw, Coal generation, cost modification, repositioning |
A balanced deck draws from all three pillars. An all-red deck deals damage but dies to sustained pressure. An all-blue deck survives forever but never closes the fight. Yellow is the glue — it makes the other two playable in sequence.
Cost Up / Cost Down
Some effects permanently change a card's cost. Cost Down on a key card makes it repeatable — a 3-cost card becomes a 1-cost staple. Cost Up on enemy attacks is just as valuable: inflating a boss's heavy attack past your AP pool effectively removes it from their rotation.
Charged cards
Charged cards can be held an extra turn to amplify their effect. A charged Artillery Shot that sits one turn doubles its push distance. The risk: your intended target moves out of position while you wait.
Inflation
A debuff that increases all card costs by 1–2 AP for a duration. Devastating against a full board. Prioritize removing Inflation before executing your main combo, and carry at least one yellow utility card that clears debuffs.
Exhaust
Exhausted cards leave the deck until a shop or rest stop. Use exhaust as a thinning tool: a curse or low-impact starter can be exhausted after one use, improving draw quality for the whole fight.
Coal — the second resource
Coal is an energy resource separate from AP. Some yellow cards generate it; specific high-power cards consume it instead of AP. A 3-Coal stockpile effectively gives you 8 AP worth of actions in a turn.
The signature Coal combo: Coal Generator (1 AP) builds stock, then Artillery Supercharge (0 AP, consumes 3 Coal) makes your next Artillery Shot free with double range — push a boss off the cliff in one move.
Train positioning and carriage HP
Your train occupies multiple grid cells, one per carriage. Each carriage has its own HP pool. A destroyed carriage removes its entire card package from your deck for the rest of the run. Destroy the locomotive and the run ends.
Carriage order matters: front carriages absorb hits but enjoy clear firing arcs; rear carriages are safer but have shorter/degraded arcs; some enemies carry penetrating weapons that reach the rear, so a fragile support carriage belongs in the middle, not the back. Artillery wants the front for line of sight; support belongs behind it.
The Driver Gauge system
Each driver has a gauge that fills from specific combat behavior and unlocks special effects when full. Drivers also bring an innate module and named special cards. Two drivers are currently documented in detail on the official community wiki:
| Driver | Gauge goal | Innate module | Named cards |
|---|---|---|---|
| Monica "Cold Snap" | 20 player-turn damage | Ice Pillar | Deathly Chill, Blizzard, Frostbite Arrow |
| Pan "Pathfinder" | 10 damage to marked units | Card Clock | Wormhole, Time Capsule, Infinite Eventualities |
Monica rewards aggression: hit the damage threshold each player turn and her gauge fires, letting Ice Pillar defend the train while you keep pressing. Pan rewards focused targeting — mark a unit, burn it down, and the Card Clock opens time-manipulation plays. The wiki also references an "Archenemy" system — each driver may have a rival that can appear under certain conditions — with a preview added to the driver screen in a recent update.
Carriages — Complete Reference
Starter carriages
| Carriage | Role | Notes |
|---|---|---|
| Artillery | Displacement and ranged pressure | Push-focused attacks; the environmental-kill teacher |
| Protector | Defensive support | Keeps the train intact through early fights |
Unlockable carriages (Spikes costs, per current wiki)
| Carriage | Cost | Role |
|---|---|---|
| Minigun | 25 Spikes | Direct, repeated firepower; burst-damage core |
| Harpoon | 100 Spikes | Positional control; pulls/moves targets |
| Leeter, Passenger, Crane, Sword, Tesla Coil, Experiment 52 | Listed | Detailed launch data still being completed by the wiki; verify in-game |
Update history shows unlock conditions have shifted: Update #2 moved Leeter, Bullet, and Crane to earlier unlock points and removed some playstyle-gated requirements, so expect the table above to evolve. Upgrades at Central Station cost 100 Scrap and unlock additional cards for that carriage.
Carriage positioning rules
- Front carriages take more hits but have better firing arcs
- Artillery needs clear line of sight — put it forward
- Support and fragile carriages go in the middle, not the back (penetrating weapons reach the rear)
- Each destroyed carriage removes its whole card package from the deck
- Longer trains occupy more cells — tighter battlefields become harder to navigate
Progression Strategy — What to Unlock First
Metaprogression priority (Spikes)
After each run you earn Spikes, the permanent meta-currency, even on failure. Spend in this order:
- New locomotive — a different engine means a different starting deck and playstyle. Expands options immediately.
- Minigun carriage (25 Spikes) — burst damage. A major early power spike.
- Driver upgrades — each driver has an upgrade that adds a powerful special card. Focus on drivers that match your locomotive.
- Harpoon carriage (100 Spikes) — the control-build enabler. Worth saving for.
- Starting bonuses — extra gold or a free upgrade are nice but don't change how you play. Last.
Your first 3–5 runs will probably die in region 2. That's normal — every death buys permanent progress.
Fog Thickness and difficulty
Fog Thickness is the difficulty slider. Reviewers reference "fog 0" through "fog 3" runs — the deeper the fog level, the more hostile the modifiers, including the Corruption mechanic on higher levels. Corruption received balance passes (Update #2 made it less punishing while keeping its essence). Start at low thickness, and only climb once you've cleared a region with your current build.
Route selection and nodes
The region map branches into nodes. Some nodes carry small green or red dots — positive or negative modifiers that meaningfully change difficulty or rewards. Factor them into route planning.
| Node | What it is | Priority |
|---|---|---|
| Fight | Standard combat, defeat all enemies | Medium — take when healthy |
| Convoy | Special fight; destroy a convoy vehicle for valuable modules | High when offered |
| Central Station | Safe haven: buy, sell, upgrade carriages, region rewards, deliver cargo for Scrap | High before the boss and with 100+ Scrap |
| Random Encounter | Unpredictable boon or challenge | Variable |
| Cash Shop | Buy/remove/transform cards, upgrade carriages | Medium — deck fixes live here |
| Boss | End-of-region climactic fight; required to advance | Gate |
Region modifiers
| Modifier | Effect | Best build |
|---|---|---|
| Scorched Territory | Fire damage over time each turn | Shield-heavy, repair-focused |
| Electrical Storm | Hacker-style cards cost 1 less | Control builds |
| Bandit Fortress | More enemies, more rewards | Minigun burst |
| Fog Banks | Hidden enemy intents | Defensive default |
Route toward the modifier that favors your current train. Half-dead train? Route toward waystations and the nearest station.
Builds and Tier Lists
Build archetypes
1. Artillery Control
Locomotive: Scout Engine (faster action cycles)
Carriages:  Artillery → Crane → Harpoon
Core cards: Push Shot, Crane Pull, Harpoon Strike, Aerial Swap
Goal:       win without raw damage — push, pull, and crash enemies into terrain
Best in:    cliff-side regions
Weak in:    open plains with no environmental finish
2. Minigun Burst
Locomotive: Armored Hauler (survive the setup turn)
Carriages:  Minigun → Ammo support
Core cards: Rapid Fire, Coal Generator, Overcharge, Suppression
Goal:       generate Coal, supercharge the Minigun twice in one turn, delete single targets
Weak in:    swarms — no splash
3. Control / Disruption
Locomotive: Default Engine
Carriages:  Hacker-style car → Crane
Core cards: Hijack, Decoy Deployment, EMP Burst, Neural Override
Goal:       take enemy vehicles, reposition them, detonate for chain clears
Best in:    Electrical Storm regions (cost reductions)
Requires:   precise AP sequencing
4. Balanced Starter
Carriages:  Artillery + Protector, driver with simple gauge
Goal:       learn the loop; every archetype above is a specialization of this
Driver tier list (as currently documented)
| Driver | Tier | Best with | Gauge trigger |
|---|---|---|---|
| Monica "Cold Snap" | S/A | Aggressive damage builds | 20 damage per player turn |
| Pan "Pathfinder" | A | Focus-fire and marking builds | 10 damage to marked units |
Monica is the standout for aggressive players: her Ice Pillar module is a persistent defensive tool, and the gauge (20 player-turn damage) rewards exactly the pressure you need to clear regions fast. Her named cards — Deathly Chill, Blizzard, Frostbite Arrow — layer crowd control on top of the damage. Pan is the thinking player's pick, trading raw pressure for time manipulation through the Card Clock.
Step-by-Step Strategy Sequences
Sequence 1 — The opening turn against a standard convoy
Enemy layout: Transport truck (front), Escort buggy (middle), Support van (rear).
- Read intents: Transport will ram your front carriage; Escort will shoot your locomotive; Support will heal Transport.
- Find the environmental finish: cliff on the left edge.
- Play Push Shot (2 AP) on the Support van, moving it behind the Escort.
- Play Artillery Blast (2 AP) on the Transport, pushing it into the Escort — collision damage to both, both now adjacent to the cliff.
- Play a Shield card (1 AP) on your front carriage.
- End turn. The Support's heal misfires (target moved). The Escort's shot is blocked.
Sequence 2 — Boss with minions
- Turn 1: ignore the boss; clear both minions with Explosive Shell (2 AP). The boss re-summons next turn if they survive.
- Turn 2: boss telegraphs a Slam hitting your front 3 carriages. Play Crane Pull (2 AP) on your front carriage, moving it out of the target zone.
- Play Ammo Load (1 AP) — 2 Coal.
- Play Overcharge (2 AP) — consumes 2 Coal, supercharges your next damage card.
- The slam hits empty space.
Sequence 3 — Fog Banks (hidden intents)
- Play blind defensively: Barrier (1 AP) on the locomotive every turn.
- Play Scout Drone (1 AP) — reveals enemy intents for 2 turns.
- Follow the five-step turn while intents are visible.
- Reapply the drone when it expires; never let the reveal lapse during Fog Banks.
Sequence 4 — The station upgrade decision
You have 80 Scrap and a damaged Protector. Options: upgrade Protector (80 Scrap, +2 HP, +Shield card to deck), repair (40 Scrap), or a new carriage (100 Scrap).
If the Protector is your only defense, repair now and upgrade at the next station. If you have a second defensive option, skip repair and save toward the Harpoon — control tools scale better than raw HP.
Sequence 5 — The Coal 7-AP turn
Default AP is 5. With 3 Coal saved:
- Coal Generator (1 AP) — 2 more Coal, total 5.
- Artillery Supercharge (0 AP, consumes 3 Coal) — next Artillery Shot costs 0 and gains double range.
- Artillery Shot (0 AP) — push the boss off the cliff.
- 4 AP remain: spend 2 on defense, keep 2 for next turn.
Sequence 6 — Monica Cold Snap activation
Running Monica with a burst build:
- Rapid Fire (2 AP) + Double Tap (1 AP) = 18 damage; gauge at 18/20.
- Frostbite Arrow (1 AP) — 3 damage; gauge passes 20, Ice Pillar triggers.
- Ice Pillar defends your front carriage.
- Coal Generator (1 AP) sets up next turn.
- Gauge resets; repeat the cycle next turn.
Advanced Tips
Think in momentum, not damage. A turn that pushes an enemy off a cliff, shields a key carriage, and banks 2 Coal beats a turn dealing 15 raw damage to the boss. Wins come from sustained resource advantage.
Deck thinning is winning. By mid-game your deck should be 15–18 cards, not the 22+ you started with. Exhaust bad cards, remove starters at every shop. A thin deck draws its best cards every turn; situational filler is a trap.
Protect the middle. Fragile support carriages belong in the middle of the train. The rear is only safe against non-penetrating attacks — and enemies with pierce will reach it.
The three-question card filter. Before taking any card reward: does it support my win condition? Can my AP curve play it without sacrificing defense? Does it create a new capability or just duplicate an existing card? Three no's = take the scrap.
Turn one is the hardest turn. Multiple reviews call this out: encounters are hardest on turn 1, before you've built momentum. Prepare by (a) always reading intents before playing, (b) keeping a defensive card in hand for the first turn, and (c) treating the first turn as survival, not damage.
Watch for anti-synergies. The main complaint from frustrated veterans: some car combinations work against each other. Before attaching a carriage, check whether its card package dilutes or disrupts your existing deck. A carriage that sounds great in isolation can sabotage a build.
Enable grid lines. Community advice is unanimous: turn on grid lines in the options. Tactical visibility improves sharply — ranges and target cells become readable at a glance.
Don't hoard the driver ability. Using the gauge to close a fight quickly — even a non-boss fight — saves HP and resources that matter more than the satisfaction of a perfect proc.
Upgrade carriages when the build struggles. Upgrading a carriage unlocks new cards for it. If your deck feels stuck, a single carriage upgrade often opens the combo you're missing.
AP and draw cards are secretly the best cards. Extra energy and extra card draws enable the big turns. Take them whenever offered.
Boss Pattern Recognition
- The Juggernaut (Region 1): Slow, telegraphed charges. Stay mobile, push it into walls, and save Coal for the charge telegraph. A supercharged Artillery Shot pushes it off the track — three cliffs end it.
- The Swarm Mother (Region 2): Summons minions every 3 turns. Clear minions on turns 2 and 3, focus the Mother on turn 1 of each cycle.
- The Phantom (Region 3): Teleports your carriages around the battlefield. Anchor the locomotive with a Lock Down card to resist displacement.
Enemy mechanics trend toward overwhelming numbers rather than clever individual behavior — the counter is always the same: intents first, environment second, damage third.
Meta & Update History
Fogpiercer's developers are responsive; the game has been patched continuously since launch. What's changed and what it means:
Update #9 (latest)
- Pattern mods were far too rare; they're now a more common mod type — expect to see pattern-altering mods frequently
- Card sorting/filtering added to the Logs' "Cards" view; max-rank train units are visible
- Archenemy preview added to the driver screen
Update #8
- Fixed the card flicker bug on hover (longstanding complaint)
- Map edge pan setting now OFF by default
- Improved 3D card collision handling
Update #7
- Card distribution rework: rewards and chop-shop choices previously leaned too heavily toward yellow (shop utility) cards; ratios were redesigned to favor carriage cards
- Localization catch-up
Update #6
- Passenger carriage rework: repositioned as the support carriage that sets up other carriages; some cards changed completely
- New cargo cards: straightforward, easy one-shot-or-hold decisions
Update #5
- Pity system: rare and epic card probabilities increase when you've gone without them
- Environmental hazard variety improved (fewer repeats of the same hazard in the same biome)
- Smarter modding system
Update #4
- 16 new modules added — more variety at the start, more synergy potential
- Train building screen redesigned (two screens merged into one, double-click on train unit buttons)
Update #3
- Difficulty curve revisited; enemy numbers lowered on fog 0; the most difficult segments got fewer enemies across all regions
- Unit progression reworked (carriges unlock cards over time)
Update #2
- Unlock conditions for Leeter, Bullet, and Crane moved earlier — no longer locked behind a tactical-positioning playstyle
- Corruption mechanic (higher fog levels) made less punishing
What it means for you
- Carriage cards are now seen more often than shop utility cards (Update #7) — build around your train, not the shop
- Pattern mods appearing often (Update #9) can make wild cards — read what the mod does before picking
- The pity system (Update #5) guarantees you'll see big cards eventually — patience pays
- If you bounced off early anti-synergies, revisit: Update #2 and #6 directly addressed carriage gating and support-car design
Accessibility, Settings, and Steam Deck
| Feature | What it does |
|---|---|
| Grid lines | Shows the tactical grid; community-recommended to enable |
| Color alternatives | Adjusts card colors for color vision deficiency |
| Camera comfort | Reduces camera shake and movement |
| Custom volume | Separate sliders for SFX, music, UI |
| Adjustable difficulty | Fine-tune enemy damage, HP, spawn rates |
| Mouse-only mode | Full game playable with mouse only |
| Save anytime | Pause and save mid-run |
Steam Deck: plays beautifully, full controller support, smooth at native resolution, and Save Anytime works perfectly for handheld sessions. Recommended: right trackpad for card-targeting precision, End Turn bound to a back paddle. Keyboard shortcuts include WASD/arrows for battlefield scroll, Space to end turn, Esc for pause.
FAQ / Common Mistakes
Q: Why am I running out of cards every fight? A: Your deck is too thin early. Don't exhaust or discard aggressively until yellow draw cards establish a loop.
Q: What does Spikes currency do? A: The meta-progression currency earned after runs, win or lose. Spend in the Garage on locomotives, carriages, driver upgrades. You keep Spikes after failed runs.
Q: Focus one carriage or spread upgrades? A: Focus one damage carriage and one defensive carriage. A maxed Artillery beats three half-upgraded options.
Q: How do I beat the Juggernaut? A: Save Coal for the charge telegraph; supercharged Artillery Shot pushes it off the track. Three cliffs end it.
Q: The game seems too hard / fights are hardest on turn 1. A: Correct on both counts. Fogpiercer is balanced around failure; the first turns of each fight are the hardest by design. Keep a defensive card for turn 1, read intents first, and accept that early runs die in region 2 — each death buys Spikes.
Q: Some card/carriage combos feel like they fight me. A: That's the anti-synergy critique in the reviews. Check the carriage's card package before attaching it, and remove dead weight at every shop. Updates #2 and #6 addressed the worst offenders.
Q: Demo or full game? A: The free demo carries progress. If you like Slay the Spire or Into the Breach, you'll almost certainly want the full game.
Q: Is it on Game Pass? A: Microsoft's page displayed a Game Pass badge when checked mid-2026. Availability varies by region and plan.
Q: Runs on Linux / Steam Deck / GOG? A: Windows, macOS, and Linux native; Steam Deck runs it great; GOG sells DRM-free.
System Requirements
| Component | Minimum | Recommended |
|---|---|---|
| OS | Windows 10 64-bit / macOS 12 | Windows 10 64-bit |
| CPU | i5-4670 / FX-8300 | i5-7700K / Ryzen 5 1500X |
| RAM | 4 GB | 8 GB |
| GPU | GTX 960 4GB / RX 570 4GB | GTX 1060 6GB / RX 5500 XT 8GB |
| Storage | 2 GB | 2 GB |
Guide reflects verified data as of August 2026: Steam store, official community wiki, and the fogpiercer.org field guide. The official wiki is still being completed — carriage and driver entries are being filled in continuously, so verify unlock costs after major balance updates.