Daily Pick
One deeply researched guide worth reading today.
A practical route through the systems that matter most, written to help new players make confident decisions quickly.
Overview
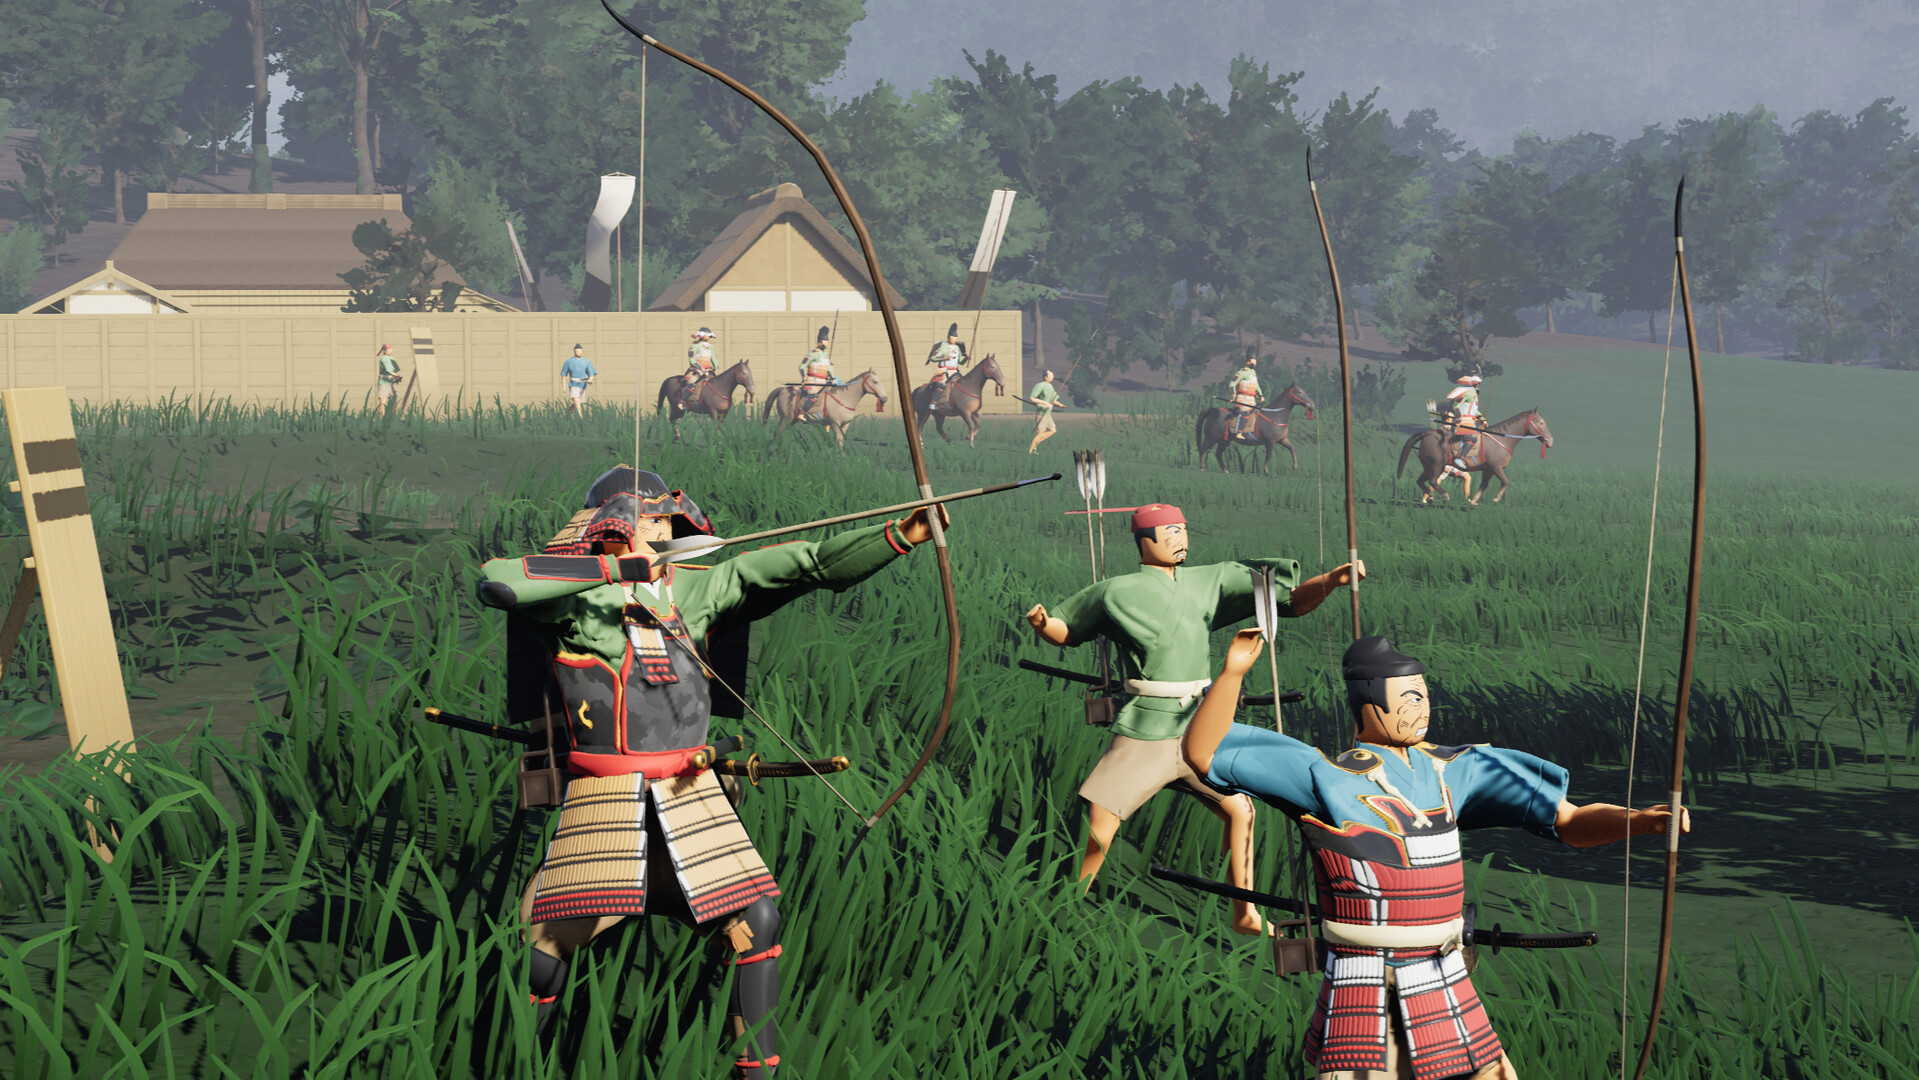
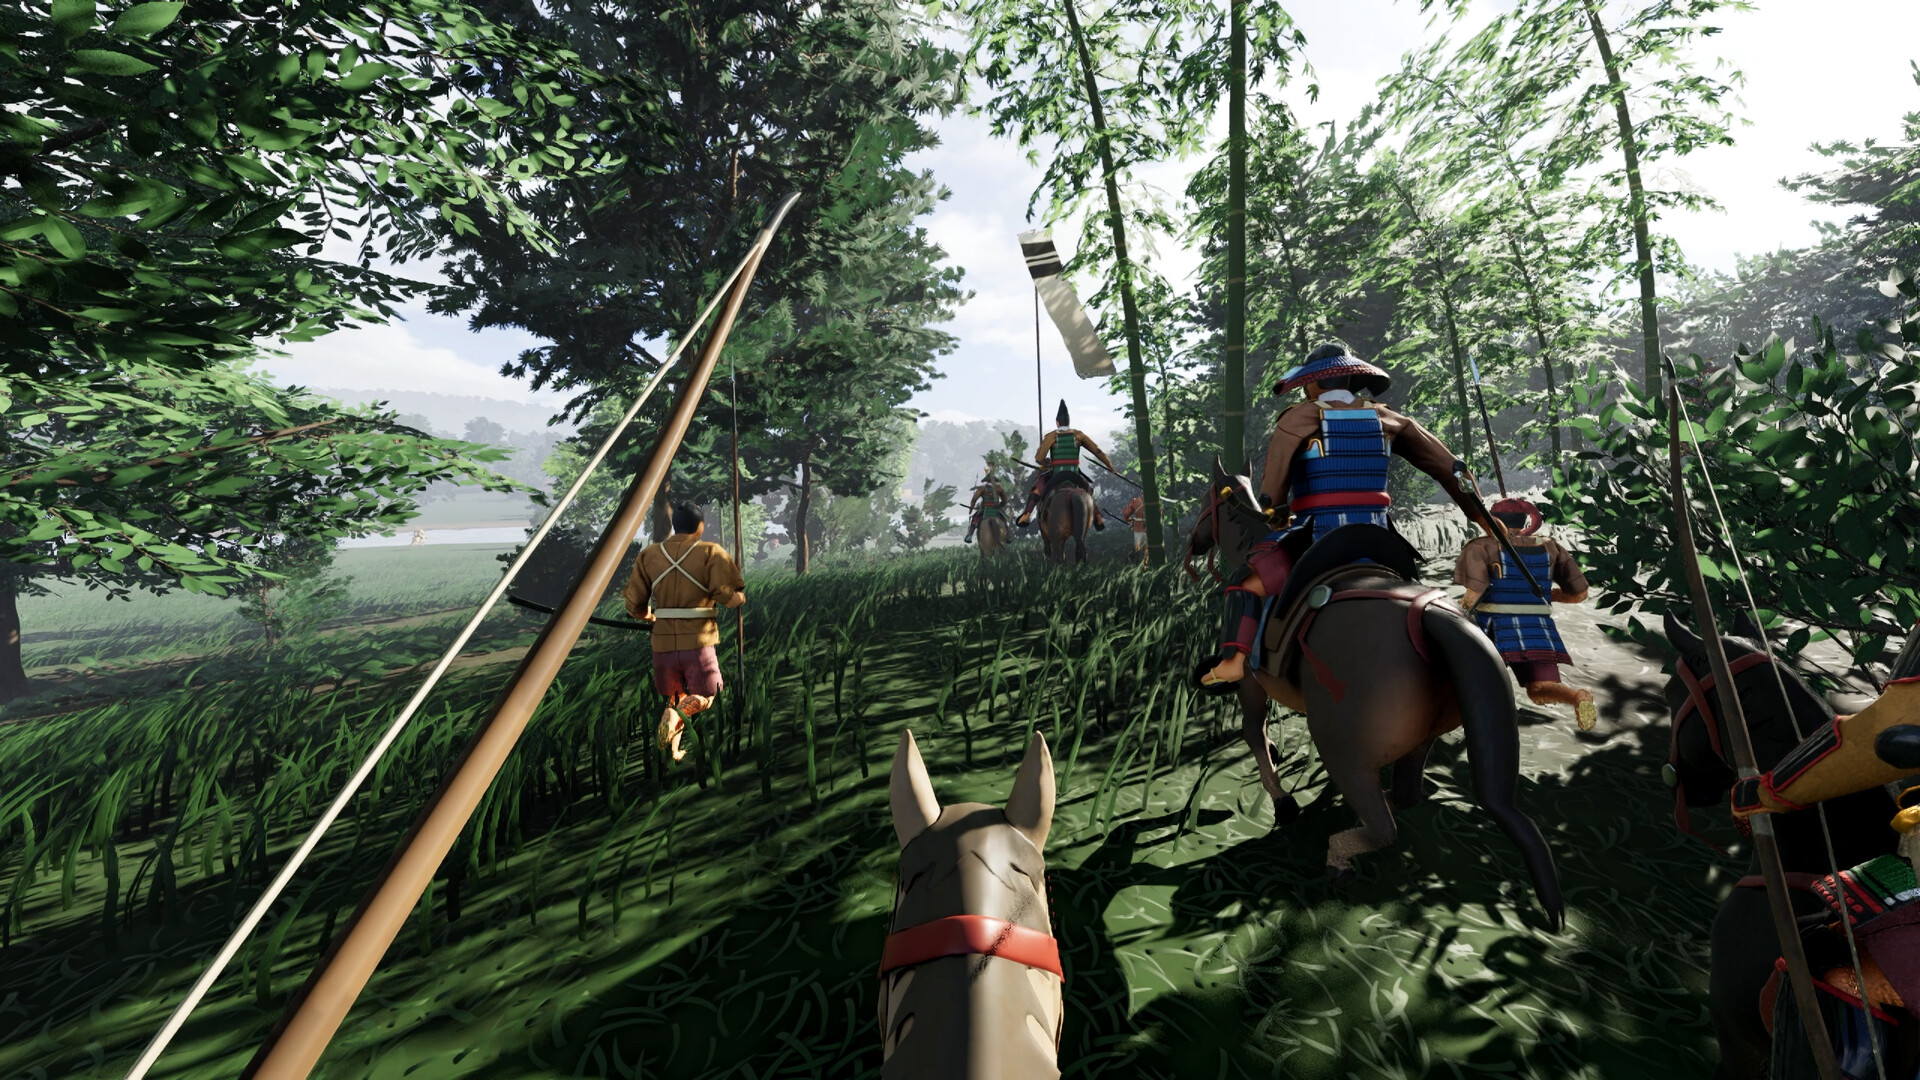
Warlord: Awaji is the second entry in Darkmatter Games' immersive strategy series, the follow-up to Warlord: Britannia. The Emperor hands you command of a samurai army and one order: conquer the island of Awaji and save a regime on the edge of collapse. Rebel forces hold the island, and their leader is returning from the West with a massive army meant to depose the Emperor in Kyoto. Rumor says the monks and warriors of Awaji have uncovered powerful arcane weapons from a bygone war. Defeat the rebellion and find out what they dug up. You fight from the first person. You lead armies, build camps, seize villages and forts, and break the enemy clans that resist you.
The series' signature is "immersive strategy": complex strategic gameplay fixed into the shoes of your character. You see the world through a samurai warlord's eyes, yet command a sprawling campaign. When battle turns against you, you draw your own weapon and fight alongside your hand-picked warriors in real time.
The game launched September 9, 2026, published by Darkmatter Games, a solo operation with no investors, no publisher, and no donations, funded purely by sales of the previous game. It is not an Early Access title: it shipped finished and has already received a steady run of post-launch patches, including a major difficulty rework and a large performance fix. Store reception sits at Mostly Positive, with roughly 80% of reviews recommending it.
| Fact | Detail |
|---|---|
| Developer / Publisher | Darkmatter Games |
| Genre | Immersive strategy, first-person strategy |
| Series | Second entry; after Warlord: Britannia |
| Platform | Windows (Steam) |
| Release date | September 9, 2026 |
| Price | $24.99 USD (no launch discount) |
| Reception | Mostly Positive, about 80% positive of 250+ reviews |
| Map | 16x16 km (256 km²), real Awaji heightmap at 1/3 scale |
| Settlements | Around 300 across 6 samurai clans plus monk factions |
| Settlement types | Almost 20 (more than tripled from Britannia's 6) |
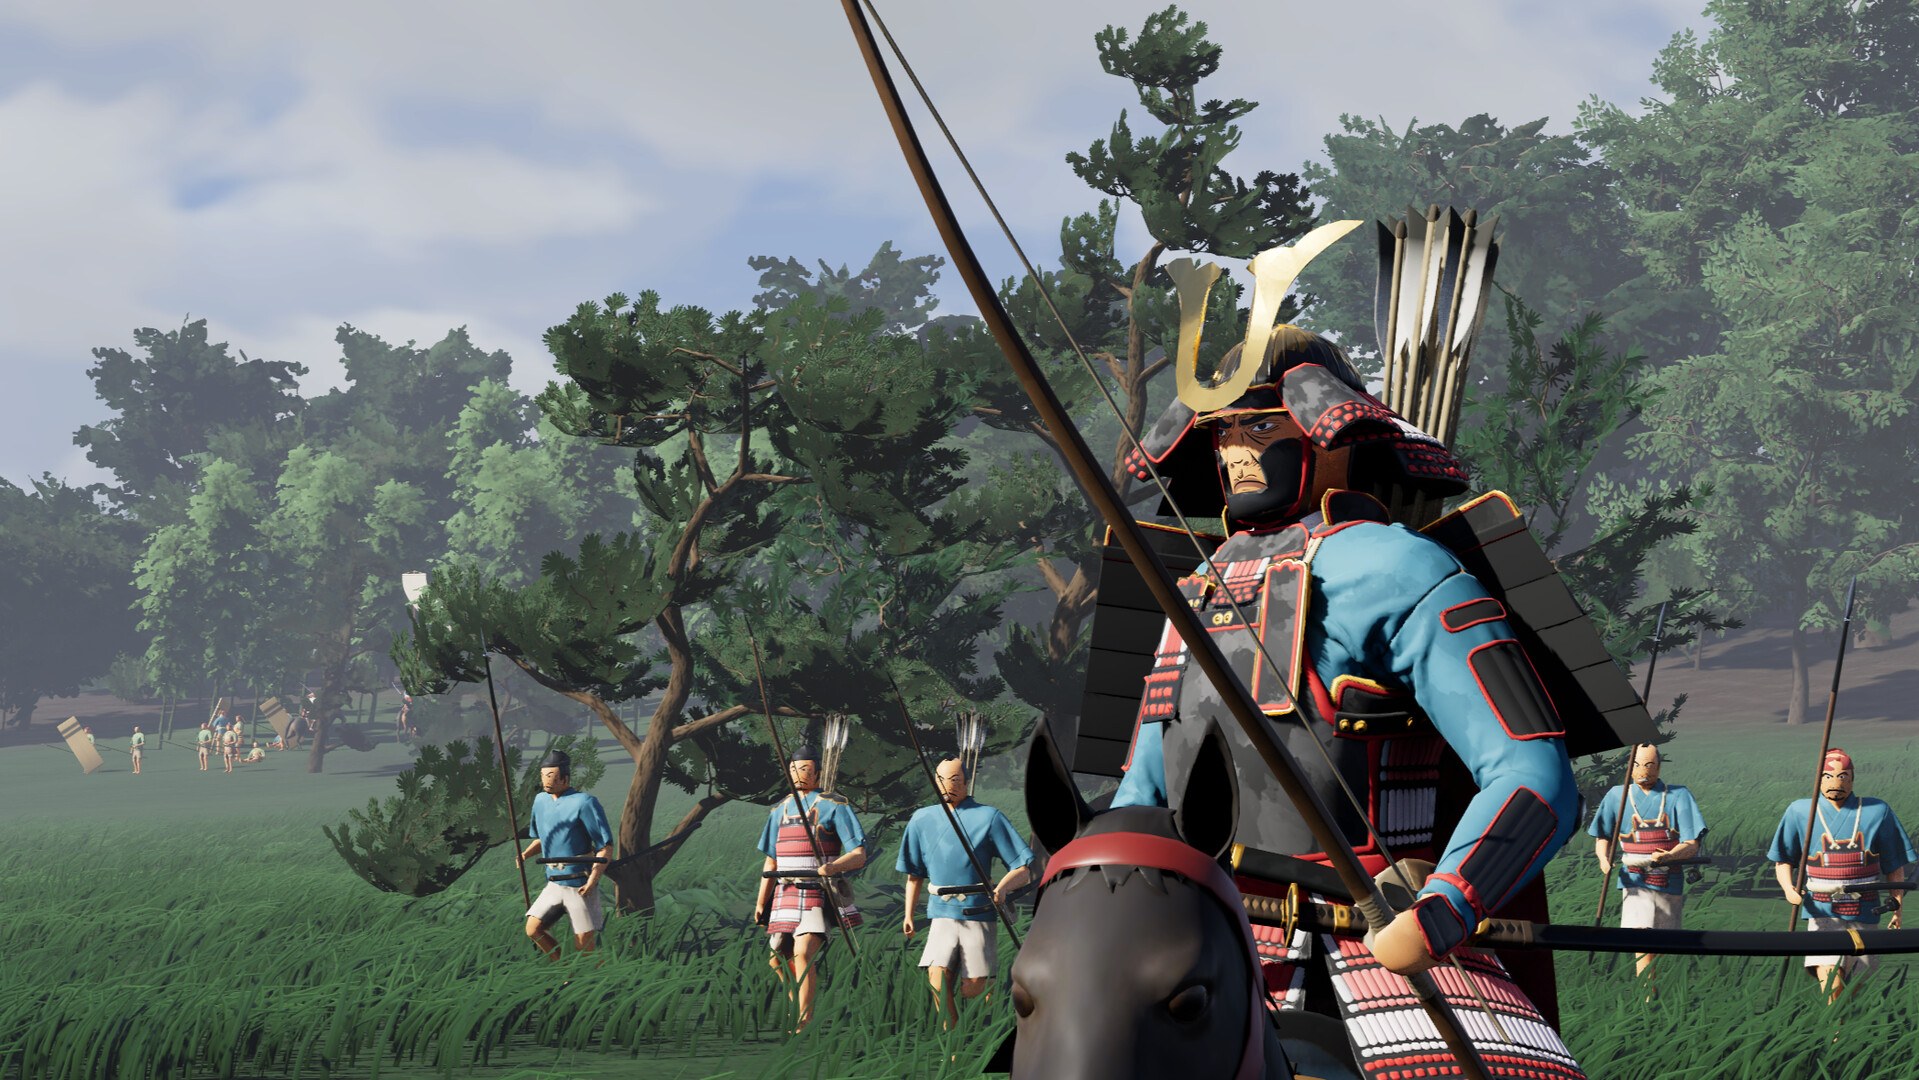
| Army | Recruited samurai with unique names, XP, gear |
| Troop types | Melee, ranged, cavalry |
| Base building | Deployable war camps anywhere in the open world |
| Economy | Closed item economy; all resources fixed at save creation |
| Achievements | 57, including nine named after campaign regions |
| Languages | 14, including Simplified Chinese, Portuguese-Brazil, Japanese |
| Accessibility | Adjustable text size, color alternatives, custom volume, adjustable difficulty, save anytime |
Who it is for: Warlord: Britannia veterans, Mount & Blade style first-person strategy fans, history buffs who care about 14th-century Japan accuracy, and anyone who wants an open-world campaign where armies, camps, and shrines all matter.
Who it is not for: players who want a pure RTS camera, arcade action, or a quick campaign. This is a slow burn with historical weight, and the middle hours repeat until the fourth region opens up the scale of the war.
Getting Started
The campaign opens on a beach. From there you climb the bluffs into the northern starter region, hilly and forested. The whole island is yours to take, but the first hour decides how the first ten go.
Save discipline comes first
There is no autosave. This is the single most common regret in player reviews: hours of conquest lost to one death or one crash because nobody pressed the save button. Save every time you capture a settlement, every time you promote a warrior, and every time before you attack anything bigger than a farm. Saving works anywhere and pauses the game, so there is no cost except the two seconds it takes. Do not trust a single save slot either; rotate two or three, because at least one early player reported a save file dying outright.
The opening plan for conquest
- Camp on the first night. Pitch tents before dark, set screens and fences as a perimeter, and assign guards. Camps provide sleep, rest, and sustenance. A sheltered camp survives night ambushes.
- Recruit a balanced core. Build melee first, add ranged, hold cavalry until your army earns it. Your warriors are your most important weapon.
- Form groups immediately. Recruits arrive unattached, and unattached troops count against a hard limit. Right click and drag a grouping line onto a leader to form a squad. Do this before the recruit cap blocks further recruitment.
- Read the roads. The main road is your guiding path and always leads to samurai settlements, temples, and shrines. Offshoot paths lead to farms and points of interest. Follow the main road to complete the campaign.
- Take a shrine for your first objective. Shrines give a passive benefit to whoever controls them. Early shrine control sets the tone for the spiritual layer.
- Loot everything once. Settlements start with a fixed set of items and never regenerate. Take what you need when you capture a place, or it is gone forever.
- Save after every capture. The no-autosave rule makes this the cheapest insurance in the game.
The first 30 minutes, minute by minute
Playtesters who jumped straight into battle without reading the systems got eaten. The players who held got a smooth ramp. Here is the proven early sequence:
00:00-05:00  Land, climb the bluffs, do NOT sprint inland.
05:00-10:00  Recon the ridge above the beach. Spot the nearest farm, the road, the shrine.
10:00-15:00  Recruit 4-6 retainers. Form one melee group, one ranged group immediately.
15:00-20:00  Loot the nearest farm. Take wood, cloth, any weapon.
20:00-25:00  Locate a defensible camp spot (high ground, near water, clear sightlines).
25:00-30:00  Pitch camp before sundown. Set tents, screens, fence perimeter, assign guards.
If you skip the camp step on night one, you risk a night ambush with a tired, unarmored group. That single choice cascades into the whole first week.
Since patch vR103, the starter region also hands you tools that used to take hours to find: bows and naginata now sit in checkpoints and temples, and a horse waits at the Iwaya clan mansion on the northern tip of the island. Grab the horse early. Walking everywhere before you own a mount is the slowest part of any campaign.
Beginner mistakes to avoid
- Expecting passive income. There are no taxes and no regenerating resources. Waiting at camp for money to roll in is a dead end. Constant action is the only economy.
- Hoarding one elite squad. Promoted leaders raise army capacity and open follower slots. Cycle your best warriors into leadership and keep training new blood, or your army stalls.
- Ignoring camp needs. Tents, seating, food trays, and sake matter. Warriors expect tatami mats and lacquered trays; retainers make do with thatch rolls. An army without basics fights tired and weak.
- Fighting every battle alone. The game lets you fight alongside your men. Your weapon swings turn hard fights into easy ones.
- Pushing south too early. Northern garrisons carry spears, swords, and basic belly-protector armor. Southern clans are well equipped. Your own gear must catch up before you cross the mountains.
- Overextending. Clans react aggressively to your exploits and send quick-reaction forces. Anger the wrong clan in the first hour and a war band twice your size can chase you across the whole map while you are still doing tutorial objectives.
- Forgetting the monks. Esoteric warrior monks curse enemies and coordinate coalition attacks. They are a force multiplier, not flavor.
- Standing trading blows in melee. Block, step, and punish. The stamina economy punishes button mashing.
- Ignoring the arrow ballistics. Arrows penetrate, ricochet, and shatter. A straight line of fire through a crowd can hit friendlies.
Difficulty Settings
The launch difficulty tuning was too forgiving, and the Balance Patch rebuilt it. Difficulty in this game is a damage multiplier applied to every hit your troops take, on top of damage reduction from camp needs and spiritual modifiers. Before the patch those reductions stacked so far that even Veteran felt trivial; the patch re-anchored the whole ladder.
| Difficulty | Damage taken now | What it feels like |
|---|---|---|
| Recruit | 1.0x | The old Regular baseline; players who called launch "too easy" |
| Regular | 1.2x | The old Veteran; the new normal |
| Hardened | 1.8x | A real challenge; losses climb every battle |
| Veteran | 2.2x | Consecutive battles without healing at camp may be unwinnable |
Practical guidance: play your first campaign on Regular. The strategy layer is light enough that Recruit turns sieges into target practice, and the game opens up once troops actually die when they make mistakes. On Hardened and above, camp needs stop being roleplay and become a damage-mitigation system: a fully served camp (tents, seating, trays, sake) shaves real damage off every hit your men take, and that margin decides whether a second battle in a day is survivable. Keep a healer-equipped, fully rested army before any fight you cannot afford to lose, because retreating to camp to heal is the only recovery loop.
Core Mechanics
The closed economy: the GDP of Awaji
The biggest mechanical change from Britannia is how resources work. All items on the island are created once when the save file is created. Nothing regenerates. Nothing is generated by NPCs. Convoys move goods between settlement inventories, but they do not create items. Items are converted and moved, never made or destroyed (except what you spend).
The dev logs call this the "big bang" moment of Awaji's economy. Think of every item on the island as fixed mass. Convoys shift it around, battles transfer it, your camp converts it into equipment, but the total never grows. The total value of every item on the island is the win condition: the player who seizes all of it has, in the developer's own framing, captured the GDP of Awaji.
Practical effect: the entire wealth of Awaji is a finite pool, and taking it is the win condition. Every settlement holds a set inventory you can seize once. Conquered villages yield simple materials like wood, but richer places hold cloth, tatami mats, weapons, and armor. Advanced armaments do not exist in the north; you must push deeper to find them.
This changes the daily loop. You never sit in camp waiting for tax money. You raid convoys for goods in transit, strip captured settlements, and convert what you take into a better army. Convoys are moving loot piñatas: intercepting one yields goods without a siege.
One consequence cuts both ways. Because settlement inventories are just loot sitting on a map, a determined player can sprint past the difficulty curve: clear the starter region for starting capital, then raid mid-game or even end-game areas directly for their gear. It works, and patches have not closed it. The cost is that skipping regions also skips the promotion farm, so your army quality lags the shiny new weapons.
Army, formation, and equipment
Every samurai has a unique name and gains experience through heroic action. The army interface is fully player-driven. There are no preset groups waiting for you to populate. You decide which groups exist and who leads them.
The formation system is decentralized: leaders and followers. Leaders drive the structure relative to the player (or the formation anchor when holding position), and followers keep up and align to their leader. When a follower dies, other members of the group naturally fill the gap. In marching mode the formation snakes along your path; in battle mode leaders scramble into position and followers fight to keep up.
Key army rules:
| Rule | What it means |
|---|---|
| Unattached cap | Recruits join unattached. Hit the limit and further recruitment is blocked |
| Promotion = capacity | Promoted leaders open slots for followers. Expanding the army requires promoting |
| Drag grouping | Right click and drag a line from a leader to attach followers and create a group |
| Batch grab | Give one item type to every troop in a group at once, ideal for armor or mass cavalry conversion |
| Personal retinue | Mark favorite warriors as your own guard, then detach them for flanking or reconnaissance |
| Land to warriors | Distributing conquered land to warriors grows your army over the campaign |
Land distribution is the campaign-scale progression system. Conquered territory is not just loot: it is a resource you hand to warriors, which lets you field a larger force. The more land you take and distribute, the bigger your army can become. This is the missing link between map control and army size that Britannia lacked.
Equipment is physical. Weapons and armor sit in your camp inventory as items. Drag them onto a warrior to equip him, or batch grab to arm a whole squad. Want a cavalry group? Batch grab horses and armor onto a melee group and convert them. The equipment you loot literally shapes the army you can field.
Know the limits before you build plans on top of them. Orders go to the whole army rather than to individual groups, so the realistic command palette is hold position versus charge. Clever maneuvers like sending cavalry around the enemy flank alone are not currently possible; you approximate them by detaching your personal retinue before the battle starts and walking it into position yourself. Post-launch patches have improved what your troops do within those orders: patch vR104 raised accuracy and fire rate across all ranks, substantially increased allied horse health to make cavalry worth bringing, and made armed support stick closer to the front of the formation.
Troop composition runs melee, ranged, and cavalry. Samurai period constraints removed Roman-formation options like the testudo, so think in terms of leader-anchored squads rather than rigid blocks.
Camp life: needs and morale
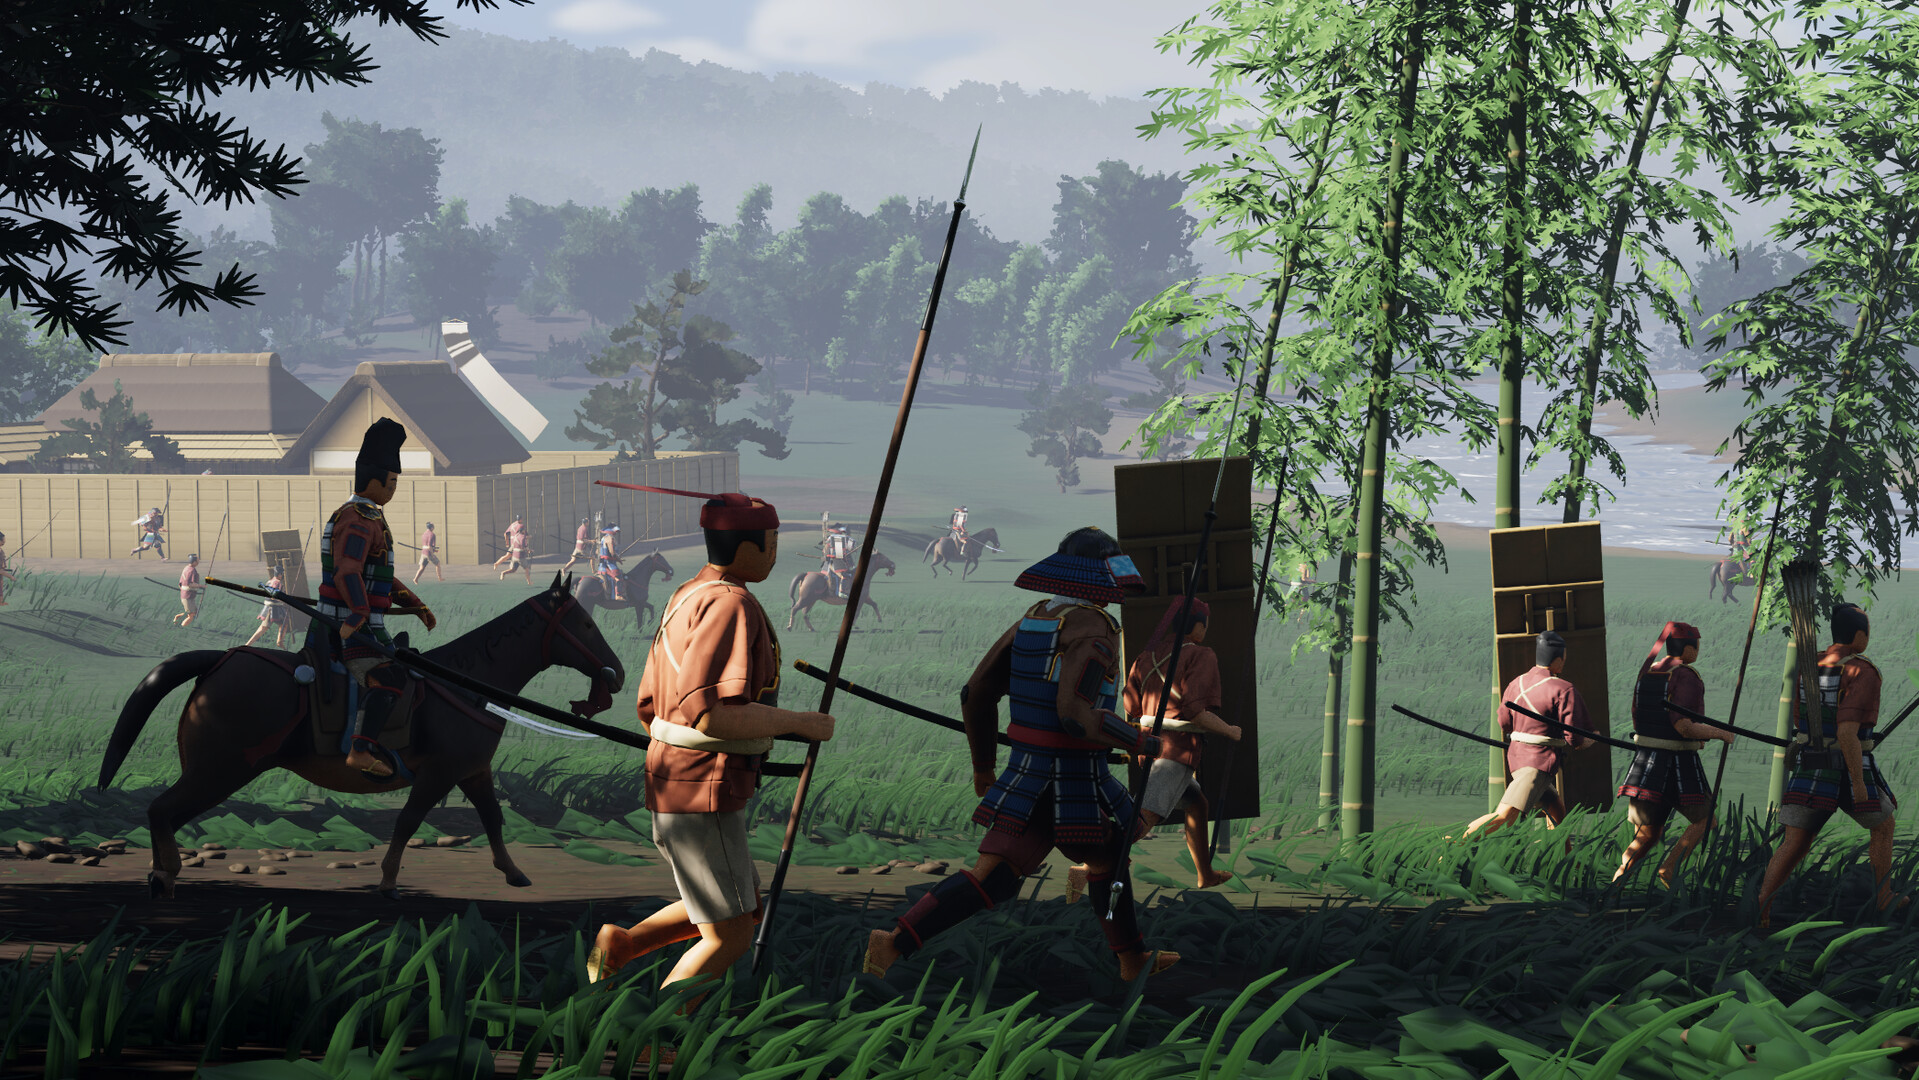
Your army must return to camp to heal and rearm between attacks. Camps are built anywhere in the open world and can be packed up and relocated at any time. That alone is a strategic tool: feint toward one valley, then march the camp across the island while enemy quick-reaction forces chase your old position.
New to Awaji is the Camp Needs system. Each troop has needs: a place to sleep, somewhere to sit and rest, a tray for food, some sake. Rank matters. Warriors sit on tatami mats, eat off elevated lacquered trays, and expect a dignified posture. Retainers are comfortable crashing on thatch sleeping rolls. Folding screens, tatami, lacquer chests, and other luxury items keep your elite satisfied.
Buildings auto-complete on a timer now. There is no AI building and no harvesting, and storage space is gone. Trees and foliage can still be cleared for defensible positions and sightlines. The free time your troops save goes into immersive routines: farmers work fields by day and come inside at night, warriors gather around campfires at dusk and doze under the stars.
Two camp warnings from the field. First, wood is the resource you will never have enough of; the base must grow, and every wall, screen, and tent eats the same logs your siege equipment wants. Second, relocating the camp refunds the structures but not the placement work: you will re-place every tray, mat, and screen by hand. Choose a camp site you can hold for a week, not one you will abandon tomorrow.
Factions, relations, and the spiritual layer
Britannia was Romans versus Brits. Awaji is a web. The island holds six samurai clans plus roughly as many monk factions, and your relation with each determines what happens.
Some factions are hostile for story reasons. Others are neutral, and some can become allies who provide military support when called. Relation is gained and lost mainly through actions during and after combat, and through how you handle captured settlements. Unrest is gone; relation replaced it, and it drives enemy reactions the same way but with a positive side: diplomacy.
The spiritual layer is a second economy:
| Element | Effect |
|---|---|
| Shinto shrines | Passive benefit to whichever faction controls them |
| Buddhist temples | Home to monks and armed sohei; typically neutral with their own forces |
| Monk factions | Can become ally or enemy based on your actions |
| Monastery trading | Temples buy and sell goods; sell surplus loot, buy what a region lacks |
| Spiritual maledictions | Monks curse enemy factions, weakening them before battle |
| Coalition attacks | Allied monks coordinate multi-faction assaults |
Trading with the monk factions is easy to miss because it used to be nearly invisible: the only way to discover it at launch was to happen to hover your mouse over a temple marker on the map. A post-launch patch surfaced the feature. Use it. Temples sit on convoy roads, which makes them natural markets: strip a captured region of its surplus, carry it to a friendly temple, and trade for the weapons and armor the region never spawned with. One notorious launch exploit let players buy goods from a temple, raze the temple's allied settlement, and double the goods elsewhere; that loop is fixed, so trading honestly is now the profitable path.
Capture rival shrines to boost your spiritual aura and harm theirs. Work with monk factions to curse enemies before the swords meet. Shrine control is a campaign objective on its own, not a side quest.
Combat: weight, stamina, and ballistics
Horses and mounted AI, bows with ranged AI, five arrow types with ammunition switching, and advanced arrow ballistics including penetration depth, ricochets, bounces, and shatters. Projectiles behave like projectiles: angles and lines of fire matter.
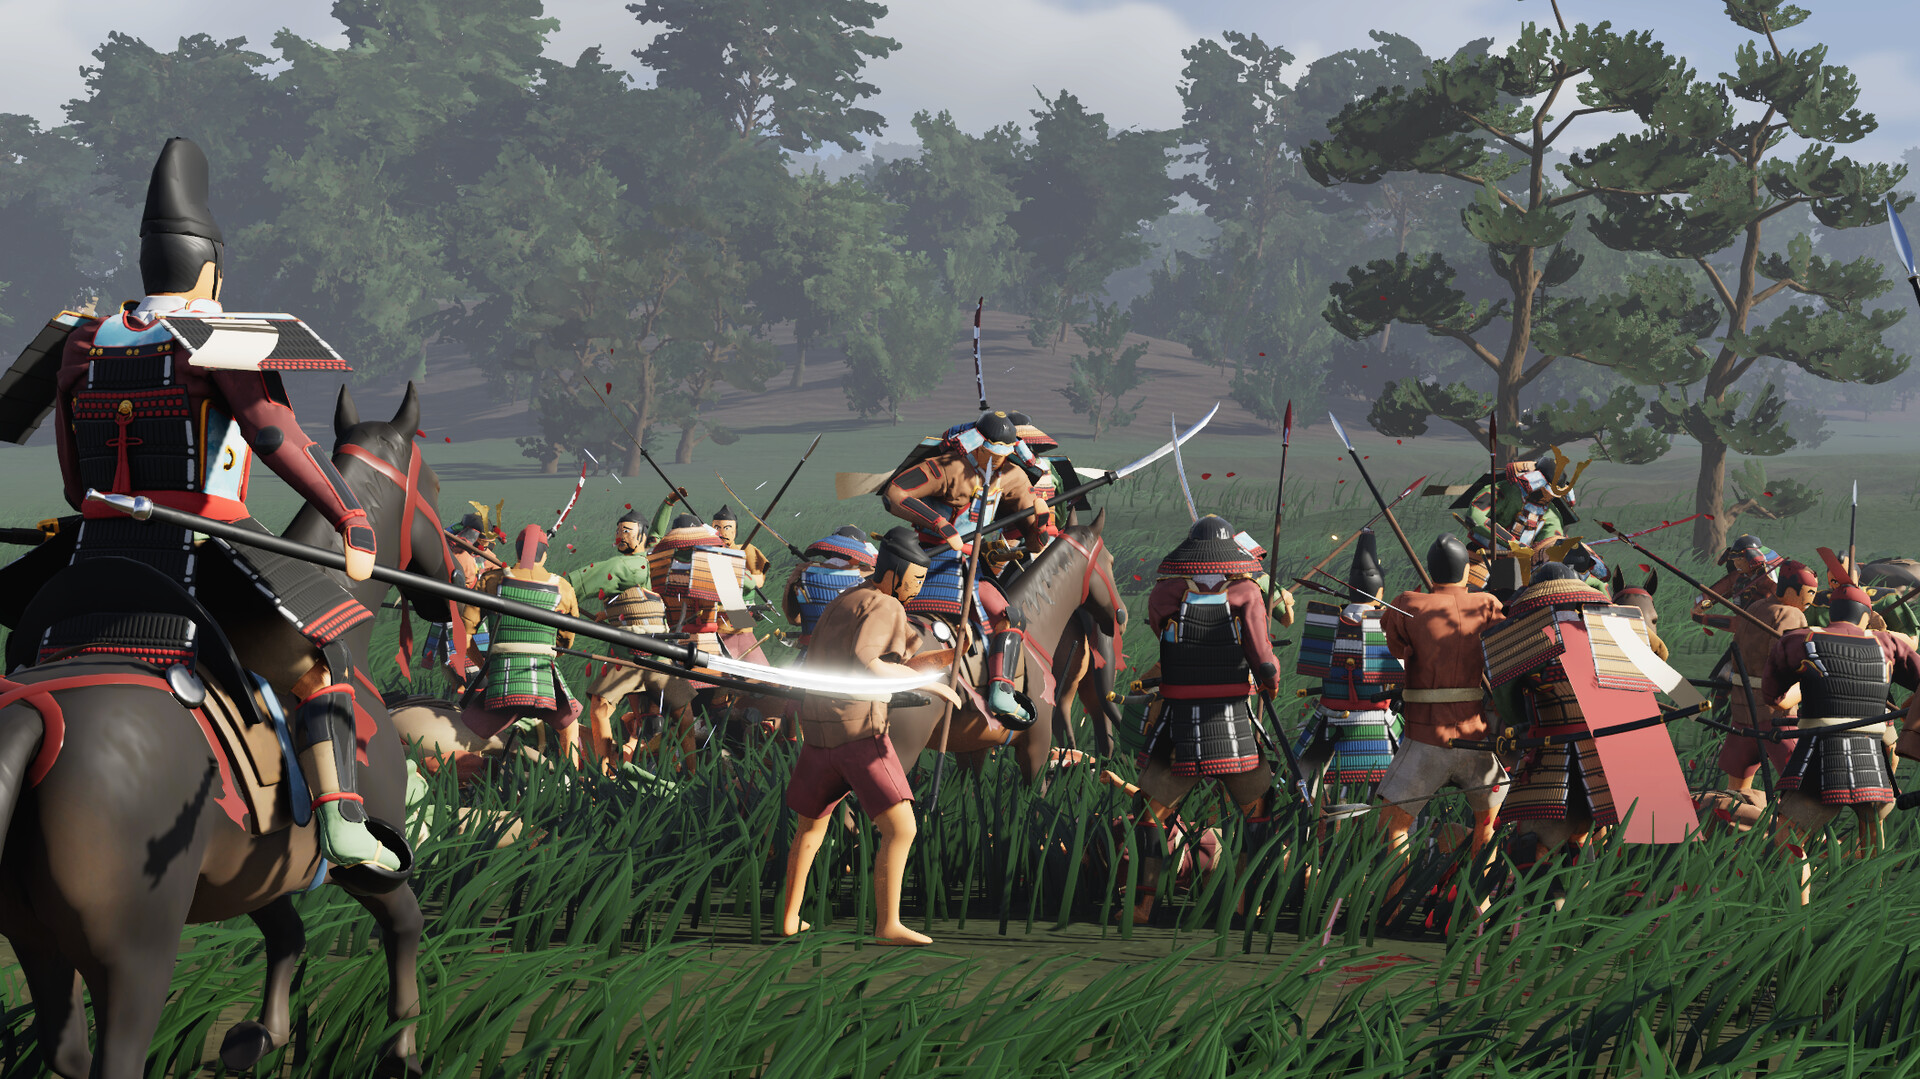
Melee has weight. Each weapon has unique sounds and hit feel, with animation follow-through and hit lags. Spears and naginata can break instead of drop when you run out of stamina, and their drop chance rises when stamina is gone. Blocking with a spear costs extra stamina. Naginata and odachi hit harder than the rest. Shield-deploying AI means your shields actually form cover lines.
The combat controls are deceptively simple but have real depth:
| Input | Effect |
|---|---|
| Right click | Slash / horizontal swing |
| Right click while holding left click | Stab (quick thrust) |
| Block | Costs stamina, more for spears |
| Shift + S + W while jumping | Forward bunny hop, useful for closing distance |
Master the slash-stab rhythm. A slash hits a wider arc and catches multiple enemies; a stab is faster and penetrates. Playtesters discovered the bunny hop (Shift + S + W while jumping) for closing distance on archers. Movement tech matters because stamina pressure is the real enemy.
Awareness tools were built because playtesters struggled to tell friend from foe. A color-coded dynamic cursor and a radar identify friendlies and enemies within range and in your field of vision. Unit highlights distinguish sides, and both radar and highlights can be disabled for immersion purists. In the campaign you will memorize your troops' armor colors quickly anyway.
Experience rewards thoughtful play. Assists count: if an enemy you hit dies within three seconds, you get half XP. Beheading defeated enemies grants kaishaku XP, but killing injured or surrendered allies grants none. Experience requirements were tuned so early levels come fast, with logarithmic damage scaling giving a quicker damage boost early. Level 13 awards a new oyoroi armor color. The Next Fest update rebalanced XP and damage scaling so early levels feel forgiving while late levels still reward commitment.
Late in the campaign you can also find firearms. They arrive at the tail of the tech curve, and on the pre-patch difficulty players reached them without ever feeling threatened; on the reworked ladder they are a reward for surviving the southern clans.
Map, roads, and terrain
The island is the real Awaji at one-third scale, with the real heightmap untouched and treated with erosion simulations. Every mountain, hill, valley, bay, and plain you can visit exists in real life. Clans are named after their real localities, and every Buddhist temple and Shinto shrine in the game exists in reality.
Geography is progression. You start on a beach, climb bluffs into a hilly, forested region, backtrack out of the starter zone, cross a large mountain range, and descend into the southern main mass. Ridges split the south into self-contained plains, each home to different clans and Buddhist factions. The north is poor: spears, swords, belly-protector armor. The south is rich: better armament, more urban villages, markets, and a canon economy where the rural north sends food south in exchange for crafted goods.
Foliage varies by region: plains, forests, ancient forests, bamboo groves, black pine groves, and hinoki cypress in the mountains. Mist forms in low areas as the sun goes down. That is not just atmosphere. It is concealment for ambushes, yours and theirs.
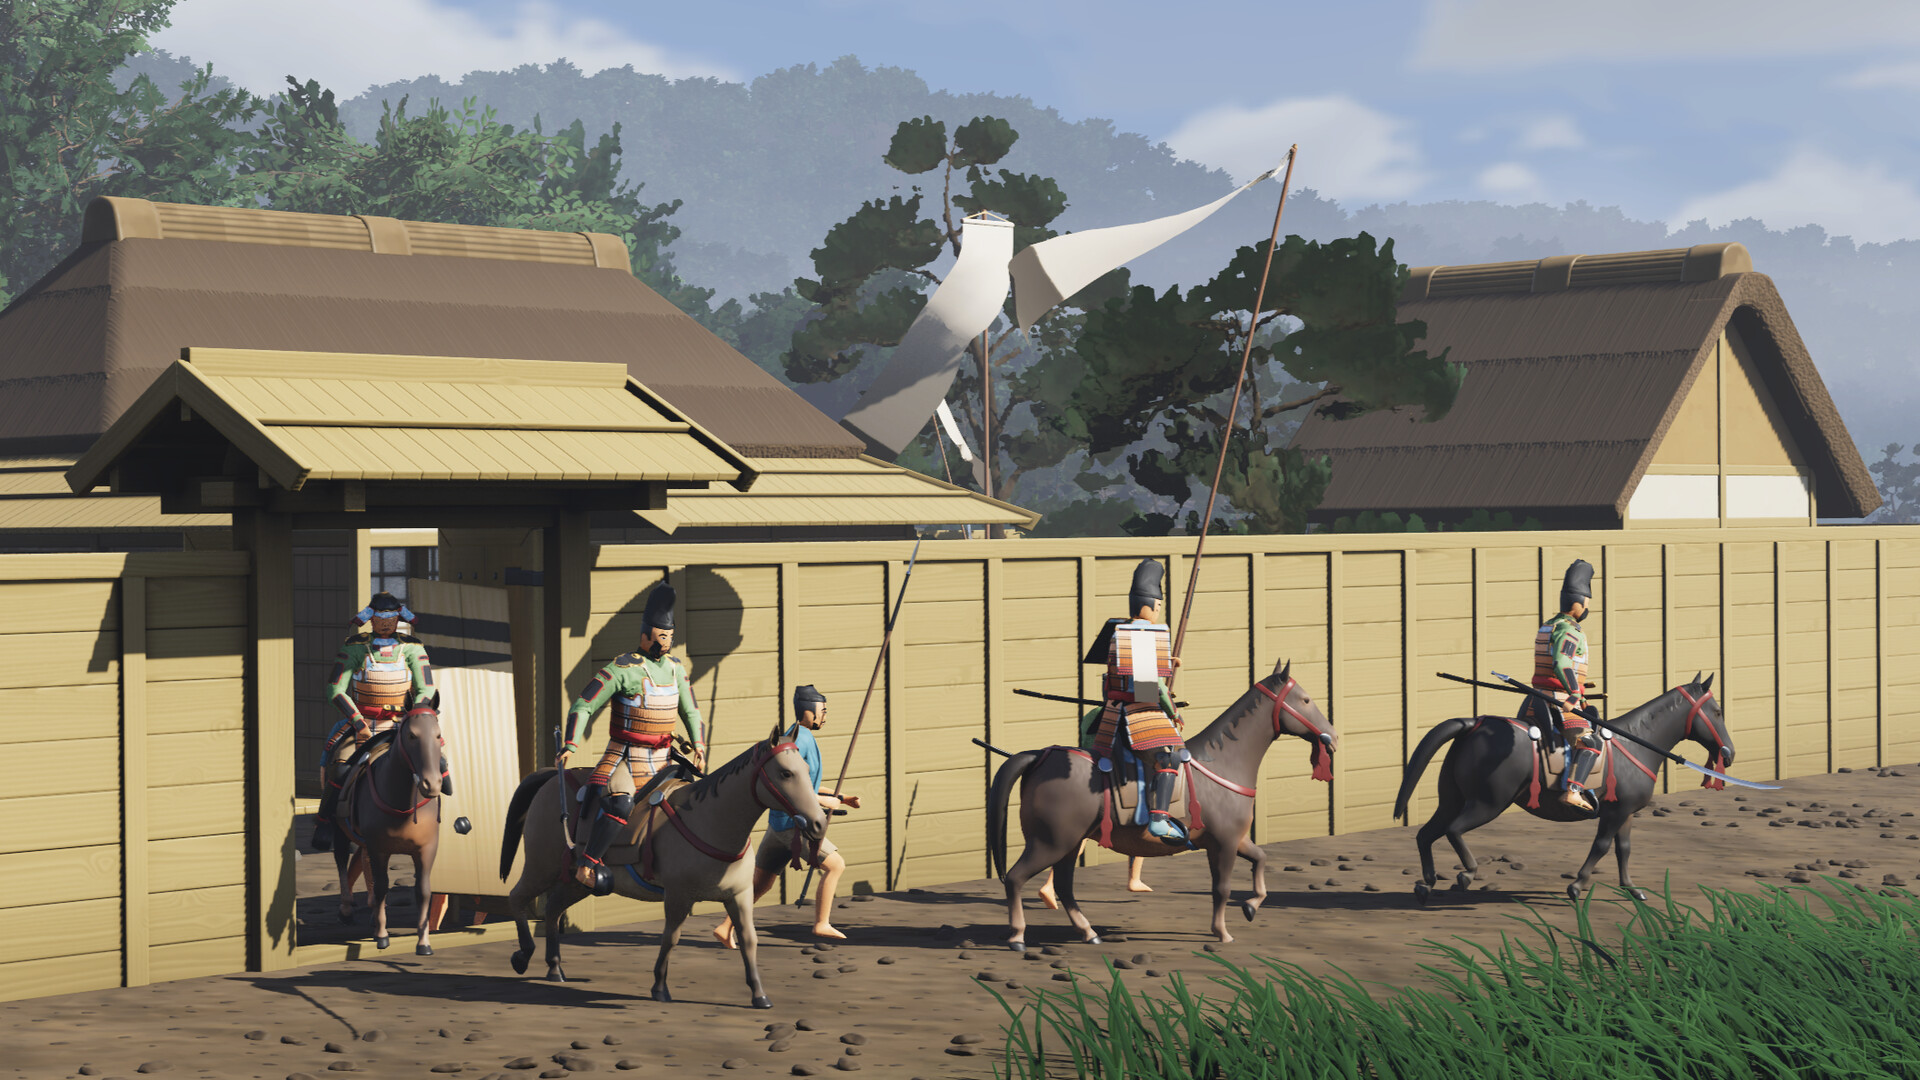
Settlement types number almost 20, up from Britannia's 6. Content rolls out across the whole campaign: northern settlements are simple farms, southern settlements grow into urban villages and markets, and each clan is anchored by a warrior mansion or estate that serves as its heart. Take the mansion and you break the clan.
Progression Strategy
Warlord: Awaji has no XP bars for you to farm, no skill trees to fill. Progression comes from four interlocking levers. Pull them in the right order and the campaign snowballs.
The four levers
| Lever | How it grows | Priority |
|---|---|---|
| Army size | Promote leaders + distribute conquered land | Highest |
| Gear quality | Loot deeper regions, strip settlements, convert convoys | High |
| Relations | Battle choices, settlement surrender handling | Medium |
| Spiritual power | Capture shrines, ally monk factions | Medium |
Early game (days 1-5): overflow into leadership
Your bottleneck is the unattached cap, and the only way past it is promotion. This means the first warriors you promote should be the ones who survive the first fights. Do not promote a random recruit. Let heroes emerge in battle, then promote them. Each promotion opens follower slots, which lets you recruit more, which lets you promote more. The loop compounds.
Priority order for early resources:
- Wood and cloth for the first camp (tents, screens, fence)
- Any weapon beyond the starting one, so your best melee warrior fights with something real
- A second group of ranged units
- Sake and trays for camp needs once the basics exist
What to unlock/conquer first:
- The nearest farm (wood, cloth, food)
- The nearest shrine (passive benefit)
- A convoy route (recurring goods)
- The weakest village (first full settlement capture)
Mid game (days 6-20): the gear gate
The mountain range is a gear check, not a difficulty spike. Southern clans field better armor than anything you can loot in the north. Farm convoys and northern villages until every frontline warrior has a real weapon and at least belly-protector armor. Then, and only then, cross.
Mid-game checklist:
- Every melee warrior equipped with a sword or spear
- Ranged group has a full quiver of arrows (know your arrow types)
- At least one allied faction or neutral monk faction
- A forward camp site scouted on the southern side
- Two or three rotating save files, all current
Late game: land and coalitions
In the late game, army size is gated by land distribution. The more clans you break, the more land you can hand out, the bigger your army. This is where relations pay off: allied monks can curse an enemy before battle, and coalition attacks let you hit a fortress with two armies at once.
Late-game sequence:
- Identify the clan mansion (clan heart)
- Befriend the monk faction nearest to it
- Curse the target clan before engaging
- Attack with allied military support
- Distribute the conquered land immediately
Fast travel and the razing trade-off
Captured checkpoints and mansions double as fast travel points, and the island is 16 by 16 kilometers, so the network matters. The catch: razing a settlement destroys its fast travel point along with everything else. Razing pays out immediately in resources and removes a future rebel staging ground; keeping the settlement pays out slowly in logistics. The discipline that works: raze only deep in hostile territory you do not intend to garrison yet, and keep every checkpoint along your supply line back to camp intact. Losing an hour of marching because you burned your own highway is a preventable loss.
Builds and Tier Lists
Awaji has no classes, but it has loadouts. Weapons, armor, and unit roles combine into effective "builds" for both your character and your squads.
Your character weapons, ranked
| Tier | Weapon | Why |
|---|---|---|
| S | Odachi | Highest damage, long reach, shreds groups |
| S | Naginata | Hard-hitting, great vs cavalry, sweep arcs |
| A | Spear (Yari) | Reach + thrust, but blocking drains stamina and it can break when exhausted |
| B | Katana | Balanced, reliable, no stamina penalty on block |
| B | Bow | Situational; great from high ground, weak in melee chaos |
| A (late) | Tanegashima-style firearms | Endgame firepower, once the southern clans are broken |
The pattern: two-handed weapons win in skirmishes, spears control space, swords are the safe default. Switch weapons between fights. A spear user who has been blocking all battle will drop his weapon when stamina empties.
Squad compositions
| Build | Composition | Use it for | Weakness |
|---|---|---|---|
| Hammer | 60% melee, 25% ranged, 15% cavalry | Open field battles, sieges | Slow, vulnerable on flanks |
| Wall | 70% melee with shields, 20% ranged | Defending camps, holding passes | No pursuit; skirmishers drag it apart |
| Mongol-style | 40% cavalry, 40% ranged, 20% melee | Convoy raiding, harassment | Fragile in sustained melee |
| Elite core | 30% promoted veterans, 40% recruits, 30% ranged | Mid-game balance | Recruitment bottleneck |
Early-mid transition build order
For the first ten days, follow this build order:
- 1 melee group (leader + 5)
- 1 ranged group (leader + 3)
- Promote 2 melee veterans to leaders
- 2nd melee group (leader + 5)
- Equip all melee with swords/spears from loot
- 1 cavalry group (leader + 3) once horses are looted
- Repeat: every 2 promoted leaders, add a new group
Step-by-Step Campaign Strategy
The campaign tracks your progress through nine named regions and milestones, and the achievement list mirrors the intended route: Gaining a Foothold in the starter region, then Hokudan, Ichinomiya, Iwato, Aihara, Goshiki, Sumoto, Mihara, and Nandan, ending with Conqueror of Awaji. Plan each phase around the next name on that list.
Phase 1: Beachhead (day one)
Land, then immediately find defensible ground near the beach: high ground with a clear view of approach routes. Build your first camp before nightfall. Tents, a perimeter of screens and fences, guards on watch. First night ambushes are a real mechanic, and a prepared camp shrugs them off.
Phase 2: Core army (days one to three)
Recruit to the unattached cap, then promote your best recruits to leaders and drag grouping lines to attach followers. Build two melee groups and one ranged group. Loot the nearby farms and villages for wood, cloth, and whatever weapons you can find. Keep the army inventory lean: you carry everything physically, and camp inventory is where gear lives.
Phase 3: First objectives
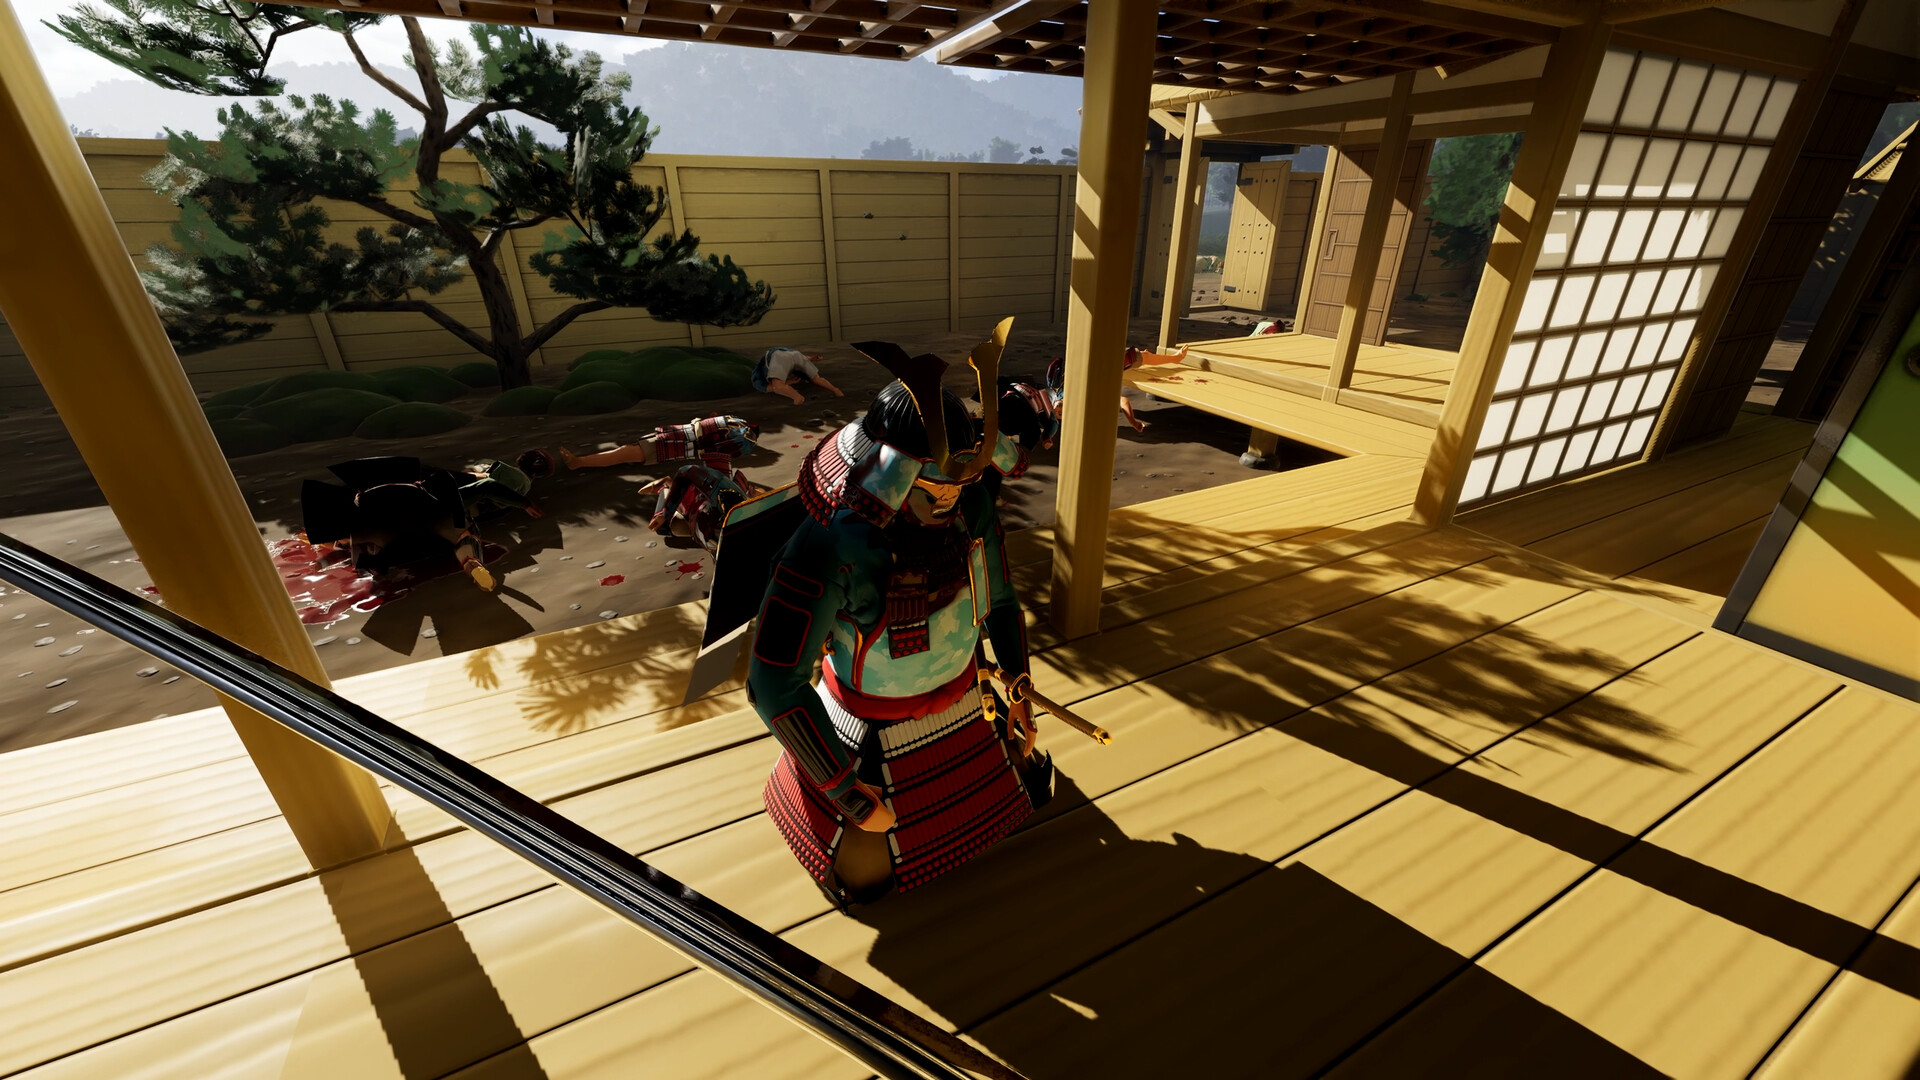
Take the nearest shrine for its passive benefit. Then capture the weakest village in the starter region. When the battle ends, use the survivor options deliberately. Release surrendered retainers to curry favor with their faction. Let crestfallen warriors commit seppuku to regain honor. Every choice feeds your relation network.
Phase 4: Northern consolidation
Sweep the northern clans methodically. Their garrisons carry only spears, swords, and basic armor, so this is where you feed easy victories to the warriors you plan to promote. Keep the army moving. Convoys cross the region in real time, so patrol the roads and intercept goods in transit. Promote leaders as your army grows. Park a camp near the mountain pass and use it as a staging base.
Phase 5: The mountain crossing
Before you cross, check your gear against what the south fields. The south is better equipped, and the gap kills careless invaders. Establish a forward camp on the southern side once you find a defensible shelf. Watch the valleys at sundown: mist rolls in and ambushes hide in it. March in formation, keep your retinue close, and do not split the army on unknown roads.
Phase 6: Southern campaign
Now the faction game starts in earnest. The south is split by ridges into clan plains. Work relations before you attack: befriend neutral clans, call allied military support, get monk factions on your side, and curse your target before engaging. Capture shrines to shift the spiritual economy in your favor. Stall quick-reaction forces by attacking in an order that spreads them thin: take a far shrine while they defend a fort, then swing back.
Phase 7: Endgame
Target the warrior mansions and estates that anchor each clan. These are the clan hearts, and taking them breaks resistance. Coordinate coalition attacks with your monk allies for the final pushes. The endgame fantasy of Awaji is explicit: seize the entire island's wealth. Every item is a finite resource, so by the end you are literally carrying the GDP of Awaji.
Steam Achievements
The game ships with 57 achievements. Ten of them frame the whole campaign, and they double as a progress map:
| Achievement | What it marks |
|---|---|
| Gaining a Foothold | The starter region is secured |
| Hokudan | Second region taken |
| Ichinomiya | The shrine-town region falls |
| Iwato | Mountain-region campaign advanced |
| Aihara | Another southern plain conquered |
| Goshiki | Five-color coast region claimed |
| Sumoto | The Sumoto castle town region taken |
| Mihara | The southern Mihara plain conquered |
| Nandan | The final southern region before the capstone |
| Conqueror of Awaji | The entire island is yours |
The remaining 47 cover the side of the game the region names do not: combat feats, army milestones, kaishaku and assist play, spiritual objectives, and exploration of the island's stranger corners. Treat the ten above as your campaign checklist and the rest as a scavenger hunt you will largely complete while conquering.
Advanced Tips and Strategies
Use camps as bait
Pack up a decoy camp, leave a small guard, and march the main force to an undefended objective. Relocation is a strategic tool, not a convenience.
Feed promotion targets
Experience accrues through heroic action. Feed easy victories to the warriors you plan to promote. Their leadership expands army capacity, and the cycle compounds.
Micro the formation leaders
A follower's death is auto-filled by the rest of the group. Protect the leaders, not the followers. If a leader falls, the group structure breaks, so pull wounded leaders back and let followers screen.
Detach the retinue
Your personal retinue can operate independently of the main formation. Use detachments for flanking maneuvers and reconnaissance: one group on the road, the main force swinging wide. This is also the only reliable way to put cavalry behind an enemy line, since army-wide orders cannot split the force mid-battle.
Play the stamina economy
Spear blocking drains stamina fast. When a warrior runs out, his weapon drops or breaks. Press enemies who are out of stamina, and protect your own spear users from prolonged block exchanges. Naginata and odachi reward aggressive two-handed play with big damage and hit force.
Respect arrow ballistics
Arrows penetrate, ricochet, bounce, and shatter. Shoot down lines with clear sight, use high ground for plunging fire, and keep shields deployed to break up incoming volleys. Five arrow types exist; match the arrow to the target. Ammunition switching is a real tactical choice, not menu dressing.
Chase the assist window
If you tag an enemy and he dies within three seconds, you earn half XP. In big battles, spread hits across a pushing enemy line instead of overkilling single targets.
Manage the bomb-and-revive endgame
Late-game clans throw bombs, and bombs drop your men where they stand. Downed troops are recoverable after the fight, but at 50+ soldiers, walking the battlefield reviving everyone after every battle turns into the game's most tedious chore. Two mitigations: fight bomb-using clans with a smaller elite force (fewer bodies to lift), and always finish the revive sweep before saving, so a post-battle save never freezes a half-dead army.
Mind the early-aggression spiral
If you raid a strong clan's villages before you can fight its army, the clan sends a war band after you, and it will chase you across the island. A force twice your size on the road ends runs. The rule: scout the clan mansion's garrison count before your first raid into its lands, and do not raid any clan whose field army exceeds yours until you have allies or a defensible camp to fall back to.
Mind the night
Mist forms in low areas at sundown. Guards exist for a reason. Pick camp spots with defensible terrain, and set guards before dark.
Match troop types to terrain
Cavalry suffers in forests; ranged units shine from high ground; melee holds narrow passes. The island's real geography rewards players who read it.
Convoys are the mid-game economy
Settlement inventories are one-time loot. Convoys move goods continuously. If you want a steady income stream without conquering everything, patrol the roads. A single intercepted convoy can carry more value than two farm raids.
Respect the surrender mechanic
How you treat defeated enemies is a relation lever. Releasing retainers builds favor with their clan; forcing seppuku restores honor. Neither choice is free, and both feed back into the faction web.
Controls and Accessibility
Warlord: Awaji plays from a first-person perspective with classic WASD movement and mouse look.
| Action | Control |
|---|---|
| Move | WASD |
| Look / aim | Mouse |
| Interact (warriors, loot, camp objects) | E |
| Slash | Right click |
| Stab | Right click while holding left click |
| Command menu (recruit, promote, organize) | Open command menu |
| Formation editor | Drag-and-drop arrangement (right click + drag to group followers) |
| Equip items | Drag from camp inventory onto troops; batch grab for whole groups |
| Save | Escape menu, available anytime and anywhere |
| Movement tech | Shift + S + W while jumping (bunny hop to close distance) |
The accessibility suite is broad: adjustable text size, color alternatives, custom volume controls, adjustable difficulty, and the ability to save at any time. The radar and unit highlights can be toggled off, and the gore option can be disabled without losing kaishaku XP (that bug is fixed).
System Requirements
Current Steam listing (post-launch, higher than the pre-release numbers):
| Tier | OS | CPU | RAM | GPU | Storage |
|---|---|---|---|---|---|
| Minimum | Windows 10 64-bit | Intel i5 9th gen | 16 GB | NVIDIA GeForce GTX 2060-class (listed as GTX 2060; treat an RTX 2060 or equivalent as the floor) | 6 GB |
| Recommended | Windows 11 64-bit | Intel i7 11th gen | 32 GB | NVIDIA GeForce RTX 3070 | 6 GB |
The game runs on modest hardware after the performance patch (players report smooth play on low-end machines at tuned settings), but VRAM-starved GPUs will crawl in big battles. If you are between the two tiers, drop foliage detail first; trees were the single biggest performance cost in the engine until vR106.
Performance and Settings
At launch the game stuttered for reasons that had nothing to do with graphics quality: the engine's built-in tree colliders were crushing the physics budget. Patch vR106 replaced them with bespoke proxy colliders, which delivered up to 2X FPS gains in crowded scenes and cut loading times dramatically. If you tried the game in its first days and bounced off the stuttering, it runs a different game now.
Known performance notes:
| Situation | Expectation |
|---|---|
| Launch-week stutter | Largely fixed by vR106 |
| Dense settlements, 100+ unit battles | Frame dips remain on mid-range GPUs; battle size scaling work is ongoing |
| Frame rate capping | The game ignores some external FPS caps (RTSS-style limiters), which can push GPUs to 100% and heat up systems; cap it in the driver control panel if your card runs hot |
| Low-spec instability | The developer has acknowledged abnormal crashes on some machines and is investigating separately from general optimization |
Practical settings order for weak machines: lower foliage and shadows first, keep draw distance moderate (you need to see formations), leave unit highlights on (the radar is cheap, and losing track of friendlies costs more frames in reloads than it saves), and prefer DLSS/FSR upscaling over resolution cuts. Early DLSS/FSR builds had a glowing-trees artifact; that was patched.
Price and Monetization
Warlord: Awaji costs $24.99 USD at launch with no discount. It is a one-time purchase: no microtransactions, no DLC announced, no in-game store. The developer funds continued development purely from sales. Player opinion on the price splits: many reviews call the campaign worth full price for 20 to 40 hours, while a vocal group suggests the game earns its shelf at a sale price because of the repetitive mid-game. If you are on the fence, the Steam Next Fest demo progression carries into the full game, so trying the demo first costs nothing.
Update History
The post-launch patch train has been steady. The milestones that change how you play:
| Patch | Headline changes |
|---|---|
| vR101 | Tutorial fixes: player spawn moved closer to the target homestead, non-sequential objectives to prevent softlocks, pause no longer passes time |
| vR102 | Follower counts and icons on promote buttons, discovered settlement types in the progress panel, hidden inventory items now shown greyed out |
| vR103 | Starter region pacing: bows and naginata at checkpoints and temples, a horse at the Iwaya clan mansion; Hokudan gets bows at all military settlements (new saves only) |
| vR104 | Ghost armies fixed, unconquerable settlements fixed, fast travel distance exploit fixed, the temple trade-and-raze doubling exploit fixed, accuracy and fire rate raised across all ranks, allied horse health substantially increased |
| vR106 (Performance) | Tree collider overhaul: up to 2X FPS, much faster loading, smoother world simulation |
| Trading patch | Monastery trading surfaced in the UI after players proved they could not find it |
| Balance patch | Difficulty rebuilt: Recruit 1.0x, Regular 1.2x, Hardened 1.8x, Veteran 2.2x damage taken |
Known Issues and Community Feedback
An honest picture of the game as it stands, from the post-launch review consensus:
| Issue | Status and workaround |
|---|---|
| No autosave | By design, and the top regret of negative reviews. Save after every capture, promotion, and before every attack |
| Army-wide orders only | Commands go to the whole army; no per-group orders mid-battle. Approximate flanking with a detached retinue before contact |
| Repetitive mid-game loop | Capture-fight-loot repeats until the fourth region. Vary it with convoy hunting, shrine objectives, and monastery trading |
| Enemy AI stalls | Occasionally enemy reinforcements stop moving instead of pressing an attack. Exploit it or re-engage; the developer iterates on AI frequently |
| Post-battle revive chore | Late-game bomb attacks down dozens of troops; reviving all of them is manual. Fight those clans with a leaner force |
| Frame pacing on mid-range GPUs | Improved by vR106; heavy scenes still dip. Cap FPS in your driver panel to protect hardware |
| Allying feels weaker than conquering | Allied military support is real but conquest pays more directly. Ally for curses and coalition attacks, not economics |
FAQ
Is Warlord: Awaji out? Yes. It launched September 9, 2026 on Steam for Windows, at $24.99 USD.
Is this a sequel to Warlord: Britannia? The second entry in the Warlord series, with a new setting and a much larger world. Expect familiar systems: camps, convoys, settlement capture, and formation-based first-person combat, rebuilt from the ground up.
What is immersive strategy? First-person strategy: you command from inside the world, walking your camp and fighting alongside your troops, instead of watching from a floating camera.
How big is the map? 16x16 km based on the real Awaji heightmap at roughly one-third scale. Expect around 300 settlements across six samurai clans plus monk factions.
Why is there no fast travel or taxes? There is fast travel now, from captured checkpoints and mansions, but razing a settlement destroys its fast travel point. Taxes still do not exist: the economy is closed, all items are fixed at save creation, nothing regenerates, and the design pushes you to constant action: raid, capture, loot, and convert.
Can I save anywhere? Yes. Saving and pausing are available at any time during gameplay, a major change from Britannia, which only allowed saving at camp. There is no autosave, so saving is on you.
What difficulty should I pick? Regular for a first campaign. The Balance Patch made Regular as hard as the old Veteran, so the old advice to start on Hardened no longer applies. Step up to Hardened once your camp needs routine is solid.
Do the demo and playtest progression carry over? Yes. Player progression carries between the playtest, the Steam Next Fest demo, and the full game.
Is the game Early Access? No. Darkmatter Games deliberately skips Early Access. The game launched finished, and post-launch patches have been delivered as free updates, as happened with Britannia's year-long roadmap.
How does the economy stay finite? All items are created once when the save is generated. Convoys move items but never create them. Nothing regenerates, no taxes roll in, and the total value on the island is fixed at the start.
What happens after I conquer a settlement? You gain its inventory, can distribute the land to your warriors (which grows your army), and your relation with the defeated faction updates based on how you treat survivors. Captured checkpoints and mansions add fast travel points unless you razed them.
Are the arcane weapons real? The premise says the monks and warriors of Awaji uncovered powerful weapons from a bygone war, and the Emperor wants them found. Exploring that mystery is part of the campaign's pull; the island's temples and shrines hold more than passive bonuses.
How long is the campaign? A focused conquest run takes most players in the 20 to 40 hour range, longer if you chase all 57 achievements or play on Hardened and above, where battles demand healing stops between pushes.
Who funds Darkmatter Games? Sales only. No investors, no publisher, no donations. The developer attributes this directly to players who bought Warlord: Britannia.