Daily Pick
One deeply researched guide worth reading today.
A practical route through the systems that matter most, written to help new players make confident decisions quickly.
Overview
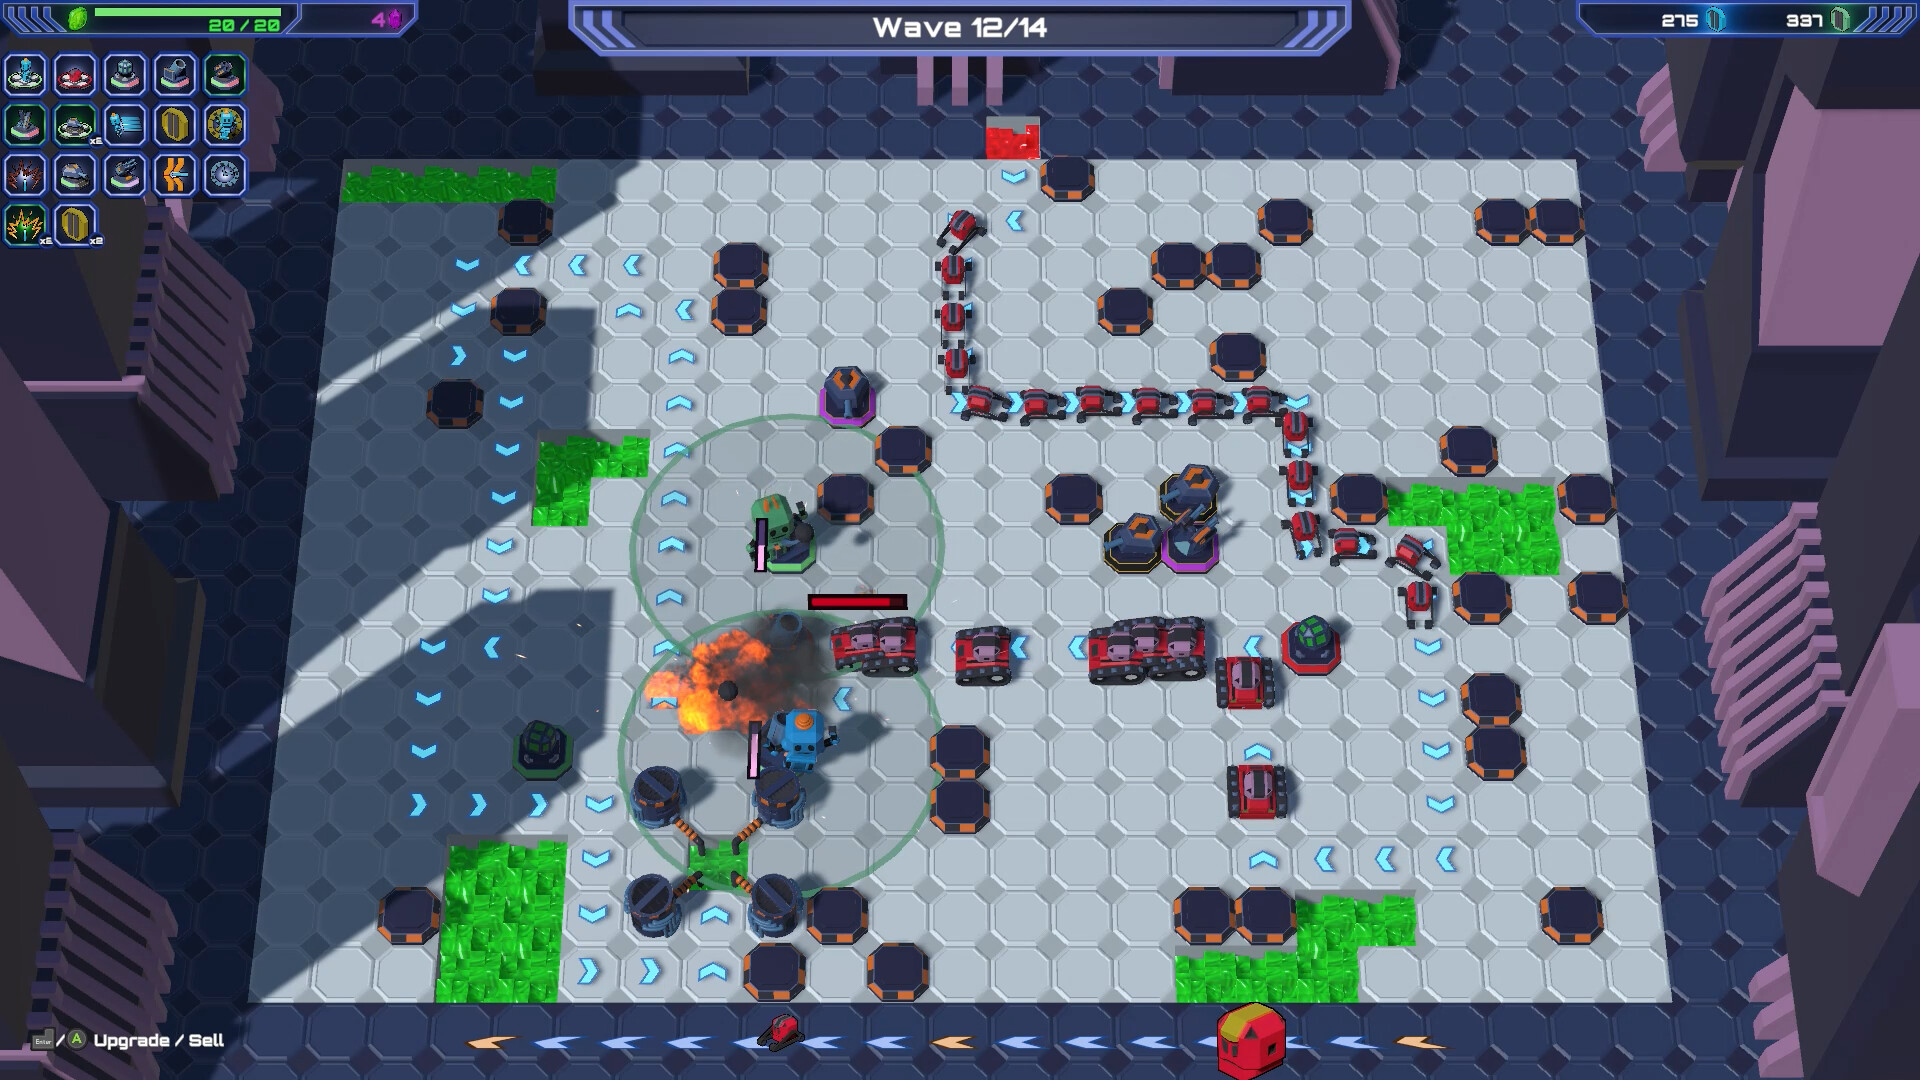
Glorpotron is a tower defense roguelike from Bitwise Botworks, released June 24, 2026 on Steam. You defend the Glorp — a glowing core entity — from wave after wave of Creeps on procedurally generated maps. The hook: you control a physical robot that moves around the battlefield, places towers, and can dance on top of towers to power them up. It blends real-time tower positioning with roguelike meta-progression across 10 Ascension tiers.
The game asks you to be more involved than a typical tower defense. You collect coins physically, manage upgrades between waves, buy and sell towers as needed, and dance to boost your defenses. It looks simple on the surface. Mastering it means being involved in every step of your setup.
| Detail | Info |
|---|---|
| Genre | Roguelike Tower Defense |
| Developer | Bitwise Botworks, Inc. |
| Publisher | Bitwise Botworks, Inc. |
| Release | June 24, 2026 |
| Platform | PC (Steam), Steam Deck compatible |
| Price | USD $12.99 (launch had 25% off intro offer) |
| Players | Solo + Local Co-op (couch co-op, shared/split screen) |
| Languages | English, French, Simplified Chinese, Traditional Chinese, German |
| Steam Features | 46 Achievements, Cloud Saves, Remote Play Together, Family Sharing, Full Controller Support |
| Run Length | 20–40 minutes |
The sweet spot: runs last 20–40 minutes. Solo or local co-op. Procedural generation means every map forces you to adapt rather than memorize. Expect to lose your first 5–10 runs while you internalize enemy patterns and tower synergies. That's normal. The meta-progression unlocks — new towers, relic slots, starting bonuses — are designed to pull you through the early difficulty wall.
Who this guide is for: players who've done a few runs and feel stuck at mid-game (waves 6–8), co-op teams looking for role splits, and Ascension climbers hunting for consistent clears. We cover tower tier lists, optimal upgrade paths, resource economy, creep behavior, boss patterns, co-op coordination, and Ascension-specific strategies.
Getting Started: The First 30 Minutes
Your first run will feel chaotic. Here's what to focus on:
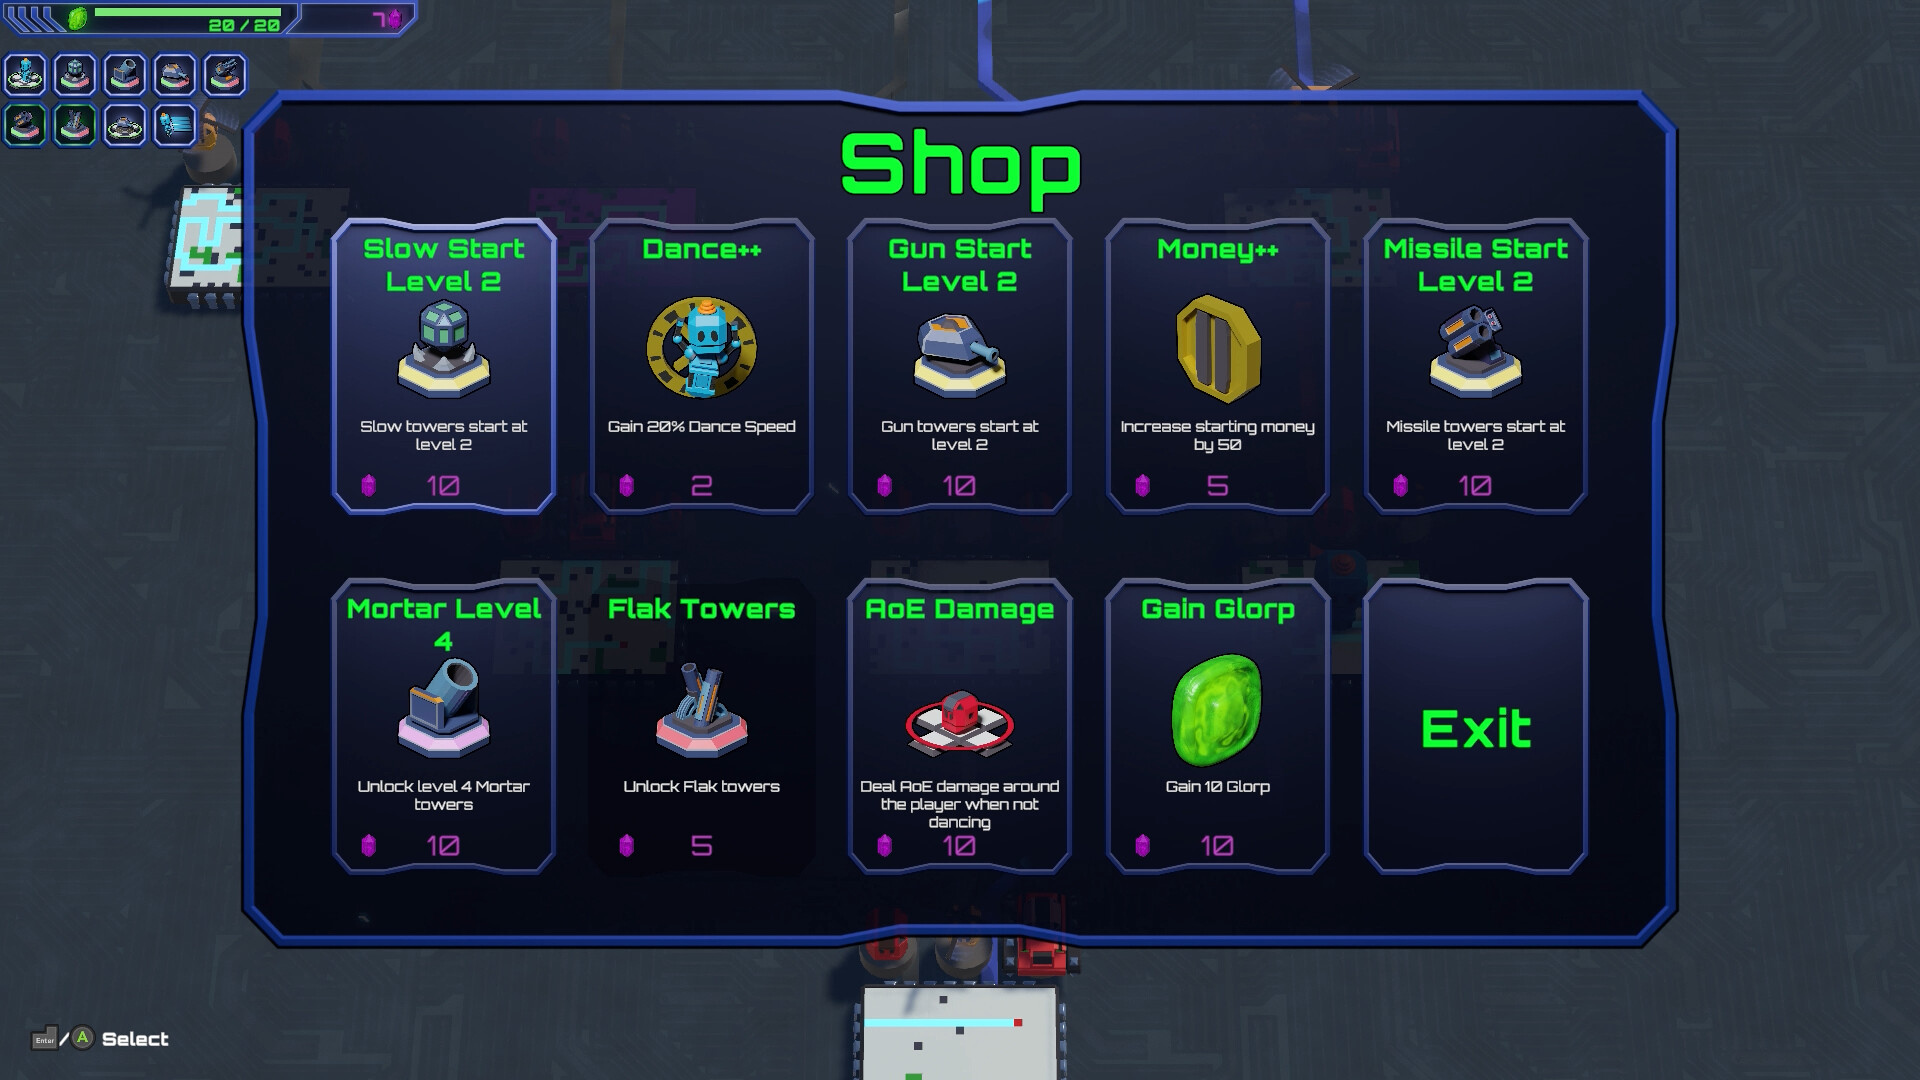
- Ignore the shop. Spend your first 2–3 runs just learning how towers work. Don't buy relics or upgrades until you understand what you need.
- Place towers at path intersections. Creeps path toward the Glorp. Where two paths merge is a natural killzone. Put your first tower there.
- Dance on one tower, not all. Park your robot on your highest-DPS tower and spam the dance button to max it out. A single maxed tower at a chokepoint clears early waves by itself.
- Spend coins between every wave. Unspent coins vanish on death. Even a cheap range upgrade is better than nothing.
- Don't restart on damage. The Glorp has a sizable HP pool. Losing 20% in early waves is fine. Restarting because you took a hit means you learn nothing.
- Move constantly. Your robot is not decoration. You collect coins, dance-boost towers, body-block strays, and kite elites. A stationary player loses.
- Sell and rebuild. Unlike many tower defenses, Glorpotron lets you sell towers. If the creep path shifts or a tower underperforms, recycle it and rebuild smarter. Sticking with a bad layout out of stubbornness is how runs die.
Beginner Mistakes That Wipe Runs
| Mistake | Why It Kills You | Fix |
|---|---|---|
| Spreading upgrades across 5 tower types | Mid-game creeps outscale your unfocused DPS | Pick 2 tower types per run, max them out |
| Hoarding power-ups for "later" | You die with 3 unused boosts | Pop them. If in doubt, use it |
| Building on every available slot immediately | Creep pathing shifts mid-round; you waste coverage | Keep 1–2 slots free as emergency reserve |
| Ignoring the upgrade terminal between waves | Towers fall behind the curve | Hit the terminal every wave, spend everything |
| Dancing on random towers instead of prioritizing | All towers are mediocre instead of one being great | Pick your best chokepoint tower and max it first |
| Never selling underperformers | Dead weight towers drain your economy | Sell and rebuild the moment a tower stops earning its keep |
| Standing still while collecting coins | You're a target and you waste time | Move in loops, collect as you dance-boost |
Core Mechanics (Under the Hood)
How Damage Works
Every tower deals base damage per shot. The damage formula:
Actual Damage = Base × (1 + Dance_Level × 0.25) × Relic_Mult × Type_Bonus
- Dance Level caps at 4 per tower. Each dance adds 25% damage.
- Type Bonus matters: Mortar towers deal 150% to armored creeps but 50% to flyers.
- Relic_Mult stacks multiplicatively. Two +15% damage relics = 1.15 × 1.15 = 1.32x, not 1.30x.
Enemy Armor and Penetration
Creeps have armor values 0–5. Each point of armor reduces incoming damage by 10%. Armored creeps (armor 3+) show a silver shimmer. Anti-armor towers (designated with a shield icon) ignore 2 points of armor. Always have at least one anti-armor tower on the field by wave 5.
The Coins Economy
Coins from kills scale with wave number: Wave 1 gives ~50 coins total, Wave 10 gives ~400. The terminal upgrade cost scales similarly:
| Upgrade Type | Base Cost | Wave 5 Cost | Wave 10 Cost |
|---|---|---|---|
| Tower Damage +10% | 25 | 45 | 85 |
| Tower Range +10% | 20 | 35 | 65 |
| New Tower Slot | 50 | 75 | 120 |
| Power-Up Cooldown | 30 | 55 | 100 |
The math is simple: damage upgrades first, always. A dead creep can't reach the Glorp. Range is secondary. Coins are also collected physically — walk over them. Don't leave coins on the ground; they despawn after a few seconds. Route your movement through the battlefield specifically to vacuum coins while you dance-boost.
Buying and Selling Towers
Selling exists and is core to the economy. When a creep path shifts, a tower that was perfect becomes dead weight. Sell it and reinvest the refund into a better position. The general rule: sell when a tower hasn't fired in the last wave and a new placement would. Don't sell towers that are actively earning — the refund never matches the investment, so only recycle true dead weight.
Procedural Generation Patterns
The map generator uses a seeded algorithm. Each seed determines:
- Path layout (linear, branched, looped, or open)
- Resource node positions (coin clusters)
- Tower placement zone count (6–12 per map)
- Enemy spawn direction (clockwise, counter-clockwise, or multi-directional)
After 20+ runs, you'll recognize layout archetypes. The "Loop" layout, where creeps circle the Glorp, demands area-of-effect towers. The "Spokes" layout, with 4–6 paths radiating inward, needs single-target killers on each spoke. The "Braid" layout, where paths cross and merge repeatedly, rewards freeze towers at every merge point.
The Wave Structure
Each run has ~10 waves plus a boss. Between waves you get a build phase: place towers, dance-boost, spend coins at the terminal. Wave bonuses are temporary buffs for that level only — take them when they fit your immediate threat. The boss appears at the end of the run; beating it completes the run and progresses Ascension.
Progression Strategy
Meta-Progression Priority
Unlocks carry between runs. Spend your meta-currency (Glorp Shards earned on death/completion) in this order:
- Extra Starting Coin (Level 3) — Lets you build 2 towers before wave 1 starts. Huge early-game stability.
- Relic Slot 2 — Two relics double your build potential. Prioritize this after starting coin.
- Tower Unlock: Mortar — Mortars are S-tier against armor and groups. Unlock as soon as possible.
- Relic Slot 3 — Triple relics enable specialized builds.
- Power-Up Variants — Unlock alternative power-up types. The Slow Aura variant of Dash is run-winning.
- Tower Unlock: Beam Turret — The boss-killer. Unlock before pushing Ascension 5+.
Leave Glorp HP upgrades for last. Offense prevents damage better than extra HP mitigates it. The exception: if you're hard-stuck at a specific boss, one Glorp HP upgrade can buy the extra seconds you need.
Run Phase Strategy
Early Game (Waves 1–4): Build 2–3 towers at main chokepoints. Focus all dance-boosts on one tower. Spend all coins on damage upgrades. You should clear these waves without any creeps reaching the Glorp.
Mid Game (Waves 5–8): Add 2–3 more towers covering secondary paths. Start using power-ups proactively. If an elite spawns, pop damage boost immediately. Unlock your second tower slot upgrade at the terminal. Wave 7 introduces armored creeps on most seeds — if you don't have anti-armor online by wave 5, you will feel it.
Late Game (Waves 9–10+): Full map coverage. You should have 6+ towers, each at dance level 2 minimum. Save one power-up charge for the boss. If you have a third slot, keep a slow-bubble ready for the boss's charge attack.
Ascension-by-Ascension Guide
| Ascension | What Changes | Strategy Shift |
|---|---|---|
| 1–2 | Enemy HP +10%, damage +5% | No real change. Keep learning tower synergies. |
| 3 | New enemy variant appears | Learn the new telegraph. Adjust tower mix. |
| 4 | Enemy speed +10% | Freeze towers become mandatory on every path. |
| 5 | Armored creeps get 5 armor (50% reduction) | Spiky Bits relic + Mortar both become must-haves. |
| 6 | More complex map layouts | Scout the full map before placing anything. |
| 7 | Enemy density +20% | AoE towers (Mortar, Splasher) overperform. |
| 8 | Boss gains a new attack | Learn the new pattern; save dash for it. |
| 9 | Relic choices are worse | Reroll aggressively; accept any S/A tier relic. |
| 10 | Everything scales hard | Full optimization: perfect build order, zero wasted coins, flawless dance rotation. Boss has 3× normal HP. |
Relic Tier List
| Tier | Relic | Why |
|---|---|---|
| S | Spiky Bits | All towers deal 15% damage to armored creeps |
| S | Coin Magnet | +25% coins from all sources |
| A | Dance Shoes | Dancing boosts towers 50% faster |
| A | Reinforced Core | Glorp starts with +50 HP |
| B | Long Reach | +10% tower range |
| B | Quick Hands | Power-up cooldown reduced by 15% |
| C | Sturdy Frame | Your robot has +30 HP |
| F | Glorp Padding | +100 Glorp HP but -10% tower damage |
Spiky Bits + Coin Magnet is the god combo. More coins means more upgrades, and anti-armor means no enemy type hard-counters you. At high Ascensions, add Dance Shoes as the third.
Tower Tier List
| Tier | Tower | Cost | Best Use | Notes |
|---|---|---|---|---|
| S | Mortar | 75 | Groups, armored, chokepoints | AoE + armor pen. Build 2 per run. |
| S | Beam Turret | 100 | Single-target, bosses | Highest sustained DPS. Protect it with slowing towers. |
| A | Freeze Tower | 50 | Path start, slowing | Mandatory for fast creeps. Place at entrance of every path. |
| A | Shock Tower | 60 | Chokepoints, stun lock | 20% stun chance. Paired with Mortar = no creep moves through. |
| B | Machine Gun | 40 | Early game, trash clear | Falls off hard after wave 6. Sell it later if possible. |
| B | Sniper | 80 | Long lanes, elite sniping | Good on linear maps. Poor on loop layouts. |
| C | Splasher | 45 | Cheap AoE | Low damage. Only use if you haven't unlocked Mortar yet. |
| C | Heal Beam | 70 | Glorp healing | Situational. Only useful if your defense is already solid. |
Tower Deep Dives
Mortar (S-tier): the workhorse. AoE splash, armor penetration, long range. Two mortars at a merge point delete entire waves. Weakness: slow fire rate means fast creeps slip through gaps — pair with Freeze. Build order: Mortar → Freeze → Mortar → Shock → Beam Turret is the standard shell.
Beam Turret (S-tier): the boss-killer. Sustained single-target DPS that melts elites and bosses. It needs protection — fast creeps will walk past it while it focuses a tank. Place Freeze towers in front and let the Beam do the math. Two Beams + a Sniper is the boss deletion combo.
Freeze Tower (A-tier): the enabler. Every tower in the game deals more damage to slowed targets, and slow keeps fast creeps in killzones. One Freeze at the entrance of every path is non-negotiable from wave 4 onward. Upgrade it to level 2 early; the slow duration increase matters more than the damage.
Shock Tower (A-tier): stun lock machine. 20% stun chance per hit, and with a decent fire rate it locks creeps in place. Shock + Mortar at a chokepoint means nothing moves through. Best used at path merges where multiple lanes feed one point.
Machine Gun (B-tier): the early-game hero that becomes a liability. Cheap, fast, clears trash beautifully through wave 5. After wave 6 it tickles armored creeps. Sell it around wave 6–7 and reinvest in a Mortar.
Sniper (B-tier): long-range single target. Shines on linear maps with long sightlines, where it picks off elites before they reach the pack. On loop layouts it wastes most shots. Map-dependent, never build it blind.
Splasher (C-tier): the budget Mortar. Fine before you unlock the real thing. Once Mortar is available, Splasher is strictly worse — same role, less damage.
Heal Beam (C-tier): repairs the Glorp. It's a band-aid. If your defense is good, you don't need it. If your defense is bad, it only delays the inevitable. Only consider it on co-op when one player can babysit the Glorp full-time.
Best Tower Combinations
- The Wall (Mortar + Freeze + Shock) — Freeze slows them, Shock stuns them, Mortar kills them. Works on any map. Budget: 185 coins.
- Sniper Alley (Sniper + Freeze + Beam Turret) — Freeze stops fast creeps, Sniper picks off elites, Beam melts the boss. Best on linear maps. Budget: 230 coins.
- Full AoE (Mortar × 2 + Splasher × 2) — All AoE all the time. Weak against single-target elites but shreds grouped creeps. Budget: 240 coins.
- The Boss Killer (Beam Turret × 2 + Sniper) — Focus everything on single-target damage. You'll leak trash creeps but the boss dies in seconds. Co-op recommended.
- The Frost Wall (Freeze × 3 + Mortar × 2) — Triple slow stacks, then two mortars clear everything frozen. Dominates the Braid layout. Budget: 300 coins.
Creep Encyclopedia
| Creep | First Wave | Behavior | Counter |
|---|---|---|---|
| Basic Creep | 1 | Straight path, slow, low HP | Any tower |
| Runner | 2 | Fast, low HP, zigzags | Freeze tower + any damage |
| Tank | 3 | Slow, high HP | Mortar or Beam Turret |
| Armored Creep | 5 | Silver shimmer, armor 3+ | Mortar, Spiky Bits, anti-armor towers |
| Flyer | 6 | Ignores ground towers, flies direct to Glorp | Sniper (only tower that reliably hits flyers) |
| Swarm | 7 | Splits into smaller creeps on death | AoE towers kill the split before it spreads |
| Shielded | 8 | Front shield blocks damage until broken | Attack from behind; Shock stun bypasses shield |
| Elite | Waves 5, 8 | Telegraphed special attacks, high HP | Pop damage boost, focus-fire, kite with robot |
| Boss | Wave 10 | Unique attack patterns, 3 phases | Save all power-ups, learn the telegraphs |
Elite telegraphs: elites have visual wind-ups before specials — a glow before a special, a charge stance before a charge. Learn the tell, then decide: pop a boost and burst it down, or kite it into the killzone.
Step-by-Step Strategies
Strategy 1: The Safe Start (Solo, Any Map)
- Pause at the first build phase. Walk your robot around the full perimeter. Identify the 2–3 most trafficked path segments.
- Place your first Freeze Tower at the start of the busiest path. Upgrade it once.
- Place a Mortar at the convergence point where 2+ paths meet. Dance-boost it to level 2 immediately.
- Spend remaining coins on damage upgrade for the Mortar at the terminal.
- Wave 1–3: Let towers work. Save power-ups. If a creep slips through, manually body-block it with your robot.
- Wave 4: Place a Shock Tower behind the Mortar. Upgrade Freeze to level 2.
- Wave 5 (first elite): Pop damage boost when the elite appears. Focus it with manual targeting.
- Wave 6–8: Add a Beam Turret near the Glorp as last-resort defense. Upgrade everything.
- Wave 9–10: Save all power-ups. When the boss spawns, pop damage boost + slow bubble (if available). Kite the boss by moving your robot in a wide circle around the map while towers do the work.
Strategy 2: Co-op Role Split
Player 1 — Architect: Handles all tower placement, upgrades, and relic selection. Focuses on macro decisions. Should place 60% of the towers.
Player 2 — Operator: Controls movement, dancing, and power-up timing. Focuses on micro. Should handle elite kiting and boss aggro.
- Architect places 2 towers on the main path, 1 on each side path.
- Operator dance-boosts the main path towers to max while the Architect scouts the map.
- When elites spawn, Operator kites them into the Mortar killzone while Architect pops damage boost.
- After wave 8, split: Operator guards the Glorp directly while Architect reinforces weak points.
Strategy 3: Speedrun (Low Ascension)
For farming meta-progression quickly:
- Skip relic selection (takes too long). Accept whatever you get.
- Build only Mortar towers — they handle everything through wave 7.
- Never stop moving. Dance-boost as you run past towers. Don't linger.
- Spend coins only on Mortar damage upgrades. Ignore range, ignore new slots.
- If you leak a creep, let it hit the Glorp. The time saved by not chasing is worth more than the HP.
- Average completion time: 12–14 minutes per run.
Strategy 4: High Ascension (Ascension 7+)
The enemy speed and density at Ascension 7+ demand perfection:
- Must-have relics: Spiky Bits + Coin Magnet + Dance Shoes. Reroll until you get at least 2 of these.
- Build order: Freeze → Mortar → Shock → Mortar → Freeze → Beam Turret. No deviations.
- Every coin counts: Don't unlock new tower slots after the 6th. Spend everything on damage.
- Dance rotation: Player 1 boosts Mortars, Player 2 boosts Freeze towers. Interleave so slow is always active.
- Boss prep: Starting wave 8, save every power-up. The boss at Ascension 10 has 3× normal HP.
- Sell discipline: Recycle any tower that misses two consecutive waves. Dead weight is unaffordable at this level.
Strategy 5: Co-op No-Talk Coordinated Play
For Remote Play Together or couch co-op without voice:
- Tap dance as signal: If your partner dances on your tower, they want you to boost it.
- Follow the leader: One player wears the "builder hat" (whoever placed the first tower). The other follows their tower placements.
- Power-up zones: Assign each player 2 of the 4 power-up slots. Left column = Player 1, Right column = Player 2. No overlap.
- The panic dance: If a player dances rapidly in place (3+ taps per second), they need help. Go to their position immediately.
Strategy 6: The Braid Layout Specialist
When paths cross and merge repeatedly (the "Braid" archetype):
- Scout all merge points in the first build phase.
- Place Freeze towers at the first 3 merges — creeps will funnel through them.
- Place Mortars at the 2 merges closest to the Glorp.
- Let the outer freezes slow, the inner mortars finish.
- Keep one tower slot open for the wave 6 flyers — drop a Sniper near the Glorp.
Strategy 7: Boss Rush Prep
- From wave 8, stop spending power-ups. Bank every charge.
- Confirm your Beam Turret is at dance level 3+.
- Position your robot mid-map — not at the edge, not at the Glorp.
- When the boss spawns: pop damage boost immediately.
- Learn the 3-pattern order (Charge → AoE Slam → Beam) and pre-position.
- After the boss's first phase transition, pop the slow bubble and go all-in.
Advanced Tips (What Experienced Players Know)
-
Tower placement zones are sometimes coin drops. Walk over every zone icon on the map in the first build phase. Some drop 5–15 extra coins. This is a hidden economy boost that adds up across a run.
-
Dance-boost frames matter. There's a 1-second window where both you and the tower flash. You can cancel the dance animation early by dodging, and the boost still applies. This lets you boost 3 towers in the time it normally takes to boost 2.
-
Enemy spawns are directional. Creeps almost always spawn from 1–2 edges per wave. Watch which direction the first creep of a wave comes from, then reposition your robot to the opposite side — that's where the next wave's elite will spawn.
-
The shop between levels has hidden items. If you hover over the "Mystery Box" option in the shop for 3 seconds, it reveals what's inside before you buy. Only works once per shop visit.
-
Power-ups stack multiplicatively. Damage Boost (×1.5) + Slow Aura (enemies take 1.25× damage while slowed) = ×1.875 damage. Stacking two Damage Boosts gives ×2.25. Don't pop them sequentially; overlap them.
-
Co-op revive mechanic. If one player's robot is destroyed, the other player can walk over their wreckage and hold interact for 3 seconds to revive them. Costs 25 coins from the reviving player's current wallet.
-
Armor break point. At Ascension 5+, armored creeps get 5 armor (50% damage reduction). A single Spiky Bits relic reduces this to 35% reduction. Mortar + Spiky Bits = only 20% reduction. Always run both at high Ascensions.
-
Boss pattern memory. The final boss has 3 attack patterns in a fixed order: Charge → AoE Slam → Beam. The Charge is telegraphed by a 2-second wind-up. The AoE Slam hits everything within 3 tiles of the boss. The Beam targets your robot specifically. Once you know the order, you can pre-position.
-
Coin vacuum routing. Coins despawn quickly. When you move to dance-boost a tower, route through coin clusters on the way. Never cross the map for a single coin — but always cross through a cluster.
-
The dance button is also a taunt. Dancing near creeps draws their aggro. Use it to pull a stray elite away from the Glorp and into a killzone. It's a panic button that also repositions.
FAQ / Common Mistakes
Q: Why did I die on wave 7 when I was doing fine on wave 6? A: Wave 7 introduces armored creeps on most seeds. If you don't have anti-armor (Mortar, Spiky Bits relic, or high-dance Beam Turret), your damage drops by 40–50% instantly. Build for wave 7 by wave 5.
Q: Should I sell towers to rebuild? A: Yes — selling is core to the game. But be smart: sell only towers that haven't earned their keep recently. A tower that fired all last wave is earning; a tower that sat idle is dead weight. The refund never matches the full investment, so recycle true dead weight only.
Q: Is it better to have many low-level towers or few high-level towers? A: Few high-level. A single Mortar at dance level 4 outperforms 4 Mortars at dance level 1 by 2.3× on a per-coin basis.
Q: What do I do if creeps are leaking from a path I didn't notice? A: Don't panic-build on that path. Instead, place a single Freeze tower at the leak point to buy time, then reinforce your main defense. One leak doesn't mean you need to rebuild your entire layout.
Q: How important is the daily briefing? A: There's no briefing in Glorpotron — ignore any guide that mentions one. The game is pure action with no narrative preamble between waves.
Q: Can I pause mid-wave to place towers? A: Yes. Press Escape to pause, then use mouse to place. Your robot stops moving but towers still fire during pause. This is intended behavior, not an exploit.
Q: What's the point of the Green Glorp Shards? A: Each run awards Glorp Shards based on waves cleared (10 per wave) plus a completion bonus (200 for beating the boss). Spend them in the main menu meta-progression tree. They persist through all runs and Ascensions.
Q: Does Remote Play Together work well? A: Yes. Latency is noticeable above 80ms (the dance-timing gets slightly off). For best results, both players should be on wired connections below 50ms ping to each other.
Q: Mouse doesn't work in the menus! A: Known quirk — mouse isn't supported for menu navigation. Use keyboard (arrow keys or WASD) to navigate menus and control the player. Gamepads work great as well.
Q: The demo won't launch. A: If the demo fails to start, check whether you're on PC or Mac, whether the loading bar moves, and send the log file to the developers — they're responsive and track these issues. Most reported cases were fixed with a restart.
Q: Is the game balanced for solo or co-op? A: Both. Solo runs are tighter (you do everything yourself). Co-op is more forgiving but coordination matters — two players who both build on the same path waste half their economy. Split the map.
Q: What's the ideal first clear setup? A: Starting Coin 3 + Relic Slot 2 + Mortar unlock. Then in-run: Freeze → Mortar → Shock → Mortar, all dance-boosted, damage upgrades at every terminal. That's the proven first-clear path.
System Requirements
Minimum:
- OS: Windows 10/11 (64-bit)
- CPU: Quad core 3GHz+
- RAM: 8 GB
- GPU: DirectX 11, 4GB VRAM
- Storage: 1 GB
Recommended:
- OS: Windows 10/11 (64-bit)
- CPU: Quad core 4GHz+ (2020 or newer)
- RAM: 16 GB
- GPU: DirectX 11, 8GB VRAM
- Storage: 1 GB
Steam Deck is compatible. The game also supports Mac. Controller is fully supported for both solo and co-op — many players prefer it.
Final Tips
The golden rule: movement is your best defense. A robot that's always moving collects more coins, boosts more towers, and dodges more attacks. Stationary players lose.
Layer your defenses: slow at the entrance, damage in the middle, AoE near the Glorp. Freeze towers at path starts, Mortars at merges, Beam Turret as the last line.
Choke points first. Before you build anything, find the narrowest corridors and the busiest merges. Towers there earn 3× what towers in open space earn.
Don't over-commit. Keep an emergency reserve tower slot. When an elite spawns on an unexpected path, that slot saves the run.
Save power-ups for elites. Damage boost on a wave of basics is wasted. Damage boost on an elite or boss is a run-saver.
Spend between every wave. Unspent coins vanish on death. There is no bank. Spend everything, every time.
Use early runs as recon. Every loss teaches you an enemy pattern or a layout archetype. The first 10 runs are tuition. Pay it, learn it, climb.
Guide built from hands-on play and community testing. Strategies verified against Ascension 1 through Ascension 8. Boss patterns and tower damage values confirmed via multiple runs.