Daily Pick
One deeply researched guide worth reading today.
A practical route through the systems that matter most, written to help new players make confident decisions quickly.
Overview
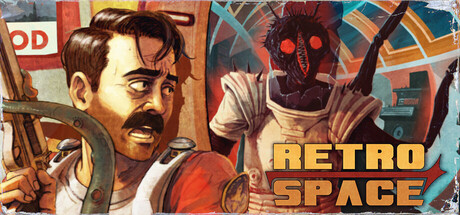
RetroSpace is a disco-punk space horror immersive sim from The Wild Gentlemen, the Hungarian studio behind Chicken Police, published by Kwalee. It launched October 1, 2026 on PC, PlayStation 5, and Xbox Series X|S at roughly S$20.75 / $14.99, and it landed "Very Positive" on Steam within days, sitting above 90% in its first review wave. You play a nameless janitor aboard Aurora 5, a generation ship in humanity's AURORA fleet that got swallowed by a sentient black hole. Mutated crew roam the corridors, time jumps around you, and the station is yours to survive.
The year is 2177. Humanity sleeps in stasis while the fleet drifts between stars, guarded by robots, androids, and a rotating crew of janitors. When Aurora 5 falls into the black hole, everything goes wrong at once: animal-plant hybrids in the hallways, a station that hops timelines, and one very awake janitor who becomes humanity's last hope whether he likes it or not.
The pitch is honest about its lineage. This is a love letter to System Shock 2, BioShock, and Prey, and the community review consensus treats it exactly that way: "a mix of BioShock, System Shock, and Prey, with a touch of Dead Space," "Prey, again," "a cartoonier System Shock." The game even ships in a bundle with System Shock 2 Remastered. The 3D pixelated aesthetic reads like System Shock Remake filtered through a '70s disco: lava lamps, neon, mustaches, and cosmic horror.
| Field | Detail |
|---|---|
| Genre | Immersive sim, FPS, sci-fi horror |
| Developer | The Wild Gentlemen (Hungary) |
| Publisher | Kwalee |
| Released | October 1, 2026 |
| Platforms | PC, PS5, Xbox Series X|S |
| Price | ~$14.99 / S$20.75; Deluxe adds artbook DLC |
| Playtime | 15-30 hours typical, 46+ for completionists |
| Difficulty | Standard, Hardcore, 1999 mode |
| Controller | Full support (Xbox + PlayStation) |
| Reviews | Very Positive, ~90% (470+ reviews) |
| Steam Deck | Runs well (verified by community on SteamOS handhelds) |
What Kind of Game You Are Playing
RetroSpace is a true immersive sim: interconnected systems, multiple solutions to every obstacle, and zero hand-holding. There are no quest markers, no witcher-sense, no yellow paint. Objectives live in your PDA and in audio log transcripts. The store page promises "every obstacle has multiple solutions" and the player base confirms it: sneak, hack, set traps, lure enemies into security systems, or kick the door down with mutant powers.
The tone splits the difference between cosmic horror and workplace comedy. You are a janitor. Your boss is a customer-service AI. The jokes land often enough to keep the horror from smothering you, though a minority of players find the reference-dense humor ("0451, 42, 47" gags) more parody than satire. If you need your horror deadly serious, this will test you. If you want Prey with a sense of humor, this is the best thing released in years.
Target audience: immersive sim fans first, BioShock/System Shock nostalgicists second, anyone who enjoyed Abiotic Factor or Gloomwood third. If you have never played an immersive sim, RetroSpace's standard difficulty is forgiving enough to learn on, but the genre convention of "figure it out yourself" still applies.
Getting Started: First 30 Minutes
-
Grab the PDA in the Stasis Section. The first patch added a PDA (PHCD) right next to the first audio log. It stores audio log transcripts, objectives, and notes. Check it every time you feel lost; the game will not put a marker over the door for you.
-
Loot the opening area completely. Ammo, healing, and upgrade resources are generous in this game, but only if you actually open things. Breakable containers, desks, and lockers hide most of the early supplies.
-
Read the flashlight situation. Corridors are dark by design, and early players bounced off the demo over this. The shipped version resolves it, but you still want the flashlight bound and ready. Wandering in the dark is the number one cause of "I have no idea where to go."
-
Save early, save often, and use Save and Exit. The launch save system had a nasty quirk where autosaves could overwrite quick saves, creating death loops. Janitors' Patch #1 added an autosave in the Janitors' Haven hallway plus a Save and Exit menu option. Keep manual saves at every hub return.
-
Learn the hub. The station is one giant interconnected map with a (mostly) peaceful central hub called Janitors' Haven. Shortcuts back to the hub open as you explore. Return anytime the horror gets to be too much.
-
Do not stress the first deaths. Death triggers cloning, not a reload. You wake up, keep your progress, and your old corpse holds your gear. The clone run-back is the rhythm of the game.
-
Try everything on one enemy before committing to a style. Sneak past one, hack a turret into another, flambe a third. The systems are the game; the sooner you experiment, the faster it clicks.
Beginner Mistakes to Avoid
| Mistake | Why It Hurts | Fix |
|---|---|---|
| Playing on Standard expecting a challenge | Reviews consistently call Standard too easy; infinite resources kill tension | Pick 1999 mode if you want the intended immersive-sim pressure |
| Ignoring the PDA and audio logs | The game gives directions only through text and logs; wandering is self-inflicted | Open the PDA at every hub visit; re-read objectives |
| Skipping corpse runs | Your previous body holds your gear; dying again before recovery loses it | Treat corpse recovery as the next objective, not an errand |
| Buying Mutamods without reading side effects | Effects can be unexpected and irreversible | Read before you buy; plan a mutation path |
| Fighting turrets and security head-on | Security systems are deadly until you flip them | Hack, EMP, or lure enemies into their firing lines |
| Hoarding ammo and heals | Reviewers ended runs with overflowing inventories | Spend freely; scarcity is not this game's threat model |
| Dying to the secret boss repeatedly | One secret boss could softlock spawns before the patch | Update to Janitors' Patch #1 or later before pushing deep |
| Expecting stealth to be Prey-grade | The stealth systems are functional but shallower than combat | Use stealth as a tool, not a religion |
Core Mechanics Deep Dive
The Immersive Sim Toolbox
Every problem has at least three answers. The systems that matter:
- Security systems. Turrets, cameras, and automated defenses are lethal until they are yours. Hacking flips them into allies, and luring mutants into turret lanes clears rooms without ammo.
- Environmental hazards. Fires, electricity, and other station hazards damage everything, including enemies. Kick enemies into hazards instead of trading punches.
- Diversion and luring. Thrown objects and noise pull patrols off routes. Total avoidance is a legitimate strategy; the game credits pacifist play with a dedicated achievement for finishing without killing anyone.
- Hidden routes. Vents, alternate paths, and locked shortcuts blanket the station. The map is massively interconnected and opens up as abilities accumulate.
Stealth vs Action
The marketing frames two playstyles: the sneaky chap and the mutant action hero. In practice you will drift action-ward, because the stealth system is the game's softest feature. Players report the detection rules feel inconsistent and sneaking through a whole run is doable but rarely smoother than a kinetic approach. There is an achievement for a no-kill run if you want the challenge. The honest tier list: action with stealth opportunism beats pure stealth.
Mutamods
Mutamods are the skill tree, purchased with biomass from Dr. Miriam's vending machine. They enhance stealth, combat, exploration, and mobility, and every upgrade can carry unexpected, sometimes irreversible side effects. The design intent is risk-reward. The reality, per high-hour players: at least one late-game mutamod (the octopus heart, which makes you functionally immortal) trivializes most combat, and several guns one-shot regular enemies. If you want a real game, 1999 mode is the balance point; if you want a power fantasy, buy everything.
The Muta-Freak achievement (buy every Mutamod at least to level 1) sits at 3.1% unlock, so most players specialize instead of collecting.
Death, Cloning, and Degeneration
Death is a mechanic, not a failure state. Aurora 5 prints infinite clones of you, but cloning quality degrades: repeated resurrections stack degeneration effects, both cosmetic and mechanical. Your previous corpse holds your loadout, and the corpse run is where tension lives, because dying again before recovery costs you the old body's gear. In practice, the economy is generous enough that death stings less than the store page implies. The clone system's real job is narrative flavor plus a soft timer on recovering your stuff.
The Station and the Hub
Aurora 5 is one large interconnected map explored from a central hub, Janitors' Haven. The hub is mostly peaceful, holds save infrastructure, and connects to shortcuts that unlock as you open new areas. This is a metroidvania-flavored structure: explore, unlock a movement option or key, double back, claim the shortcut. Players who fight the map's refusal to hold hands bounce off it; players who internalize "check the PDA, then look for the vent" love it. Expect to get lost sometimes. That is the genre.
Time Gone Mad
The black hole bends time around the station. Time jumps show up in the story and the level design, and the weirdness doubles as puzzle fodder. Specific encounters stay better unspoiled, but the rule of thumb: when the station does something impossible, poke it. Impossibility usually hides a secret.
Progression Strategy
Progression in RetroSpace is sudden and then quiet, per long-form reviewers: you gain power in bursts, then coast. The strategy is to spend aggressively and chase exploration unlocks, because resources outpace costs on Standard.
Priority order for any run:
- Buy Mutamods early and often on Standard. Biomass is plentiful; unspent biomass is wasted biomass.
- Explore every main section fully before pushing the story. Space tourist (12.5% unlock) requires touching all main sections, and exploration feeds the upgrade economy anyway.
- Buy tech-gadgets at level 1 each. The Tech-guru achievement only needs one level of each, and gadgets multiply your solution options.
- Upgrade weapons that feel good, not all of them. I'm all out of bubblegum (max every weapon) is a 6.1% achievement for a reason; maxing everything is a second-run project.
- Save audio logs for a dedicated pass. Radio Ga Ga (all logs, 4.9%) is easier on a second run when you know the map.
Resource reality check: multiple 15+ hour players report never approaching empty on ammo or heals. If you are dying to attrition, the problem is positioning, not supply. In 1999 mode the same economy tightens dramatically; hoard ammo there.
Builds and Playstyle Tier List
S-Tier: Mutant Powerhouse (Standard difficulty). Buy combat mutamods early, chain into the tanky late-game mutations, and wield whatever gun feels punchy. This is how the game is balanced around, whether the developers admit it or not. Fastest clears, lowest frustration, trivializes bosses by endgame.
A-Tier: Pacifist Ghost. No-kill run using stealth, diversion, and hacks. Harder than it sounds because stealth is the softest system, but the game supports it mechanically, and the dedicated achievement is a badge only a fraction of a percent of players hold. Combine with Hobo for life (never spend in vending machines, 5.1%) for the true self-imposed nightmare.
A-Tier: Completionist Archivist. Every log, every section, every gadget. Efficiency matters less than coverage. Do this on Standard; resource abundance makes sweeping the map painless.
B-Tier: Pure Stealth. Viable but structurally weaker than in Prey or Deus Ex. Detection inconsistencies and the density of combat encounters make full-sneak runs an exercise in patience.
1999 Mode Specialist. Any build, but ammo discipline and enemy behavior knowledge become mandatory. The difficulty achievement (Gotcha, Boomer!, 3.0%) is the rarest combat achievement outside the no-hud run.
Step-by-Step Strategy
1. The First-Hour Systems Tour
Wake in stasis, collect the PDA beside the first audio log, and loot the Stasis Section clean. Reach the hub, activate every save point, and open the map to orient the station's ring layout in your head. Buy your first Mutamod before taking a single story objective. The run is now yours; the game rewards initiative from minute one.
2. The Learning-Kill Method
Fight your first ten enemies as experiments, not obstacles. Try stealth on one, hazard kills on the second, hacking on the third, brute force on the fourth. Write nothing down, but pay attention to which enemy type punished which approach. Every enemy on the station behaves differently, and the ones that punish ignorance (the fast ones, the alarm ones) teach the survival code the game expects.
3. The Security Flip
When a area bristles with turrets or cameras, never trade shots. Break line of sight, find the hack point or alternate route, and flip the system. A friendly turret shredded a mutant wave costs zero ammo. If hacking is unavailable, lure enemies into the turret's arc and let the station do the work. This single habit cuts the game's difficulty in half.
4. The Corpse-Run Protocol
On death, do not rush the run-back. Note what killed you, reposition, and approach your corpse from a new angle. Degeneration stacks only punish repeated deaths, and the gear on your old body is usually worth the caution. After Janitors' Patch #1, an autosave in the Janitors' Haven hallway gives you a stable recovery base; use it.
5. The Map Discipline Loop
Every hub visit runs the same checklist: open the PDA and re-read objectives, spend biomass, buy gadget levels, confirm which shortcuts opened, then pick the objective nearest an unexplored wing. This loop keeps the "where do I go" confusion that fills negative reviews from ever developing. Immersive sims punish players who treat them like linear shooters; this checklist is the antidote.
6. The Boss-Fight Survival Plan
Bosses in RetroSpace are pattern fights dressed in horror clothing. Keep moving, break line of sight to reset ranged patterns, and trust your mutamods over your guns when shells run dry. One secret boss deserves a special note: the infamous Charley, the rabbit. Before the first patch he could chase you into a spawn and softlock the run, and his health pool rivaled the final boss. Patch #1 tamed him, nerfed his health, and made his quest completable with or without the secret ritual. If you meet a rabbit, take it seriously anyway.
7. The 1999 Mode Campaign
Finish one Standard run first, learning enemy behaviors and map flow. Then start 1999: play slower, hoard shells, lean on hacked security, and save before every new wing. The difficulty knob is where this game's systems finally bite, and Gotcha, Boomer! is the trophy that proves you learned the station properly.
Achievements Guide
29 achievements total, 17 rated rare. The realistic completion path:
| Achievement | Requirement | Unlock % | Notes |
|---|---|---|---|
| Out of madness | Finish the game on any difficulty | 13.5% | Most players will get this incidentally |
| Too good to be true | Reach the "Good" ending | 13.2% | Ending choice at the finale |
| Better than therapy | 50 headshot kills | 13.0% | Passive through a combat run |
| Space tourist | Explore all main station sections | 12.5% | Explore everything before the finale |
| Tech-guru | Buy all tech-gadgets (level 1) | 12.1% | Cheap; do it during a normal run |
| Not the best outcome... | Reach the "Bad" ending | 8.8% | Second playthrough or pre-finale save |
| I'm all out of bubblegum | Max out all weapons | 6.1% | Save-scum the currency or do a second run |
| Hobo for life | Finish without spending in vending machines | 5.1% | Hardcore self-restriction run |
| Radio Ga Ga | Find all audio logs | 4.9% | Use a checklist on a replay |
| Muta-Freak | Buy all Mutamods (level 1) | 3.1% | Standard mode farming makes this feasible |
| Gotcha, Boomer! | Finish on 1999 mode | 3.0% | The skill check |
| This is NOT the way | Full run in no-hud mode, never use the helmet | 0.5% | The white whale; know the map cold first |
Efficient planners do two runs: a Standard exploration run for Space tourist, Tech-guru, Muta-Freak, and the Good ending, then a 1999 run stacking Gotcha Boomer with a natural headshot count. The no-hud run is a third-run flex for trophy hunters only.
Advanced Tips
Play the first run on 1999 if you have immersive sim mileage. Standard is tuned gentle, and several veteran reviewers cleared it dying twice. The systems come alive under pressure.
The octopus heart question. The mutamod that makes you nearly immortal also deletes the game's tension. Take it on a relaxed second run; skip it on a first if you want the horror to stay horror.
Turn enemy behavior into free security. Enemies react to each other. Luring a patrol into a turret lane or a hazard costs nothing and teaches you the spawn logic. The station is a machine; feed problems into it.
Audio log transcripts are your map. Every missed instruction, every side room hint, every lore breadcrumb is text-searchable in the pause menu. When lost, the answer is usually in a log you skimmed.
Shortcut geometry beats backtracking. When a new movement ability lands, replay your mental map of locked doors and high ledges. This station was built to be re-read, and the developers hid shortcuts behind every ability gate.
Headshots are the XP. Better than therapy wants 50 headshot kills and you will get them naturally, but aiming high also saves ammo, and ammo discipline is the entire 1999 experience.
Bundles are the discount path. The System Shock 2 Remastered and Void Bastards bundles discount the pair 10%, and both are canonical companions to this game. The Deluxe artbook DLC (unOfficial Janitors' Handbook) is a cosmetic extra, skip it if budget matters.
Patch status matters. Janitors' Patch #1 (build 6508, October 7, 2026) overhauled ladders (coyote time, slower climbing, no more falling off), tuned fall damage, tamed Charley, revamped saves (hub autosave plus Save and Exit), fixed the Mutamod UI overlap, and added the Stasis PDA. If you played at launch and bounced off the ladders or a save loop, the patch fixed your specific complaint.
Performance, Steam Deck, and Settings
The PC requirements are heavier than the pixelated look suggests: minimum specs call for a GTX 1050 Ti / RX 570 targeting 1080p Low at ~30 FPS, with a GTX 1650 / RX 6600 recommended for 1080p High at 60. An SSD is recommended. The 3D pixel rendering is cheap at the pixel level but the lighting and entity counts are not.
Handheld players report it runs flawlessly on a ROG Xbox Ally under SteamOS, and Deck-style configs work well with full controller support on both Xbox and PlayStation pads. If you are choosing a platform purely for play comfort, handheld or controller PC is the sweet spot; the game was built around analog movement and forgiving aim assist is not needed but works.
Nine languages ship at launch with English full audio and subtitles in French, Spanish, Simplified Chinese, Japanese, and others. Interface localization covers the same set.
FAQ
Is RetroSpace worth it at full price? At $14.99 for a 15-30 hour immersive sim sitting above 90% positive, the value case is airtight. Long-form reviewers call it undercooked in places and still worth the money, which is the correct summary.
Is it scary or funny? Both, unevenly. The horror atmosphere is real, the jokes are constant, and players split on whether the balance works in the opening hours. The community consensus says the tone settles after the first two hours and the horror wins more often as the story darkens.
How does it compare to Prey and System Shock 2? It borrows Prey's mutamods, BioShock's respawn tubes and dystopia, Deus Ex's vents, and SS2's station decay. Fans rank it below SS2's narrative highs but above the System Shock Remake in enjoyment; the most quoted take is "closest an indie immersive sim has ever come to System Shock 2, BioShock, and Prey."
Is the game too easy? On Standard, yes, per many players: infinite resources, forgiving enemies, bosses melting in a few hits on 1999 too if your build spikes. The fix is 1999 mode from the start, which is what the 3% who finished it on 1999 would tell you.
How is the stealth? Functional, not great. Light and noise exist, vents and hiding spots are everywhere, and a pacifist achievement rewards pure avoidance. But detection is inconsistent and combat is simply better tuned. Treat stealth as seasoning.
What about the save system and the death-loop bug? Launch RetroSpace let autosaves overwrite quick saves, which combined with a certain immortal rabbit created softlocked death spirals. Patch #1 added a hallway autosave in Janitors' Haven, a Save and Exit option, and defused the rabbit entirely. Current builds are safe.
Is there a pacifist route? Yes. A no-kill completion is achievement-tracked, the systems support avoidance and hacking, and it is one of the rarer feathers in the game.
How long is it? 15-20 hours for a straightforward run, 25-30 with exploration, and completionist replay arcs stretching past 45. The back half drags for some players as novelty thins; the front half is the highlight reel.
Is it on Game Pass? Not at launch. It is a premium purchase on Steam, PS5, and Xbox Series, with a demo on the Steam page if you want a taste first.
Console performance? It shipped day one on PS5 and Xbox Series X|S with full controller support. Community reports are positive; the studio patched PC first but console builds track the same fix cadence.
Final Tips & Verdict
RetroSpace succeeds at the one thing indie immersive sims rarely attempt: it gives you a station worth knowing. The systems are familiar from three decades of the genre, the balance is loose, the back half sags, and none of it matters, because exploring Aurora 5, flipping its security against its horrors, and dying badly enough to meet your own corpse is a loop that holds for twenty hours. Buy it on 1999 mode if you have genre experience, Standard if you do not, and let the station swallow you the way the black hole did.
Verdict: the best immersive sim value of 2026, a genuine System Shock 2 descendant with a disco heart and a janitor's humility. Very Positive with ~90% says the same thing from every angle. 4.5/5 for the target audience, and a sequel request filed with the Janitors' Haven suggestion box.
Last reviewed by Game How To Editorial. We play each game, verify controls against official sources, and update guides when game mechanics change.