
Daily Pick
One deeply researched guide worth reading today.
A practical route through the systems that matter most, written to help new players make confident decisions quickly.
Overview
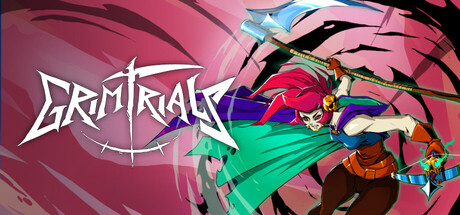
Grim Trials is a heavy metal action roguelite from Glory Jam (published by Soft Source / Neon Doctrine) launching August 20, 2026 on Steam, Xbox Series X|S, Nintendo Switch, Switch 2, and PlayStation 5. You play as Avelin, a young woman who died too soon. Recruited as a trainee Reaper, you fight through hex-grid arenas, defeat seven Sinful Souls, and gather enough power to return to the living world and see your lover one more time.
This is not a Hades clone. The DNA is similar — room-based runs, hub between attempts, permanent upgrades layered over temporary blessings — but Grim Trials pivots hard into three distinct systems: a crafting minigame that determines gear quality, a dual-wield combat flow (melee + crossbow) with directional attacks, and a life-symbol health system that rewards preparation over reflexes.
The game has already crossed 50,000 wishlists before release, a huge milestone for a small Indonesian studio. The demo has been through multiple updates based on community feedback — the June 2026 update rebalanced the first boss (Acedia), improved ranged combat auto-aim, and laid groundwork for control remapping.
| Detail | Info |
|---|---|
| Genre | Heavy Metal Action Roguelite |
| Developer | Glory Jam (Rolling Glory Jam) |
| Publishers | Neon Doctrine, Soft Source |
| Release | August 20, 2026 |
| Platforms | Steam, Xbox Series X|S, Nintendo Switch, Switch 2, PS5 |
| Price | TBA (demo available now) |
| Players | Single-player |
| Languages | English, Simplified Chinese, Traditional Chinese, French, Italian + more (10 total) |
| Steam Features | Achievements, Cloud Saves, Family Sharing |
| Story Connection | Canonical sequel to Rage in Peace |
Target audience: players who enjoy Hades, Dead Cells, or Rogue Legacy but want a fresh combat rhythm with heavier emphasis on gear crafting. Difficulty is medium-high. A first clear takes 15-25 hours depending on resource grind efficiency.
Getting Started
First 30 Minutes
You wake up in the Academy with nothing. Do this:
- Talk to every NPC. Morrigan (veteran Reaper), Finn (chatty 1920s soul), and Elena (recent arrival) each give you a side quest and unlock dialogue progression. The game marks NPCs with new speech, so you don't have to memory-check.
- Meet Kai. The June 2026 demo added a second playable character — a fellow "Cocoon" (trainee Reaper) who challenges you to get stronger so he can share Grim Reaper secrets as your senior. Interacting with Kai unlocks the Training Ground.
- Equip your starter weapons. Scythe in melee slot, crossbow in ranged slot. You dual-wield both.
- Craft potions. Go to the workshop bench. You start with zero. Make at least 10 before your first real run.
- Spend your first skill points on +Life Symbols. This is the single highest-ROI investment in the entire skill tree. More HP = more mistakes you can survive.
- Do one resource run. Enter a trial intending to die. Break every breakable object. Collect everything. Come back with materials.
- Practice in the Training Ground. The endless Training Ground and Combat Arena (unlocked through Kai) let you experiment with builds before heading into the real Afterlife. This is the single best addition for learning weapon timing — use it.
- Craft more potions. Repeat steps 4-7 until you have 20+ potions banked.
Beginner Mistakes That Kill You
| Mistake | Why It Hurts | Fix |
|---|---|---|
| Mashing attack button | Directional swings mean you miss enemies standing close to you | Pause, aim each swing, then swing |
| Hoarding special charges | Special recharges fast when you're landing hits | Use it on the first opening |
| Ignoring the crossbow | Ranged damage keeps you safe and builds charge | Weave in crossbow shots between melee combos |
| Saving potions for emergencies | Potions restore only 2 hits each; you need 15-20 per boss | Drink early, drink often |
| Taking every blessing offered | Some blessings are traps — poison is weak early game | Prioritize healing > attack > dash |
| Standing still to shoot | You become a target | Fire crossbow while moving — the June update made this viable |
| Skipping the Training Ground | You learn boss patterns by dying instead of practicing | Use Kai's arena to drill dodge timing for free |
HUD Quick Reference
┌────────────────────────────────────────────┐
│ ⬡⬡⬡⬡⬡⬡  Life Symbols (HP)    ⚡⚡  Special│
│ Active buffs below                          │
│                                    ┌──────┐│
│                                    │ Mini ││
│                                    │ map  ││
│                                    └──────┘│
│ [Potion] [Potion] [Potion]                 │
│                                Boss HP bar │
└────────────────────────────────────────────┘
Each life symbol = 2 hits. Start with 6 symbols (12 hits). Max out at 22+ hits through skill tree upgrades.
Core Mechanics Explained
Dual-Wield Combat System
You carry one melee weapon and one ranged weapon simultaneously. No stamina. The only limiter is attack speed, which you can upgrade.
Melee attacks are directional. Your swing arc goes where your character faces. Enemies standing directly adjacent can cause you to miss if they're inside your swing arc. This is the single most important mechanical nuance to internalize.
Crossbow attacks can now be fired while moving (added in the June 2026 demo update). This was a game-changer. Before, you had to stand still to shoot. Now you can kite enemies while peppering them. The same update increased the auto-aim angle and accuracy for long-range combat — the crossbow is now a reliable primary weapon, not a situational poke.
Special attacks charge up as you land hits. Start with 2 charge slots. Upgrade to 3+ through the skill tree. Specials vary by weapon — the scythe does a wide spinning slash; the axe does a high-damage overhead slam; crossbow specials fire a powerful bolt.
Dodge roll (space + direction) has invincibility frames. Use it through enemy swings and trap triggers.
Wall jump lets you bounce off walls. Combine with crossbow for aerial sniping.
No contact damage. Bumping into enemies doesn't hurt. Only their actual attacks do. This means you can play aggressively and body-block enemies into corners.
Directional attacks can miss. This is the flip side of the directional system. If an enemy is inside your swing arc's blind spot, your attack whiffs entirely. The fix is positioning: step back, re-aim, then swing. Never swing while an enemy is hugging your back.
Weapon Types
| Weapon | Speed | Damage | Range | Best For | Special Attack |
|---|---|---|---|---|---|
| Scythe | Medium | High | Medium | Crowd control, sweeping combos | Wide arc slash |
| Axe | Slow | Very High | Short | Single-target burst, stagger | Overhead slam |
| Greatsword | Slow | Very High | Medium | Heavy stagger, wide arcs | Chargeable sweep |
| Dual Blades | Fast | Low-Medium | Short | Rapid hits, combo building | Flurry strike |
| War Hammer | Very Slow | Extreme | Short | Boss staggering, shield break | Shockwave slam |
The full game adds Greatsword, Dual Blades, and War Hammer beyond the demo's scythe and axe. Each weapon type has a unique special attack with different properties.
Weapon feel notes from testing: the axe has noticeably slower movement recovery — dodge-cancel weaving is essential with it. The scythe is the best all-rounder for learning. Dual Blades build combo stacks fastest and are the speedrun choice. The War Hammer's special destroys boss stagger bars but its attack speed makes room clearing painful.
Life Symbol Health System
No HP bar. You have life symbols on screen. Each symbol absorbs 2 hits before breaking.
How damage works:
- A single enemy hit = 1 life symbol lost (2 hits worth of damage)
- A boss heavy attack = 1 full symbol
- Trap damage = 1 symbol per tick
- Later enemies can hit for multiple symbols at once
How to heal:
- Crafted potions — restore 1 symbol. Craft at Academy workshop between runs. Carry as many as you craft.
- Healing blessing — passive recovery during runs. Base level: half a symbol every 3 combat rooms. Max level: 1 full symbol per cleared combat room.
That's it. No HP drops. No leech. No fountains. The game forces you to prepare.
Potion Economy Math
One potion = 2 hits. A single boss fight against the first Sinful Soul typically deals 10-15 unavoidable hits over its duration.
Minimum potions for first boss: 15-20
Time to farm materials for 20 potions: 2-3 resource runs (10 min each)
Skill tree investment to reduce need: prioritize +Life Symbols
Crafting potions is a valid use of a whole run. Enter a trial with zero boss intent. Break everything. Die intentionally. Repeat. This is the fastest way to stockpile. You can craft up to 99 potions if you're willing to grind materials — and for late-game boss attempts, you'll want close to that.
The Crafting Minigame
When you craft an item, a grid of symbols appears and flashes a sequence. You must repeat the sequence from memory.
The trick: the sequence is always the same for a given recipe. Learn it once, craft it perfectly every time. Higher accuracy = higher quality = better stats.
| Quality Level | Stat Multiplier |
|---|---|
| Flawless (100%) | 1.5x base stats |
| Good (80-99%) | 1.2x base stats |
| OK (50-79%) | 1.0x base stats |
| Poor (0-49%) | 0.7x base stats |
A Flawless scythe does 50% more damage than a Poor one. Always aim for Flawless. Practice the pattern on cheap items first. Resources are relatively easy to get in the demo — the bottleneck is your memory of the sequences, not the materials.
The Blessings System
At the end of each room, choose one of three random blessings. Every buff can be upgraded to max level 4 by choosing it again when it appears.
| Category | Base Effect | Max Level (Lv4) | Priority |
|---|---|---|---|
| Healing | +0.5 symbol per 3 combat rooms | +1 symbol per cleared room | S-tier |
| Attack | +15% melee/ranged damage | +60% damage | A-tier |
| Dash | +1 dodge range, faster recovery | +3 range, near instant recovery | A-tier |
| Cooldown | +20% special charge rate | +80% charge rate | B-tier |
| Combo | +5% damage per consecutive hit (up to 5 stacks) | +12% per hit (up to 10 stacks) | S-tier late |
| Poison | 3 damage per second for 5 seconds on hit | 12 DPS for 8 seconds | C-tier early, A-tier late |
| Shield | 1-hit barrier at start of each room | 3-hit barrier | S-tier |
| Thorns | 10% damage reflected | 40% damage reflected | B-tier |
Progression Strategy
Skill Tree Priority Order
The skill tree offers permanent upgrades bought with skill points earned from kills (persist even on failed runs).
| Priority | Upgrade | Why |
|---|---|---|
| 1 | +Life Symbols | Every point = +2 hits you can take. Rush to at least 12 symbols |
| 2 | Dodge Speed | One point makes the dodge noticeably snappier |
| 3 | Special Charge Slots | More specials = more burst damage on bosses |
| 4 | Special Charge Speed | Get specials back faster during combat |
| 5 | Melee Weapon Damage | Obvious value, but HP and specials matter more early |
| 6 | Ranged Weapon Damage | Crossbow becomes your safe damage source |
| 7 | Crit Rate / Crit Damage | Scales well once you have base stats |
| 8 | Attack Speed | Endgame optimization |
Full Skill Tree Route (First Clear)
Phase 1 (first 5-10 runs): +Life Symbols → 12 total hits
Phase 2 (runs 10-20): Dodge Speed → Special Slots → Special Speed
Phase 3 (runs 20-30): Start investing in weapon damage
Phase 4 (30+): Crit build / Attack speed / Defense nodes
The skill tree is forgiving. Every failed run still earns points. Eventually you outscale the content through raw stats alone. The game is explicitly designed so players will eventually succeed given enough time.
NPC Relationships
The Academy NPCs aren't decoration. Building relationship levels unlocks:
- Morrigan — defensive synergy (damage reduction during runs)
- Finn — resource discovery (more materials per room)
- Elena — attack blessings appear more frequently
- Kai — Training Ground access and combat knowledge (practice arena, senior Reaper tips)
How to raise relationships:
- Talk after every run (game notifies you when someone has new dialogue)
- Give gift items found during runs — match the gift to the NPC's personality for double points
- Complete their side quests
Relationship gains are permanent. Maxing all three before attempting later bosses makes a significant difference. The game also has a dog and a cat you can talk to — pure flavor, but consistent with the Hades-style hub design.
Blessings System — In-Depth
Best Blessing Combinations
Survival Build (best for learning):
Healing Lv4 ─── mandatory, non-negotiable
Shield Lv3 ─── free hits every room
Dash Lv2 ─── mobility to avoid damage
Attack Lv2 ─── rooms end faster = less damage taken
Combo Aggro Build (speed runs / boss melts):
Combo Lv4 ─── ramps to +120% damage
Cooldown Lv4 ─── specials every few seconds
Attack Lv3 ─── base 45% damage
Poison Lv2 ─── extra DPS while kiting
Glass Cannon Boss Killer:
Attack Lv4 ─── +60% damage
Combo Lv4 ─── +120% at full stacks
Cooldown Lv3 ─── special spam
Poison Lv3 ─── 8 DPS for 6 seconds
Healing Lv1 ─── you take damage, deal with it
Blessing Tier List
S: Healing, Shield, Combo (late game)
A: Attack, Dash, Cooldown
B: Thorns
C: Poison (early game)
The healing blessing is a must-have. The demo's two healing methods are potions (crafted) and the healing blessing. No HP drops, no healing springs, no leech life blessings exist. If the healing blessing appears early, take it — even over an attack blessing. The shield blessing is a close second: a 3-hit barrier every room is effectively +6 hits per room.
Crafting System — Complete Breakdown
Crafting accounts for roughly half your total power. The system has three pillars: materials, quality minigame, and gear variety.
Materials You Collect
| Material | Source | Used For |
|---|---|---|
| Soul Shards | Enemy drops, breakable objects | Potions, basic gear |
| Bone Fragments | Skeletal enemies, treasure rooms | Weapons |
| Ethereal Cloth | Academy quest rewards, rare drops | Armor |
| Sinful Essence | Boss kills | Endgame crafting |
| Echo Dust | Breakable objects in resource rooms | Potion enhancement |
Gear Slot Breakdown
Weapon Slots:
  └─ Melee Weapon (scythe, axe, greatsword, dual blades, war hammer)
  └─ Ranged Weapon (crossbow, or alternative ranged options TBA)
Armor Slots:
  └─ Chest Armor (defense, resistances)
  └─ Leg Armor (movement speed, dodge)
  └─ Accessory (special effects, stat bonuses)
Consumables:
  └─ Potions (HP recovery)
  └─ Blessing Charms (start a run with a free blessing)
  └─ Trap Kits (deployable during runs)
Each armor piece has 2-3 random stat rolls. The quality of the item determines the range of those rolls. A Flawless chest piece can roll max HP, defense, and a unique effect. Gear can be upgraded beyond crafting quality (not available in the demo, confirmed for full release).
Crafting Strategy
- Memorize the pattern for potions first. You'll craft hundreds. The sequence is fixed per recipe — learn it once, profit forever.
- Craft in batches of 10. The minigame is faster when muscle memory is warm.
- Prioritize a Flawless weapon over Flawless armor. A 1.5x damage weapon changes every fight. A 1.5x defense chest only changes the fights you're losing.
- Keep a backup weapon. The final boss fight uses your own weapon against you — a backup you haven't over-upgraded is a strategic asset.
Step-by-Step Strategy: Full Run Walkthrough
Phase 1: Academy Preparation (5 min)
- Collect any new quests from NPCs
- Check if you have materials for a weapon upgrade
- Craft Flawless potions — aim for 30+ in reserve
- If you have a boss waiting, craft the highest-quality weapon you can
- Drill the boss's dodge timing in the Training Ground (if it's a rematch)
- Enter the trial portal
Phase 2: Early Rooms (Rooms 1-5)
- Prioritize healing blessing. If it doesn't appear, take dash or shield
- Break everything. Every breakable object drops materials
- Learn the enemy types in each room. Approach carefully, watch telegraphs
- Don't hoard potions. Drink any time you lose a symbol
- Clear all side rooms. Don't rush to the boss — more blessings = easier fight
- Check your weapon arc. Swing once in open space to confirm your positioning habits are sound before combat gets chaotic
Phase 3: Mid Run (Rooms 6-12)
- You should have Healing Lv2+ by now. If not, consider whether your build is viable
- Treasure rooms — always enter. They give materials and sometimes gear drops
- Resource rooms — break everything, collect every drop
- Start stacking. If combo blessing appeared, start building stacks
- Check your potion count. If below 10, play more carefully
- Use the mini-map. The top-right mini-map is easy to interpret — plan your room order to hit treasure rooms before the boss
Phase 4: Pre-Boss (Room 13-15)
- You should have Healing Lv3+ or Shield Lv2+
- Top off HP. Use potions to restore full symbols before entering the boss arena
- Save special charges. Enter the boss with full special meter
- Check your weapon — is it Flawless quality? If not, you'll need more potions
- One last check: do you have 15+ potions? If not, it's okay — you can still win
- Memorize the boss's first telegraph. The first attack of every boss is the same every attempt — pre-plan your dodge
Phase 5: Boss Fight
- Phase 1 (75-100% HP): Learn the telegraphs. Boss attacks have a red glow wind-up
- Phase 2 (40-75% HP): Boss adds a new attack pattern. Dodge timing changes
- Phase 3 (0-40% HP): Enrage phase. Boss attacks faster. Use specials to interrupt
- Heal between phases. Boss has downtime after phase transitions — drink potions
- Don't get greedy. 2-3 hits then retreat is the rhythm
- Crossbow during enrage. When the boss speeds up, switch to crossbow kiting — the June update's auto-aim buff makes this genuinely effective now
Phase 6: Post-Boss
- Collect Sinful Essence from the boss arena
- Interact with the portal to return to Academy
- Talk to NPCs — new dialogue unlocked
- Spend skill points earned during the run
- Repeat
Boss Strategies — The Seven Sinful Souls
Boss 1: Acedia (The Sloth Demon)
Arena: Dark forest clearing with trees blocking movement
Attack Patterns (post-June-2026-update):
| Attack | Telegraph | Dodge | Punish Window |
|---|---|---|---|
| Sweep | Slow wind-up, weapon glows red | Roll backward | 2 hits after swing |
| Ground Pound | Both hands raise | Jump or roll through shockwave | 3 hits during recovery |
| Charge | Leans forward, red trail | Side-dodge left or right | 2 hits from behind |
| Summon Spores | Kneels, ground pulses | Kill summoned spores immediately | None (deal with adds) |
| Eye Hazard (Phase 2+) | Oval-shaped ground damage, now with visual cue | Move off the oval before it fires | Small window |
June 2026 rebalance notes: the Acedia fight was tuned after Next Fest feedback. The devs added a maximum limit on spawned minions, decreased the number of Eye Hazards in phase 2, added a visual cue for the Eye Hazard attack, and increased the boss's idle time between attacks to give players a larger attack window. If you struggled with Acedia in the earlier demo, the fight is fairer now.
Strategy: Stay at mid-range to bait the charge. Side-dodge and get 2-3 hits on the recovery. Back off before the sweep. When spores spawn, kill them instantly — they explode after 5 seconds and deal heavy damage. In phase 2, watch for the Eye Hazard's new visual cue and reposition before it fires.
Recommended build: Healing Lv3+, Shield Lv2+, Dash Lv2+. Bring 15+ potions minimum.
Boss 2: Luxuria (The Lust Demon)
Arena: Crystal cave with reflective surfaces
Attack Patterns:
| Attack | Telegraph | Dodge | Punish |
|---|---|---|---|
| Charm Beam | Stares at you, eyes glow pink | Hide behind crystal pillar | 2 hits after beam ends |
| Crystal Shards | Raises arms, crystals form overhead | Keep moving | None, just avoid |
| Teleport Slash | Vanishes in pink smoke | Roll immediately after reappearance | 1 hit, then retreat |
| Mirror Image (50% HP) | Splits into 3 copies | Hit the real one (slight color difference) | All copies die |
Strategy: Use pillars to block the charm beam — getting hit leaves you stunned for 3 seconds. When she teleports, roll the instant she reappears. At 50% HP, she creates mirror images. The real one has a slightly darker aura. Hit it to dispel all copies.
Boss 3: Ira (The Wrath Demon)
Arena: Volcanic chamber with rising lava floor
Attack Patterns:
| Attack | Telegraph | Dodge | Punish |
|---|---|---|---|
| Fist Slam | Rears back, fist glows | Roll sideways | 3 hits on arm |
| Lava Eruption | Stomps, ground cracks | Move to safe zone (crack-free area) | None |
| Enrage Flurry (40% HP) | Roars, attacks speed 2x | Roll rhythmically | Small windows only |
| Meteor Call (20% HP) | Points upward | Keep moving, watch shadows | None |
Strategy: The floor shrinks as lava rises — this is a soft enrage. Don't let the fight drag. Go aggressive. When she enrages at 40%, your dodge timing needs to be perfect. Use crossbow from range during this phase — the auto-aim buff makes kiting viable.
Boss 4-7: Additional Sinful Souls
The remaining four bosses (Superbia/Pride, Invidia/Envy, Gula/Gluttony, Avartia/Greed) follow the same design philosophy: learn the telegraph, dodge into punish windows, manage arena hazards. Each adds one new mechanic:
- Pride — reflects projectiles. Don't use crossbow during its shield phase.
- Envy — copies your build. If you stacked combo, it hits hard.
- Gluttony — arena shrinks as it eats terrain. Stay in the safe zone.
- Greed — drops fake loot that explodes. Don't pick up gold during this fight.
Final Boss: Death (The Grim Reaper)
Phase 1: Death uses your own weapon against you. The better your gear, the harder he hits. Bring a backup weapon that you haven't upgraded heavily.
Phase 2: Death summons shadows of defeated Sinful Souls. Each shadow uses one attack from their original fight. This is a test of whether you learned the telegraphs.
Phase 3: Death's arena collapses. You can't dodge infinitely — the floor shrinks to a small platform. Burn him down. This is a DPS check.
Advanced Tips
Economy Optimization
- Every run is progress. Even dying at room 2 gives skill points. Never feel like you wasted time.
- Resource runs are efficient. A dedicated resource run (break everything, ignore enemies, die at room 8) yields 40-60 materials in 8 minutes.
- Craft in batches of 10. The crafting minigame is faster when you do identical items back to back — your muscle memory is warm.
- Stockpile before boss attempts. Don't face a new boss with 8 potions. You'll die and waste the run. Have 25+.
- Sell nothing early. Every material has a use. Only sell duplicates after you've crafted your endgame gear.
- The 99-potion ceiling. If you're grinding for a hard boss, craft up to the 99 cap. Potions are cheap once you know the pattern and have materials flowing.
Combat Technique Library
Dodge-cancel weaving: Slash → dodge roll → slash → dodge roll. This cancels recovery frames, letting you attack faster than the animation suggests. Essential for the axe, which has the longest recovery.
Wall jump crossbow snipe: Jump toward a wall → wall jump → aim down → fire crossbow. This gives you a height advantage and lets you hit enemies behind obstacles.
Corner funneling: Back into a corner or doorway. Enemies can only approach from one direction. Your scythe swing hits everything in a cone. Combine with thorn blessing for passive damage.
Special weaving: The optimal DPS rotation for most weapons: slash slash → special → slash slash → special. This keeps special charge generation maximized while dealing sustained damage.
Crossbow mobility kiting: Fire crossbow while backpedaling. Enemies that chase you take damage; enemies that don't chase you means you have space to breathe. Use this to isolate single targets from packs. The June update's auto-aim improvements made this the strongest defensive option in the game.
Directional swing discipline: Before every swing, check your facing. A swing that misses because an enemy is in your blind spot is a swing that wasted your attack window. Step back, re-aim, swing.
Speedrun Tips
- Skip treasure rooms if you already have a strong build. They waste time.
- Prioritize combo + cooldown blessings. These clear rooms fastest.
- Dual Blades are the speedrun weapon of choice. Fast attacks build combo stacks instantly.
- Ignore potions in speedruns — you're going for a perfect run anyway.
- Learn boss skips. Some bosses can be damaged during their intro animations.
- Kai's Training Ground is your practice lab. Drill each boss's phase transitions there until they're automatic, then speedruns become execution, not learning.
Build Compendium
S-Tier: Reaper's Stability (First Clear Build)
Skill Tree: +Life Symbols (max) → Dodge Speed → Special Slots → Special Speed
Blessings: Healing Lv4 → Shield Lv3 → Attack Lv2 → Dash Lv2
Weapon: Scythe (Flawless quality)
Armor: Chest — HP + Defense / Legs — Dodge + Speed
Potions: 25+ carried
Strategy: Slow, methodical room clears. Never rush. Heal between every fight.
Difficulty: Low
Clear Rate: 85%+
A-Tier: Combo Storm (Aggressive Clear)
Skill Tree: Special Slots → Special Speed → Attack Speed → Crit
Blessings: Combo Lv4 → Cooldown Lv4 → Attack Lv3 → Healing Lv1
Weapon: Dual Blades (Flawless)
Armor: Chest — Attack + Crit / Legs — Speed + Dodge
Potions: 10-15 carried
Strategy: Build combo stacks in first room, maintain through run. Melt bosses.
Difficulty: Medium
Clear Rate: 60%
A-Tier: Hammer of Wrath (Boss Melter)
Skill Tree: Damage → Crit → Attack Speed → HP
Blessings: Attack Lv4 → Combo Lv4 → Cooldown Lv2 → Poison Lv2
Weapon: War Hammer (Flawless)
Armor: Chest — Damage + Stagger / Legs — Movement Speed
Potions: 20 carried
Strategy: Slow room clear, instant boss deletion. War Hammer special destroys boss stagger bars.
Difficulty: Medium-High
Clear Rate: 55%
B-Tier: Crossbow Kiter (Safe Ranged)
Skill Tree: Ranged Damage → Dodge → HP → Special Speed
Blessings: Attack Lv3 → Dash Lv3 → Shield Lv2 → Healing Lv2
Weapon: Crossbow (Flawless, +damage rolls)
Armor: Chest — Ranged Damage / Legs — Dodge Distance
Potions: 15 carried
Strategy: Never stop moving. Fire while running. Use melee only when cornered.
Difficulty: Low (but slow)
Clear Rate: 70%
S-Tier (June 2026 Meta): The Mobile Sharpshooter
Skill Tree: Ranged Damage → Attack Speed → Special Speed → HP
Blessings: Attack Lv4 → Cooldown Lv4 → Dash Lv3 → Healing Lv1
Weapon: Crossbow primary (Flawless) + Dual Blades secondary
Armor: Chest — Ranged Damage / Legs — Dodge Distance
Potions: 12 carried
Strategy: The June update's move-while-shooting + auto-aim buff made this build tier-defining.
Fire continuously while circling enemies. Dodge-roll through attacks without breaking your DPS.
Difficulty: Medium
Clear Rate: 75%
The Training Ground & Endless Mode
Kai's addition in the June 2026 demo brought two major features:
Training Ground: an endless practice arena where you can experiment with builds before heading into the real Afterlife. No resource cost, no death penalty. Use it to:
- Drill boss dodge timing without burning potions
- Test weapon combinations before committing materials
- Practice the crafting minigame patterns in a low-stakes environment
- Learn enemy telegraphs you've never seen
Combat Arena: Kai challenges you to fight — a sparring match that doubles as a skill check. Winning proves your readiness and unlocks Grim Reaper secrets from Kai as your senior. Treat it as a mid-game gate: if you can beat Kai's challenge, you're ready for the next trial.
Endless Mode (full game): post-game content in the Training Grounds where difficulty scales indefinitely. The skill tree's infinite progression means you can eventually push endless mode deep — this is the long-term replay loop beyond the seven bosses and final boss.
FAQ / Common Mistakes
Q: I keep dying to the first boss. What am I doing wrong? A: Three things. 1) You don't have enough potions — bring 15+. 2) You're panic-rolling instead of watching for the red glow telegraph. 3) You skipped resource runs and don't have enough skill tree upgrades. Go grind.
Q: Is the axe better than the scythe? A: Neither is strictly better. Scythe is better for crowd control and learning. Axe is better for boss damage once you know attack patterns. Greatsword is the best of both but slowest. Pick based on your playstyle.
Q: How do I get Flawless quality consistently? A: The pattern sequence for each recipe is fixed. Craft the same recipe 3-4 times to memorize its pattern. Once memorized, you'll hit Flawless every time.
Q: Should I use controller or keyboard? A: Controller is recommended by the developers. The dodge timing and directional attacks feel better on analog stick. Keyboard works fine but has a higher skill ceiling for precise movement.
Q: Can I respec my skill tree? A: Not confirmed. Invest carefully. The tree is forgiving since you earn points infinitely, but early misallocations delay your power curve.
Q: What happens after I beat all seven Sinful Souls? A: The final boss (Death himself) unlocks. Beating the game unlocks New Game+ with harder enemy scaling and new blessings. Post-game content includes an Endless Mode in the Training Grounds.
Q: Is there a secret boss? A: When you enter a boss fight with maximum relationship with all three Academy NPCs, there is an additional dialogue scene referencing a "hidden eighth sin." Whether this is a boss or just flavor text is unknown.
Q: Do I need to play Rage in Peace first? A: No. Grim Trials is a canonical sequel but stands completely alone. You get more from the story if you recognize the connections, but the game explains everything you need.
Q: How long until the game is unbeatable if I don't grind? A: The skill tree is designed so that eventually, through enough attempts, you can brute-force any content through raw stat advantage. There is no permanent failure state.
Q: Who is Kai? A: A fellow Cocoon (trainee Reaper) added in the June 2026 demo. He challenges Avelin to get stronger, acts as a senior who shares Grim Reaper secrets, and unlocks the Training Ground and Combat Arena.
Q: I heard the Acedia fight was changed. What's different? A: The June 2026 update rebalanced Acedia based on Next Fest feedback: minion spawns are capped, phase 2 has fewer Eye Hazards, the Eye Hazard now has a visual cue, and the boss's idle time between attacks is longer. The fight is fairer — the attack windows are bigger.
Q: What changed with the crossbow? A: The June 2026 update added move-while-shooting and increased the auto-aim angle and accuracy. The crossbow went from a situational poke to a reliable primary weapon. Kiting builds are now meta.
Q: Does the game support my language? A: The demo added Simplified Chinese, Latin American Spanish, and Brazilian Portuguese in June 2026, on top of English and other languages. The full game ships with 10 languages total.
Q: How do I unlock Endless Mode? A: It's in the Training Grounds, part of the full game's post-game content. The demo's Training Ground is the practice version; the full game's Endless Mode scales difficulty indefinitely.
Q: What platforms is this on? A: Steam, Xbox Series X|S, Nintendo Switch, Switch 2, and PlayStation 5. August 20, 2026.
Release Info
| Detail | Info |
|---|---|
| Release Date | August 20, 2026 |
| Platforms | Steam, Xbox Series X|S, Nintendo Switch, Switch 2, PS5 |
| Price | TBA (demo available now) |
| Languages | English, Chinese, French, Italian + more (10 total) |
| Steam Features | Achievements, Cloud Saves, Family Sharing |
| Wishlists | 50,000+ pre-release |
| Community | Discord, X/Twitter (@rollinggloryjam), Bluesky, Instagram, TikTok, YouTube (@GloryJamGames) |
Final Tips
The golden rule: preparation beats reflexes. Potions, Flawless gear, and skill tree investment matter more than twitch reactions. A prepared player with average reflexes beats an unprepared player with godlike reactions every time.
The 15-25 hour first clear. Budget your time: 2-3 resource runs per boss attempt, one boss per session, Training Ground drills between attempts. The game respects methodical play.
Healing > everything. The healing blessing and potion stockpile are the two most important resources in the game. Never skip the healing blessing. Never enter a boss with fewer than 15 potions.
Learn the directional system. Every death caused by a whiffed swing is a lesson in positioning. Step back, re-aim, swing. The crossbow's new mobility makes it the perfect tool for re-positioning while dealing damage.
Use Kai's Training Ground. It's free practice with no potion cost. Drill every boss phase transition there until it's automatic. The players who clear Grim Trials fastest are the ones who treat the Training Ground as a mandatory warm-up, not an optional extra.
Grim Trials launches August 20, 2026. The demo is available now on Steam, including Kai, the Training Ground, and the rebalanced Acedia fight.



