
Daily Pick
One deeply researched guide worth reading today.
A practical route through the systems that matter most, written to help new players make confident decisions quickly.
Overview
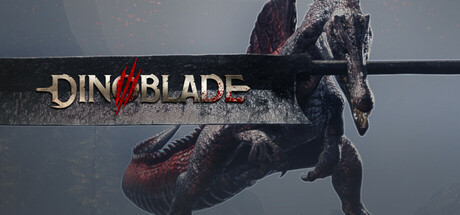
Dinoblade is an action RPG from Team Spino LLC and Boltray Games where you play a young Spinosaurus wielding a colossal Great Sword in its jaws. A cataclysmic event reshaped the prehistoric world: dinosaurs gained intelligence, started forging weapons, and formed rival clans. Your clan was nearly wiped out. You carry an ancestral blade and carve a path through dry canyons and mist-shrouded jungles to uncover what caused the cataclysm and stop a looming extinction.
The game released July 23, 2026 on Steam for Windows at $19.99. It runs on Unreal Engine 5. During Next Fest the demo earned a 97% positive rating and the game passed 500K wishlists; the full release sits at Very Positive on Steam with over 1,500 reviews. Playtime runs 6 to 10 hours for a first clear, plus another 3 to 5 for Boss Rush Mode.
Genre and feel. This is a Souls-like with a twist: the combat engine revolves around a posture meter instead of a pure stamina bar. You cannot cancel attacks. Every swing is committed because the Spinosaurus holds the blade in its mouth and attacks originate from neck movements. The result is a deliberate, rhythm-driven combat system closer to Sekiro's deflection dance than Dark Souls' roll-and-poke. The game targets players who already enjoy hard action games. There is no difficulty slider and no character creator. You are the Spinosaurus, full stop.
What makes it stand out. Four named Alpha predators rule the biomes, each with a distinct fight identity. The final boss, a T-Rex, first swings a smaller dinosaur as an improvised club, then draws a massive blade for phase two. Defeating it unlocks Boss Rush Mode, a four-boss gauntlet with no healing between fights and leaderboard timers.
Quick Facts
| Attribute | Detail |
|---|---|
| Developer | Team Spino LLC |
| Publisher | Team Spino LLC, Boltray Games |
| Release Date | July 23, 2026 |
| Price | $19.99 |
| Platforms | Windows |
| Genre | Action RPG, Souls-like |
| Engine | Unreal Engine 5 |
| Playtime | 6-10 hours (first playthrough) |
| Difficulty | Hard, single difficulty |
| Steam Rating | Very Positive (~92%) |
| Features | Steam Achievements, Cloud Saves, Leaderboards, Full Controller Support |
System Requirements (Minimum)
| Component | Requirement |
|---|---|
| OS | Windows 10 64-bit |
| Processor | Intel Core i5-7500 / AMD Ryzen 5 1600 |
| Memory | 4 GB RAM |
| Graphics | NVIDIA GeForce GTX 1050 4GB / AMD Radeon RX 560 |
| DirectX | Version 12 |
| Storage | 13 GB available space |
UE5 means the game is heavier than those minimums suggest. Community reports show frame drops from 120 to the mid-40s in dense jungle areas on mid-range cards. If you care about smooth boss fights, lower shadows and foliage quality first; see the Performance section.
Getting Started
Your First 30 Minutes
The game opens in a tutorial canyon that teaches the combat loop: light attack, heavy attack, dodge, parry, posture break. The first enemies are spear-wielding Parasaurs that only attack when you approach, which makes them safe practice dummies. Use them deliberately.
Minute-by-minute plan for the opening:
- Spend 5 minutes on controls in a safe spot. Practice the light-light-heavy chain, the parry timing against a slow Parasaur, and the dodge roll's iframe window. Do not fight anything until the inputs feel automatic.
- Clear the canyon's passive enemies. They drop Souls, the currency for purchasing items. A few hundred Souls here buys healing consumables that carry you through the first mini-bosses.
- Find the parry training dummy. A secluded side cave in the canyon holds a training dummy with looping attack animations. Practice until you land three perfect parries in a row. This single habit saves more frustration than any other early decision.
- Take the mini-bosses. Scattered canyon encounters reward Souls and, critically, Skill Points. Mini-bosses are the only repeatable-ish source of skill points in each biome and some guard hidden loot paths.
- Do not rush the main path. Side paths hold upgrade materials and at least one hidden weapon (the Razor Fang). Exploration in Dinoblade is not optional padding; it is how you get strong enough to survive the first Alpha.
Beginner Mistakes
Treating it like a character action game. You cannot cancel a heavy swing into a dodge. You cannot interrupt a combo to parry. Every input is a commitment, so button-mashing is a death sentence. One whiffed swing against an Alpha means eating a full combo.
Ignoring your own posture meter. The posture system cuts both ways. Blocking and taking hits fill your meter, and at roughly 70% full, a single partial parry can stagger you. New players watch the enemy bar and forget their own.
Backing off to heal. Enemies restore posture the moment you disengage. If you land two perfect parries and then run away to heal, the posture progress evaporates. The game punishes passive play. Heal by repositioning aggressively, not by retreating to a corner.
Spreading skill points thin. The skill tree has fewer total points than nodes. You cannot max everything. Focused investment in 2-3 branches outperforms a little bit of everything. Community consensus is unanimous here: a 3-point combo extension beats one point in five different skills.
Skipping the parry tutorial cave. It is easy to miss and the game never forces it. Find it. The parry window is tight (roughly 8-12 frames), and the training dummy is the only place to drill it without risk.
Not fixing the camera settings. Camera collision in confined boss arenas is a known issue. Set camera distance to maximum in the options before your first boss fight, not during it.
Core Mechanics
The Posture System
Posture is the heart of Dinoblade. It is a gauge on you and on every enemy. It fills from actions on both sides, and when anyone's meter maxes out they become vulnerable to a finisher that can end the fight on the spot.
| Action | Posture Effect |
|---|---|
| Perfect parry (deflect) | Fills enemy posture significantly |
| Regular block | Fills both your posture and enemy posture slightly |
| Taking a hit | Fills your posture moderately |
| Landing attacks | Fills enemy posture modestly |
| Disengaging / backing off | Enemy posture slowly recovers |
The last row is the most important insight in the game: enemies recover posture when you stop pressuring them. The community calls Dinoblade's philosophy "always be attacking" — not recklessly, but consistently. Every fight is a pressure loop: attack until the enemy counter-attacks, parry the counter, counter-attack during the stagger, repeat until the break.
Parry Windows and Timing
Parrying is the single most important skill. When an enemy attack is about to connect, press the parry button within an estimated 8-12 frame window:
- Perfect parry — deflects the attack, deals heavy posture damage, opens a counter window.
- Partial parry — reduces damage taken but still fills your own posture meter.
- Missed parry — full damage plus significant posture damage to you.
The key to consistent parries is reading wind-up animations, not reacting to impact. Every species telegraphs differently: a Carnotaurus lowers its head before charging, a Styracosaurus shifts its weight before a horn thrust. Learn the tells and parrying becomes rhythm, not reaction.
What to Dodge vs. What to Parry
| Attack Type | Response | Reason |
|---|---|---|
| Regular melee swing | Parry | Builds enemy posture, maintains pressure |
| Multi-hit combo | Parry each hit | Sustained posture damage from deflections |
| Red-flash grab attack | Dodge roll | Unblockable — parry will fail |
| Wide AOE slam | Dodge away | Area damage cannot be deflected |
| Charged heavy | Parry (risky) or dodge | High damage if parried late |
Default to parrying. Only dodge when you see the unmistakable red-flash grab or AOE telegraphs. The dodge roll has iframes similar to Dark Souls but with a heavier, more committed feel that matches the Spinosaurus's bulk.
Animation Commitment
Because the Spinosaurus holds its Great Sword in its mouth, every attack originates from neck movement. There is no animation canceling. This creates the game's central strategic layer: input planning. Before pressing attack, ask whether you will be vulnerable during the animation. The safe windows differ by action:
| Action | Animation Duration | Safe Input Window | Vulnerability |
|---|---|---|---|
| Light attack | ~20 frames | After enemy stagger or parry | ~8 frames recovery |
| Heavy attack | ~35 frames | After posture break or knockdown | ~15 frames recovery |
| Combo chain | 50-80 frames | Only during known enemy recovery | Extended vulnerability |
| Charge attack | 40-60 frames | After long enemy recovery or dodge | Long vulnerability |
| Dodge roll | ~18 frames | Anytime | ~10 frames after iframes |
| Parry | Near-instant | Anytime during recovery-free state | Recovery if missed |
Rule of thumb: never start an animation longer than the enemy's recovery window unless you are certain they cannot attack during your vulnerability. Light attacks after parries. Heavy attacks after posture breaks. Full combos only when you know the chain will complete.
The Combat Flow
Every fight follows the same cycle:
- Engage — close distance and begin attacking.
- Parry — deflect the enemy's counter-attack to build their posture.
- Counter — land hits during the stagger window after a successful parry.
- Pressure — keep attacking to prevent posture recovery.
- Break — when the meter fills, execute the finisher.
If you are not attacking, you should be parrying. If you are not parrying, you should be repositioning for the next exchange. Passive waiting is the game's hidden difficulty spike.
SP Skills
SP skills are special abilities with cooldown timers on the HUD. They complement your weapon combos and each has an ideal timing:
| Skill Type | Best Timing | Worst Timing |
|---|---|---|
| Posture Burst | When enemy posture is 70-90% full | When enemy posture is below 30% |
| AOE damage | Multi-enemy encounters, Kira's adds | Against a single isolated target |
| Summon | When you need a distraction to reposition | During a boss combo you should be parrying |
| Buff | Before a known long attack sequence | During a recovery window you should spend attacking |
| Heal | At critical health with a safe window | During a boss combo (animation lockout = free hit) |
The Posture Burst is the standout. It deals massive posture damage in one activation. Optimal use: build enemy posture through parries to 75-85%, wait for a safe window, activate the burst. The meter fills completely and the finisher window is immediate. Using it at 40% posture is the classic waste — the enemy recovers the progress before you can finish the job.
Progression Strategy
The Skill Point Economy
Skill points are finite. Community estimates from the demo suggest a pool large enough to specialize in 2-3 areas but not to max every branch. You cannot grind for more:
| Source | Points Awarded | Availability |
|---|---|---|
| Mini-boss defeats | 1 per mini-boss | Fixed encounters per biome |
| Alpha boss defeats | 1-2 per boss | Campaign progression |
| Hidden area discoveries | 0-1 | Optional exploration |
| Boss Rush completion | Uncertain | Post-campaign |
Because points are non-repeatable, exploration is mandatory. Hidden paths contain skill point rewards that rushers miss entirely.
Skill Tree Branches — ROI Analysis
| Branch | Skill | Effect | Value |
|---|---|---|---|
| Health & Survival | Health Upgrade | +15-20% base HP per rank | High — survival buffer |
| Health & Survival | Healing Effectiveness | +healing amount per use | Medium |
| Health & Survival | Posture Recovery Rate | Faster self-posture drain | High — reduces stagger risk |
| Offense & Posture | Posture Damage Up | +10-15% posture per rank | High — accelerates every boss fight |
| Offense & Posture | Combo Extension | Additional attack in chains | Medium-High |
| Offense & Posture | Charge Attack Boost | +damage on charged strikes | Medium |
| Parry & Defense | Parry Window Extension | Wider perfect parry detection | High early, Medium late |
| Parry & Defense | Counter-Attack Damage | Bonus damage after deflections | Medium-High |
| Parry & Defense | Dodge Roll Iframes | Additional invincibility frames | Low |
| SP & Abilities | SP Skill Cooldown Reduction | Faster ability availability | Medium |
| SP & Abilities | Posture Burst Enhancement | More posture per burst | High |
| SP & Abilities | AOE Skill Unlock/Enhance | Area damage capability | Medium — key for Kira |
Posture Damage Up is the best offensive investment in the game. It amplifies your primary tool: parrying. A 15% posture increase means 15% fewer parries per boss, which means 15% less time in danger. It compounds across the entire run.
Parry Window Extension is the best early defensive investment. It widens the window from frame-perfect to very tight but achievable. As your raw timing improves it becomes unnecessary, and the game's respec system lets you reallocate later. The recommended pattern: invest early, respec out once you land perfect parries consistently.
Recommended Allocation Paths
- New player: Health Upgrade → Parry Window Extension → Posture Damage Up. Survive first, learn timing second, accelerate fights third.
- Experienced player: Posture Damage Up → Posture Burst Enhancement → Combo Extension. Maximize break speed and finisher windows.
- Never: one point in five different branches. Focused builds win.
Weapons — Full List and Tier Rankings
There are 8 known weapons across 4 types. Each has a unique combo chain and moveset, and you select your weapon before engaging — you cannot switch mid-fight.
| Weapon | Type | Tier | Damage Type | Location |
|---|---|---|---|---|
| Colossal Great Sword | Blade | S | Slash | Starting weapon |
| Ancient Power Blade | Unique | S | Ancient Power | Hidden late-game biome, requires environmental puzzles |
| Storm Edge | Blade | A | Slash | After defeating the second Alpha boss |
| Tyrant Crusher | Heavy | A | Blunt | Mist-shrouded jungle biome |
| Canyon Reaver | Blade | B | Slash | Hidden path in the dry canyon |
| Jungle Cleaver | Heavy | B | Blunt | Deep in the mist-shrouded jungle |
| Razor Fang | Blade | C | Slash | Early canyon area |
| Bone Maul | Blunt | C | Blunt | Mini-boss drop in the tutorial area |
Weapon Combo Chains
| Weapon | Combo Chain |
|---|---|
| Colossal Great Sword | Basic slash combo → Charged heavy → Posture break finisher |
| Storm Edge | Quick slash chain → Storm uppercut → Lightning strike finisher |
| Canyon Reaver | Sweeping slash → Sand vortex → Tearing finisher |
| Razor Fang | Quick slashes → Fang strike |
| Tyrant Crusher | Heavy slam → Ground shockwave → Crushing blow |
| Jungle Cleaver | Overhead chop → Vine grab → Earthquake slam |
| Ancient Power Blade | Ancient power slash → Energy burst → Cataclysm finisher |
| Bone Maul | Maul strike → Bone toss |
Tier List Analysis
S-Tier — Colossal Great Sword. The starting weapon is S-tier for the entire game. Its versatile combo potential, reliable damage, and balanced reach make it the community's most trusted pick, and many experienced players prefer it over the legendaries. It is never a bad choice, in any fight, at any point.
S-Tier — Ancient Power Blade. The strongest damage potential in the game but locked behind late-game environmental puzzles. Its Cataclysm finisher is the highest single finisher damage available. Pick it up for Boss Rush optimization, but do not postpone the campaign waiting for it.
A-Tier — Storm Edge. Unlocked after the second Alpha. The lightning finisher adds reach and crowd control that the base kit lacks. Excellent for the jungle biomes.
A-Tier — Tyrant Crusher. Blunt damage matters against armored enemies. The ground shockwave staggers groups. Slightly slower than the blade weapons, so pair it with posture-focused skills.
B-Tier — Canyon Reaver / Jungle Cleaver. Solid mid-game options if found early, outclassed once the A-tier weapons arrive.
C-Tier — Razor Fang / Bone Maul. Early-game placeholders. Fine for the canyon, outclassed by the time you reach the second biome.
Best for Boss Rush: Colossal Great Sword or Ancient Power Blade. Both handle every boss type without matchup problems.
Builds / Loadouts
A loadout in Dinoblade has three pillars: weapon, skill build, and SP ability. They must align. A weapon built for short burst combos wastes combo extension points. An SP ability that needs charge time is wasted in a build with no charge investment. The best loadouts point all three pillars at one goal.
Loadout 1: The Posture Assassin (Boss-Kill Optimization)
Goal: break boss posture in the minimum number of exchanges.
| Component | Choice | Why |
|---|---|---|
| Weapon | Fossil Mauler-type heavy | Highest per-hit posture damage; stagger on charged attacks |
| Primary Skills | 8 Posture Damage, 4 Parry Window | Maximize posture per exchange, wider error margin |
| Secondary | 3 Combo Extension, 2 Attack Damage, 2 Dodge Recovery, 1 Health | Survivability and combo flexibility |
| SP Ability | Posture Burst | Massive posture in one activation for phase transitions |
The loop: Parry → counter with heavy → chain into combo extension hit if the window allows → reset to defensive stance → repeat until break. Estimated breaks: Styracosaurus 3-5 parries, Carnotaurus 4-6, Kira 4-6 (phases 1+3), T-Rex 5-7.
Kira note: the heavy weapon's crowd-control weakness makes phase 2 harder. Carry the Colossal Great Sword as your second weapon and switch at the phase 2 transition — Dinoblade allows weapon switching between encounters.
Loadout 2: The Balanced Warrior (All-Content Versatility)
Goal: perform well everywhere with no bad matchups. The safest pick for first playthroughs and Boss Rush.
| Component | Choice | Why |
|---|---|---|
| Weapon | Colossal Great Sword | Best all-rounder, no content where it struggles |
| Primary Skills | 5 Posture Damage, 4 Health, 3 Parry Window | Balanced offense and defense |
| Secondary | 3 Attack Damage, 2 Combo Extension, 2 Dodge Recovery, 1 SP Power | Support across all scenarios |
| SP Ability | Versatile Strike | Reliable damage spike for any situation |
Boss Rush advantage: health points carry between fights, parry window points compound into fewer total mistakes across four consecutive bosses, and the versatile weapon has no bad matchups. This is the definitive Boss Rush build.
Loadout 3: The Charge Cannon (Burst Damage Specialization)
Goal: maximum damage in guaranteed openings. For experienced players who know every boss pattern.
| Component | Choice | Why |
|---|---|---|
| Weapon | Extinction Crusher-type heavy | Highest single-hit damage on charged attacks |
| Primary Skills | 7 Charge Attack, 5 Posture Damage | Maximize charge damage, reduce charge time |
| Secondary | 4 Dodge Recovery, 2 Parry Window, 2 Health | Rapid repositioning between charges |
| SP Ability | Extinction Wave | Massive single-target burst |
Charge windows are the skill here — you must recognize when a boss has committed to an uncancelable animation:
| Boss | Charge Window | Duration |
|---|---|---|
| Styracosaurus | After ground stomp recovery | 1.5-2.0s |
| Styracosaurus | Phase transition roar | 2.0-2.5s |
| Carnotaurus | After double rush wall rebound | 1.0-1.5s |
| Carnotaurus | After ground slam recovery | 1.5-2.0s |
| T-Rex | After Parasaur club swing recovery | 1.5-2.0s |
| T-Rex | After weapon swap animation | 1.0-1.5s |
| T-Rex | Phase transition roar | 2.0-2.5s |
With 7 charge points the charge time drops to ~0.8 seconds, fitting most of these windows. This loadout fails against Kira's phase 3 (hyper-aggressive melee with no recovery pauses) and T-Rex phase 3.
Boss Guide — All Alphas Ranked
| Boss | Tier | Threat | Weakness | Key Strategy |
|---|---|---|---|---|
| Styracosaurus | A | High | Parry Pressure | Parry charges and headbutts; stay aggressive |
| Carnotaurus | A | High | Dodge & Counter | Never parry the charge; punish recovery |
| Kira | S | Extreme | Positioning | Clear adds first; manage multi-phase resources |
| T-Rex | S | Extreme | Posture Break | Dodge club phase, parry blade phase |
Styracosaurus (First Alpha)
The first Alpha and the game's parry tutorial in boss form. Its attacks: charge attacks, headbutt combos, and ground slams. It telegraphs with body shifts — the frill lowers before a charge, the weight shifts before a headbutt.
Strategy: Stay aggressive and maintain posture pressure. Parry the charge attacks — they are the fastest way to fill its posture. When it pauses, attack immediately; it restores posture if you disengage. The fight takes 2-3 minutes with the Posture Assassin build (3-5 parries to break).
AI exploit: Styracosaurus attacks most frequently at medium range. Hold close distance to trigger its parryable close-range thrusts and sweeps. Stepping to medium range provokes harder-to-parry charge attacks.
Carnotaurus (Second Alpha)
An aggressive charger with finisher combos. It will chain multiple charges in succession — dodge the first, watch for follow-ups. The charge's parry window is extremely tight; do not attempt it.
Strategy: Dodge the charges and counter during recovery. This is a reactive fight. The AI pauses briefly before charging — watch for the decision window pause and you can predict the charge type. Punish with the heavy counter after each dodge.
Kira (Third Alpha)
A multi-phase fight with nearby aggro enemies. The adds are the real threat: Kira's AI becomes more aggressive when her adds are alive, and her aggro range increases in later phases.
Strategy: Clear the nearby enemies first before engaging Kira directly. Use AOE skills to damage both Kira and her minions simultaneously if you have them. Conserve resources for later phases — the fight intensifies as it progresses. This is the game's hardest camera fight; the arena geometry plus multiple enemies create the worst camera situations in the game. Keep your back to open space.
Phase 2 note: switch to the Colossal Great Sword for the add-clearing phase, then back to your heavy weapon for phases 1 and 3.
T-Rex (Final Boss)
The ultimate test, with two completely distinct phases. Phase 1: the T-Rex swings a smaller dinosaur as an improvised club. Phase 2: it draws a massive blade with entirely different attack patterns.
Phase 1: Dodge the club sweeps. The club swing has a long recovery — punish after each swing. Watch for the grab, always signaled by a red flash and a distinctive body turn. Dodge it.
Phase 2: Precise parry timing against the blade. The blade attacks are telegraphed and parryable — this phase rewards everything the game taught you. The T-Rex alternates weapon attacks and grabs in a predictable rhythm: parry the weapon attacks, dodge the grabs.
Posture strategy: The T-Rex is weak to posture breaks. Use the Pressure Cascade (below) and save Posture Burst for the 75-85% mark in each phase.
Step-by-Step Strategy Sequences
Sequence 1: The Pressure Cascade (Every Boss Fight)
- Open with 2-3 light attacks before the boss counter-attacks.
- Perfect parry the counter — this deals massive posture damage.
- Land 1-2 hits during the stagger window.
- Keep attacking to force another counter-attack.
- Parry again — another massive posture hit.
- Repeat until the meter breaks, usually 4-6 cycles for most bosses.
The cascade is a positive feedback loop: attacking forces the boss to counter, parrying builds posture, counter-attacking forces another counter. Never give the boss time to recover posture between pressure sequences.
Sequence 2: Managing Your Own Posture
- Know your critical threshold: roughly 70% self-posture. Above it, a single partial parry can stagger you.
- Perfect parry exclusively — partial parries fill your meter unnecessarily.
- Dodge one attack per cycle — the most dangerous blockable attack — giving your posture time to recover.
- Use health as a resource: take a small hit to avoid a posture-breaking partial parry, then heal in the next safe window.
- If your posture is critical, create distance for 2-3 seconds of recovery before re-engaging.
Sequence 3: Crowd Control (Multiple Enemies)
- Lock on to the most dangerous enemy first — typically the one with the largest weapon.
- Use AOE SP skills to damage multiple targets at once.
- Position to line up enemies so one attack hits several.
- Remember passive enemies (spear-Parasaurs) do not attack until you enter their range — use this to isolate threats.
- Turn lock-on off when fighting groups; the camera sticks to the locked target and you cannot see flanking attacks.
Sequence 4: The Posture Burst Kill Window
- Build enemy posture through parries to 75-85%.
- Wait for a safe animation window (after dodging an unblockable, for example).
- Activate Posture Burst.
- The enemy posture breaks — run in for the finisher.
- Execute the finisher for massive damage.
This is the fastest known method for controlled boss posture breaks. The classic mistake: using the burst at 40% posture, where the meter fills to maybe 70% and the enemy recovers before you finish the job.
Sequence 5: Boss Rush Mode Preparation
- Beat the campaign. Boss Rush unlocks from the main menu after defeating the T-Rex. Your campaign build and equipment carry in; there is no mid-rush respec.
- Expect the order: Styracosaurus → Carnotaurus → Kira → T-Rex. No healing between fights. Whatever health you carry out of Styracosaurus is what you start Carnotaurus with.
- Use the Balanced Warrior loadout: 4 health points, 3 parry window points, and the Colossal Great Sword.
- Treat fight 1 as a no-damage requirement. Taking damage in fight 1 is a compounding penalty for fights 2-4.
- Run the Pressure Cascade on every boss and save Posture Burst for each boss's 75-85% posture mark.
- The timer tracks your run. Optimized speed runs favor the Posture Assassin with aggressive play and minimal healing.
Sequence 6: Full Campaign Route
- Dry Canyon: clear side paths for Razor Fang and upgrade materials before the first mini-bosses. Beat Styracosaurus.
- Second biome: unlock Storm Edge after the second Alpha (Carnotaurus). Grab the Canyon Reaver if missed.
- Mist-shrouded jungle: find Tyrant Crusher and Jungle Cleaver. Solve environmental puzzles for hidden loot.
- Late-game biome: solve the environmental puzzles for the Ancient Power Blade.
- Final boss: T-Rex. Then unlock and practice Boss Rush.
Advanced Tips
Animation commitment is a weapon. Because your attacks cannot be canceled, neither can the enemy's reactions to them. Bait an enemy into attacking during your swing's recovery — their attack whiffs, you recover, you punish. This is how experienced players create openings that raw parries never give.
The AI is rule-based, not random. Every enemy responds to your positioning, distance, and actions. Distance-based enemies attack when you enter a range — bait by stepping in, then parry. Action-reactive enemies counter specific actions — feint to trigger predictable responses. Combo-followup enemies chain if the first hit lands — parry the first hit to interrupt the entire chain.
Camera management wins fights. Maximize camera distance in settings. Position with open space behind you — never back into walls or corners. Use manual camera rotation during wide attacks rather than relying on lock-on. These techniques matter most in the Kira fight.
Lower ambient audio slightly. Ambient sounds can mask enemy attack wind-up cues. The boss music is a timing aid for some patterns — keep it audible. Community reports also note the constant dinosaur growls can be fatiguing; the audio sliders let you balance them out.
Elemental and blunt damage exist. Blunt weapons (Tyrant Crusher, Jungle Cleaver, Bone Maul) matter against armored enemies. Damage type synergy is real — the wiki's weapon damage comparisons show blade versus blunt mattering more than raw numbers in specific fights.
Respec exists. Attribute reallocation uses special items. Community advice: respec when you want to try a different playstyle, and specifically respec out of Parry Window Extension once your raw timing is consistent.
Performance tuning. UE5 games are heavy. If frames drop below 60 in jungle areas, lower shadows and foliage first; those cost the most. DLSS, FSR, TSR, and XeSS are all available — FSR tends to look best on non-NVIDIA cards. The Steam Deck runs the game but expect medium settings and 30-40 FPS.
Known annoyances. Controls can feel unresponsive at times — this is the animation commitment system working as designed, but the game does not communicate it well. The constant roars and growls are loud; adjust audio. UI could be clearer. None of these block progress, but knowing them in advance prevents confusion.
FAQ / Common Mistakes
Q: How long is the game? A: 6-10 hours for a first playthrough. Boss Rush adds 3-5 hours for completion and leaderboard runs.
Q: Is it free? A: No. The full game costs $19.99 on Steam. The demo (97% positive during Next Fest) is free and progress carries over.
Q: Are there difficulty options? A: No. Single difficulty tuned for Souls-like veterans. The game is punishing: one caught attack can kill you even at high HP.
Q: Can I respec? A: Yes, using special items. Respec early out of Parry Window Extension once your timing is consistent.
Q: Can I fight bosses in any order? A: No. Alphas guard the path forward. You must defeat them in biome order in the campaign. Boss Rush lets you fight them all again in sequence.
Q: Do bosses respawn? A: No, not in the campaign. Boss Rush is the repeatable content.
Q: Is there multiplayer? A: No. Single-player only, with online leaderboards for Boss Rush times.
Q: Which weapon should I use? A: The starting Colossal Great Sword is S-tier for the entire game. The Ancient Power Blade is the strongest late-game option. Pick based on your build's goal: posture breaks, versatility, or charge burst.
Common mistake: backing off to heal. Enemies restore posture when you disengage. Heal aggressively — reposition, don't retreat.
Common mistake: using Posture Burst too early. At 40% enemy posture it wastes the cooldown. Wait for 75-85%.
Common mistake: ignoring self-posture. Your meter above 70% means a partial parry staggers you. Manage your own gauge as carefully as the enemy's.
Common mistake: fighting the camera. Max camera distance, keep your back to open space, and turn off lock-on for groups.



