Daily Pick
One deeply researched guide worth reading today.
A practical route through the systems that matter most, written to help new players make confident decisions quickly.
Overview: What Kind of Game Is Beatlow?
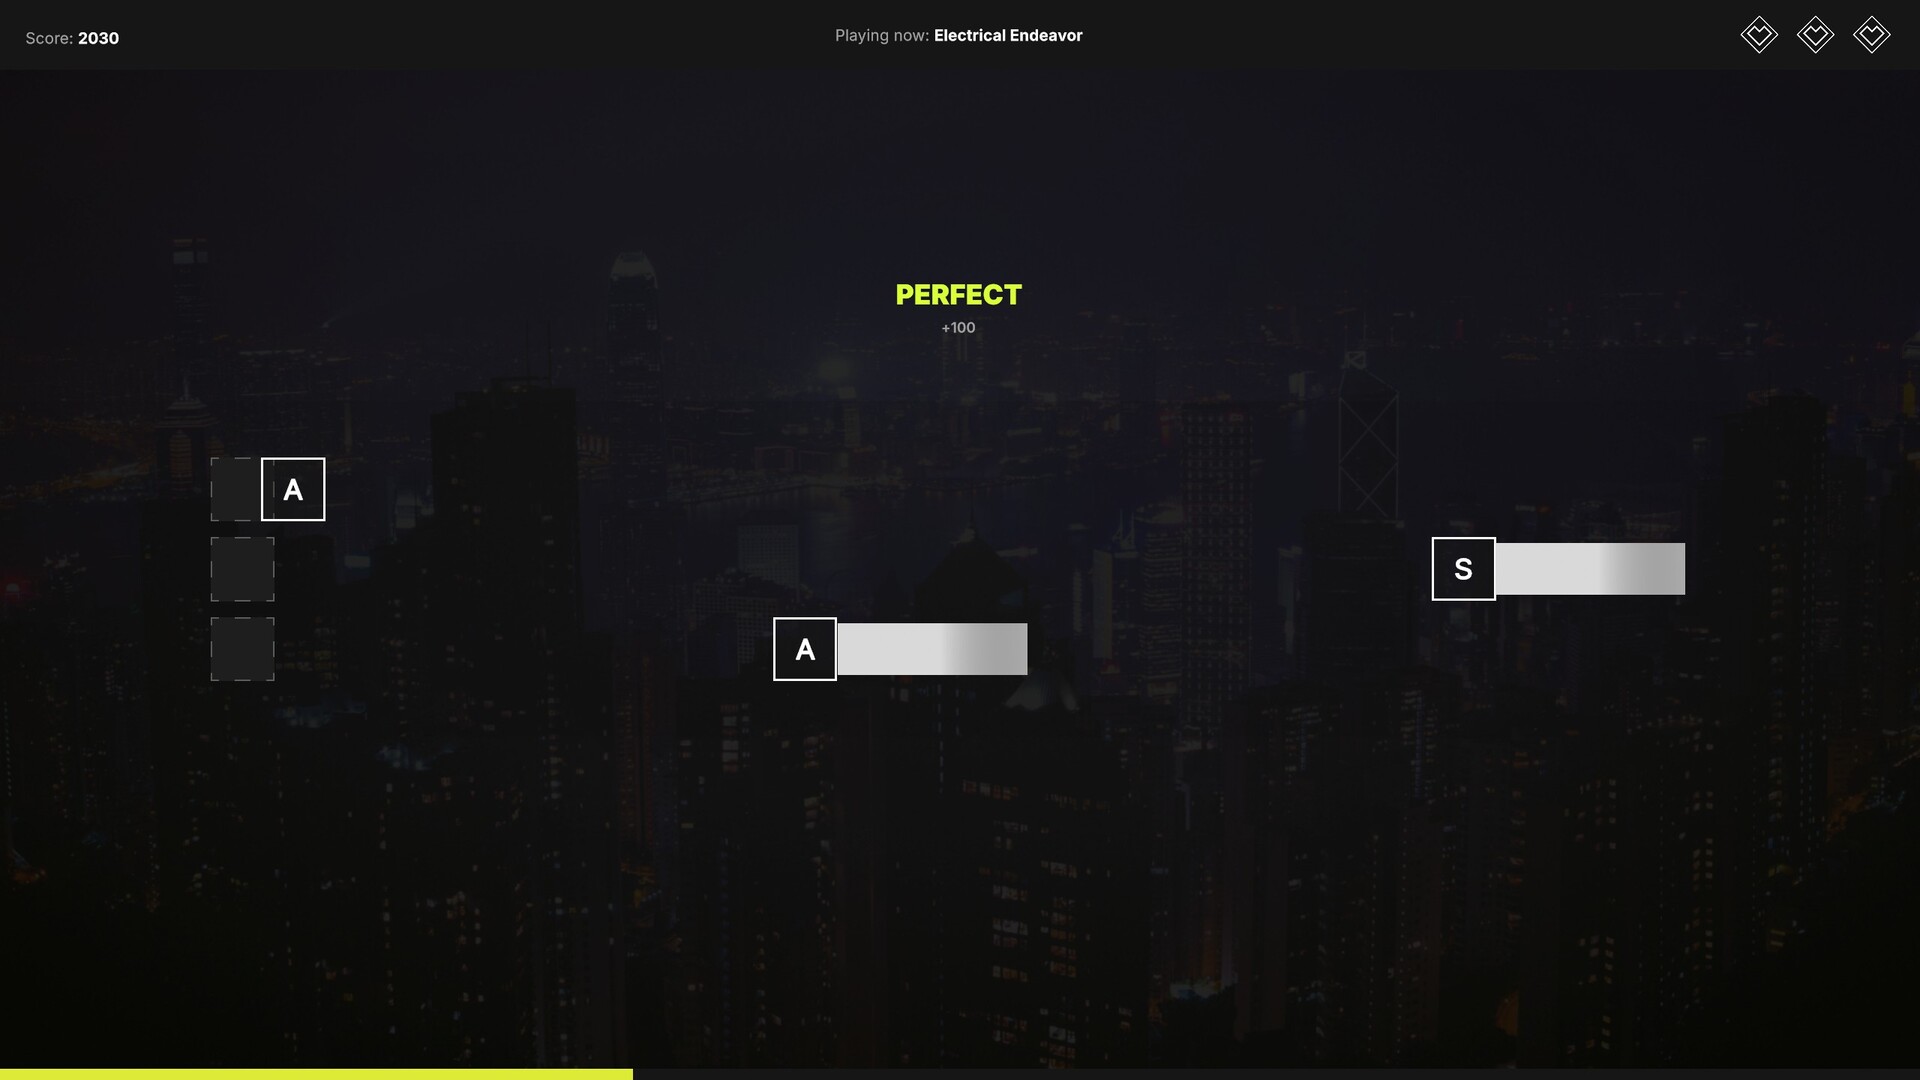
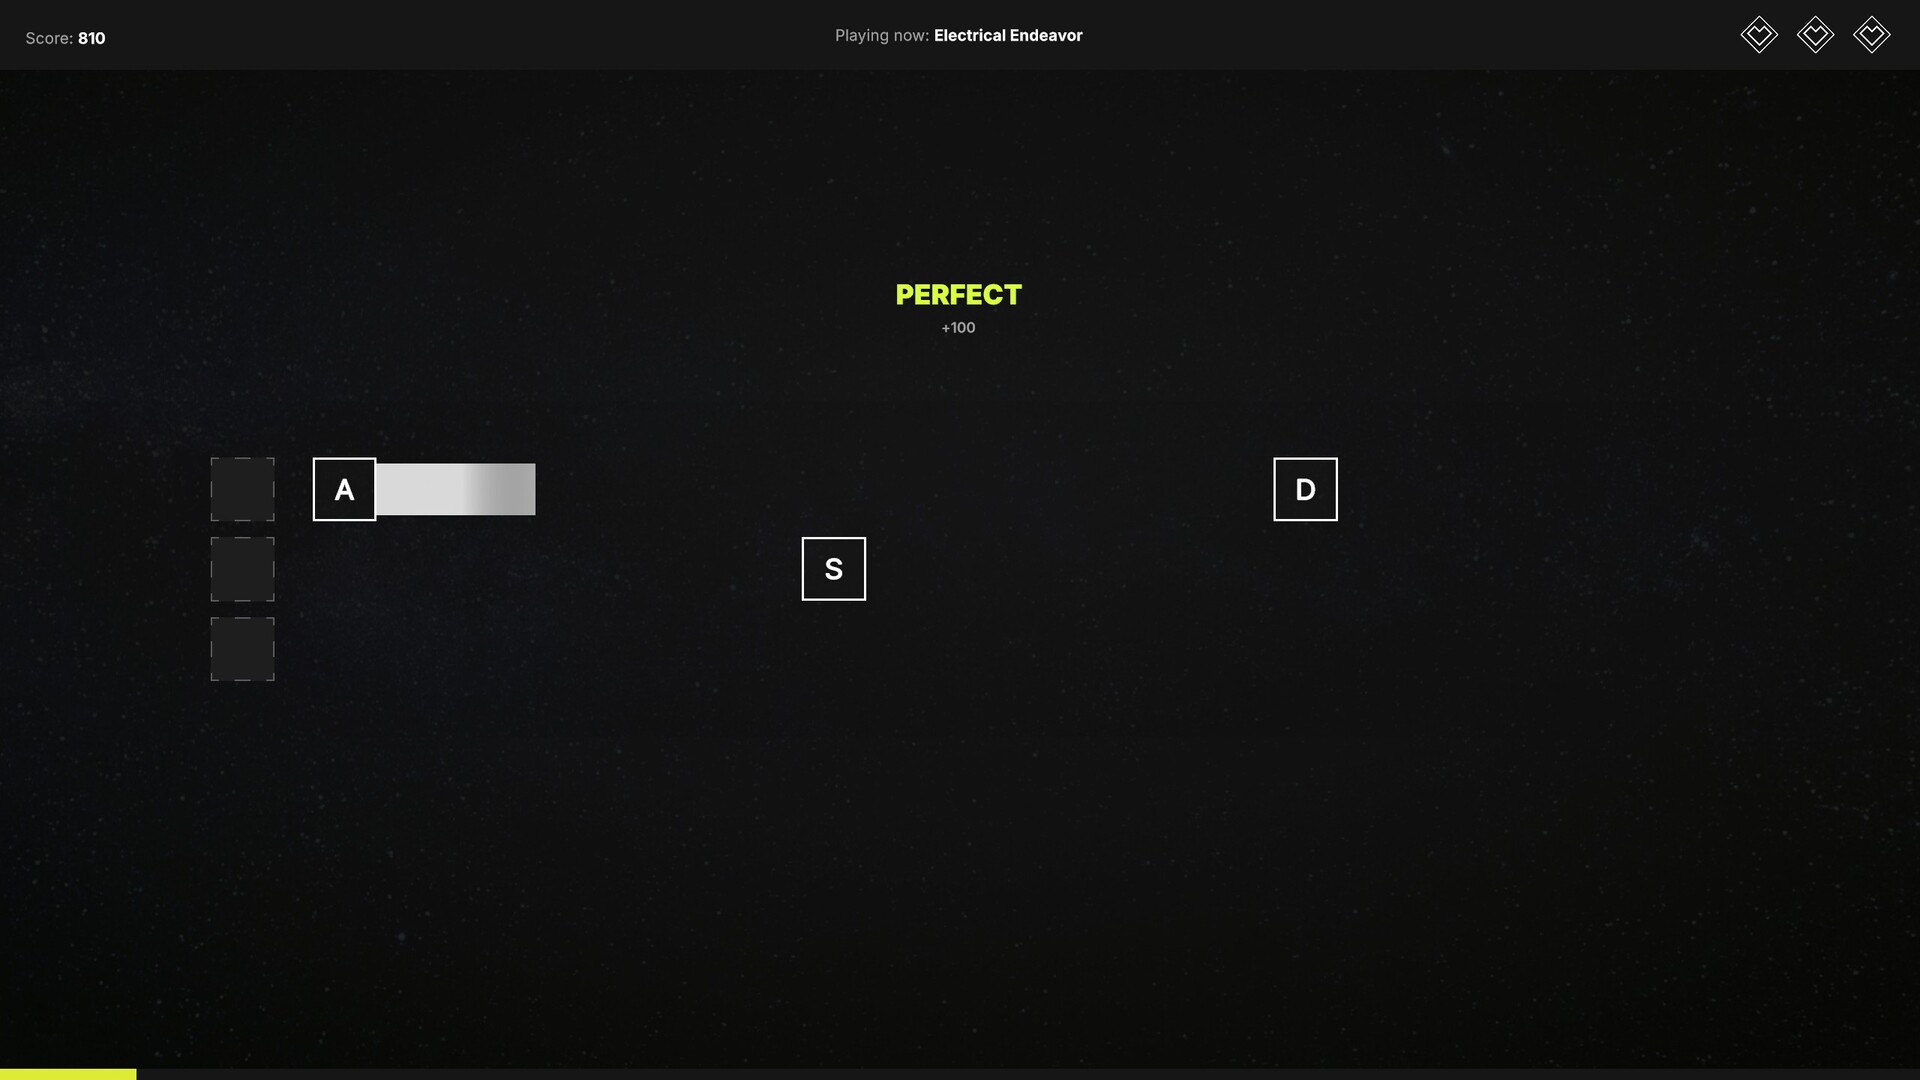
Beatlow is a rhythm game where mistakes are lethal. Every missed note costs a life. Every three levels, random mutators flip the rules. Developed by Windfall Studio, this isn't a cozy music game — it's a gauntlet where the tempo climbs and the game actively tries to break your rhythm.
Beatlow launched June 24, 2026 on Steam at $4.49, with a 10% launch discount until July 1st. Windows only, keyboard required. The soundtrack DLC adds the full tracklist for $1.25. The game supports 7 interface languages: English, Polish, French, German, Spanish (Spain), Czech, and Turkish.
The design sits at a specific point on the rhythm-game spectrum. Where most rhythm games either punish hard (Stepmania-style) or forgive aggressively (Beat Saber-style), Beatlow lands at the higher-skill end of the casual range: tuned input windows, tight audio cues, and visual feedback that is forgiving enough to feel fair but strict enough to keep every run tense. It is a rhythm game with a roguelike's run-modifier discipline strapped to it. The result plays faster and more aggressively than the standard Crypt of the NecroDancer-style fusion attempts.
What sets it apart from other rhythm games:
- Lethal mistakes. Miss a note, lose a life. Run out of lives, the run is over. No difficulty slider lets you cruise through.
- Random mutators every 3 levels. Notes reverse direction. Keys remap. The highway tilts. You adapt instantly or you die.
- Power-up economy. Coins come from accurate hits. Spend them on power-ups that extend your run — or hoard them and die with a full wallet.
- Escalating tempo. BPM climbs as you progress. What feels manageable at level 1 becomes a blur by level 20.
The studio's story matters for expectations: Beatlow was initially developed by a single person, then Windfall Studio was founded and several people began working on it. Development began around June 2025. It is Windfall Studio's first commercial Steam release, and the execution is more polished than a debut indie usually manages, particularly in the audio-timing tuning that decides whether a rhythm game is fun or frustrating.
Who is this for? Players who want a rhythm game with real run-to-run variation rather than fixed song-list repetition. Fans of the roguelike layer who want progression that survives a single track. If you need a narrative wrapper, multiplayer, or AAA presentation, this is not that. It is a personal-best chaser: single-player, no leaderboards on the Steam page, no co-op, no online competition. Short, focused sessions are the intended shape.
| Field | Detail |
|---|---|
| Genre | Rhythm, roguelike, casual, indie |
| Developer / Publisher | Windfall Studio |
| Platform | Windows (keyboard only) |
| Price | $4.49 (10% launch discount until July 1) |
| Soundtrack DLC | $1.25, adds 12 tracks (24 total) |
| Players | Single-player |
| Release | June 24, 2026 |
| Perspective | 2D note highway |
| Controller | None (keyboard required) |
| Languages | English, Polish, French, German, Spanish (Spain), Czech, Turkish |
| Steam features | Achievements, Stats, Camera Comfort, Family Sharing, Steam Timeline |
| Steam | store.steampowered.com/app/4019820 |
Getting Started (First 30 Minutes)
Beatlow throws you into your first run with minimal explanation. Here's what to do immediately:
1. Run the calibration tool. Beatlow has input calibration in the settings menu. Spend two minutes on this. A 20ms offset between audio and visual feedback will destroy your timing on higher tempos. Adjust until your Perfect hits feel natural.
2. Play the demo first. The free demo includes the first 6 levels (2 mutator cycles). Beat all of them before buying. If you can't consistently hit Good or better on every note, the full game will eat you alive.
3. Learn the five note types. Beatlow uses five lanes mapped to A, S, D, F, Space. Each lane scrolls notes that require specific timing. Practice each lane individually by focusing on one column per run.
4. Accept early deaths. Your first 10 runs will end before level 9. That's the game's design — mutator shock kills beginners. Each death teaches a pattern.
5. Learn the mutator preview rhythm. Every 3 levels, a mutator activates before the song starts. You see what it is during a 5-second preview window after the shop closes. That preview is your only warning. Use it to plan your response before the notes start.
Beginner Mistakes That End Runs
| Mistake | Why It Kills | Fix |
|---|---|---|
| Buying Score Multiplier first | Doesn't help survival, you die with extra coins | Always buy Shield or Extra Life first |
| Panic-restarting after one miss | Throws away coins and practice | Play until actually dead — every second teaches you |
| Ignoring the 5-second mutator preview | Enter the level blind and surprised | Study the mutator icon, plan your response |
| Spreading upgrades across multiple power-ups | You never get the critical ones | Stack defensive upgrades early |
| Using wrong key layout | Slower reaction times to off-beat notes | Stick to default ASDF+Space, it's optimized for this game |
| Playing the same way every run | If Reverse Highway always kills you, you never drill it | Identify your weakest mutator and practice audio-only play |
| Panic-spreading fingers at high BPM | Tensing up and mashing keys guarantees misses | Keep your hand loose, tap with minimum force |
| Quitting after losing a life | One Miss costs a life, not the run | Play until you see "Game Over" |
Core Mechanics Explained
The Judgment System
Notes scroll upward toward a judgment line at the top of the screen. Hit the matching key when a note crosses the line. Four timing brackets determine your accuracy:
| Rank | Window | Coins | Combo Effect |
|---|---|---|---|
| Perfect | ±0.05s | Full coins | Combo multiplier increases |
| Good | ±0.1s | Partial coins | Combo maintained |
| Okay | ±0.15s | No coins | Combo resets |
| Miss | >0.15s or wrong key | Lose 1 life | Combo resets |
The combo multiplier amplifies coin earnings exponentially. A 50-note Perfect streak generates roughly 3x the coins of scattered Good hits at the same accuracy percentage. Protect your combo above all else.
The tuning philosophy matters here. Windfall Studio spent real effort on the input window, the audio cue, and the visual feedback to give the right amount of forgiveness without making the game trivial. Trust the calibration: if your Perfects feel late or early, fix the offset instead of fighting it.
Coin Economy
Coins drop from every Perfect and Good hit. The exact amount scales with the combo multiplier:
- No combo: 1 coin per Perfect
- 10x combo: 2 coins per Perfect
- 25x combo: 3 coins per Perfect
- 50x combo: 5 coins per Perfect
A perfect run through a standard level (no misses, all Perfects, 100+ combo) yields about 400 coins. Typical runs with 70-80% accuracy yield 150-200 coins per level.
The shop economy is the roguelike element. A long, clean run gives you a fat coin buffer to invest in survival options; a sloppy run forces you to gamble what you have on basic life-extensions just to reach the next checkpoint. That choice — invest in scoring vs invest in survival — is the meta-game above the rhythm-game, and it is where Beatlow earns its replay value.
Level Structure
Each level is one song or song segment (90-120 seconds of gameplay, about 200-400 notes depending on BPM).
Level flow:
- Song plays — Standard rhythm gameplay. Hit notes, build coins.
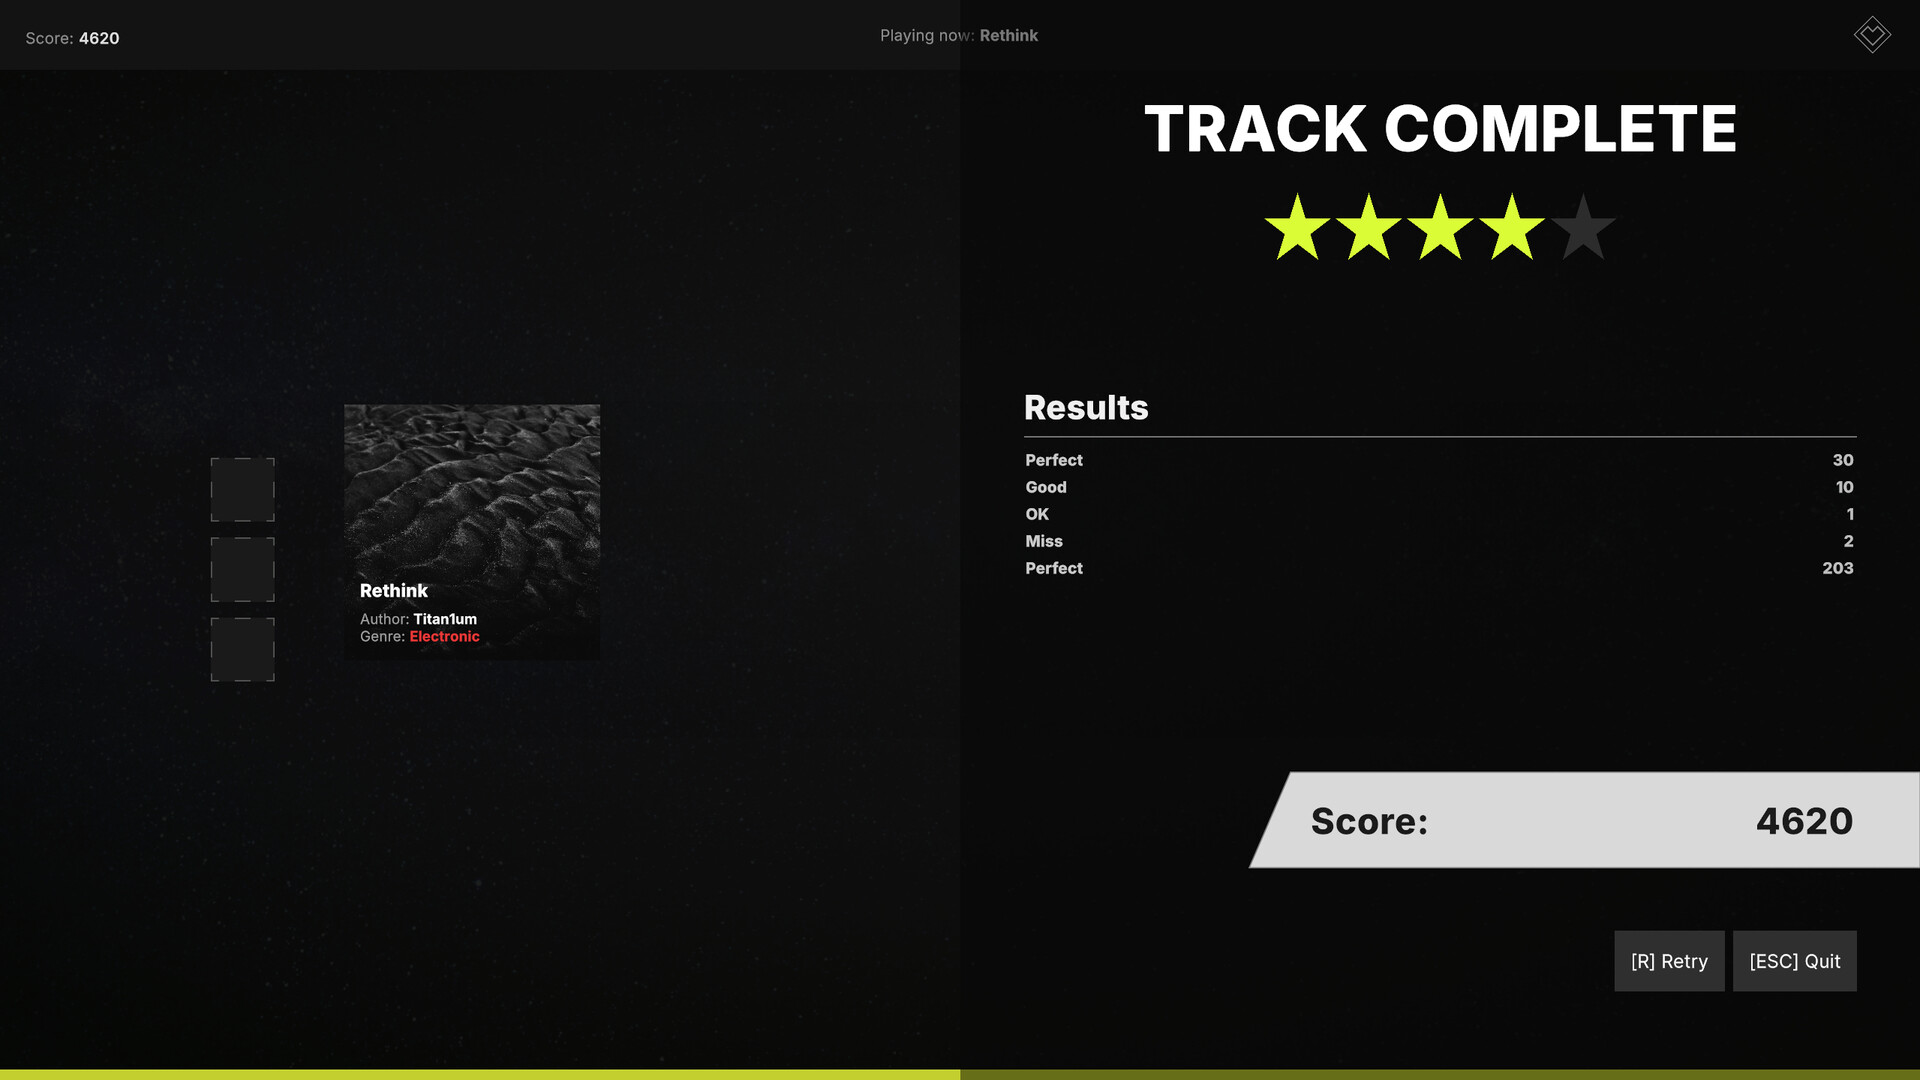
- Results screen — See accuracy percentage, coins earned, lives remaining.
- Shop — 15-second window to spend coins. Shop auto-closes.
Every 3 levels, a mutator activates before the song starts. You see what it is during a 5-second preview window after the shop closes. Use that time to mentally prepare.
The Mutator System
Mutators are the foundational innovation. Every three levels, a new random mutator activates, and past level 15 you deal with 4-5 simultaneously. The mutator system means no two runs play the same, and the rhythm skill required to survive becomes adaptive rather than memorised. Reported mutator examples include reverse-scrolling notes, blind sections where note positions hide before reaching the hit zone, doubled-note-density sections, and key-remapping that forces relearning the controls mid-track.
Progression Strategy
How Runs Escalate
Beatlow runs don't have a fixed end — they continue until you lose all lives. Difficulty scales in two dimensions:
- BPM escalation. Starting around 100 BPM, every 5 levels the tempo increases by roughly 10%. By level 25, you're hitting notes at 170+ BPM.
- Mutator stacking. Each mutator cycle (every 3 levels) applies a new mutator. Past level 15, you're dealing with 4-5 active mutators simultaneously.
What to Unlock First
Beatlow doesn't have a traditional skill tree. The only "progression" is your own skill and the coins you earn per run. But you can think of it as unlocking knowledge:
| Priority | What You Learn | Why |
|---|---|---|
| 1st | Map memory for the first 6 levels | The early game is always the same — learn every note pattern |
| 2nd | Mutator recognition speed | Know each mutator icon instantly, no hesitation |
| 3rd | Shop economy optimization | Know exactly what to buy and when — don't waste coins |
| 4th | Speed endurance | Build up to handling 150+ BPM for extended sessions |
| 5th | Multi-mutator handling | Late-game with stacked mutators is the real boss |
Optimal Coin Spending by Level
| Level Range | Priority Buy | Why |
|---|---|---|
| 1-2 | Nothing (or Shield if available) | Save coins for the first mutator at level 3 |
| 3 | Shield | Survive the first mutator shock |
| 4-5 | Extra Life | Build a safety net |
| 6 | Slow Motion | Second mutator is usually harder |
| 7-8 | Extra Life or Shield | Stack defenses |
| 9 | Auto-Play (if available) | Third mutator can be brutal — use Auto-Play to survive |
| 10+ | Whatever keeps you alive | Prioritize survival over everything |
Power-Up Tier List
| Tier | Power-Up | Cost | Verdict |
|---|---|---|---|
| S | Shield | 75 coins | Absorbs one Miss. Cheapest reliable defense. Buy every time. |
| A | Extra Life | 150 coins | Nets you one extra Miss. More expensive but same effect. |
| B | Slow Motion | 100 coins | Halves note speed for 10s. Game-saver on Speed Spike mutator. |
| C | Auto-Play | 200 coins | Hits all notes for 5s. Expensive but gets you through brutal sections. |
| D | Score Multiplier | 100 coins | Doubles coin income. Useless if you're dead. Buy only when confident. |
| F | Cosmetics | 50+ coins | Visual fluff. Never buy during a run. |
Strategy: If you have 75 coins and see Shield, buy it immediately. If Shield isn't available, save for Extra Life or Slow Motion. Never buy Score Multiplier before level 9. Wait 8 seconds in the shop if you don't see what you want — the selection refreshes.
Reported power-up families to watch for: combo-protection (one miss doesn't break the combo), visual-aid overlays for high-density passages, and mutator-resistance buffs that soften the impact of the harder rule changes. These are the survival-tier purchases that extend runs past the mid-game wall.
Mutator Encyclopedia
Mutators activate every 3 levels. Each one changes the game's rules. Here's every confirmed mutator and how to beat it:
Reverse Highway
Effect: Notes scroll upward instead of downward. Counter: Your brain is trained on downward scrolling. Before the level starts, look at the top edge of the play area. During gameplay, track the notes as they approach from below. Don't fight the reversal — retrain your gaze in 5 seconds. Pro tip: Hum the song tempo to lock your rhythm. Visual becomes secondary to audio.
Key Remap
Effect: Your keys are shuffled. W becomes left, A becomes right, etc. Counter: Don't try to mentally translate key-to-finger. Look at the on-screen prompts that show the new mapping. Your muscle memory is the enemy here — override it by watching the tutorial overlay. Pro tip: Before the level starts, tap each key once to feel the new layout.
Invisible Notes
Effect: Notes fade to 20% opacity 0.5 seconds before the judgment line. Counter: Close your eyes. Seriously. Rely entirely on the beat. The note timing is locked to the song's rhythm, so if you know the track, you can hit it blind. Pro tip: Learn the song structures during practice runs. By run 5, you should be able to play the first 3 levels from memory.
Speed Spike
Effect: Tempo jumps 50% for the entire level. Counter: If you have Slow Motion in your inventory, activate it immediately when the level starts. If not, switch to a "hit every other note" strategy — intentionally skip every second note to maintain rhythm. Panic-spamming all keys guarantees misses. Pro tip: Tap your foot at 2x the normal beat. This forces your hand to match the faster pace.
Double Notes
Effect: Two notes must be hit simultaneously. Counter: Position your index and middle fingers over adjacent keys before the section starts. Look for visual pairs — notes that arrive at the same horizontal position. Train your peripheral vision to spot pairs. Pro tip: Most Double Note sections appear in predictable patterns. After the first encounter, you'll recognize the song segment.
Mirror
Effect: The play field horizontally flips. Left becomes right. Counter: Same principle as Reverse Highway — don't fight the flip, accept it. Your brain will recalibrate in 3-5 seconds. Focus on the center note (D) as an anchor point.
Ghost Notes
Effect: Extra visual notes appear that aren't real. Hitting them counts as a Miss. Counter: The fake notes are slightly dimmer and arrive a fraction of a beat off the real rhythm. Train your ear over your eyes. If it doesn't sound right, don't hit it.
Blind Sections
Effect: Note positions hide before reaching the hit zone. Counter: This is the mutator that punishes sight-readers hardest. The note timing stays locked to the music, so the only reliable strategy is audio-first play. Count beats internally and trust the rhythm you've learned. Pro tip: This mutator rewards the same skill as Invisible Notes — deep song familiarity. The two mutators together are brutal, but manageable if you have practiced blind.
Note Density Surge
Effect: Doubled note density for sections of the track. Counter: Simplify your input. In high-density sections, prioritize the downbeats and let the off-beats go. A partial hit pattern keeps the combo alive where a panic mash destroys it. Pro tip: Reduce finger lift height — minimum motion per tap. High density rewards efficiency, not force.
Step-by-Step Strategy Sequences
Sequence 1: How to Survive Your First Run
- Start a new run. Don't buy anything in the first shop (level 1-2).
- On level 3, you'll face your first mutator. Study the icon during the 5-second preview.
- Spend your saved coins on a Shield (75 coins) if available.
- Play level 3 defensively — prioritize not Missing over hitting Perfect.
- After level 3, buy an Extra Life in the shop (150 coins).
- You now have 2-3 lives with a Shield buffer. Play levels 4-6 normally.
- At level 6, buy Slow Motion if you see it. The second mutator is often harder.
- If you reach level 9 with at least 200 coins, buy Auto-Play for the third mutator.
Sequence 2: Maximizing Coin Income
- Focus on combo perfection during non-mutator levels (1-2, 4-5, 7-8).
- On these levels, your goal is 100% Perfect accuracy. Accept nothing less.
- A 100-note Perfect streak earns ~500 coins per level.
- Mutator levels are about survival, not coins. Accept Okay/Miss to stay alive.
- By level 9, you should have 800-1000 saved coins — enough for survival gear through level 15.
Sequence 3: Handling Dual Mutators (Level 12+)
- At level 12, two mutators are active. Your preview shows both icons.
- Prioritize the harder mutator in your response. If you see Reverse Highway + Speed Spike, prepare for Speed Spike first.
- Activate Slow Motion immediately on level start if the pair is dangerous.
- Keep fingers hovering over all five keys, not just the home row.
- Accept that you'll lose 1-2 lives in the first 15 seconds. Don't panic. Stabilize and continue.
Sequence 4: Beating the Tempo Wall (Level 20+)
- BPM is now 160+. Pre-tension your forearm muscles before the level starts.
- Reduce finger lift height — tap keys with the minimum motion required.
- Breathe in a 4-count cycle: inhale 4 beats, exhale 4 beats. This prevents oxygen starvation.
- If you feel your hand cramping, intentionally Miss 2-3 notes to give a brief rest window.
- Focus on the center three keys (A, S, D) and let your ring/pinky handle the edges.
Sequence 5: Speed Spike + Reverse Highway (Worst Combo)
- This is the hardest mutator pair in the game. If you have Auto-Play, use it.
- If no Auto-Play: accept that you'll lose 2-3 lives here.
- Ignore visual completely. Close your eyes and play by ear.
- Hit only the downbeat notes (every 4th note). Skip the off-beats.
- After the level, buy every defensive item in the shop. You'll need them.
Sequence 6: The Blind Section Survival Protocol
- When Blind Sections activate, stop reading the highway entirely.
- Lock onto the song's rhythmic structure. Count in 4s.
- Play the downbeat only for the first 30 seconds to stabilize.
- Reintroduce off-beat hits only after the pattern feels locked.
- If you break combo, drop back to downbeats-only for 8 bars, then rebuild.
Advanced Tips
- Input offset matters more than skill. A 30ms calibration error costs you more lives than any single mutator. Recalibrate every 3 runs as your hands warm up.
- Alternate hands between runs. Your dominant hand fatigues faster. Switch to your non-dominant hand for practice runs (you'll score worse but build coordination).
- The first 2 seconds of a mutator level are the most dangerous. The mutator applies a brief disorientation window. On level start, don't try to hit anything — just watch for 1-2 beats, then join in.
- Stacking defensive power-ups doesn't give diminishing returns. Having Shield + Extra Life means you survive 2 mistakes instead of 1. For a rhythm game, that's enormous.
- The shop timer starts at 15 seconds but items cycle. If you don't see what you want, wait 8 seconds and the selection refreshes. Don't impulse-buy.
- Use the Steam Achievement list as a progress tracker. The 24 achievements correspond to specific milestones (survive to level 6, 12, 18, 24, etc.). Check which ones you're missing to identify your weak point.
- Record your gameplay. Reviewing a failed mutator level in slow-motion reveals exactly where you panicked. Most deaths happen at predictable note patterns, not random chaos.
- The shop economy is a survival gamble, not a shopping spree. A long clean run gives you a fat coin buffer to invest in survival; a sloppy run forces you to gamble what you have on basic life-extensions. Spend like the next mutator is always the worst one.
- Adaptive skill beats memorised skill. The mutator system is designed so no two runs play the same. The players who survive deep runs are the ones who read the mutator list and reshape their approach on the fly, not the ones who memorised one song.
System Requirements
Beatlow runs on modest hardware. Here are the official specs from the Steam store:
| Component | Minimum |
|---|---|
| OS | Windows 10 or newer (64-bit) |
| Processor | Intel Core i3-4130 or equivalent |
| Memory | 4 GB RAM |
| Graphics | Intel HD 4000 or equivalent |
| DirectX | Version 11 |
| Storage | 370 MB available space |
The game does not support Mac or Linux. A mechanical keyboard with low-latency switches (Cherry MX Red or similar linear switch) is recommended over membrane keyboards, which add input lag. The game needs stable 60 FPS for accurate timing — enable Steam's in-game FPS counter, and if you're under 60, reduce background effects in settings.
Soundtrack & DLC
The base game includes 12 tracks arranged across the run. The Beatlow Soundtrack DLC ($1.25) adds 12 more tracks for a total of 24. The soundtrack DLC doesn't change gameplay — it just adds variety to your runs. The music leans toward electronic with a fast-paced, high-energy sound. The note patterns are procedurally generated to match each track, so even familiar songs play differently each run.
The audio-timing tuning is the game's quiet achievement. Windfall Studio got the input window, audio cue, and visual feedback balanced so the game feels fair at the higher-skill end of the casual range. If the audio feels off, it is a calibration problem, not a game problem.
Achievement Guide
Beatlow has 24 Steam achievements. Here are the ones we've confirmed and how to unlock them:
| Achievement | How to Unlock |
|---|---|
| First Beat | Complete your first level |
| Perfect Hit | Get your first Perfect rating on a note |
| Getting Serious | Reach level 6 (first full mutator cycle cleared) |
| No Mistakes | Finish a level with zero misses |
| Human Metronome | Finish a level with all Perfect ratings |
| Flawless Run | Complete a run with no misses across multiple levels |
| Perfect Run | Complete a run with all Perfect ratings |
| Perfect Only | Achieve 100% accuracy on a single level |
| Taking The Risk | Accept and survive a dangerous mutator combination |
| Into The Flow | Reach level 12 (four mutator cycles in) |
| Never Ending Song | Reach level 18 |
| Unstoppable | Reach level 24 |
| Out Of Control | Complete a level with 3 or more active mutators |
| First Investment | Buy your first power-up from the shop |
| Worth It | Complete a purchase in the shop |
| One More Run | Die 10 times total across all runs |
The deeper achievements (level 18, 24, 3+ mutators) require serious endurance. Focus on survival fundamentals — defensive power-ups, audio tracking, and tempo breathing — to push past level 15. Steam Timeline support means your runs are tracked on your Steam profile, and the Stats integration gives you per-run data to audit your weak points.
Developer Background
Windfall Studio is a small team that has been working in the rhythm-game space for the better part of a year. Beatlow was initially developed by a single person, then the studio was founded and several people began working on the game. Development began around June 2025. Beatlow is their first commercial Steam release.
The studio has signalled that post-launch updates will add new mutator types and additional tracks based on player feedback. The package is built to grow rather than ship-and-forget. For a rhythm-roguelike at this price point, that ongoing-content commitment is significant.
FAQ / Common Mistakes
Q: How many songs are in Beatlow? A: The base game includes 12 tracks arranged across the run. The soundtrack DLC adds 12 more for a total of 24.
Q: Can I use a controller? A: Keyboard only. A mechanical keyboard with low-latency switches (Cherry MX Red or similar linear switch) is recommended. Membrane keyboards add input lag.
Q: Is there an endless mode? A: No separate endless mode. Standard runs continue until you die. Runs typically last 15-45 minutes depending on skill.
Q: Does it support custom songs? A: Not at launch. The fixed soundtrack ensures balanced mutator timing. Notes are procedurally generated, so each playthrough is unique.
Q: What languages does Beatlow support? A: 7 languages: English, Polish, French, German, Spanish (Spain), Czech, and Turkish. All have full interface support.
Q: How does it compare to other rhythm games? A: Beatlow sits at the punishing end — think Friday Night Funkin' on hard mode or osu! with permadeath. The mutator system is unique to Beatlow. The closest modern comparisons are Crypt of the NecroDancer (rhythm + roguelike), Robobeat, and Soundfall (rhythm + shooting), but Beatlow strips out the dungeon and shooting entirely: just rhythm plus mutators plus shop.
Q: The game feels laggy. What do I do? A: Enable Steam's in-game FPS counter. If you're under 60 FPS, reduce the background effects in settings. Beatlow needs stable 60 FPS for accurate timing.
Q: Is there multiplayer or leaderboards? A: No. Single-player only, no co-op, no online competition, no leaderboards on the Steam page. It is a personal-best chaser.
Common Mistake #1: Buying Score Multiplier before level 6. The extra coins don't help if you die to the second mutator. Defense first.
Common Mistake #2: Playing the same way every run. If Reverse Highway always kills you, practice that specific mutator by focusing on audio-only play. Identify your weakness and drill it.
Common Mistake #3: Panic-spreading fingers during high BPM. When tempo spikes, beginners tense up and mash keys. Keep your hand loose. Tap with the minimum force required.
Common Mistake #4: Quitting after losing a life. One Miss costs you a life, not the run. The combo resets, but coins keep flowing. Play until you see "Game Over."
Common Mistake #5: Ignoring the demo. The demo's 6 levels include 2 full mutator cycles. Mastering them before buying saves you $4.49 and frustration.
Common Mistake #6: Spending like the shop is a store, not a survival station. Every coin spent on cosmetics or multipliers before level 9 is a coin not spent on the Shield that saves you at level 12. The meta-game is survival math.
Version History
| Date | Notes |
|---|---|
| June 24, 2026 | Beatlow launches on Steam with 12 tracks, 24 achievements, 5-key gameplay |
| July 2026 | Launch discount ends; game at full $4.49 price |
| Post-launch (announced) | New mutator types and additional tracks based on player feedback |